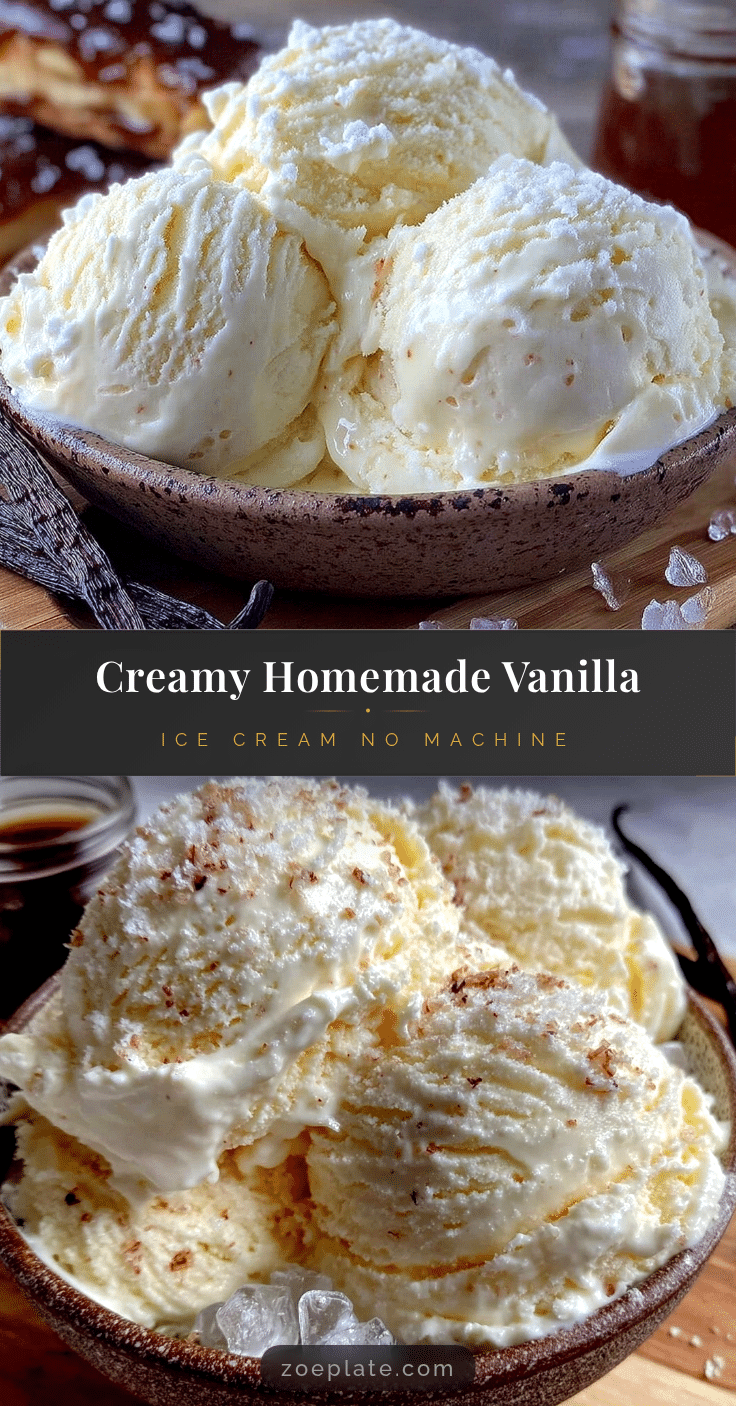
Let me tell you, the scent of rich vanilla beans swirling through luscious cream, even without an ice cream machine, is enough to make anyone’s mouth water. The first time I made this creamy homemade vanilla ice cream no machine recipe, I was instantly hooked—a kind of moment where you pause, take a deep breath, and just smile because you know you’re onto something truly special. Years ago, when I was knee-high to a grasshopper, my grandma used to make ice cream by hand during hot summer afternoons, and that nostalgic comfort stuck with me. I finally decided to recreate that magic with a modern twist, and honestly, I wish I’d discovered this dangerously easy method years ago.
My family couldn’t stop sneaking spoonfuls off the counter while it was setting (and I can’t really blame them). This creamy homemade vanilla ice cream no machine recipe quickly became a staple for our family gatherings and those cozy nights when you just want a sweet treat without fuss. You know what’s better? It’s perfect for potlucks, birthday parties, or simply brightening up your Pinterest dessert board. After testing it multiple times in the name of research, of course, I’m confident you’re going to want to bookmark this one for your next dessert craving.
Why You’ll Love This Recipe
Honestly, this creamy homemade vanilla ice cream no machine recipe has been a game-changer in my kitchen for a few reasons. It’s quick, simple, and downright delicious—plus, it doesn’t require a fancy ice cream maker, which means less clutter and more joy!
- Quick & Easy: Comes together in under 20 minutes, perfect for busy weeknights or last-minute dessert emergencies.
- Simple Ingredients: No exotic trips to specialty stores—you likely already have everything in your pantry and fridge.
- Perfect for Any Occasion: Great for summer BBQs, family dinners, or a sweet treat after a long day.
- Crowd-Pleaser: Kids and adults alike rave about the creamy texture and delicate vanilla flavor.
- Unbelievably Delicious: The silky texture and deep vanilla notes make this far better than store-bought versions.
What makes this recipe stand out is the secret to its texture: whipping heavy cream to soft peaks before folding in a sweetened condensed milk and vanilla bean mixture. It’s not just another vanilla ice cream; this is the best creamy homemade vanilla ice cream no machine version you’ll ever try. It’s comfort food reimagined—rich, smooth, and ready without the hassle. Your guests will think you spent hours on it, but you’ll know the truth!
What Ingredients You Will Need
This recipe uses simple, wholesome ingredients to deliver bold flavor and satisfying texture without the fuss. Most are pantry staples, and a couple are easy to find in any grocery store.
- Heavy Whipping Cream (2 cups / 480 ml) – The backbone of the creamy texture. I prefer brands like Organic Valley for richness.
- Sweetened Condensed Milk (1 can, 14 oz / 396 g) – Adds sweetness and creaminess without needing extra sugar.
- Pure Vanilla Extract (2 teaspoons) – For a smooth vanilla flavor; use Nielsen-Massey if you want the best quality.
- Vanilla Bean (1 whole bean, split and scraped) – Adds depth and those irresistible specks of vanilla. If unavailable, just increase the extract slightly.
- Salt (a pinch) – Balances sweetness and brings out flavor.
Optional:
- Vanilla Bean Paste (1 tablespoon) – You can swap the bean and extract combo for this for convenience and extra visual appeal.
- Almond Extract (a few drops) – For a subtle twist if you want to experiment.
Feel free to experiment with dairy-free heavy cream alternatives if needed, though the texture might shift a bit. For a seasonal touch, try adding crushed freeze-dried berries once folded in, but that’s a tale for later.
Equipment Needed
- Mixing Bowls: Large and medium-sized bowls, preferably chilled to help whip the cream faster.
- Electric Mixer or Stand Mixer: For whipping the heavy cream to soft peaks. You can use a hand whisk, but be ready for a workout!
- Spatula: A rubber or silicone spatula for gentle folding.
- Loaf Pan or Airtight Container: For freezing the ice cream. A metal pan helps freeze faster, but plastic works fine too.
- Knife and Spoon: To split and scrape the vanilla bean.
If you don’t own a stand mixer, an electric hand mixer works just as well (I’ve tested both, and the results are just as creamy). For budget-friendly options, inexpensive hand mixers from brands like Hamilton Beach have done the trick without breaking the bank. Keep your bowls and beaters chilled in the freezer for about 15 minutes before whipping—trust me, it makes a world of difference!
Preparation Method

- Prepare the Vanilla Bean: Split the vanilla bean lengthwise using a sharp knife. Scrape out the tiny seeds with the back of the knife. Set both seeds and pod aside.
- Whip the Heavy Cream: Pour the 2 cups (480 ml) of heavy whipping cream into a large, chilled mixing bowl. Using an electric mixer on medium-high speed, whip until soft peaks form—about 3 to 5 minutes. You want the cream to hold shape but still be soft and airy.
- Mix the Base: In a separate bowl, combine the sweetened condensed milk (14 oz / 396 g), vanilla bean seeds, vanilla extract (2 tsp), and a pinch of salt. Whisk together until fully incorporated. Remove the vanilla bean pod.
- Fold Cream into Base: Gently fold about a third of the whipped cream into the condensed milk mixture to lighten it. Then, carefully fold in the remaining whipped cream until fully combined. Be gentle here—you want to keep as much air in the mixture as possible for that creamy texture.
- Freeze: Transfer the mixture into a loaf pan or airtight container. Smooth the top with a spatula. Cover tightly with plastic wrap or a lid.
- Freeze Time: Place in the freezer for at least 6 hours, ideally overnight, until firm but scoopable.
- Serving: Remove from the freezer about 5 minutes before serving to let it soften slightly. Scoop and enjoy!
Pro tip: If you notice any icy spots after freezing, give the ice cream a quick stir about halfway through freezing to keep it smooth—this little trick saves you from a gritty texture. Also, using a metal loaf pan chills the ice cream faster, which helps prevent large ice crystals from forming.
Cooking Tips & Techniques
Whipping the cream just right is the secret to this creamy homemade vanilla ice cream no machine recipe. Over-whip, and you risk turning it into butter; under-whip, and the ice cream won’t have that airy texture. I learned this the hard way, honestly, after a few batches that were either too dense or too runny.
Folding is another critical step. You want to fold gently to keep that whipped cream fluff intact. Think of it like folding in delicate egg whites for a souffle—too much stirring, and you lose all the air.
Timing is key: chill your bowls and beaters, and whip the cream in a cool environment if you can. This helps the cream maintain its structure better. If your kitchen is warm, pop the bowl in the fridge for a bit before whipping.
Don’t skip the pinch of salt—it’s a simple touch that brightens the vanilla flavor immensely. Also, if you want to experiment, add a splash of liquor like bourbon or rum for a grown-up twist that keeps the ice cream from freezing too hard.
Variations & Adaptations
- Dairy-Free Version: Substitute heavy cream with full-fat coconut cream and use sweetened condensed coconut milk. The texture is slightly different but still creamy and satisfying.
- Chocolate Swirl: Fold in melted and cooled dark chocolate or chocolate chips before freezing for a marbled effect.
- Seasonal Fruit: Add crushed freeze-dried strawberries or blueberries for a fruity burst without adding extra water that could cause iciness.
For different cooking methods, you can try freezing the mixture in individual silicone molds for fun shapes or ice cream pops. If you want a softer texture, let it sit out a few minutes before serving or give it a quick stir halfway through freezing.
Personally, I once added a teaspoon of espresso powder to the base, and it made a delicious coffee-infused vanilla ice cream that my kids surprisingly loved. Feel free to customize the recipe to fit your flavor cravings or dietary needs.
Serving & Storage Suggestions
Serve this creamy homemade vanilla ice cream no machine dessert slightly softened for the best scoopability. Pair it with warm apple pie, fresh berries, or a drizzle of caramel sauce for an extra special treat. For drinks, a cold brew coffee or a fruity mocktail complements it beautifully.
Store the ice cream covered tightly in the freezer for up to two weeks. If it hardens too much, let it sit at room temperature for 5 to 10 minutes before scooping. You can also scoop the ice cream into airtight containers as single servings for quick snacks later on.
Over time, the vanilla flavor deepens and the texture softens just enough to feel like a fresh, homemade treat every time you dig in. Just be sure to keep it well sealed to avoid freezer burn or ice crystals.
Nutritional Information & Benefits
This creamy homemade vanilla ice cream no machine recipe is rich and indulgent, with approximately 250 calories per 1/2 cup (120 ml) serving, depending on ingredient brands. It’s high in fat from the heavy cream, which is what gives it that luscious texture and satisfying mouthfeel.
Vanilla bean adds antioxidants, and the pinch of salt helps balance electrolytes. For those watching carbs, this recipe is moderate due to the sweetened condensed milk, but you can try a lower-sugar condensed milk alternative.
While it contains dairy and is not suitable for lactose-intolerant diets unless adapted, it’s free from artificial flavors and preservatives found in many store-bought ice creams. Honestly, making this at home feels like a little act of self-care with real ingredients you trust.
Conclusion
In short, this creamy homemade vanilla ice cream no machine recipe is a keeper. It’s simple, satisfying, and downright delicious, perfect for impressing guests or treating yourself without the hassle of special equipment. I love how it brings back those nostalgic summer vibes while fitting perfectly into modern, busy lifestyles.
Don’t be afraid to customize it—try different add-ins, swap ingredients, or experiment with flavors to make it your own. I hope this recipe brings you as much joy as it has me and my family. Give it a try, and let me know how your creamy vanilla ice cream adventure goes!
Please share your thoughts or any fun twists you’ve tried in the comments below—I love hearing from you!
FAQs About Creamy Homemade Vanilla Ice Cream No Machine
Can I make this ice cream without an electric mixer?
Yes! You can use a hand whisk, but it will take a bit longer and more elbow grease to whip the cream to soft peaks.
How long can I store the ice cream in the freezer?
It’s best within two weeks for optimal flavor and texture, but properly sealed, it can last up to a month.
Can I use vanilla extract instead of a vanilla bean?
Absolutely! Use 2 to 3 teaspoons of pure vanilla extract if you don’t have a vanilla bean handy.
Why is my ice cream icy or grainy?
This usually happens if the cream isn’t whipped enough or the mixture isn’t folded gently. Also, stirring halfway through freezing can help prevent large ice crystals.
Can I add mix-ins like chocolate chips or nuts?
Yes! Fold them in gently after mixing the base and before freezing for delicious texture variations.
Pin This Recipe!
Creamy Homemade Vanilla Ice Cream No Machine Easy Recipe for Perfect Dessert
A quick and easy homemade vanilla ice cream recipe that requires no ice cream machine, delivering a rich, creamy texture and deep vanilla flavor perfect for any occasion.
- Prep Time: 15 minutes
- Cook Time: 6 hours
- Total Time: 6 hours 15 minutes
- Yield: 8 servings 1x
- Category: Dessert
- Cuisine: American
Ingredients
- 2 cups (480 ml) heavy whipping cream
- 1 can (14 oz / 396 g) sweetened condensed milk
- 2 teaspoons pure vanilla extract
- 1 whole vanilla bean, split and scraped
- A pinch of salt
- Optional: 1 tablespoon vanilla bean paste
- Optional: A few drops almond extract
Instructions
- Split the vanilla bean lengthwise using a sharp knife. Scrape out the tiny seeds with the back of the knife. Set both seeds and pod aside.
- Pour the 2 cups (480 ml) of heavy whipping cream into a large, chilled mixing bowl. Using an electric mixer on medium-high speed, whip until soft peaks form—about 3 to 5 minutes.
- In a separate bowl, combine the sweetened condensed milk (14 oz / 396 g), vanilla bean seeds, vanilla extract (2 tsp), and a pinch of salt. Whisk together until fully incorporated. Remove the vanilla bean pod.
- Gently fold about a third of the whipped cream into the condensed milk mixture to lighten it. Then, carefully fold in the remaining whipped cream until fully combined.
- Transfer the mixture into a loaf pan or airtight container. Smooth the top with a spatula. Cover tightly with plastic wrap or a lid.
- Place in the freezer for at least 6 hours, ideally overnight, until firm but scoopable.
- Remove from the freezer about 5 minutes before serving to let it soften slightly. Scoop and enjoy!
Notes
Chill bowls and beaters before whipping cream for better results. Fold gently to keep air in the mixture. Stir halfway through freezing to prevent icy texture. Using a metal loaf pan helps freeze faster and reduces ice crystals. Let ice cream soften 5 minutes before serving for best scoopability.
Nutrition
- Serving Size: 1/2 cup (120 ml)
- Calories: 250
- Sugar: 21
- Sodium: 50
- Fat: 18
- Saturated Fat: 11
- Carbohydrates: 22
- Protein: 3
Keywords: vanilla ice cream, homemade ice cream, no machine ice cream, easy dessert, creamy ice cream, vanilla bean ice cream