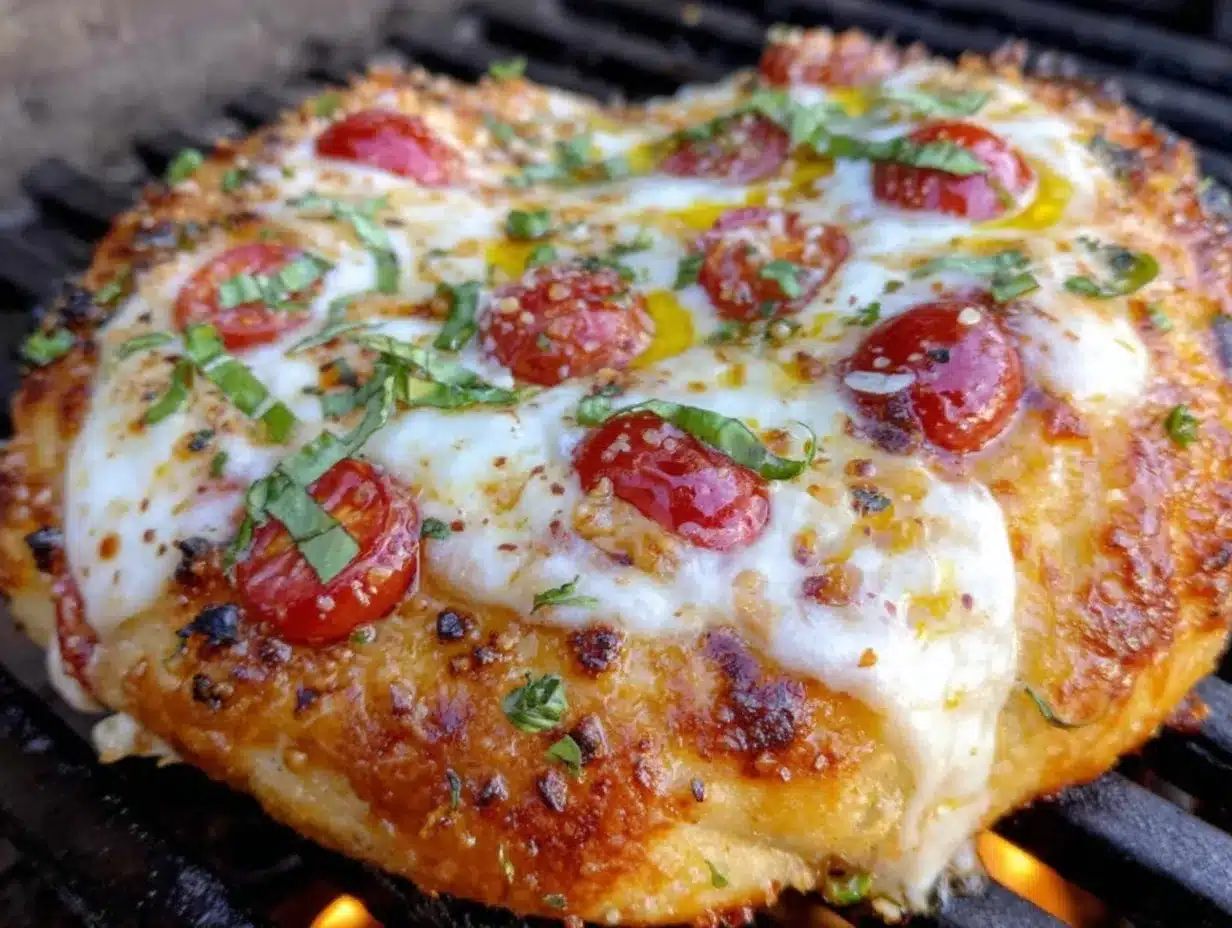
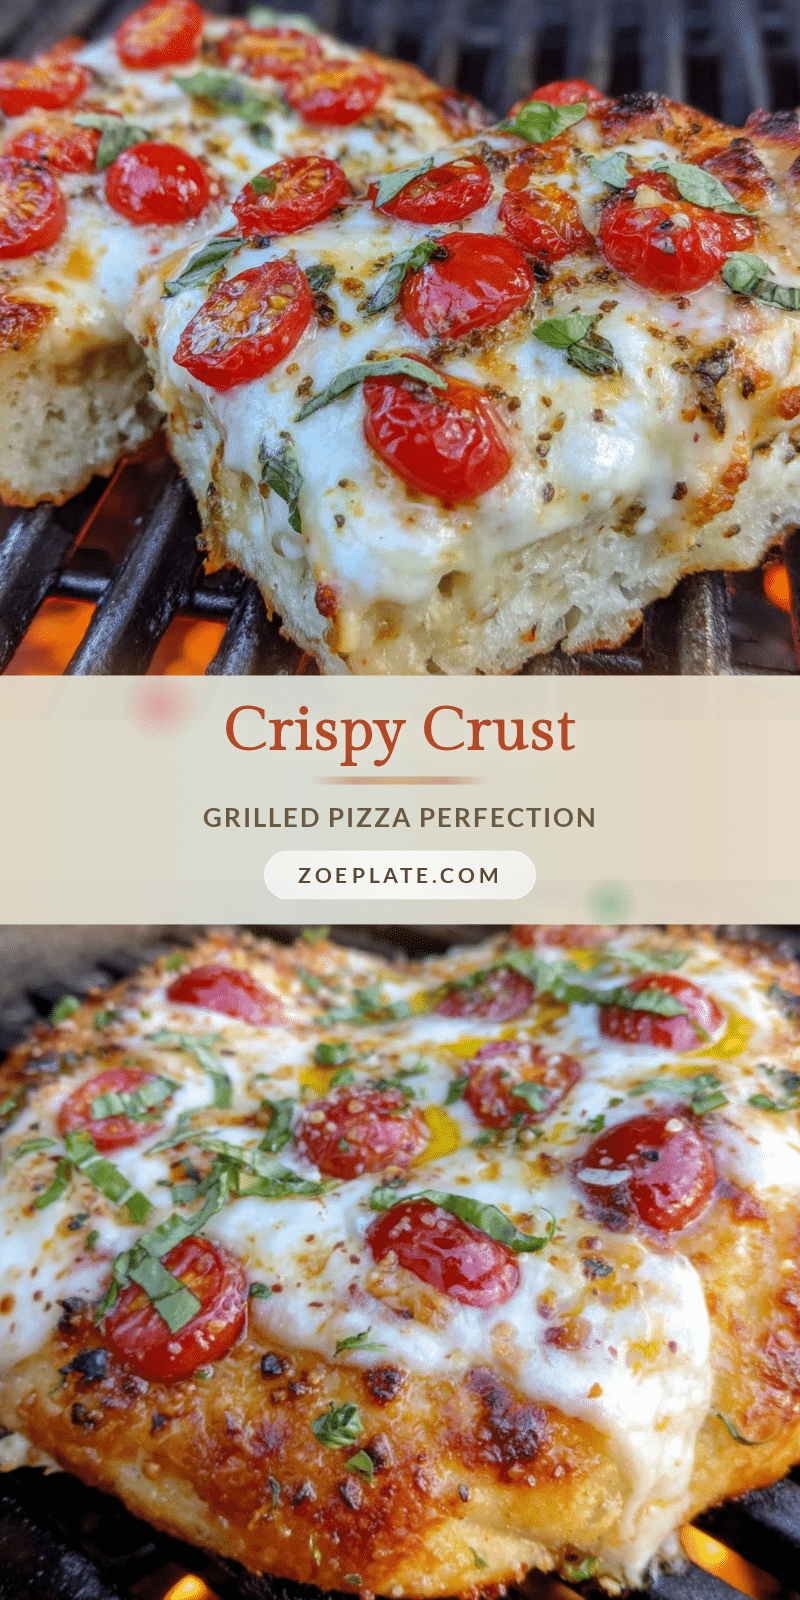
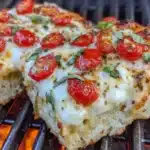
“Are you sure this will work?” my friend asked, eyeing the pizza dough precariously balanced on the grill rack. Honestly, I had my doubts too when I first tried making crispy grilled pizza on a gas grill. It started as a last-minute save on a sweltering summer night when the oven decided to quit. With a few quick tweaks and some hopeful flipping, that slightly charred, ultra-crispy crust turned out to be the highlight of our backyard hangout. From skeptical first bite to repeated requests, this recipe became my go-to for outdoor cooking — no oven required.
What I love most about this grilled pizza is how the high heat and smoky edges create a texture you just can’t get indoors. The crust crisps up perfectly, with those little bubbles and golden spots that make you want to dig right in. Plus, grilling it outside means no heating up the house (huge win on hot days). It’s become such a favorite that I find myself making this pizza several times a week, sometimes swapping toppings on a whim, and always ending up with something deliciously simple and satisfying.
Whether you’re firing up the grill for a casual dinner, entertaining friends, or just craving that perfect crispy crust, this recipe fits right in. It’s the kind of meal that brings people together around the heat, with the smell of melting cheese and sizzling dough filling the air. If you’ve ever struggled with soggy pizza or complicated oven settings, give this method a try—you might just find your new favorite way to make pizza outdoors.
There’s something quietly rewarding about pulling that golden, bubbly pizza off the grill and knowing you nailed it. It’s comfort food that feels like a small celebration of outdoor cooking done right.
Why You’ll Love This Recipe
From my many grilling sessions, this crispy grilled pizza on a gas grill stands out because it’s reliable, fast, and downright tasty. Here’s why it’s worth making again and again:
- Quick & Easy: The entire process takes about 20 minutes, perfect for busy weeknights or spontaneous outdoor meals.
- Simple Ingredients: You likely have everything on hand—basic pizza dough, sauce, cheese, and your favorite toppings.
- Perfect for Outdoor Gatherings: Great for backyard parties, summer cookouts, or when you want to keep the heat outside.
- Crowd-Pleaser: Kids and adults alike love the crispy texture and smoky flavor, making it a hit every time.
- Unbelievably Delicious: The crust crisps up with a subtle char that adds character, while the cheese melts perfectly without burning.
This recipe isn’t just another grilled pizza hack. The trick lies in preheating the grill and managing the heat zones to get that signature crisp without overcooking the toppings. Using a light brush of olive oil on the dough before grilling gives it a golden sheen and prevents sticking, too. I also like to experiment with different cheeses and fresh herbs right off the grill for a personal touch. It’s comfort food with a smoky twist, and honestly, it’s the kind of recipe that makes you pause and savor the moment.
What Ingredients You Will Need
This grilled pizza recipe relies on simple, fresh ingredients that come together beautifully without fuss. The ingredients are easy to find and mostly pantry staples, which makes this an accessible recipe no matter the season.
- For the Dough:
- 1 ball of store-bought or homemade pizza dough (about 12 oz / 340 g) – I recommend King Arthur brand for consistent texture
- 2 tablespoons olive oil (for brushing, adds crispness and prevents sticking)
- For the Sauce:
- 1/2 cup marinara or pizza sauce – homemade or a trusted jar like Rao’s works well
- For the Toppings:
- 1 1/2 cups shredded mozzarella cheese (fresh or low-moisture, shredded) – use whole milk for creamier melt
- Optional: pepperoni slices, fresh basil leaves, sliced bell peppers, mushrooms, or any favorite toppings
- Finishing Touches:
- Sprinkle of grated Parmesan cheese (adds a salty kick)
- Fresh cracked black pepper and red chili flakes (to taste)
- Extra virgin olive oil for drizzling
If you want a gluten-free option, you can swap the dough with a cauliflower crust or a gluten-free dough mix. For a dairy-free version, substitute mozzarella with a plant-based cheese like cashew mozzarella. During summer, fresh tomatoes or basil can replace sauce for a lighter, fresher flavor. The beauty of this recipe is its flexibility—you can keep it classic or make it your own.
Equipment Needed
- Gas Grill: A reliable gas grill with at least two burners is essential for controlling direct and indirect heat zones.
- Pizza Stone or Heavy-Duty Grill Pan (Optional): Helps distribute heat evenly and prevent dough from burning, but you can grill directly on the grates if you’re careful.
- Grill Tongs and Spatula: For safely flipping and handling the pizza.
- Rolling Pin: To roll out the dough evenly (if your dough isn’t pre-rolled).
- Brush: For applying olive oil to the dough.
- Pizza Peel or Large Baking Sheet: To transfer the pizza onto the grill smoothly.
If you don’t have a pizza stone, a cast iron skillet works well as a substitute and is easier to maintain. For cleaning, I’ve found that scrubbing the grill grates with a wire brush after they cool prevents sticking on subsequent uses. Investing in a good grill thermometer can also make a big difference for managing heat consistency, which I learned the hard way during earlier attempts.
Preparation Method
- Preheat the Grill: Turn on your gas grill to high heat and let it preheat for about 10-15 minutes, aiming for 500°F (260°C). If you’re using a pizza stone, place it on the grill grates during this time to heat up as well.
- Roll Out the Dough: On a floured surface, roll your pizza dough into a roughly 12-inch (30 cm) circle. Make sure it’s about 1/4 inch (6 mm) thick for the best crispness. If the dough resists stretching, let it rest for 5 minutes before trying again.
- Oil the Dough: Lightly brush one side of the dough with olive oil. This side will go down first on the grill to prevent sticking and help crisp up the crust.
- Grill the Dough: Place the oiled side down on the grill grate. Close the lid and grill for 2-3 minutes until grill marks appear and the dough firms up. Use tongs to lift and check the bottom—it should be golden brown and slightly charred.
- Flip and Add Toppings: Brush the uncovered side with olive oil, then quickly flip the dough. Immediately spread the pizza sauce evenly over the grilled side, followed by cheese and your chosen toppings. Close the lid again.
- Cook Until Cheese Melts: Grill for another 3-5 minutes, keeping an eye on the cheese to ensure it melts without burning. Rotate the pizza if your grill has hot spots.
- Finish and Serve: Carefully remove the pizza from the grill using a pizza peel or spatula. Sprinkle with Parmesan, fresh basil, black pepper, and a drizzle of olive oil. Let it rest for a minute before slicing.
Pro tip: If the crust cooks too quickly or the cheese isn’t melting fast enough, turn off one burner and move the pizza to indirect heat, closing the lid to create a mini-oven effect. This trick saves the toppings from burning while keeping the crust crispy.
From personal experience, don’t rush flipping the dough the first time—you want it to be sturdy enough to flip without tearing. And trust your nose! The smell of that toasty crust is your best indicator that it’s time to flip.
Cooking Tips & Techniques
Grilling pizza on a gas grill might seem tricky at first, but a few insider tips make it easy to master:
- Heat Management: Set up a two-zone fire—one side on high for searing the crust, the other on low or off for melting the toppings gently.
- Prevent Sticking: Always oil your dough and clean the grill grates before cooking. A well-oiled and hot grill helps the dough release easily.
- Use a Pizza Stone or Cast Iron: These tools distribute heat evenly and minimize flare-ups. If you don’t have one, keep the dough moving and watch closely.
- Don’t Overload Toppings: Too many toppings can weigh down the dough and make it soggy. Less is more for that crispy texture.
- Watch the Cheese: Keep the lid closed but peek regularly to avoid burning. Ideally, the cheese should bubble and just start to brown.
- Practice Patience: Resist the urge to poke or move the dough too much while grilling. It needs time to develop those beautiful grill marks and crispness.
I remember my first few tries when I hurried the process and ended up with a floppy crust and half-melted cheese. After a couple of lessons—mostly involving patience and temperature control—the results improved dramatically. It’s the kind of recipe that rewards a slow, attentive approach.
Variations & Adaptations
One of the best things about grilled pizza is how easy it is to customize. Here are some ways to mix it up:
- Seasonal Veggie Pizza: Swap classic toppings for grilled zucchini, cherry tomatoes, and fresh arugula after cooking for a fresh summer vibe.
- Meat Lover’s Version: Add cooked sausage, bacon, or pepperoni before grilling. For smoky flavor, try adding a brush of barbecue sauce under the cheese.
- Gluten-Free Option: Use a store-bought gluten-free dough or cauliflower crust. Cook times might vary slightly, so keep an eye on the crust crispness.
- White Pizza: Skip the tomato sauce and use a garlic-infused olive oil base with ricotta and mozzarella, finished with fresh herbs.
- Cheese Variations: Mix mozzarella with provolone, fontina, or even a sprinkle of blue cheese for a more complex flavor.
One of my favorite adaptations was making a carbonara-style pizza with pancetta and a soft egg cracked on top after grilling. It sounds fancy but was surprisingly simple and a real crowd-pleaser.
Serving & Storage Suggestions
Serve your grilled pizza hot off the grill for the best crisp texture. It pairs wonderfully with a simple green salad or a refreshing drink like iced tea or a crisp white wine. For casual outdoor meals, I like to set up a toppings station so everyone can customize their slices.
If you have leftovers, wrap the pizza tightly in foil or place it in an airtight container and refrigerate for up to 2 days. To reheat, pop slices back on the grill over medium heat for 2-3 minutes with the lid closed to crisp up the crust again without drying the toppings.
Freezing grilled pizza isn’t ideal because the texture changes, but you can freeze the dough balls ahead of time for quick prep later. The flavors in grilled pizza tend to hold up well, and in fact, the crust crisps up even better on reheating, which I find satisfying on busy days.
Nutritional Information & Benefits
This crispy grilled pizza recipe offers a balanced mix of carbs, protein, and fats, making it a satisfying meal. A typical serving (1/4 pizza) provides approximately:
| Nutrient | Amount |
|---|---|
| Calories | 320 kcal |
| Protein | 15 g |
| Carbohydrates | 35 g |
| Fat | 12 g |
| Fiber | 2 g |
Key health benefits come from the olive oil’s heart-healthy fats and the protein from cheese and toppings. Using fresh veggies adds fiber and vitamins, making this grilled pizza a more wholesome option than takeout. For those watching carbs, opting for a cauliflower crust can lower the carb count significantly.
Note: This recipe contains dairy and gluten, so it’s not suitable for those with allergies unless substitutions are made.
Conclusion
This crispy grilled pizza on a gas grill has become a staple in my home for good reason. It’s straightforward, fast, and yields a crust that’s crisp without being tough, topped with melty cheese and your favorite flavors. You can tweak it endlessly to suit your taste or occasion, and it always feels a bit like a special treat, even on a weeknight.
Honestly, I love how it brings people outdoors, turning simple ingredients into a shared experience that’s as much about the cooking as the eating. If you try it, don’t hesitate to experiment with toppings or pair it with easy sides like the crispy pork fried rice for a complete meal that impresses without stress.
I’d love to hear how your grilled pizza turns out or what creative spins you put on it. Sharing food stories is part of the fun, isn’t it? Happy grilling!
FAQs About Crispy Grilled Pizza on Gas Grill
How do I prevent my pizza dough from sticking to the grill?
Make sure to preheat the grill well and brush the dough generously with olive oil on the side that touches the grates. Also, clean your grill grates thoroughly before cooking to avoid sticking.
Can I use a charcoal grill instead of a gas grill?
Yes, charcoal grills work wonderfully and add a nice smoky flavor, but heat control can be trickier. Use two-zone cooking by piling coals on one side and grilling the pizza on the cooler side to avoid burning.
How thick should I roll out the dough?
About 1/4 inch (6 mm) thick is ideal. Too thin and it may tear or burn; too thick and it won’t crisp up properly on the grill.
What should I do if my cheese isn’t melting fast enough?
Move the pizza to indirect heat by turning off one burner and close the lid. This traps heat and melts the cheese without burning the crust.
Can I prepare this pizza ahead of time?
You can pre-shape and refrigerate the dough for a few hours, but it’s best to add sauce and toppings just before grilling for the freshest flavor and best texture.
Pin This Recipe!
Crispy Grilled Pizza on Gas Grill
A quick and easy recipe for making perfectly crispy grilled pizza on a gas grill, ideal for outdoor cooking with a smoky, golden crust and melty cheese.
- Prep Time: 10 minutes
- Cook Time: 10 minutes
- Total Time: 20 minutes
- Yield: 4 servings 1x
- Category: Main Course
- Cuisine: American
Ingredients
- 1 ball of store-bought or homemade pizza dough (about 12 oz / 340 g)
- 2 tablespoons olive oil (for brushing, adds crispness and prevents sticking)
- 1/2 cup marinara or pizza sauce
- 1 1/2 cups shredded mozzarella cheese (fresh or low-moisture, shredded)
- Optional toppings: pepperoni slices, fresh basil leaves, sliced bell peppers, mushrooms, or any favorite toppings
- Sprinkle of grated Parmesan cheese
- Fresh cracked black pepper (to taste)
- Red chili flakes (to taste)
- Extra virgin olive oil for drizzling
Instructions
- Preheat the gas grill to high heat (about 500°F / 260°C) and let it preheat for 10-15 minutes. Place a pizza stone on the grill grates if using.
- Roll out the pizza dough on a floured surface into a roughly 12-inch (30 cm) circle about 1/4 inch (6 mm) thick. Let rest 5 minutes if dough resists stretching.
- Lightly brush one side of the dough with olive oil. Place the oiled side down on the grill grate.
- Close the lid and grill for 2-3 minutes until grill marks appear and the dough firms up. Check the bottom for a golden brown, slightly charred crust.
- Brush the uncovered side with olive oil, then flip the dough. Immediately spread pizza sauce evenly over the grilled side, add cheese and chosen toppings. Close the lid.
- Grill for another 3-5 minutes until the cheese melts, rotating the pizza if needed to avoid hot spots.
- Remove the pizza carefully using a pizza peel or spatula. Sprinkle with Parmesan, fresh basil, black pepper, and drizzle with olive oil. Let rest for 1 minute before slicing.
Notes
Use two-zone cooking on the grill to manage heat: one side high for searing crust, the other low or off for melting toppings. Brush dough with olive oil to prevent sticking. If cheese melts too slowly, move pizza to indirect heat and close lid to create a mini-oven effect. Avoid overloading toppings to keep crust crispy.
Nutrition
- Serving Size: 1/4 of the pizza
- Calories: 320
- Fat: 12
- Carbohydrates: 35
- Fiber: 2
- Protein: 15
Keywords: grilled pizza, gas grill pizza, outdoor cooking, crispy pizza, easy pizza recipe, summer recipe, backyard pizza