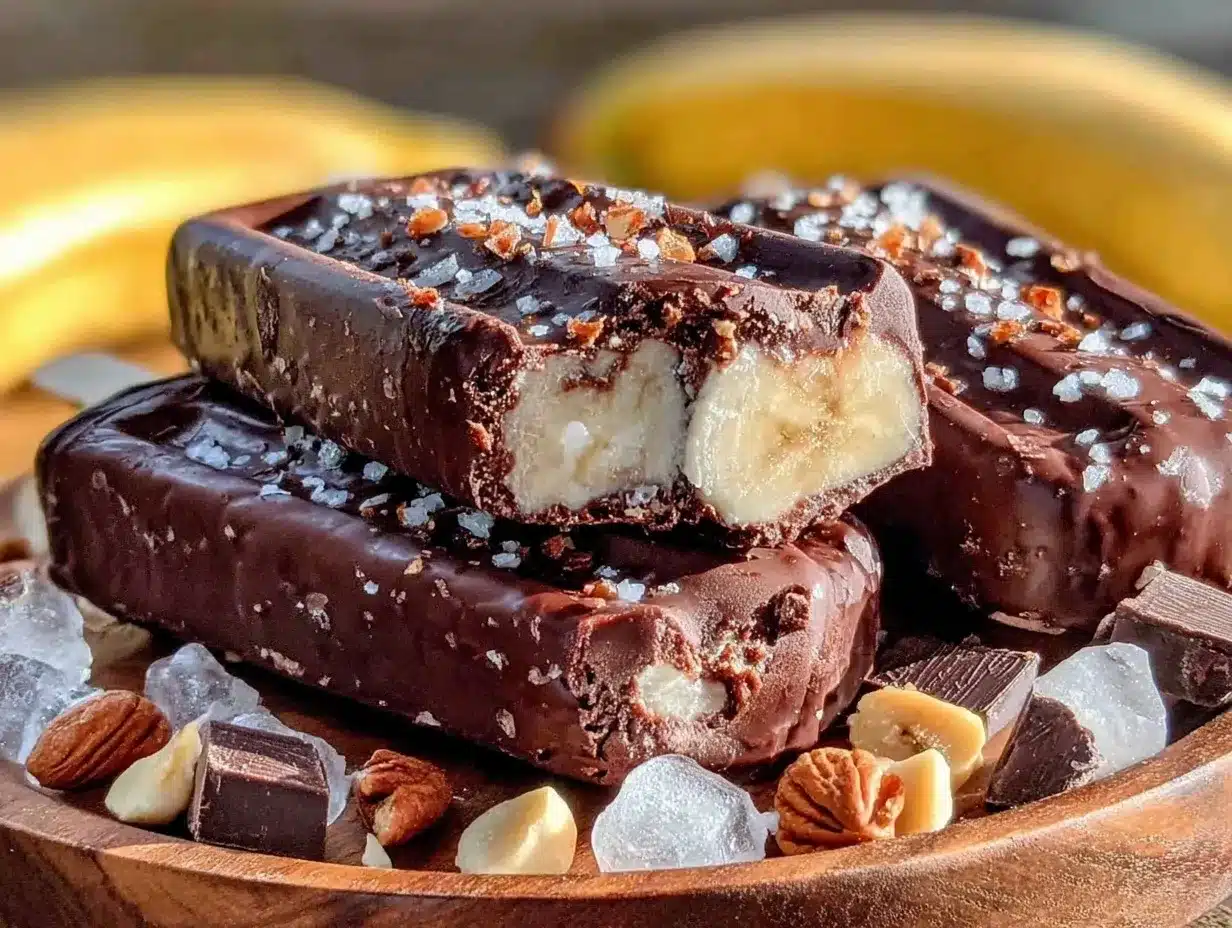
“You want a popsicle?” my kiddo asked, holding up a couple of sad, half-melted fruit bars from the freezer. Honestly, I was feeling the heat that day—kitchen chaos, a to-do list longer than my arm, and a craving for something sweet but not a total sugar bomb. So, I grabbed some overripe bananas from the counter and thought, why not try something new? Little did I know, this creamy chocolate banana popsicles with crunchy nut coating would quickly become a freezer staple around here.
The first batch was a bit of a happy accident—I wasn’t planning on the crunchy nuts shell, just wanted a quick dip to make them less messy. That crunch? Game changer. The creamy, rich chocolate blended with the natural sweetness of bananas, and then the unexpected texture of nuts made it feel like a mini treat every time. It’s funny how some of the best recipes come from those “just winging it” moments, right?
Now, whether it’s a hot afternoon or a casual dessert after dinner, these popsicles have become my go-to. They’re simple, satisfying, and honestly, a little bit addictive. Plus, having a homemade frozen snack that doesn’t scream “store-bought” has been a quiet little win for me. So, if you’re curious about a way to turn bananas and chocolate into something unexpectedly delightful, stick around—this recipe just might become your new favorite, too.
Why You’ll Love This Recipe
From my countless trials in the kitchen, this creamy chocolate banana popsicles recipe with crunchy nut coating stands out for a handful of reasons I’m pretty sure you’ll appreciate:
- Quick & Easy: Ready in under 30 minutes (plus freezing time), perfect when you want a fast homemade treat without fuss.
- Simple Ingredients: No need for fancy items—just bananas, chocolate, nuts, and a few basics you probably already have.
- Perfect for Any Occasion: Whether it’s a sunny afternoon snack, a kid-friendly dessert, or a guilt-free indulgence after a cozy dinner, these popsicles fit right in.
- Crowd-Pleaser: Kids, adults, even picky eaters tend to ask for seconds—especially when they discover that satisfying crunchy coating.
- Unbelievably Delicious: The creamy texture from ripe bananas combined with chocolate’s richness and a nutty crunch creates a flavor and mouthfeel combo that’s seriously next-level.
This recipe isn’t just another frozen banana treat. The secret is in the coating—those crunchy nuts aren’t just for show, but add a lively contrast that makes each bite exciting. Plus, I’ve played around with blending the bananas for a smoother finish, which gives the popsicles a luscious, almost custard-like texture. It’s a little twist that makes all the difference.
Honestly, these popsicles feel like comfort food reinvented—healthier than your typical ice cream but still indulgent enough to make you close your eyes and savor each bite. They’re perfect for impressing guests without stress or turning a simple moment into something memorable. If you’ve ever loved the creamy satisfaction of a dessert like my creamy chocolate pudding, you’ll find this popsicle hits a similar note but with a fun, handheld twist.
What Ingredients You Will Need
This recipe uses simple, wholesome ingredients to deliver bold flavor and satisfying texture without the fuss. Most are pantry staples, and where you see room for swaps, I’ve got you covered.
- For the Banana Popsicle Base:
- 3 large ripe bananas, peeled and sliced (ripe for natural sweetness and creamy texture)
- 1/2 cup (120 ml) whole milk or any plant-based milk (adds creaminess; I love using almond milk)
- 1/4 cup (60 g) unsweetened cocoa powder (for rich chocolate flavor)
- 2 tablespoons (30 g) honey or maple syrup (optional, depending on banana sweetness)
- 1 teaspoon pure vanilla extract (deepens flavor)
- For the Crunchy Nut Coating:
- 1 cup (120 g) mixed nuts, finely chopped (I usually use almonds and hazelnuts for their crunch and flavor)
- 1 tablespoon coconut oil or butter (to help nuts stick and add richness)
- 100 g dark chocolate (70% cocoa is ideal, but milk chocolate works if you prefer sweeter)
Ingredient tips: For the best texture, look for firm, fresh bananas that are heavily spotted but not blackened. If you want a dairy-free version, swapping in coconut or oat milk works beautifully. I prefer Lindt 70% dark chocolate here for its smooth melt and no bitterness.
Feel free to swap the nuts for seeds like pumpkin or sunflower if allergies are a concern. In summer, I sometimes add a handful of fresh berries blended into the base for a fruity twist. For a gluten-free option, this recipe is naturally safe since it’s free from grains or wheat.
Equipment Needed
- Blender or food processor – for smooth banana-chocolate mixture (a steady blender makes a big difference; I use a Vitamix, but a regular blender works fine too)
- Popsicle molds – essential for shaping the popsicles; silicone molds are great for easy removal
- Microwave-safe bowl or double boiler – to melt chocolate gently
- Mixing bowls – for combining nuts and coating ingredients
- Spatula or spoon – for mixing and spreading chocolate
If you don’t have popsicle molds, small paper cups with wooden sticks work as a budget-friendly alternative. Just be sure to line the cups with parchment paper for easier popsicle removal. Also, keeping your chocolate warm but not hot during melting avoids clumping—a tip I learned the hard way, especially when making creamy homemade vanilla ice cream.
Preparation Method
- Prepare the Banana-Chocolate Base (10 minutes): In your blender, combine the sliced ripe bananas, milk, cocoa powder, honey (if using), and vanilla extract. Blend until silky smooth. You want no lumps here; the smoother, the creamier the popsicle texture.
- Pour into Popsicle Molds (5 minutes): Pour the blended mixture evenly into popsicle molds, leaving a small gap at the top to allow expansion. Insert sticks and freeze for at least 4 hours or overnight until solid.
- Chop Nuts and Melt Chocolate (10 minutes): While the popsicles freeze, chop your mixed nuts finely but not into powder—small chunks add the best crunch. Melt your dark chocolate with coconut oil or butter in a microwave-safe bowl in 20-second bursts, stirring frequently to avoid overheating. The oil helps the chocolate stay fluid for dipping.
- Prepare the Nut Coating (5 minutes): Spread the chopped nuts on a plate or shallow dish. This will be your crunchy coating station.
- Unmold and Coat the Popsicles (10 minutes): Once frozen solid, remove popsicles from molds. Quickly dip each popsicle into the melted chocolate, then immediately roll or sprinkle with the chopped nuts to coat evenly. Place on a parchment-lined tray and pop back into the freezer for at least 30 minutes to let the coating set.
- Serve or Store: These popsicles are best enjoyed soon after coating but can be stored in an airtight container in the freezer for up to 2 weeks.
Pro tip: If your popsicles are tough to unmold, run warm water briefly over the molds’ exterior to loosen them a bit. Also, dip quickly to prevent melting, especially if your kitchen is warm. The nut coating sets faster if the chocolate is warm but not hot.
Cooking Tips & Techniques
One trick I learned early on is that ripe bananas make all the difference. If they’re underripe, the popsicles taste bland and icy. Another is to blend the banana base thoroughly, so you don’t end up with frozen banana chunks that can be unpleasant.
Melting chocolate can be tricky—overheating causes it to seize and become grainy. Stir often, and remove the bowl promptly once it’s mostly melted; residual heat finishes the job.
When coating, working quickly is key so your popsicles don’t start melting. If you’re dipping several, keep the melted chocolate warm by placing the bowl over a pan of warm water (double boiler style).
Also, for consistency, use the same size popsicle molds so they freeze uniformly. This makes coating easier and ensures your popsicles finish at the same time.
Multitasking tip: While the popsicles freeze, prep your nuts and melt chocolate so you’re ready to coat without delay. This keeps the process smooth and efficient—trust me, it makes a difference.
Variations & Adaptations
- Dairy-Free Version: Use coconut milk or almond milk instead of dairy milk. Swap honey for maple syrup to keep it vegan-friendly.
- Nut-Free Crunch: Substitute chopped toasted seeds (pumpkin, sunflower) in place of nuts for allergy-friendly coating.
- Flavor Twists: Add a teaspoon of instant espresso powder into the banana mixture for a mocha pop. Or swirl in peanut butter before freezing for a luscious nutty surprise.
- Seasonal Fruit Boost: Blend in fresh or frozen berries with bananas for a colorful, fruity popsicle base.
- Chocolate Variations: Use white chocolate for coating with crushed pistachios for a pretty, pale green crunch.
I recently experimented with a version using cinnamon-spiced nuts for a warm, cozy flavor that was amazing. It’s a subtle twist but adds a nice seasonal feel.
Serving & Storage Suggestions
These creamy chocolate banana popsicles are best served straight from the freezer—cold and firm, with that satisfying crunch right at the first bite. I like to present them on a pretty platter lined with parchment paper, maybe scattered with a few extra chopped nuts for looks.
They pair wonderfully with fresh fruit salads or a light vanilla yogurt dip for extra creaminess. If you’re serving kids, a small drizzle of honey on top adds a nice touch.
Store leftovers in an airtight container or wrapped individually in parchment paper in the freezer. This prevents freezer burn and keeps them tasting fresh. When reheating (if you want to soften slightly), let them sit at room temperature for 5 minutes—microwaving tends to melt the nuts and chocolate unevenly.
Flavors actually deepen a bit after a day or two in the freezer, so if you can resist, they taste even better the next day. But honestly, they rarely last that long in my house!
Nutritional Information & Benefits
Each popsicle is roughly:
| Nutrient | Approximate Amount |
|---|---|
| Calories | 150-180 kcal |
| Carbohydrates | 20-25 g |
| Fat | 7-9 g (mostly from nuts and chocolate) |
| Protein | 3-4 g |
| Fiber | 3-4 g |
Bananas bring potassium and natural sweetness, while nuts provide heart-healthy fats and protein. Dark chocolate adds antioxidants—a win-win for a treat that feels indulgent but carries some nutrition. This recipe is naturally gluten-free and can be made vegan with simple swaps, making it accessible for many dietary needs.
From a personal wellness standpoint, I appreciate how this popsicle satisfies cravings without sending me reaching for processed sugar or additives. It’s a snack that feels kind to my body and soul.
Conclusion
Creamy chocolate banana popsicles with crunchy nut coating have quietly become a favorite in my kitchen—a sweet, satisfying treat that’s easy to whip up and loved by all ages. They’re a great way to enjoy bananas beyond smoothies or bread, and that crunchy coating? Honestly, it’s the star that keeps me coming back.
Feel free to play around with the nuts or chocolate, add your own flavor touches, or even try making mini versions for parties. I love how adaptable this recipe is, fitting into busy days or relaxed weekends effortlessly.
If you end up making these, I’d love to hear what variations you try or how you serve them—sharing those details always makes my day. And if you enjoy creamy chocolate treats, you might also appreciate my creamy chocolate pudding recipe for a cozy night in.
Here’s to sweet moments and simple pleasures—happy popsicle making!
FAQs
Can I make these popsicles without nuts?
Absolutely! You can skip the nut coating or use seeds like pumpkin or sunflower for a crunchy alternative that’s nut-free.
How long do these popsicles last in the freezer?
Stored properly in an airtight container, they keep well for up to two weeks without losing flavor or texture.
Can I use frozen bananas instead of fresh?
Yes, frozen bananas work great and can make the mixture even creamier, but be sure to thaw slightly before blending for easier processing.
What’s the best way to remove the popsicles from molds?
Run warm water briefly over the outside of the molds (about 10-15 seconds) to loosen the popsicles. Avoid soaking to prevent melting.
Can I prepare these popsicles ahead for a party?
Definitely! They freeze well and can be dipped and coated a few hours before serving. Just keep them in the freezer until ready to enjoy.
Pin This Recipe!
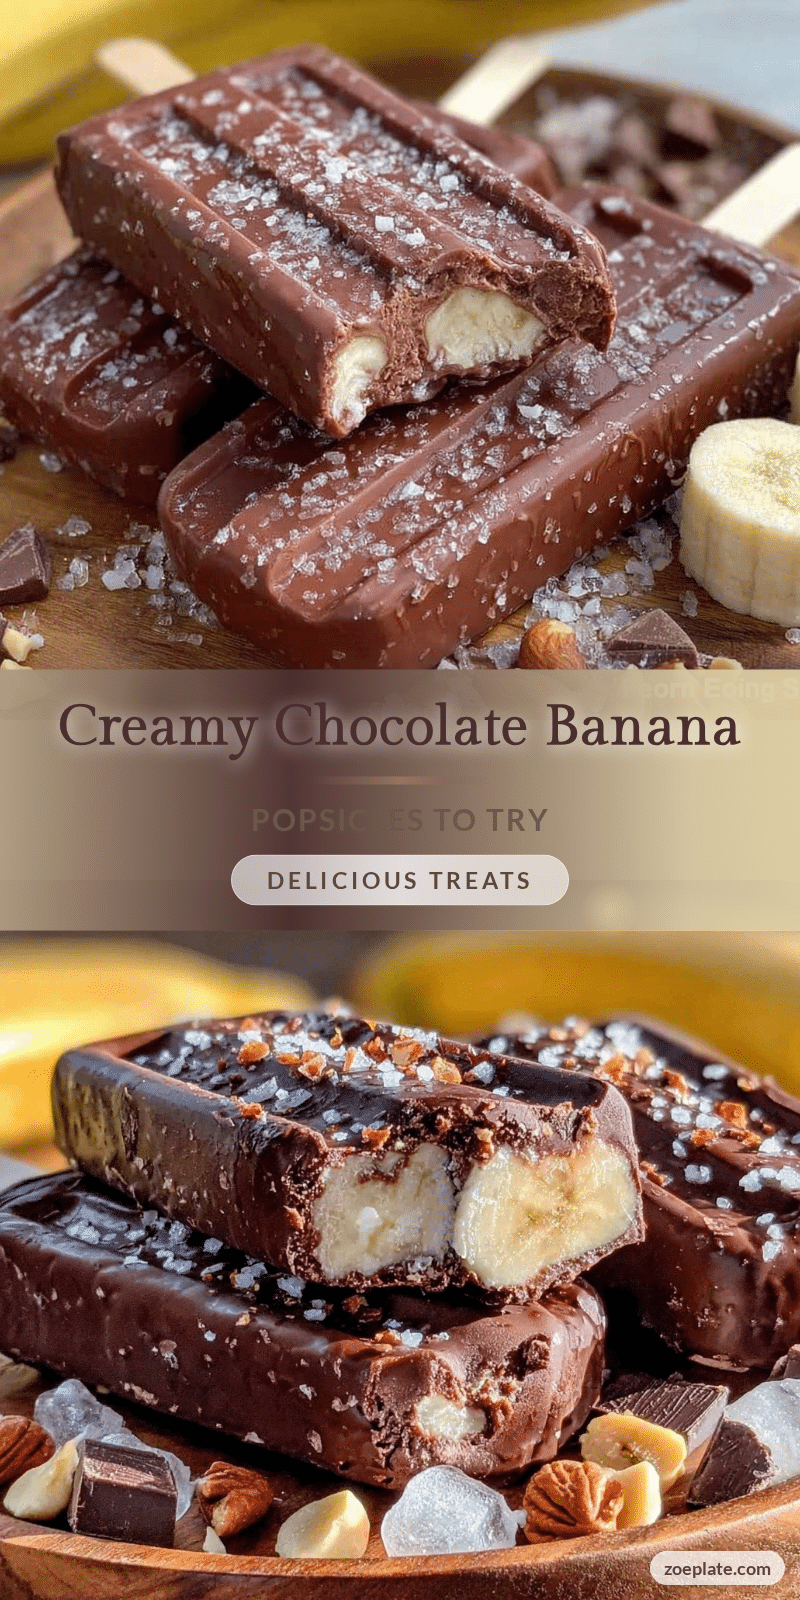
Creamy Chocolate Banana Popsicles Recipe with Crunchy Nut Coating
These creamy chocolate banana popsicles with a crunchy nut coating are a quick, easy, and delicious homemade frozen treat perfect for any occasion. They combine ripe bananas, rich chocolate, and a nutty crunch for a satisfying and healthier dessert.
- Prep Time: 15 minutes
- Cook Time: 0 minutes
- Total Time: 4 hours 15 minutes
- Yield: 6 popsicles 1x
- Category: Dessert
- Cuisine: American
Ingredients
- 3 large ripe bananas, peeled and sliced
- 1/2 cup (120 ml) whole milk or any plant-based milk (e.g., almond milk)
- 1/4 cup (60 g) unsweetened cocoa powder
- 2 tablespoons (30 g) honey or maple syrup (optional)
- 1 teaspoon pure vanilla extract
- 1 cup (120 g) mixed nuts, finely chopped (e.g., almonds and hazelnuts)
- 1 tablespoon coconut oil or butter
- 100 g dark chocolate (70% cocoa recommended)
Instructions
- Prepare the Banana-Chocolate Base (10 minutes): In your blender, combine the sliced ripe bananas, milk, cocoa powder, honey (if using), and vanilla extract. Blend until silky smooth with no lumps.
- Pour into Popsicle Molds (5 minutes): Pour the blended mixture evenly into popsicle molds, leaving a small gap at the top. Insert sticks and freeze for at least 4 hours or overnight until solid.
- Chop Nuts and Melt Chocolate (10 minutes): Finely chop the mixed nuts but keep small chunks for crunch. Melt dark chocolate with coconut oil or butter in a microwave-safe bowl in 20-second bursts, stirring frequently.
- Prepare the Nut Coating (5 minutes): Spread the chopped nuts on a plate or shallow dish for coating.
- Unmold and Coat the Popsicles (10 minutes): Remove popsicles from molds once frozen solid. Quickly dip each popsicle into the melted chocolate, then immediately roll or sprinkle with chopped nuts to coat evenly. Place on a parchment-lined tray and freeze for at least 30 minutes to set the coating.
- Serve or Store: Enjoy immediately or store in an airtight container in the freezer for up to 2 weeks.
Notes
Use ripe bananas heavily spotted but not blackened for best texture and sweetness. For dairy-free, substitute whole milk with coconut or almond milk and honey with maple syrup. To remove popsicles easily, run warm water briefly over mold exterior. Work quickly when dipping to prevent melting. Keep melted chocolate warm but not hot to avoid clumping. Nuts can be swapped for seeds for nut-free version. Flavors deepen after a day or two in the freezer.
Nutrition
- Serving Size: 1 popsicle
- Calories: 150180
- Sugar: 1215
- Sodium: 1020
- Fat: 79
- Saturated Fat: 23
- Carbohydrates: 2025
- Fiber: 34
- Protein: 34
Keywords: chocolate banana popsicles, homemade popsicles, frozen dessert, healthy popsicles, nut coating, dairy-free popsicles, vegan popsicles, gluten-free dessert