“Hey, did you see the cookie?” my sister texted me at 11:47 pm, right in the middle of my frantic kitchen cleanup. I’d just pulled a tray of sugar cookies from the oven—shaped like diplomas, if you can believe it—and was debating if I could actually pull off the royal icing detail without turning them into a sticky mess. Honestly, I was skeptical about those tiny piping details at first. But the moment I saw her message, I realized something about this recipe had clicked.
Graduation season always sneaks up on me, and this year was no different. I was scrambling for a meaningful yet fun way to celebrate my cousin’s big day. Something homemade, personal, but not the usual cake or cupcakes. The idea of personalized diploma sugar cookies came up during a quick chat with my friend who’s a crafty baker. I wasn’t sold at first—royal icing always felt intimidating, like a high-maintenance art project rather than a comfy kitchen treat. But after giving it a few tries, I found the rhythm, and these cookies turned into this delightful little tradition I can’t wait to share every year.
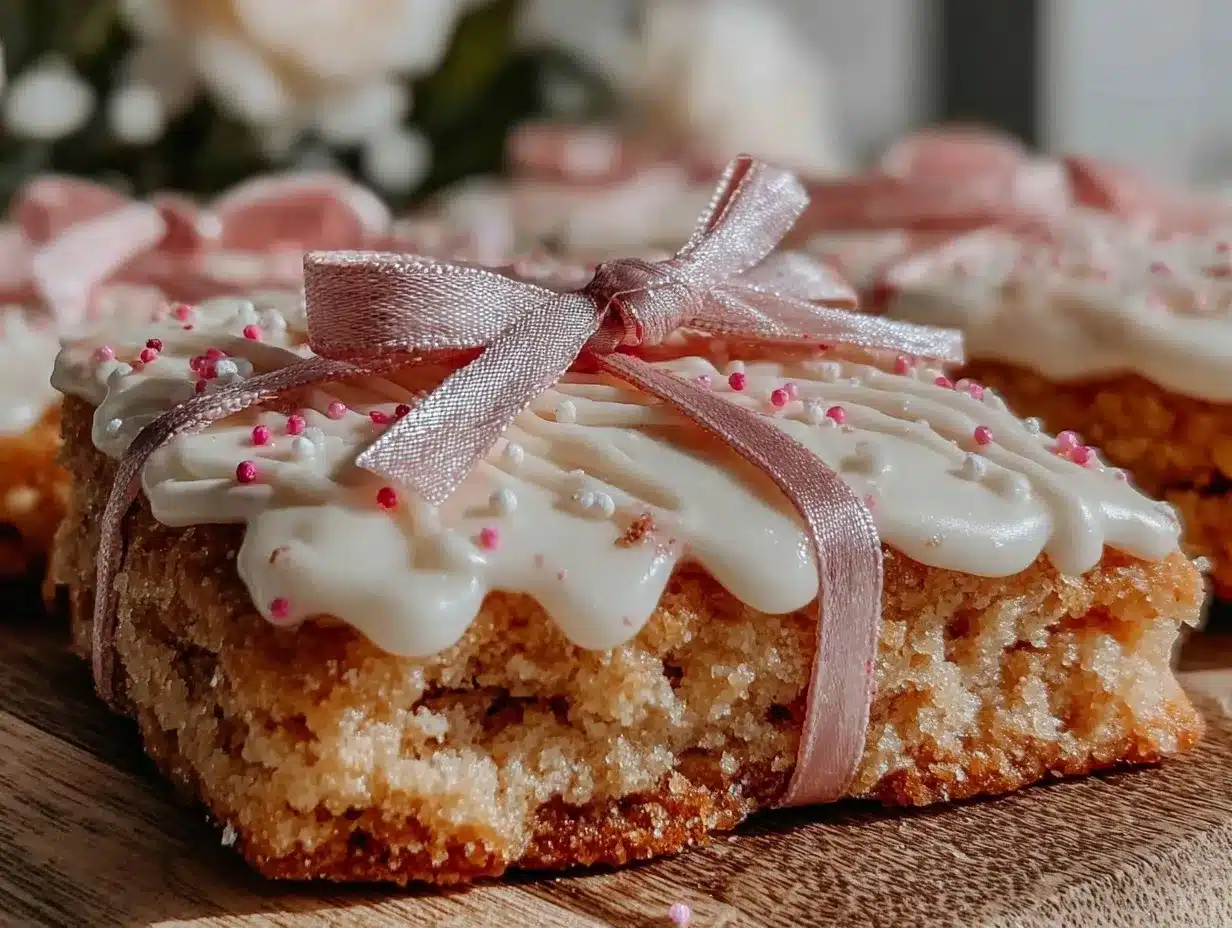
The crisp edges, the buttery softness inside, and that smooth, glossy icing with just the right amount of sweetness—it’s the kind of cookie that makes you pause, smile, and maybe even get a little nostalgic. They’re perfect for handing out at graduation parties, slipping into gift bags, or just savoring one or two while thinking about what’s next.
It’s funny how something as simple as a cookie can hold a moment in time. These diploma sugar cookies aren’t just dessert—they’re a keepsake you can eat, a little celebration you bake into every batch. And honestly, once you get the hang of the royal icing, this recipe sticks with you, the way good memories do.
Why You’ll Love This Recipe
This recipe is not just about making sugar cookies; it’s about crafting personalized diploma sugar cookies with a royal icing detail that feels special but is totally doable, even if you’re not a pro decorator. I’ve tested this recipe many times and tweaked it so the texture and flavor come out perfect every time.
- Quick & Easy: From mixing the dough to decorating, you can have these cookies ready in under two hours, perfect for last-minute party prep or weekend baking fun.
- Simple Ingredients: You probably already have most of these pantry staples—no hunting down exotic stuff required.
- Perfect for Graduation Celebrations: Whether it’s a school party, family gathering, or a sweet gift, these cookies fit right in with the occasion.
- Crowd-Pleaser: Kids and adults can’t resist the buttery base and the delicate royal icing detail—watch out for requests to make extras!
- Unbelievably Delicious: The buttery dough with just a hint of vanilla pairs beautifully with the smooth, slightly tangy royal icing, making each bite a little celebration.
What sets this recipe apart? It’s the balance between simplicity and style. The royal icing isn’t just slapped on; it’s crafted to have that perfect sheen and texture that dries smooth and allows for personalized piping—like names, dates, or little congratulatory notes. I recommend using a fine-tipped piping bag for the best results (and trust me, it’s easier than it looks). Plus, swapping in almond extract instead of vanilla adds a nice twist if you’re feeling adventurous.
These cookies aren’t just treats; they’re a sweet way to mark a milestone with a personal touch. You’ll find yourself smiling every time you decorate them, and your guests will appreciate the care behind the detail.
What Ingredients You Will Need
This recipe uses simple, wholesome ingredients to deliver buttery, tender cookies with a royal icing that dries beautifully for detailed decoration. Most are pantry staples, and substitutions are easy if needed.
- For the Sugar Cookies:
- 2 ¾ cups (345 g) all-purpose flour – for the perfect balance of softness and structure
- 1 teaspoon baking powder – helps the cookies rise just right
- ½ teaspoon salt – enhances the flavor
- 1 cup (227 g) unsalted butter, softened – I recommend using Plugrá for a richer butter flavor
- 1 ½ cups (300 g) granulated sugar – the sweetness base
- 1 large egg, room temperature – binds everything together
- 2 teaspoons pure vanilla extract – feel free to swap with almond extract for a different flavor note
- Optional: ½ teaspoon almond extract – adds a subtle nutty aroma
- For the Royal Icing:
- 3 cups (360 g) powdered sugar, sifted – the base for smooth icing
- 2 large egg whites or 4 tablespoons meringue powder mixed with 6 tablespoons water – meringue powder is a safe alternative if you’re avoiding raw eggs
- ¼ teaspoon cream of tartar – stabilizes the icing
- Food coloring gels – I use AmeriColor for vibrant, consistent colors
- Optional: ½ teaspoon vanilla or almond extract – adds flavor to the icing
When picking your flour, if you want a slightly more tender cookie, try swapping ¼ cup of the all-purpose flour with cornstarch. For those who prefer gluten-free options, almond flour can be mixed in, but expect a different texture.
If you want to switch up the look, you can add a tiny bit of lemon zest to the cookie dough for a fresh twist or swap granulated sugar with superfine sugar for a smoother dough.
Equipment Needed
Creating these personalized diploma sugar cookies with royal icing detail doesn’t require anything fancy, but there are a few tools that make the process smoother.
- Mixing Bowls: A large bowl for the dough and a medium bowl for the royal icing.
- Electric Mixer: A stand mixer or hand mixer speeds up creaming butter and sugar, but you can also mix by hand if you’re patient.
- Rolling Pin: Essential for rolling the dough evenly. I like one with adjustable rings to keep thickness consistent.
- Diploma-Shaped Cookie Cutter: If you don’t have a diploma shape, a rectangle or scroll-shaped cutter works well too.
- Baking Sheets: Use heavy-duty, rimmed baking sheets lined with parchment paper or silicone mats to prevent sticking.
- Piping Bags and Tips: For detail work with royal icing, small round tips (size #1 or #2) are perfect for writing and outlining.
- Sifter: For powdered sugar to keep icing lump-free.
If you don’t have a piping bag, a small zip-top bag with a tiny corner snipped off will do the trick. Also, cleaning royal icing tools right after use prevents hard-to-remove crusts—trust me, learned that the hard way!
Preparation Method
- Mix Dry Ingredients: In a medium bowl, whisk together 2 ¾ cups (345 g) flour, 1 teaspoon baking powder, and ½ teaspoon salt. Set aside.
- Cream Butter and Sugar: Using an electric mixer, beat 1 cup (227 g) softened unsalted butter and 1 ½ cups (300 g) granulated sugar on medium speed until light and fluffy, about 3 to 4 minutes. This step is key for tender cookies.
- Add Egg and Extracts: Beat in 1 large egg, 2 teaspoons vanilla extract, and optional ½ teaspoon almond extract until combined. The dough will look slightly shiny and smooth.
- Incorporate Dry Ingredients: Gradually add the flour mixture to the wet ingredients, mixing on low speed until just combined. Avoid overmixing to keep cookies tender.
- Chill the Dough: Divide the dough in half, flatten into discs, wrap in plastic wrap, and chill for at least 1 hour. Chilling makes rolling easier and prevents spreading during baking.
- Preheat Oven & Prepare Sheet: Heat oven to 350°F (175°C). Line baking sheets with parchment paper or silicone mats.
- Roll and Cut: On a lightly floured surface, roll one disc of dough to about ¼ inch (6 mm) thickness. Use your diploma-shaped cutter to stamp out cookies. Transfer carefully to baking sheets.
- Bake: Bake for 8 to 10 minutes, until edges are just starting to turn golden. Be careful not to overbake—cookies should be firm but still soft in the center.
- Cool Completely: Let cookies cool on the baking sheet for 5 minutes before transferring to a wire rack to cool fully before decorating.
- Make Royal Icing: In a clean bowl, beat 3 cups (360 g) sifted powdered sugar, 2 egg whites or meringue powder mix, and ¼ teaspoon cream of tartar on medium-high speed until stiff peaks form, about 7 to 10 minutes. Add extracts and gel food coloring as desired.
- Decorate: Thin the icing with a little water to flood consistency for base layers (should spread smoothly but not run off), and keep some thicker for piping details. Use piping bags with small tips to outline and add personalized messages, like names or graduation years.
- Drying: Allow royal icing to dry at room temperature for several hours or overnight before stacking or packaging.
Pro tip: If your icing feels too stiff while piping, add water drop by drop. If too runny, add powdered sugar gradually. Also, keep icing covered with a damp cloth when not in use to prevent drying out.
Cooking Tips & Techniques
Royal icing can be intimidating, but once you get a feel for it, it’s quite forgiving. Here are some tips I’ve picked up after many batches:
- Beat the Egg Whites Properly: For stiff peaks, don’t rush. It takes time but gives you that perfect spread and hold.
- Consistency Matters: Flood icing (for filling) should flow smoothly off a spoon but hold shape within 10 seconds. Outline icing (for piping details) should be thicker and hold a peak. Testing on parchment before decorating cookies helps.
- Practice Piping: If you’re new to piping, practice writing your message or drawing shapes on parchment before decorating cookies. I used to cringe at my first attempts, but practice made it manageable.
- Use Toothpicks: For fixing small icing mistakes or spreading icing evenly in tiny areas, a toothpick is your best friend.
- Multitasking: While cookies bake, prepare your icing. This keeps the rhythm and saves time.
- Store Properly: Once dry, store cookies in an airtight container with parchment layers to keep icing intact.
And here’s a little secret: I often pair these cookies with a cozy batch of one-pot freezer meals for easy party prep. That combo saves the day when time is tight and guests are hungry!
Variations & Adaptations
Personalizing diploma sugar cookies means you can get creative with shapes, flavors, and decorations.
- Flavor Swaps: Add lemon zest to the dough or swap vanilla extract for almond or orange blossom for a different aroma.
- Gluten-Free Option: Substitute with a gluten-free baking blend and add an extra tablespoon of xanthan gum to maintain structure.
- Dairy-Free Version: Use vegan butter alternatives and egg replacers like flax eggs; royal icing can be made with aquafaba instead of egg whites.
- Seasonal Colors and Themes: Adjust royal icing colors to match school colors or add edible gold dust for a fancy touch.
- Alternative Shapes: Instead of diplomas, try graduation caps or books using different cookie cutters for variety.
One time, I swapped out the usual royal icing for a simple cream cheese glaze for a softer, tangier finish. It was a hit for those who prefer less sweetness.
Serving & Storage Suggestions
These diploma sugar cookies are best served at room temperature so the royal icing has that perfect smooth snap when you bite into it. Arrange them on a platter with fresh flowers or alongside a cup of coffee or tea to make the moment feel special.
They keep beautifully in an airtight container for up to a week. For longer storage, freeze undecorated cookies tightly wrapped, then decorate after thawing. Decorated cookies freeze well too, but I recommend layering parchment paper between them to protect the icing.
Reheating isn’t necessary, but if you want to warm them slightly, a few seconds in the microwave (10-15 seconds) works fine—just be careful not to melt the icing.
Flavors tend to meld and deepen a bit after a day, so if you can, make these a day ahead of your event. They’re also a charming addition to gift boxes or party favors, making celebrations sweeter in every sense.
Nutritional Information & Benefits
Each cookie (about 3 inches long) contains approximately:
| Calories | 150 |
|---|---|
| Fat | 7g |
| Carbohydrates | 22g |
| Protein | 1.5g |
| Sugar | 14g |
While these cookies are definitely a treat, the homemade dough uses real butter and natural extracts, avoiding artificial flavors and preservatives. The icing’s base, royal icing, is made from egg whites or meringue powder, offering a protein element not found in many frostings.
For those with dietary concerns, the recipe can be adapted gluten-free or dairy-free as mentioned earlier. Keep in mind the royal icing contains egg whites, which may be allergenic for some.
From a wellness perspective, making these cookies at home means you control the quality of ingredients and skip the additives found in many store-bought options. And hey, a little indulgence during celebrations is part of life’s sweetness, right?
Conclusion
Perfect personalized diploma sugar cookies with royal icing detail are more than just a dessert—they’re a way to celebrate milestones with a personal touch that’s as fun to make as it is to share. Whether you’re baking for a graduation party, gifting to a friend, or simply indulging in a sweet moment of nostalgia, this recipe holds a special place in my kitchen and heart.
Don’t hesitate to tweak the flavors, colors, or shapes to make it your own. I love how these cookies bring a little joy wrapped in buttery dough and glossy icing, reminding us to savor the sweet things in life.
When you try this recipe, I’d be thrilled to hear how your cookies turned out or what personal touches you added. Sharing these moments makes the baking journey all the richer.
Happy baking and congrats to all the grads out there!
Frequently Asked Questions
Can I make the cookie dough ahead of time?
Yes! You can prepare the dough up to 3 days in advance. Keep it wrapped tightly in the refrigerator. For longer storage, freeze the dough for up to a month and thaw before rolling.
What if I don’t have a diploma-shaped cookie cutter?
No worries! A rectangle or scroll-shaped cutter works well, or you can cut shapes freehand with a knife for a rustic look.
How do I store decorated cookies without ruining the royal icing?
Store cooled, decorated cookies in a single layer with parchment paper between layers inside an airtight container at room temperature. Avoid stacking them directly to protect the icing.
Can I use powdered egg whites instead of fresh eggs for the royal icing?
Absolutely. Meringue powder mixed with water is a safe, convenient alternative that still gives you stiff, glossy royal icing perfect for piping.
How long does royal icing take to dry completely?
Depending on humidity, royal icing usually dries to the touch in 4-6 hours and fully hardens overnight. For best results, let decorated cookies rest uncovered at room temperature.
For a fun pairing, these cookies go great with a warm cup of cocoa recipe you can find in my creamy snow day hot chocolate recipe. Also, if you love baking, you might enjoy my fluffy funfetti birthday cake from scratch for your next party!
Pin This Recipe!

Perfect Personalized Diploma Sugar Cookies Easy Royal Icing Tutorial
These personalized diploma sugar cookies feature a buttery, tender base with smooth, glossy royal icing perfect for detailed decoration. Ideal for graduation celebrations, they combine simplicity and style for a memorable treat.
- Prep Time: 20 minutes
- Cook Time: 10 minutes
- Total Time: 1 hour 30 minutes
- Yield: 24 cookies 1x
- Category: Dessert
- Cuisine: American
Ingredients
- 2 ¾ cups (345 g) all-purpose flour
- 1 teaspoon baking powder
- ½ teaspoon salt
- 1 cup (227 g) unsalted butter, softened
- 1 ½ cups (300 g) granulated sugar
- 1 large egg, room temperature
- 2 teaspoons pure vanilla extract
- Optional: ½ teaspoon almond extract
- 3 cups (360 g) powdered sugar, sifted
- 2 large egg whites or 4 tablespoons meringue powder mixed with 6 tablespoons water
- ¼ teaspoon cream of tartar
- Food coloring gels
- Optional: ½ teaspoon vanilla or almond extract
Instructions
- Mix Dry Ingredients: In a medium bowl, whisk together 2 ¾ cups (345 g) flour, 1 teaspoon baking powder, and ½ teaspoon salt. Set aside.
- Cream Butter and Sugar: Using an electric mixer, beat 1 cup (227 g) softened unsalted butter and 1 ½ cups (300 g) granulated sugar on medium speed until light and fluffy, about 3 to 4 minutes.
- Add Egg and Extracts: Beat in 1 large egg, 2 teaspoons vanilla extract, and optional ½ teaspoon almond extract until combined.
- Incorporate Dry Ingredients: Gradually add the flour mixture to the wet ingredients, mixing on low speed until just combined.
- Chill the Dough: Divide the dough in half, flatten into discs, wrap in plastic wrap, and chill for at least 1 hour.
- Preheat Oven & Prepare Sheet: Heat oven to 350°F (175°C). Line baking sheets with parchment paper or silicone mats.
- Roll and Cut: On a lightly floured surface, roll one disc of dough to about ¼ inch (6 mm) thickness. Use a diploma-shaped cutter to stamp out cookies. Transfer carefully to baking sheets.
- Bake: Bake for 8 to 10 minutes, until edges are just starting to turn golden.
- Cool Completely: Let cookies cool on the baking sheet for 5 minutes before transferring to a wire rack to cool fully.
- Make Royal Icing: In a clean bowl, beat 3 cups (360 g) sifted powdered sugar, 2 egg whites or meringue powder mix, and ¼ teaspoon cream of tartar on medium-high speed until stiff peaks form, about 7 to 10 minutes. Add extracts and gel food coloring as desired.
- Decorate: Thin the icing with a little water to flood consistency for base layers, keep some thicker for piping details. Use piping bags with small tips to outline and add personalized messages.
- Drying: Allow royal icing to dry at room temperature for several hours or overnight before stacking or packaging.
Notes
If icing is too stiff, add water drop by drop; if too runny, add powdered sugar gradually. Keep icing covered with a damp cloth when not in use. Practice piping on parchment before decorating. Store decorated cookies in a single layer with parchment between layers in an airtight container. Dough can be made up to 3 days ahead or frozen for up to a month. For gluten-free, substitute with gluten-free baking blend and xanthan gum. For dairy-free, use vegan butter and egg replacers; royal icing can be made with aquafaba.
Nutrition
- Serving Size: 1 cookie (about 3 in
- Calories: 150
- Sugar: 14
- Fat: 7
- Carbohydrates: 22
- Protein: 1.5
Keywords: sugar cookies, royal icing, graduation cookies, personalized cookies, diploma cookies, easy sugar cookies, cookie decorating