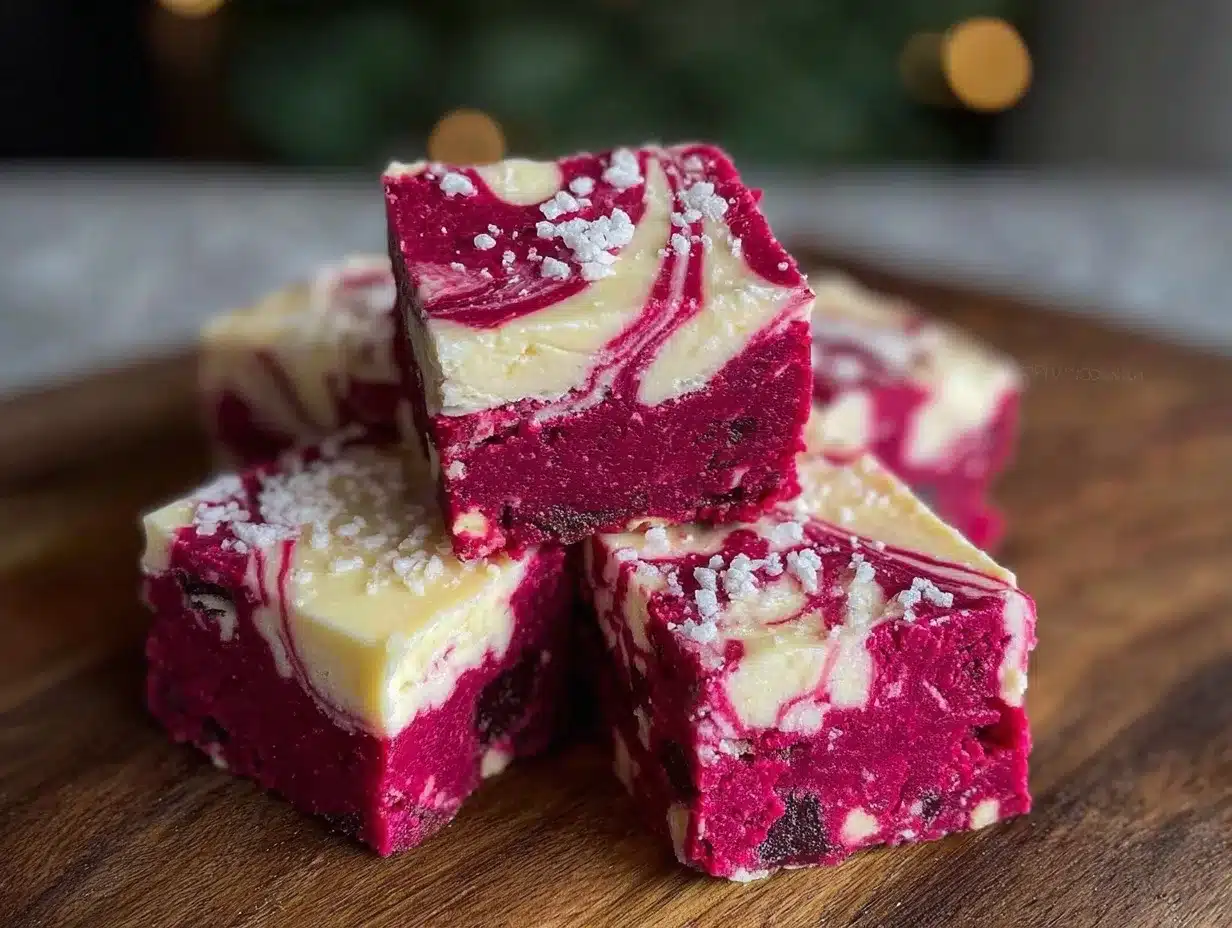
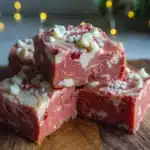
Let me tell you, the moment the rich, sweet scent of creamy pink velvet fudge wafted through my kitchen, I knew I was onto something dangerously delicious. The smooth texture, the delicate pink hue, and the playful swirl of white chocolate all combine to create a treat that’s as much a feast for the eyes as it is for the taste buds. The first time I made this fudge, I was instantly hooked—the kind of moment where you pause, take a deep breath, and just smile because you know this is pure, nostalgic comfort wrapped up in a little square.
Years ago, when I was knee-high to a grasshopper, my grandma used to whip up all sorts of sweets for holiday gatherings, but pink velvet fudge was never one of them. I stumbled across this recipe on a rainy weekend, trying to recreate that perfect balance of creamy and sweet with a twist of color that brightened even the gloomiest day. Honestly, I wish I’d discovered it years ago.
My family couldn’t stop sneaking pieces off the cooling rack (and I can’t really blame them). It quickly became a staple for birthday parties, potlucks, and gifting around the holidays. This creamy pink velvet fudge with white chocolate swirl feels like a warm hug in dessert form, and you’re going to want to bookmark this one for when you need a sweet treat that makes everyone smile.
Perfect for brightening up your Pinterest cookie board or surprising your kids with a colorful snack, this recipe is a real crowd-pleaser. You know what? It’s dangerously easy, too. Trust me, after testing it several times in the name of research, of course, I can say it’s one of those recipes that feels fancy but is actually super simple.
Why You’ll Love This Creamy Pink Velvet Fudge Recipe
After countless batches and taste tests, here’s why this creamy pink velvet fudge with white chocolate swirl stands out:
- Quick & Easy: Comes together in under 30 minutes, perfect for busy weeknights or last-minute sweet cravings.
- Simple Ingredients: No fancy grocery trips needed; you likely have everything already in your pantry.
- Perfect for Celebrations: Great for bridal showers, Valentine’s Day, or just a fun weekend treat.
- Crowd-Pleaser: Kids and adults alike rave about the creamy texture and subtle, sweet flavor.
- Unbelievably Delicious: The smooth pink velvet base combined with the white chocolate swirl creates a melt-in-your-mouth experience.
What makes this recipe truly special is the silky texture achieved by carefully melting and folding the ingredients, along with a touch of cream cheese that adds richness without overpowering. Plus, the white chocolate swirl isn’t just for looks—it adds a lovely contrast in flavor and makes every bite a little more exciting.
This isn’t just another fudge recipe; it’s the one you’ll pull out when you want to impress guests without stress or just treat yourself to something a bit more magical. Honestly, the first bite will have you closing your eyes in pure bliss. It’s comfort food with a fun, pink twist—fast, fun, and undeniably satisfying.
What Ingredients You Will Need
This creamy pink velvet fudge recipe uses simple, wholesome ingredients that come together to deliver bold flavor and that satisfyingly smooth texture without any fuss. Most of these are pantry staples, but the pink color and white chocolate swirl add a special touch that makes this fudge unforgettable.
- White Chocolate Chips (12 oz / 340 g) – I recommend Ghirardelli for the best melting and flavor.
- Sweetened Condensed Milk (14 oz / 396 g can) – Adds smooth sweetness and creamy body.
- Unsalted Butter (2 tbsp / 28 g), softened – Brings richness and helps with smooth texture.
- Vanilla Extract (1 tsp) – For that warm, inviting flavor note.
- Cream Cheese (4 oz / 115 g), softened – The secret ingredient for extra creaminess and slight tang.
- Pink Food Coloring (a few drops) – Use gel food coloring for vibrant results without thinning the fudge.
- White Chocolate Bar (2 oz / 57 g), chopped – For swirling on top and adding a pretty visual contrast.
Substitution tips: You can swap cream cheese with mascarpone for a milder flavor or use dairy-free cream cheese for a vegan-friendly version. If you want to avoid artificial colors, beet powder works great for a natural pink hue. Almond or coconut milk condensed milk can be used for dairy-free options, but the texture may vary slightly.
Equipment Needed
- Medium Saucepan: For gently melting the white chocolate and mixing the ingredients. Non-stick is preferred to avoid burning.
- Heatproof Spatula: To stir the fudge smoothly without scratching your pan.
- 8×8 Inch Baking Pan: Lined with parchment paper for easy removal of fudge squares.
- Mixing Bowls: At least two – one for the main fudge base, one for melting the white chocolate bar for the swirl.
- Whisk: Helpful for blending cream cheese smoothly into the mix without lumps.
- Measuring Cups and Spoons: For precise ingredient amounts.
If you don’t have a heatproof spatula, a silicone spoon works just fine. For melting chocolate, you can use a double boiler setup or microwave in short bursts, just watch carefully to avoid scorching. I’ve tried ceramic and stainless steel pans for this recipe, and both work well, but non-stick pans make cleanup a breeze.
Preparation Method
- Prepare Your Pan: Line an 8×8 inch (20×20 cm) baking pan with parchment paper, leaving some overhang for easy fudge removal. Set aside.
- Melt the White Chocolate: In a medium saucepan over low heat, combine 12 oz (340 g) white chocolate chips, 14 oz (396 g) sweetened condensed milk, and 2 tbsp (28 g) softened unsalted butter. Stir constantly with a heatproof spatula to prevent burning. This should take about 5-7 minutes until completely smooth.
- Add Cream Cheese: Remove the pan from heat. Quickly whisk in 4 oz (115 g) softened cream cheese and 1 tsp vanilla extract until the mixture is silky and lump-free. If lumps persist, warm gently again but don’t overheat.
- Color the Fudge: Add a few drops of pink food coloring gel, stirring gently until the color is evenly distributed. Add more drops for a deeper pink, but a little goes a long way here.
- Pour into Pan: Transfer about three-quarters of the pink fudge mixture into the prepared pan, smoothing it out evenly with your spatula.
- Prepare the White Chocolate Swirl: In a small microwave-safe bowl, melt the remaining 2 oz (57 g) white chocolate bar in 20-second bursts, stirring in between until silky smooth. Drizzle this melted white chocolate over the fudge in the pan.
- Create the Swirl: Using a skewer or knife, gently swirl the white chocolate into the pink fudge to create a marbled effect. Don’t overdo it—just enough for pretty, distinct swirls.
- Chill: Refrigerate the fudge for at least 3 hours or until firm. For best results, chill overnight to let flavors meld.
- Slice and Serve: Use the parchment overhang to lift the fudge from the pan. Cut into small squares (about 1-inch / 2.5 cm pieces) using a sharp knife. Wipe the knife clean between cuts for neat edges.
Pro tip: If your fudge isn’t setting well, it might be due to overheating the chocolate or using a low-fat cream cheese. Keep an eye on temperature and use full-fat cream cheese for that classic creamy texture. And remember, patience with the chilling time makes all the difference!
Cooking Tips & Techniques
Here’s what I learned after a few batches (and a couple of less-than-perfect ones):
- Gentle Heat is Key: Chocolate burns easily, so keep your heat low and stir constantly. I once scorched a batch by rushing, and it tasted bitter—definitely avoid that!
- Softened Ingredients Blend Best: Cream cheese and butter should be room temperature; otherwise, you’ll get lumps that just won’t disappear.
- Use Gel Food Coloring: Liquid colors can thin your fudge and affect texture. Gel colors give you vibrant hues without mess.
- Swirling Technique: Don’t over-swirl or you’ll lose the pretty contrast. Light, deliberate swirls look professional and taste great.
- Multitasking: While the fudge chills, clean your tools (you’ll thank me later) and plan your serving presentation. This helps keep things efficient.
- Consistency Check: The fudge should be smooth and glossy before pouring. If it looks grainy, the chocolate may have seized—try warming gently and stirring until smooth again.
Variations & Adaptations
This creamy pink velvet fudge recipe is flexible and fun to tweak, depending on your mood and dietary needs:
- Seasonal Twist: Swap the pink food coloring for green and add crushed peppermint candies for a festive holiday fudge.
- Dairy-Free Version: Use dairy-free white chocolate, coconut cream instead of cream cheese, and vegan butter to make a plant-based fudge that’s just as creamy.
- Nuts and Mix-Ins: Fold in chopped pistachios or dried raspberries for texture and flavor bursts. I tried adding toasted coconut once, and it was a lovely surprise!
- Flavor Swap: Add a teaspoon of rose water or almond extract for a subtle floral or nutty twist that pairs beautifully with the pink velvet base.
- Alternative Cooking Methods: You can set the fudge in silicone molds instead of a pan for fun shapes—just be sure to chill long enough for firm results.
Serving & Storage Suggestions
Serve your creamy pink velvet fudge chilled or at room temperature for the best texture and flavor. It looks stunning arranged on a pretty plate or in clear cellophane bags tied with ribbon for gifting.
This fudge pairs wonderfully with a cup of hot tea or a cold glass of milk—perfect for a cozy afternoon snack or a sweet finish to dinner. For parties, consider serving alongside fresh berries or light whipped cream to balance the richness.
Store fudge in an airtight container in the refrigerator for up to two weeks. For longer storage, freeze it wrapped tightly in parchment and foil for up to three months. When ready to eat, thaw in the fridge overnight and bring to room temperature before serving.
Over time, the flavors actually deepen and meld, making leftovers even tastier (if you can resist!). Just keep in mind that fudge can pick up fridge odors, so airtight storage is key.
Nutritional Information & Benefits
This creamy pink velvet fudge is a treat best enjoyed in moderation. Here’s an approximate breakdown per 1-inch (2.5 cm) square:
| Calories | Fat | Carbohydrates | Protein | Sugar |
|---|---|---|---|---|
| 120 kcal | 7 g | 15 g | 1 g | 14 g |
While fudge is clearly an indulgence, ingredients like white chocolate and cream cheese provide calcium and some protein. Choosing quality white chocolate with real cocoa butter (like Ghirardelli) supports a richer taste without artificial fillers.
If you’re watching sugar intake, try smaller portions or add chopped nuts for extra satiety. For those with dietary restrictions, the recipe can be adapted to gluten-free and dairy-free versions without losing its creamy charm.
Honestly, this fudge feels like a tiny celebration in every bite—a sweet moment to savor that brings pure joy.
Conclusion
So, if you’re hunting for a creamy pink velvet fudge recipe with a white chocolate swirl that’s easy to make, visually stunning, and utterly delicious, this one’s for you. It’s perfect for treating yourself or sharing with loved ones, and it’s flexible enough to match your flavor preferences and dietary needs.
I love this fudge because it’s a little piece of happiness you can make at home without fuss, and it always brings smiles (and sneaky second helpings). Give it a try, tweak it your way, and let me know how it goes!
Don’t forget to leave a comment sharing your favorite variation or any tips you discover. And hey, if you loved this recipe, share it with friends who need a sweet pick-me-up. Happy fudge-making!
Frequently Asked Questions About Creamy Pink Velvet Fudge
Can I make this fudge without cream cheese?
Yes! You can substitute cream cheese with mascarpone or even use coconut cream for a dairy-free version. Just keep in mind the texture might be slightly less tangy but still creamy.
How long does this fudge keep?
Stored in an airtight container in the fridge, this fudge keeps well for up to two weeks. For longer storage, freeze it for up to three months.
Can I use liquid food coloring instead of gel?
Gel food coloring is best because it won’t affect the fudge’s texture. Liquid colors can thin the fudge and make it less firm.
Is it possible to make this fudge vegan?
Absolutely! Use dairy-free white chocolate, vegan butter, and plant-based cream cheese or coconut cream. Adjust sweetness as needed since some dairy-free products vary.
What’s the best way to cut the fudge cleanly?
Use a sharp knife and wipe it clean between cuts to prevent sticking. Let the fudge come to room temperature for a few minutes if it’s too firm straight from the fridge.
Pin This Recipe!
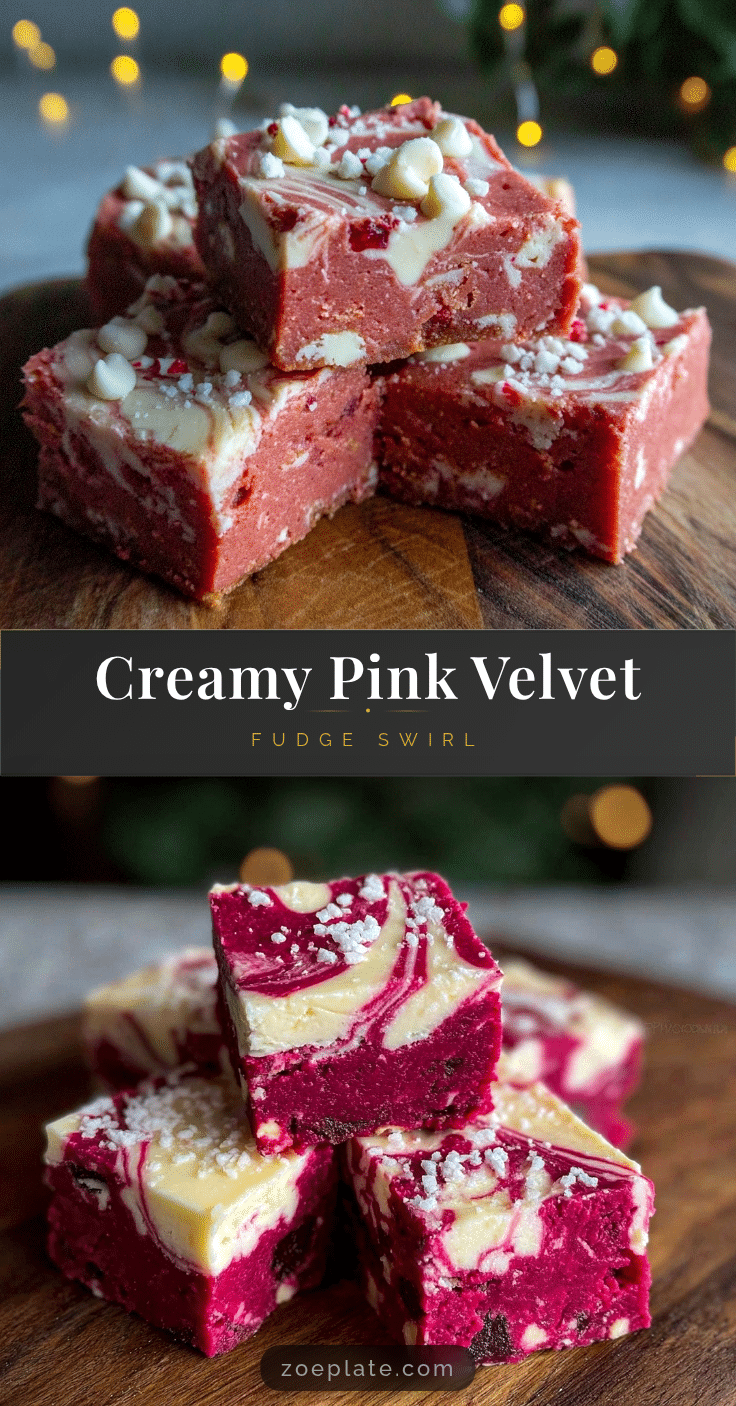
Creamy Pink Velvet Fudge Recipe with White Chocolate Swirl
A rich and creamy pink velvet fudge with a playful white chocolate swirl, perfect for celebrations and easy to make at home.
- Prep Time: 10 minutes
- Cook Time: 7 minutes
- Total Time: 3 hours 17 minutes
- Yield: 64 pieces (1-inch squares) 1x
- Category: Dessert
- Cuisine: American
Ingredients
- 12 oz (340 g) white chocolate chips
- 14 oz (396 g) sweetened condensed milk
- 2 tbsp (28 g) unsalted butter, softened
- 1 tsp vanilla extract
- 4 oz (115 g) cream cheese, softened
- A few drops pink gel food coloring
- 2 oz (57 g) white chocolate bar, chopped
Instructions
- Line an 8×8 inch (20×20 cm) baking pan with parchment paper, leaving some overhang for easy fudge removal. Set aside.
- In a medium saucepan over low heat, combine white chocolate chips, sweetened condensed milk, and softened unsalted butter. Stir constantly with a heatproof spatula to prevent burning until completely smooth, about 5-7 minutes.
- Remove the pan from heat. Quickly whisk in softened cream cheese and vanilla extract until the mixture is silky and lump-free. If lumps persist, warm gently again but don’t overheat.
- Add a few drops of pink gel food coloring, stirring gently until the color is evenly distributed.
- Transfer about three-quarters of the pink fudge mixture into the prepared pan, smoothing it out evenly with your spatula.
- In a small microwave-safe bowl, melt the chopped white chocolate bar in 20-second bursts, stirring in between until silky smooth.
- Drizzle the melted white chocolate over the fudge in the pan.
- Using a skewer or knife, gently swirl the white chocolate into the pink fudge to create a marbled effect.
- Refrigerate the fudge for at least 3 hours or until firm. For best results, chill overnight.
- Use the parchment overhang to lift the fudge from the pan. Cut into 1-inch (2.5 cm) squares using a sharp knife, wiping the knife clean between cuts.
Notes
Use gel food coloring for vibrant color without thinning the fudge. Keep heat low to avoid burning chocolate. Use full-fat cream cheese for best texture. Chill fudge overnight for best flavor and firmness. For dairy-free or vegan versions, substitute ingredients accordingly.
Nutrition
- Serving Size: 1 piece (1-inch squa
- Calories: 120
- Sugar: 14
- Fat: 7
- Carbohydrates: 15
- Protein: 1
Keywords: pink velvet fudge, white chocolate fudge, creamy fudge, easy fudge recipe, homemade fudge, dessert, sweet treat