Let me tell you, the smell of freshly baked sugar cookies wafting through the kitchen is pure magic. There’s something about those soft, tender edges paired with a delicate sweetness that makes your taste buds do a happy dance. The first time I baked these perfect soft sugar cookie cut-outs, I was instantly hooked—the kind of moment where you pause, take a deep breath, and just smile because you know you’re onto something truly special.
When I was knee-high to a grasshopper, my grandma used to make these cookies for every holiday. Years ago, I tried to recreate that nostalgic feeling and stumbled upon this recipe that’s dangerously easy and delivers pure, nostalgic comfort. Honestly, I wish I’d found it years ago because it’s become a staple for family gatherings and sweet gifts alike. My family couldn’t stop sneaking these cookies off the cooling rack (and I can’t really blame them).
You know what? Whether you’re looking for a sweet treat to brighten up your Pinterest cookie board, a fun baking project with the kids, or a charming addition to your next potluck, these soft sugar cookie cut-outs with royal icing are just the ticket. I’ve tested this recipe multiple times in the name of research, of course, and it never fails to impress. You’re going to want to bookmark this one.
Why You’ll Love This Recipe
This perfect soft sugar cookie cut-outs recipe has earned its place in my kitchen for so many reasons, and I’m excited to share why you’ll love it too:
- Quick & Easy: Comes together in under 30 minutes of active prep time, perfect for last-minute cookie cravings or holiday baking marathons.
- Simple Ingredients: No fancy grocery runs needed; you likely have everything in your pantry already, which makes it super convenient.
- Perfect for Every Occasion: Great for holiday cookie swaps, birthday parties, or just a cozy afternoon with a cup of tea.
- Crowd-Pleaser: Kids and adults alike rave about the soft texture and just-right sweetness—it’s a universal favorite.
- Unbelievably Delicious: The texture is soft but holds shape beautifully, and the royal icing adds that classic, elegant finish.
What sets this recipe apart? Well, it’s all about the balance. The cookies stay soft even days later (no rock-hard edges here!), thanks to a little trick with the butter and chilling time. Plus, the royal icing tutorial included is straightforward and forgiving, even if you’re new to cookie decorating. The icing dries with a beautiful smooth finish, perfect for intricate designs or simple, charming touches.
This recipe isn’t just good—it’s the kind that makes you close your eyes after the first bite. It’s comfort food with soul but ready for any modern kitchen hustle. Impress guests without the stress or create a sweet tradition with your loved ones. Honestly, these cookies feel like a warm hug in every bite.
What Ingredients You Will Need
This recipe uses simple, wholesome ingredients to deliver bold flavor and that satisfying soft texture without any fuss. Most are pantry staples, and you can swap a few for dietary needs without losing the magic.
- For the Sugar Cookies:
- 2 ¾ cups (345g) all-purpose flour (for gluten-free option, use almond flour with a bit of xanthan gum)
- 1 teaspoon baking powder
- ½ teaspoon salt
- 1 cup (227g) unsalted butter, softened (I prefer Kerrygold for richness)
- 1 ½ cups (300g) granulated sugar
- 1 large egg, room temperature
- 2 teaspoons pure vanilla extract (make a difference, use a quality brand!)
- 2 tablespoons whole milk (or dairy-free milk like oat milk)
- For the Royal Icing:
- 3 cups (360g) powdered sugar, sifted
- 2 tablespoons meringue powder (helps with the perfect dry finish)
- 5-6 tablespoons warm water (adjust for consistency)
- Food coloring gels (optional, use AmeriColor for vibrant shades)
Pro tip: Look for firm, high-quality butter and fresh eggs for that tender crumb. If you want a twist, swapping in coconut milk can add a subtle flavor depth. For decorating, I recommend starting with white royal icing and then adding colors gradually – it’s easier to control.
Equipment Needed
- Mixing bowls (medium and large)
- Electric hand mixer or stand mixer (makes creaming butter a breeze)
- Measuring cups and spoons (for precise baking)
- Rolling pin (a small silicone one works well for even thickness)
- Cookie cutters (choose your favorite shapes – I love classic stars and hearts)
- Baking sheets lined with parchment paper or silicone mats (prevents sticking)
- Cooling racks (essential for proper cookie cooling)
- Small piping bags or plastic sandwich bags with a tiny corner snipped (for royal icing)
If you don’t have a stand mixer, a sturdy wooden spoon and a bit more muscle will do the trick. I once tried rolling the dough between two sheets of wax paper when I was in a pinch – it’s a handy hack that keeps your counters clean. For royal icing, investing in a good set of piping tips can be fun but isn’t necessary for beginners.
Preparation Method

- Preheat your oven to 350°F (175°C). Line two baking sheets with parchment paper or silicone mats to prevent sticking.
- Mix dry ingredients: In a medium bowl, whisk together 2 ¾ cups (345g) all-purpose flour, 1 teaspoon baking powder, and ½ teaspoon salt. Set aside.
- Cream the butter and sugar: In a large bowl, use an electric mixer to beat 1 cup (227g) softened unsalted butter and 1 ½ cups (300g) granulated sugar on medium-high speed until light and fluffy, about 3-4 minutes. This step is key for soft cookies.
- Add egg and vanilla: Beat in 1 large egg and 2 teaspoons vanilla extract until combined. The mixture may look slightly curdled—don’t worry, it’s normal.
- Combine wet and dry ingredients: Slowly add the flour mixture in three parts, alternating with 2 tablespoons whole milk, starting and ending with flour. Mix on low speed until just combined. Overmixing can toughen the dough.
- Chill the dough: Divide the dough into two disks, wrap in plastic wrap, and refrigerate for at least 1 hour. This helps the dough firm up and makes rolling easier.
- Roll and cut: Lightly flour your work surface and rolling pin. Roll one disk of dough to about ¼ inch (6 mm) thickness. Use cookie cutters to cut shapes, place them 1 inch (2.5 cm) apart on prepared baking sheets.
- Bake: Bake for 8-10 minutes or until the edges just start to turn golden. The centers will look soft—this is exactly what you want for that tender bite.
- Cool: Let cookies cool on the baking sheet for 5 minutes before transferring to a wire rack to cool completely.
- Prepare royal icing: In a clean bowl, combine 3 cups (360g) sifted powdered sugar, 2 tablespoons meringue powder, and 5 tablespoons warm water. Beat on medium speed until smooth and glossy. Adjust water by teaspoon to get the right consistency—thicker for outlining, thinner for flooding.
- Decorate: Divide icing into bowls, tint with food coloring if desired. Use piping bags to outline cookie edges, then flood interiors. Let dry for several hours or overnight for best results.
Pro tip: If cookies spread too much, chill dough longer. If royal icing is too runny, add more powdered sugar gradually. I always test one cookie first to see how the dough behaves in my oven—every oven’s a little different!
Cooking Tips & Techniques
Let’s get real about making perfect soft sugar cookie cut-outs. I’ve made my fair share of mistakes, so here’s what I’ve learned:
- Don’t skip chilling: Chilling the dough is non-negotiable—trust me, I tried baking right away, and cookies spread like crazy.
- Roll evenly: Use light, even pressure with the rolling pin. Uneven thickness means uneven baking—some cookies get burnt edges while others stay doughy.
- Watch the baking time: Cookies continue cooking on the hot sheet after you pull them from the oven, so take them out once edges are pale golden, not brown.
- Mix royal icing carefully: Add water slowly. Icing that’s too thin can pool and run off the cookie; too thick, and it’s hard to spread.
- Use a toothpick: To fix small bubbles in icing, drag a toothpick gently over the surface before it dries.
- Patience pays off: Let the royal icing dry completely before stacking or packaging cookies; otherwise, colors can smudge and decorations get ruined.
- Personal lesson: I once tried to speed up drying with the oven’s warm setting and ended up melting details. Cooling racks and room temperature drying are best.
Variations & Adaptations
Feel like switching things up? Here are some fun ways to customize your soft sugar cookie cut-outs:
- Gluten-Free Version: Use almond flour plus 1 teaspoon xanthan gum instead of all-purpose flour. The texture is slightly different but still delightfully soft.
- Vegan Adaptation: Replace butter with vegan margarine, use flax egg (1 tbsp ground flaxseed + 3 tbsp water) instead of egg, and substitute dairy milk with almond or oat milk.
- Flavor Twists: Add lemon zest or almond extract to the dough for a fresh aroma. For a holiday vibe, sprinkle in cinnamon or nutmeg.
- Decorating Ideas: Swap royal icing for a simple glaze made of powdered sugar and lemon juice for a tangy finish. Or, try dipping edges in melted chocolate for extra indulgence.
- Cooking Method: If you don’t have an oven, try a skillet method on low heat with a lid, flipping carefully for even cooking.
One time, I added crushed peppermint to the icing around Christmas—it was a hit and a festive surprise! The best part? This recipe is forgiving enough to handle your creative experiments.
Serving & Storage Suggestions
Serve these soft sugar cookie cut-outs at room temperature for the best texture and flavor. They look beautiful arranged on a platter with a dusting of powdered sugar or nestled in a holiday tin for gifting. Pair them with a warm cup of cocoa, chai, or your favorite herbal tea for a cozy treat.
To store, keep cookies in an airtight container at room temperature for up to 5 days. If you want to keep them longer, freeze baked cookies (without icing) in a single layer on a tray, then transfer to freezer bags for up to 3 months. Thaw fully before decorating.
Royal icing-decorated cookies keep well at room temp, but avoid storing them in humid environments to prevent softening or smudging. Reheat is generally not recommended as it changes the texture.
Fun fact: The flavors actually deepen after a day or two, making these cookies even better the next day—if they last that long!
Nutritional Information & Benefits
Each soft sugar cookie cut-out (without icing) roughly contains:
| Calories | Fat | Carbohydrates | Protein | Sugar |
|---|---|---|---|---|
| 120 kcal | 6g | 16g | 1g | 9g |
The key ingredients—real butter and eggs—provide some essential nutrients like vitamin A and protein. While these cookies are definitely a treat, the recipe uses real ingredients without artificial flavors or preservatives. For those watching gluten or dairy, the substitutions mentioned earlier keep the cookies enjoyable without losing softness.
From a wellness perspective, baking your own treats lets you control sugar and fat quality, making this recipe a balanced indulgence you can feel good about sharing.
Conclusion
In a world full of cookie recipes, this perfect soft sugar cookie cut-outs recipe stands out by delivering that tender texture and sweet flavor you crave, paired with a royal icing that’s easy enough for beginners yet impressive enough for pros. It’s a recipe that feels cozy, nostalgic, and just plain fun to make.
Don’t be shy—customize it with your favorite flavors or colors and make it your own. Honestly, I love that it brings so much joy to my kitchen and those I share it with, and I’m confident it’ll do the same for you.
If you try this recipe, please leave a comment or share your decorating ideas—I’d love to hear how you make it special! Happy baking, and here’s to many sweet moments ahead.
FAQs
Can I make the cookie dough ahead of time?
Yes! You can prepare the dough and refrigerate it wrapped for up to 3 days or freeze it for up to a month. Thaw it in the fridge overnight before rolling.
Why are my sugar cookies spreading too much?
This usually happens if the dough is too warm or not chilled long enough. Make sure to chill the dough at least one hour before rolling to keep the shapes sharp.
How long does royal icing take to dry?
Royal icing typically dries to the touch within 1-2 hours but should be left to harden overnight for best results, especially if layering designs.
Can I use powdered egg whites instead of meringue powder?
Yes, powdered egg whites can be substituted, but meringue powder is easier and more consistent for royal icing beginners.
What’s the best way to store decorated cookies?
Store them in an airtight container at room temperature. Avoid stacking until icing is fully dry to prevent smudging.
Pin This Recipe!
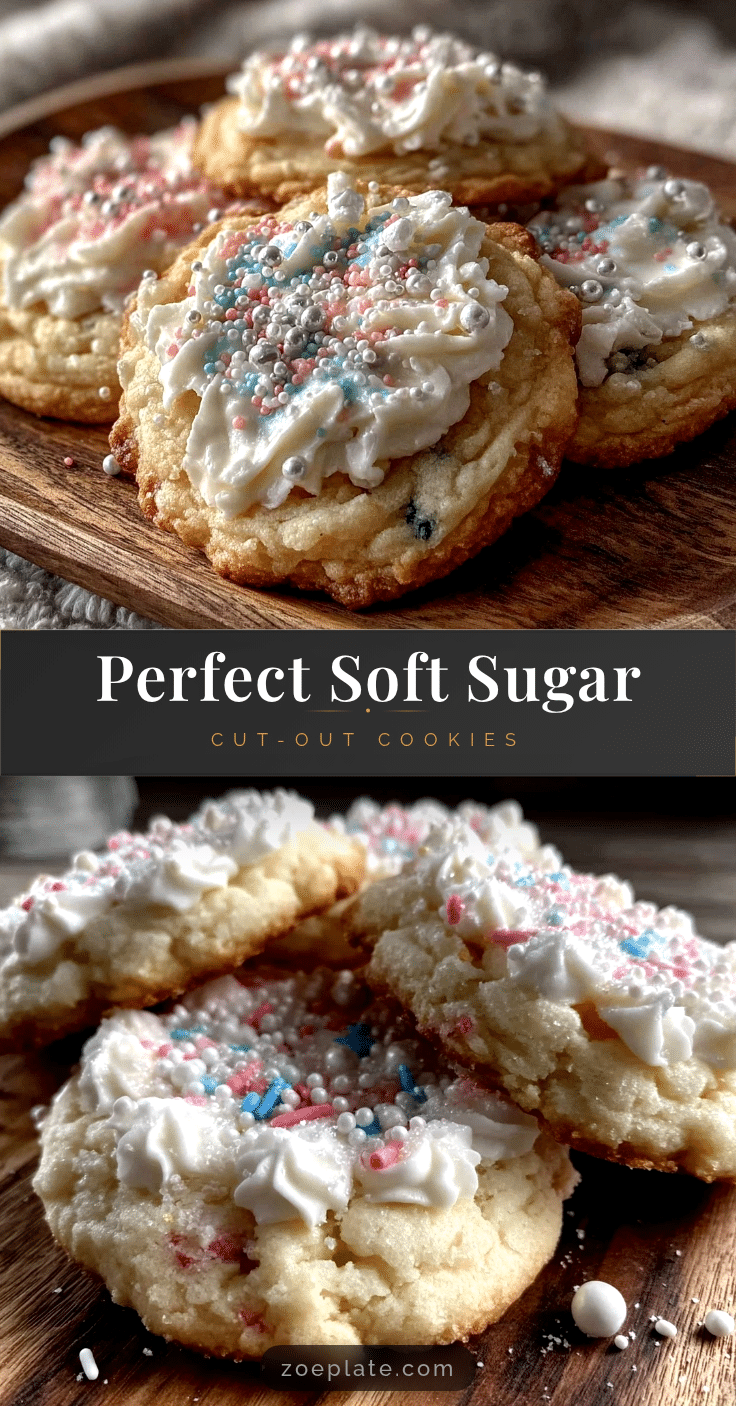
Perfect Soft Sugar Cookie Cut-Outs Recipe with Easy Royal Icing Tutorial

Soft, tender sugar cookie cut-outs with a delicate sweetness, perfect for decorating with royal icing. This nostalgic recipe is quick, easy, and a crowd-pleaser for any occasion.
- Prep Time: 25 minutes
- Cook Time: 10 minutes
- Total Time: 1 hour 35 minutes
- Yield: 24 servings 1x
- Category: Dessert
- Cuisine: American
Ingredients
- 2 ¾ cups (345g) all-purpose flour (for gluten-free option, use almond flour with a bit of xanthan gum)
- 1 teaspoon baking powder
- ½ teaspoon salt
- 1 cup (227g) unsalted butter, softened
- 1 ½ cups (300g) granulated sugar
- 1 large egg, room temperature
- 2 teaspoons pure vanilla extract
- 2 tablespoons whole milk (or dairy-free milk like oat milk)
- 3 cups (360g) powdered sugar, sifted (for royal icing)
- 2 tablespoons meringue powder (for royal icing)
- 5–6 tablespoons warm water (for royal icing)
- Food coloring gels (optional)
Instructions
- Preheat your oven to 350°F (175°C). Line two baking sheets with parchment paper or silicone mats to prevent sticking.
- In a medium bowl, whisk together 2 ¾ cups (345g) all-purpose flour, 1 teaspoon baking powder, and ½ teaspoon salt. Set aside.
- In a large bowl, use an electric mixer to beat 1 cup (227g) softened unsalted butter and 1 ½ cups (300g) granulated sugar on medium-high speed until light and fluffy, about 3-4 minutes.
- Beat in 1 large egg and 2 teaspoons vanilla extract until combined.
- Slowly add the flour mixture in three parts, alternating with 2 tablespoons whole milk, starting and ending with flour. Mix on low speed until just combined.
- Divide the dough into two disks, wrap in plastic wrap, and refrigerate for at least 1 hour.
- Lightly flour your work surface and rolling pin. Roll one disk of dough to about ¼ inch (6 mm) thickness. Use cookie cutters to cut shapes, place them 1 inch (2.5 cm) apart on prepared baking sheets.
- Bake for 8-10 minutes or until the edges just start to turn golden. The centers will look soft.
- Let cookies cool on the baking sheet for 5 minutes before transferring to a wire rack to cool completely.
- In a clean bowl, combine 3 cups (360g) sifted powdered sugar, 2 tablespoons meringue powder, and 5 tablespoons warm water. Beat on medium speed until smooth and glossy. Adjust water by teaspoon to get the right consistency.
- Divide icing into bowls, tint with food coloring if desired. Use piping bags to outline cookie edges, then flood interiors. Let dry for several hours or overnight.
Notes
Chill dough for at least 1 hour to prevent spreading. Use light, even pressure when rolling dough. Let royal icing dry completely before stacking or packaging. Adjust royal icing consistency by adding water or powdered sugar gradually. Test one cookie first to check baking time and dough behavior.
Nutrition
- Serving Size: 1 cookie
- Calories: 120
- Sugar: 9
- Fat: 6
- Carbohydrates: 16
- Protein: 1
Keywords: soft sugar cookies, sugar cookie cut-outs, royal icing, holiday cookies, easy sugar cookies, cookie decorating, gluten-free sugar cookies, vegan sugar cookies