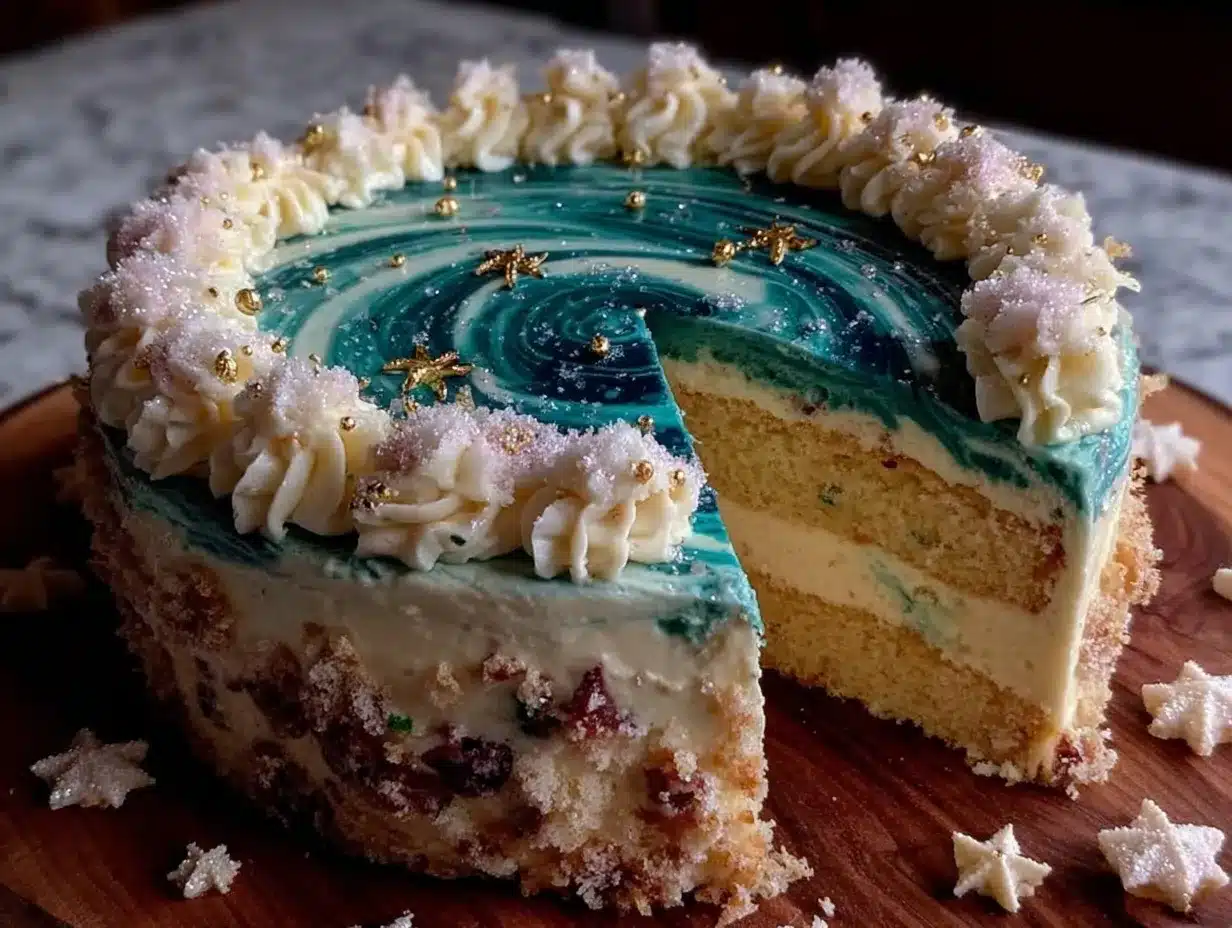
“Hey, you’ve got to see this Gemini cake I just finished!” That’s how my friend texted me last week, and honestly, I wasn’t expecting much. I mean, zodiac-themed cakes? I’d seen a few online, but something about this one caught me off guard. When the delivery arrived, the bright yellow and cool blue layers peeked out from under a smooth, elegant buttercream that looked almost too perfect to cut into. I wasn’t sure if the colors would feel too loud or if the buttercream would be heavy and overly sweet, but as soon as I took a bite, all those doubts melted away.
The cake is inspired by the Gemini zodiac sign, symbolized by the twins, which made me think of balance—bright yet calming, sweet yet light. What’s funny is that I initially thought a yellow and blue cake would clash, but this one manages to feel like a harmonious little celebration on a plate. I ended up making it twice in one week, tweaking the buttercream and cake layers until it felt just right. It’s become my go-to for birthday parties or when I want to impress without sweating it too much.
It’s a cake that looks like it takes a lot of effort but honestly doesn’t, and that’s why it stuck with me. That unexpected combo of colors and flavors—plus the smooth, velvety buttercream—reminds me it’s okay to keep things simple but still make them special.
Why You’ll Love This Recipe
This Perfect Yellow and Blue Gemini Zodiac Cake with Elegant Buttercream isn’t your average birthday cake. I’ve tested it multiple times, and here’s why it’s a real winner:
- Quick & Easy: You can have this cake ready in under 2 hours, perfect for last-minute celebrations or a fun weekend project.
- Simple Ingredients: No need for specialty stores—most ingredients are pantry staples, and the colors come from natural food coloring.
- Perfect for Zodiac Parties: Whether you’re celebrating a Gemini friend or just love astrology-themed treats, this cake makes a memorable centerpiece.
- Crowd-Pleaser: Kids and adults alike rave about the moist texture and the light, creamy buttercream that isn’t too sweet.
- Unbelievably Delicious: The yellow cake gives a warm, buttery base, while the subtle vanilla in the blue buttercream makes every bite smooth and comforting.
What makes this cake stand out is the balance of its vibrant colors with the buttercream’s delicate elegance. The buttercream is whipped just right—airy but rich, not too dense—giving the whole cake a sophisticated yet fun vibe. Plus, the way the yellow and blue layers alternate is visually stunning but surprisingly simple to pull off. I remember trying other zodiac cakes that felt overdone or gimmicky, but this one feels genuine and thoughtfully made.
It’s the kind of cake that makes you pause for a moment after the first bite—comfort food with a stylish twist. If you want a recipe that’s both beautiful and approachable, this is it.
What Ingredients You Will Need
This recipe uses simple, wholesome ingredients to deliver bold flavor and satisfying texture without the fuss. Most items are ones you probably already have handy, making it a breeze to whip this up on a whim.
- For the Yellow Cake Layers:
- All-purpose flour – 2 ½ cups (315 g), sifted for lightness
- Baking powder – 2 ½ teaspoons (10 g), to keep the cake fluffy
- Salt – ½ teaspoon (3 g)
- Unsalted butter – 1 cup (227 g), softened (I like using Plugrá for creaminess)
- Granulated sugar – 1 ¾ cups (350 g)
- Large eggs – 4, at room temperature (helps batter emulsify)
- Whole milk – 1 cup (240 ml), room temperature (adds moisture)
- Pure vanilla extract – 2 teaspoons (10 ml)
- Yellow gel food coloring – 1 teaspoon (adjust for vibrant hue)
- For the Blue Buttercream:
- Unsalted butter – 1 cup (227 g), softened
- Powdered sugar – 4 cups (480 g), sifted to avoid lumps
- Heavy cream – 2–3 tablespoons (30–45 ml), for smoothness
- Pure vanilla extract – 1 teaspoon (5 ml)
- Blue gel food coloring – 1 teaspoon (gradually add for the perfect shade)
- Pinch of salt (to balance sweetness)
You can swap the all-purpose flour for a gluten-free blend if needed, just keep an eye on the texture. For dairy-free options, coconut cream works well in the buttercream, though it gives a slightly different flavor. I usually pick gel food coloring over liquid for more vibrant colors without watering down the batter or frosting. If you’re curious about trying a similar color play, check out my fluffy vanilla cupcakes with creamy buttercream—it’s a simpler spin on the same idea.
Equipment Needed
Here’s what you’ll want to have handy before starting this cake:
- Two 8-inch (20 cm) round cake pans: These create nice even layers. If you only have one pan, just bake the layers one at a time but allow cooling in between.
- Electric mixer: Stand or hand mixer works fine. It makes creaming butter and beating the buttercream much easier and fluffier.
- Mixing bowls: One large for batter, one medium for buttercream.
- Rubber spatula: For folding ingredients and scraping bowls.
- Cooling racks: To cool the cakes evenly and avoid sogginess.
- Offset spatula or butter knife: For smooth spreading of the buttercream layers.
- Food coloring brushes or toothpicks: Helpful for mixing gel colors gradually and controlling intensity.
If you don’t have a stand mixer, a hand mixer with good power works just as well (I’ve made this cake plenty of times with a basic hand mixer). For budget-friendly pans, non-stick aluminum pans from local stores do the job perfectly. Don’t forget to grease and flour your pans for an easy cake release.
Preparation Method
- Preheat and prep: Heat your oven to 350°F (175°C). Grease and flour two 8-inch round cake pans, or line with parchment paper circles for extra insurance. This should take about 10 minutes.
- Mix dry ingredients: In a medium bowl, whisk together 2 ½ cups (315 g) all-purpose flour, 2 ½ teaspoons (10 g) baking powder, and ½ teaspoon (3 g) salt until evenly combined. Set aside.
- Cream butter and sugar: In a large bowl, beat 1 cup (227 g) softened butter with 1 ¾ cups (350 g) granulated sugar until light and fluffy—about 3-4 minutes. This step is crucial for a tender crumb.
- Add eggs: Beat in 4 large room temperature eggs, one at a time, mixing well after each. The batter might look slightly curdled; that’s okay.
- Incorporate milk and vanilla: Mix in 1 cup (240 ml) whole milk and 2 teaspoons (10 ml) vanilla extract until smooth.
- Add yellow food coloring: Stir in 1 teaspoon yellow gel food coloring, adjusting if you want a deeper color.
- Combine flour mixture: Slowly add the dry ingredients to the wet, mixing on low speed just until combined. Overmixing here can make the cake dense, so keep it light.
- Divide and bake: Evenly pour batter into the prepared pans. Bake for 25-30 minutes or until a toothpick inserted in the center comes out clean. Oven temps vary, so start checking at 25 minutes.
- Cool: Let cakes cool in pans for 10 minutes, then transfer to wire racks and cool completely. This prevents the buttercream from melting when spread.
- Make the blue buttercream: Beat 1 cup (227 g) softened butter until creamy. Gradually add 4 cups (480 g) powdered sugar, alternating with 2-3 tablespoons (30-45 ml) heavy cream. Mix in 1 teaspoon vanilla and a pinch of salt. Add blue gel coloring a little at a time until you get the perfect shade. Beat for an additional 3 minutes to get it fluffy.
- Assemble the cake: Place one yellow cake layer on your serving plate. Spread about ¾ cup of blue buttercream evenly on top. Place the second cake layer over it. Use the remaining buttercream to frost the top and sides smoothly, using an offset spatula for clean edges.
- Final touches: For an elegant finish, smooth the sides with a bench scraper or create soft swirls on top with your spatula. Chill the cake for 30 minutes before slicing to set the buttercream.
Pro tip: If your buttercream feels too soft to spread, pop it in the fridge for 10 minutes and then try again. If it’s too stiff, beat in a splash more cream. I learned this the hard way when my kitchen got a bit too warm during a summer bake!
Cooking Tips & Techniques
Getting this Perfect Yellow and Blue Gemini Zodiac Cake just right is all about a few key techniques:
- Room temperature ingredients: Butter, eggs, and milk should be at room temp for smoother batter and better rise. Cold ingredients can cause the batter to curdle or bake unevenly.
- Creaming butter and sugar properly: Beat for at least 3 minutes until pale and fluffy to trap air for a tender crumb.
- Folding flour in gently: Overmixing develops gluten and makes the cake tough. Use low speed or fold by hand if you prefer.
- Checking cake doneness: Start poking with a toothpick at 25 minutes. If crumbs stick but no wet batter, it’s ready.
- Buttercream consistency: Whip the buttercream well for airy texture. Use heavy cream to loosen it if too stiff, or chill briefly if too soft.
- Color control: Add gel food coloring bit by bit. It’s easier to deepen color than to fix if it gets too dark.
Honestly, I’ve made this cake on hectic afternoons and calm Sundays, and the results were consistent each time thanks to these little tricks. If you want a lighter frosting, try blending in some cream cheese for a tangy twist—though that’s a personal favorite variation I’ll get to later.
Variations & Adaptations
Want to switch things up? Here are some ideas I’ve tried or thought about for this Gemini cake:
- Flavor swaps: Add lemon zest to the yellow cake batter for a fresh citrus note. Alternatively, fold in a bit of blueberry puree into the buttercream for a natural blue flavor.
- Dairy-free option: Use coconut oil instead of butter in the cake, and swap heavy cream with full-fat coconut milk in the frosting. The texture is slightly different but still delicious.
- Different shapes: For a more playful presentation, bake cupcakes instead of cake layers and pipe the blue buttercream on top. Perfect for smaller gatherings.
- Nutty addition: Fold in finely chopped toasted almonds or pecans into the batter for crunch and depth. I once tried this with chopped walnuts, and it added a lovely texture contrast.
If you enjoy baking, you might appreciate how these tweaks let you make the cake your own without straying too far from the original charm. For a fun twist with a similar vibe, you could also try the fluffy funfetti cake—it’s a colorful party classic with a bit more whimsy.
Serving & Storage Suggestions
This Gemini cake is best served slightly chilled or at room temperature, so the buttercream is soft but not melting. I like slicing it into generous wedges to show off the vibrant yellow and blue layers side by side.
It pairs wonderfully with a cup of black tea or a light sparkling wine for a casual celebration. You could also serve it alongside fresh berries or a dollop of whipped cream for extra indulgence.
Store leftover cake tightly wrapped or in an airtight container in the refrigerator for up to 4 days. The flavors actually deepen overnight, making the next day’s slice even better. For longer storage, freeze individual slices wrapped in plastic and foil for up to 2 months. When ready to eat, thaw in the fridge overnight and bring to room temp before serving.
If you’re looking for other comforting homemade treats to accompany your cake, my cozy cinnamon rolls are a perfect match for a relaxed brunch vibe.
Nutritional Information & Benefits
Per slice (based on 12 slices), this cake offers approximately:
| Calories | 350 kcal |
|---|---|
| Fat | 18 g |
| Carbohydrates | 44 g |
| Protein | 3.5 g |
| Sugar | 32 g |
The cake provides a good source of energy and satisfies sweet cravings without being overly heavy. The main ingredients like eggs and butter contribute protein and fat essential for satiety. While it’s not low-calorie, it’s a treat that fits well into balanced eating when enjoyed mindfully.
This recipe is gluten-friendly if you use all-purpose flour, but you can swap for a gluten-free mix to make it accessible. The buttercream contains dairy, so those with lactose intolerance might prefer dairy-free substitutions. I personally appreciate how the buttercream uses real butter and minimal additives for a clean, authentic taste.
Conclusion
This Perfect Yellow and Blue Gemini Zodiac Cake with Elegant Buttercream is one of those recipes that’s caught me off guard in the best way. It’s colorful but not gaudy, rich but still light, and surprisingly straightforward to make. Whether you’re baking for a Gemini birthday or just want to add a little starry charm to your dessert table, it’s a recipe worth keeping in your arsenal.
Feel free to customize it with your favorite flavors or colors—there’s room for creativity here without losing the essence that makes it special. For me, it’s become a reminder that simple ingredients combined thoughtfully can create something memorable and joyful.
If you give it a try, I’d love to hear how yours turns out or what personal twists you add. Sharing these moments is part of what makes baking so rewarding, right? Here’s to many more sweet adventures in the kitchen.
FAQs About the Perfect Yellow and Blue Gemini Zodiac Cake
Can I use liquid food coloring instead of gel?
You can, but gel food coloring gives a more vibrant color without thinning the batter or frosting. If using liquid, add it sparingly to avoid affecting the texture.
How do I prevent the buttercream from melting while frosting?
Keep the buttercream chilled but spreadable. If your kitchen is warm, chill the cake layers before frosting and work quickly, refrigerating the finished cake to set the frosting.
Can I make this cake ahead of time?
Yes! Bake the layers a day ahead and wrap tightly. Buttercream can be made a day in advance and stored covered at room temperature or chilled. Assemble the day you plan to serve.
Is this recipe suitable for beginners?
Absolutely. The steps are straightforward, and the ingredients are common. Just be mindful of mixing and baking times for the best results.
How do I get smooth buttercream finishes like in the photos?
Use an offset spatula and a bench scraper to smooth the frosting. Chill the cake periodically during frosting to help set layers and reduce crumbs.
Pin This Recipe!
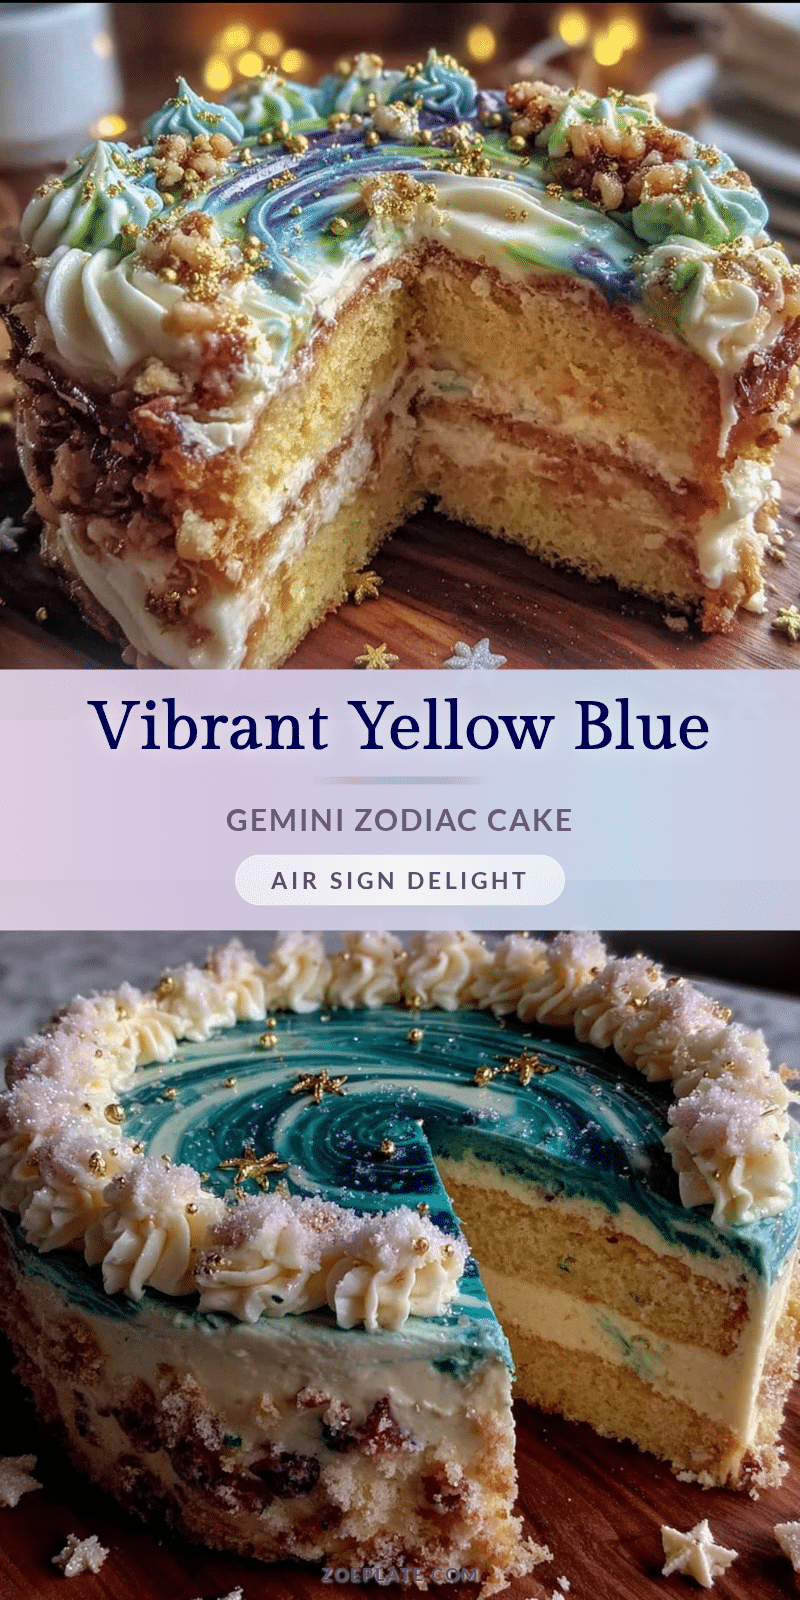
Perfect Yellow and Blue Gemini Zodiac Cake Recipe Easy Elegant Buttercream Tutorial

A vibrant and elegant Gemini zodiac-themed cake featuring bright yellow layers and smooth blue buttercream. This easy-to-make cake balances bold colors with a light, creamy texture perfect for celebrations.
- Prep Time: 20 minutes
- Cook Time: 30 minutes
- Total Time: 1 hour 20 minutes
- Yield: 12 servings
- Category: Dessert
- Cuisine: American
Ingredients
- All-purpose flour – 2 ½ cups (315 g), sifted
- Baking powder – 2 ½ teaspoons (10 g)
- Salt – ½ teaspoon (3 g)
- Unsalted butter – 1 cup (227 g), softened (for cake)
- Granulated sugar – 1 ¾ cups (350 g)
- Large eggs – 4, room temperature
- Whole milk – 1 cup (240 ml), room temperature
- Pure vanilla extract – 2 teaspoons (10 ml)
- Yellow gel food coloring – 1 teaspoon
- Unsalted butter – 1 cup (227 g), softened (for buttercream)
- Powdered sugar – 4 cups (480 g), sifted
- Heavy cream – 2–3 tablespoons (30–45 ml)
- Pure vanilla extract – 1 teaspoon (5 ml)
- Blue gel food coloring – 1 teaspoon
- Pinch of salt
Instructions
- Preheat oven to 350°F (175°C). Grease and flour two 8-inch round cake pans or line with parchment paper.
- In a medium bowl, whisk together flour, baking powder, and salt. Set aside.
- In a large bowl, beat softened butter and granulated sugar until light and fluffy, about 3-4 minutes.
- Beat in eggs one at a time, mixing well after each addition.
- Mix in milk and vanilla extract until smooth.
- Stir in yellow gel food coloring, adjusting for desired color.
- Slowly add dry ingredients to wet ingredients, mixing on low speed just until combined.
- Divide batter evenly between prepared pans and bake for 25-30 minutes or until a toothpick inserted in the center comes out clean.
- Cool cakes in pans for 10 minutes, then transfer to wire racks to cool completely.
- For the blue buttercream, beat softened butter until creamy.
- Gradually add powdered sugar, alternating with heavy cream, until smooth and fluffy.
- Mix in vanilla extract, salt, and blue gel food coloring gradually until desired shade is reached.
- Beat buttercream for an additional 3 minutes for fluffiness.
- Place one yellow cake layer on serving plate and spread about ¾ cup of blue buttercream evenly on top.
- Place second cake layer over and frost top and sides with remaining buttercream using an offset spatula.
- Smooth sides with a bench scraper or create soft swirls on top.
- Chill cake for 30 minutes before slicing to set the buttercream.
Notes
Use gel food coloring for vibrant colors without thinning batter or frosting. Keep buttercream chilled but spreadable; if too soft, refrigerate briefly. Room temperature ingredients ensure smooth batter and better rise. Overmixing flour can make cake dense. For dairy-free option, substitute butter with coconut oil and heavy cream with full-fat coconut milk.
Nutrition
- Serving Size: 1 slice (1/12 of cak
- Calories: 350
- Sugar: 32
- Fat: 18
- Carbohydrates: 44
- Protein: 3.5
Keywords: Gemini cake, zodiac cake, yellow cake, blue buttercream, birthday cake, astrology cake, easy cake recipe, buttercream tutorial