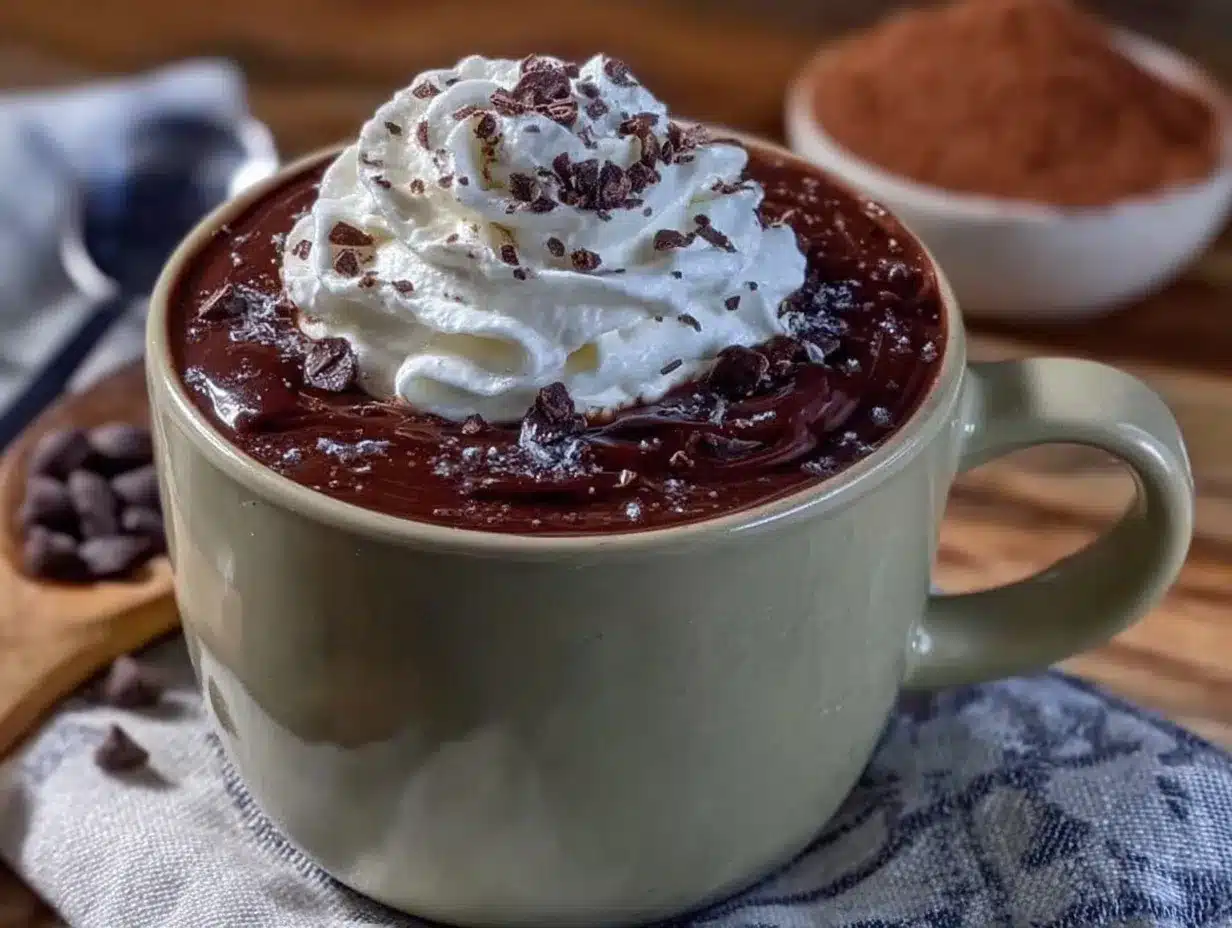
“You seriously have to try this hot chocolate,” my neighbor called out over the fence one chilly afternoon, holding up a steaming mug with a grin. I was skeptical—homemade hot chocolate always sounded like a fuss, and honestly, I’d been burned by powdery mixes before. But curiosity got the better of me after the snow started falling hard, turning our neighborhood into a white wonderland. That first sip was like a warm hug in a mug—rich, velvety, and just right on sweetness. It wasn’t some instant powder magic; this was the real deal, made from scratch with simple ingredients I already had. I found myself making this creamy snow day hot chocolate recipe over and over that week, tweaking it here and there, but always coming back to the basics. It’s funny how a cold, blustery day and a friendly nudge can turn a skeptical mood into quiet comfort, one creamy sip at a time. And that’s why this recipe stuck with me—not just because it tastes amazing, but because it feels like a little pause in the chaos, a moment of cozy calm whenever the skies turn gray and the world slows down.
Why You’ll Love This Recipe
Having tested countless hot chocolate recipes, I can tell you this creamy snow day hot chocolate from scratch stands out for a few solid reasons:
- Quick & Easy: You can whip it up in under 10 minutes—perfect for when the snow piles up and you need something warm fast.
- Simple Ingredients: No need to hunt down fancy chocolate bars or weird powders; just basics like cocoa powder, milk, and a touch of sugar.
- Perfect for Cozy Days: Whether it’s a lazy snow day, a chilly evening by the fire, or a quiet morning, this recipe fits the mood.
- Crowd-Pleaser: Kids, adults, and even the picky ones around here ask for seconds. It’s got that perfect balance of creaminess and chocolate flavor that hits the spot.
- Unbelievably Delicious: The texture is silky smooth, thanks to a little extra care in heating and stirring. Honestly, it’s a comfort drink that feels a bit fancy but without the fuss.
What truly makes this hot chocolate different? The secret is in slowly heating the milk and cocoa together to coax out the deep chocolate flavor without any bitterness. Plus, adding a pinch of salt brightens the whole drink, making every sip feel indulgent yet balanced. This isn’t just a quick mix—it’s a recipe that feels homemade and thoughtful, the kind that makes you close your eyes and savor the moment. It’s a little ritual that makes snowy days feel special and your kitchen smell like a warm chocolate haven. If you’re after a creamy, dreamy hot chocolate that doesn’t rely on powders or syrups, this is the one to keep close at hand.
What Ingredients You Will Need
This creamy snow day hot chocolate uses simple, wholesome ingredients to deliver bold chocolate flavor and satisfyingly smooth texture without any fuss. Most are pantry staples, and you can easily swap a few depending on your needs.
- Whole Milk (2 cups / 480 ml) – For the creamiest texture, though you can use any milk you prefer (dairy or plant-based like oat or almond).
- Unsweetened Cocoa Powder (3 tablespoons) – I like to use a high-quality Dutch-processed cocoa like Valrhona or Ghirardelli for richer flavor.
- Granulated Sugar (2 tablespoons) – Adjust to taste; you can swap for coconut sugar or maple syrup for a different sweetness profile.
- Salt (a pinch) – This tiny addition really lifts the chocolate flavor, making it more vibrant.
- Vanilla Extract (1 teaspoon) – Adds warmth and depth; pure vanilla is best.
- Dark Chocolate (optional, 1 oz / 30 g, chopped) – For extra creaminess and richness, stir in at the end until melted.
- Whipped Cream or Marshmallows (for topping, optional) – Because honestly, what’s hot chocolate without a little indulgence?
For a dairy-free option, swap the whole milk with your favorite plant milk and skip the dark chocolate or use a dairy-free variety. If you want a bit of a twist, you can add a sprinkle of cinnamon or a drop of peppermint extract for seasonal fun. I often keep things classic but sometimes sneak in a bit of cayenne for warmth when it’s really freezing outside.
Equipment Needed
- Small Saucepan: Essential for gently heating the milk and cocoa mixture without scorching.
- Whisk: A balloon whisk works best to blend cocoa powder evenly and prevent lumps.
- Measuring Spoons and Cups: For precise ingredient amounts—trust me, it makes a difference.
- Mug or Heatproof Serving Cups: For that cozy presentation.
- Optional – Small Grater: If you’re adding chocolate shavings on top or freshly grated dark chocolate for garnish.
If you don’t have a whisk, a fork can do the job in a pinch, though stirring gently and patiently helps keep the texture smooth. I find a non-stick saucepan cuts down on cleanup and helps prevent the milk from burning on the bottom. For those on a budget, a basic stainless steel pan and a sturdy silicone whisk are all you really need.
Preparation Method
- Measure Ingredients: Start by measuring 2 cups (480 ml) of whole milk and pour it into your saucepan.
- Mix Cocoa and Sugar: In a small bowl, whisk together 3 tablespoons of unsweetened cocoa powder, 2 tablespoons of sugar, and a pinch of salt. This dry mix ensures even sweetness and chocolate flavor.
- Heat Milk Gently: Place the saucepan over medium-low heat. Slowly warm the milk until it’s hot but not boiling—think about 160°F to 180°F (70°C to 82°C). You’ll see steam rising and tiny bubbles forming around the edges.
- Add Cocoa Mixture: Gradually whisk in the dry cocoa and sugar blend to the hot milk. Stir continuously to prevent lumps and to fully dissolve the cocoa powder. This should take about 2-3 minutes.
- Simmer and Thicken: Let the mixture simmer gently for another 2 minutes, whisking frequently. You want the hot chocolate to thicken slightly and the flavors to meld, but avoid boiling or scorching.
- Stir in Vanilla and Optional Chocolate: Remove from heat and whisk in 1 teaspoon of vanilla extract. If using, add 1 oz (30 g) chopped dark chocolate now and stir until melted and smooth.
- Serve Immediately: Pour into mugs and top with whipped cream or marshmallows if desired. For an extra touch, sprinkle a little cocoa powder or chocolate shavings on top.
If you notice any graininess, keep whisking gently off the heat—it usually smooths out as the chocolate melts. And a quick tip from experience: don’t rush the heating process. Slow and steady keeps the milk creamy and prevents that scorched taste you sometimes get with quick boiling.
Cooking Tips & Techniques
Getting creamy hot chocolate right is all about controlling heat and mixing well. Always warm the milk slowly to avoid burning or curdling—that’s a rookie mistake that’s easy to make when you’re in a hurry. Whisking the cocoa powder with sugar beforehand helps prevent clumps and mixes the flavors evenly.
If you want an ultra-smooth drink, try whisking the cocoa mixture into a small amount of warm milk first to make a paste, then slowly add the rest of the milk. This little trick can save you from lumps, especially if your cocoa powder is a bit clumpy.
Adding a pinch of salt might seem odd, but it really balances the bitterness and sweetness. Trust me on this one—it’s like a secret ingredient that makes the chocolate pop.
When I first started making this recipe, I used to rush the vanilla addition, tossing it in while the mixture was still boiling. The flavor faded quickly, so now I always add it off the heat to keep that rich, warm aroma intact. Also, stirring in chopped dark chocolate at the end adds a luscious texture and deepens the flavor—it’s worth the extra step.
For multitasking on busy days, I recommend prepping the dry cocoa mix ahead and keeping it in a small jar. That way, when the snow hits, you can just grab it and mix it straight into the milk—no measuring needed.
Variations & Adaptations
This creamy snow day hot chocolate is a great base for creative spins. Here are a few ways I’ve played with it:
- Dairy-Free Version: Swap whole milk for oat milk or almond milk. Use dairy-free dark chocolate or omit it. The oat milk especially adds a natural sweetness and creaminess that’s quite lovely.
- Spiced Hot Chocolate: Add a pinch of cinnamon, nutmeg, or even a dash of cayenne pepper for a warming kick. It’s fantastic on really cold days when you want a little extra heat.
- Mint Chocolate: Stir in a drop of peppermint extract instead of vanilla for a festive twist. Top with crushed candy canes or mint chocolate chips for a holiday vibe.
- Extra Creamy Version: Replace half the milk with half-and-half or heavy cream for a richer, dessert-style treat—great for indulgent weekends.
- Mocha Style: Mix in a teaspoon of instant espresso powder for a coffee-chocolate combo that’s perfect for afternoon pick-me-ups.
Personally, I once mixed in a spoonful of almond butter for a nutty version that surprised me with its depth. It worked especially well topped with whipped cream and a sprinkle of toasted almonds. Feel free to experiment—it’s a forgiving recipe that welcomes your personal touch.
Serving & Storage Suggestions
This hot chocolate is best served hot and fresh, straight from the stovetop to your mug. For presentation, a swirl of whipped cream and a sprinkle of cocoa powder or mini marshmallows make it feel like a treat. Pairing it with a buttery cookie or your favorite chocolate chip cookies (like these chewy tahini chocolate chip cookies) turns it into a little snow day feast.
If you have leftovers (which is rare in my house), you can store the hot chocolate in a sealed container in the refrigerator for up to 2 days. Reheat gently on the stove or in the microwave, whisking well to bring back the creaminess. Avoid boiling again, as the texture can separate.
Over time, the flavors actually mellow and deepen a bit, so letting it sit overnight can make for a different, slightly richer experience—just reheat slowly and stir well before serving. For a fun twist, freeze some in ice cube trays to add to iced coffee or smoothies later on.
Nutritional Information & Benefits
Estimated per serving (1 cup / 240 ml): approximately 200 calories, 10g fat, 20g carbohydrates, 8g sugar, and 8g protein (if using whole milk and dark chocolate). Nutritional values will vary with substitutions.
The key ingredient—unsweetened cocoa powder—is rich in antioxidants and flavonoids, which have heart-healthy benefits. Using dark chocolate adds a dose of iron and magnesium, too. Choosing whole milk adds calcium and vitamin D, important for bone health. For dairy-free versions, plant milks like oat or almond often come fortified with these nutrients.
This recipe is naturally gluten-free and can be made vegan by swapping milk and chocolate accordingly. Just watch the sugar content if you’re managing blood sugar levels—consider using natural sweeteners like maple syrup or date syrup (similar to the date syrup in my brownies recipe) as alternatives.
Conclusion
This creamy snow day hot chocolate from scratch is the kind of recipe that turns a cold, gray afternoon into a cozy, comforting moment. It’s simple, requires no fancy ingredients, and feels like a little celebration in every cup. What I love most is how easy it is to customize—whether you want it rich and decadent, light and dairy-free, or with a spicy twist, it welcomes your creativity.
Give it a try the next time the snow is falling or you just need that warm chocolate fix. And if you end up tweaking it to your liking, I’d love to hear how you made it yours. Sharing recipes and little kitchen wins is what makes cooking fun, after all. So grab your whisk, warm that milk, and settle in with a mug of this creamy hot chocolate—your snow day just got a whole lot better.
Frequently Asked Questions
Can I make this hot chocolate vegan?
Absolutely! Use your favorite plant milk like oat, almond, or soy, and swap dark chocolate for a dairy-free version. Just be sure the cocoa powder is unsweetened and pure.
Is Dutch-processed cocoa powder better for this recipe?
Yes, Dutch-processed cocoa tends to be smoother and less acidic, giving a richer flavor. But natural cocoa powder works fine—you may just notice a slightly different taste.
How can I prevent lumps in my hot chocolate?
Whisk the cocoa powder and sugar together before adding to milk, or mix them into a small amount of warm milk first to create a smooth paste, then stir in the rest.
Can I prepare this hot chocolate ahead of time?
You can make it in advance and store it in the fridge for up to 2 days. Reheat gently and whisk well before serving to restore creaminess.
What toppings work best with this hot chocolate?
Whipped cream, marshmallows, a sprinkle of cinnamon or cocoa powder, chocolate shavings, or even a dash of chili powder for a spicy kick all work beautifully.
Pin This Recipe!
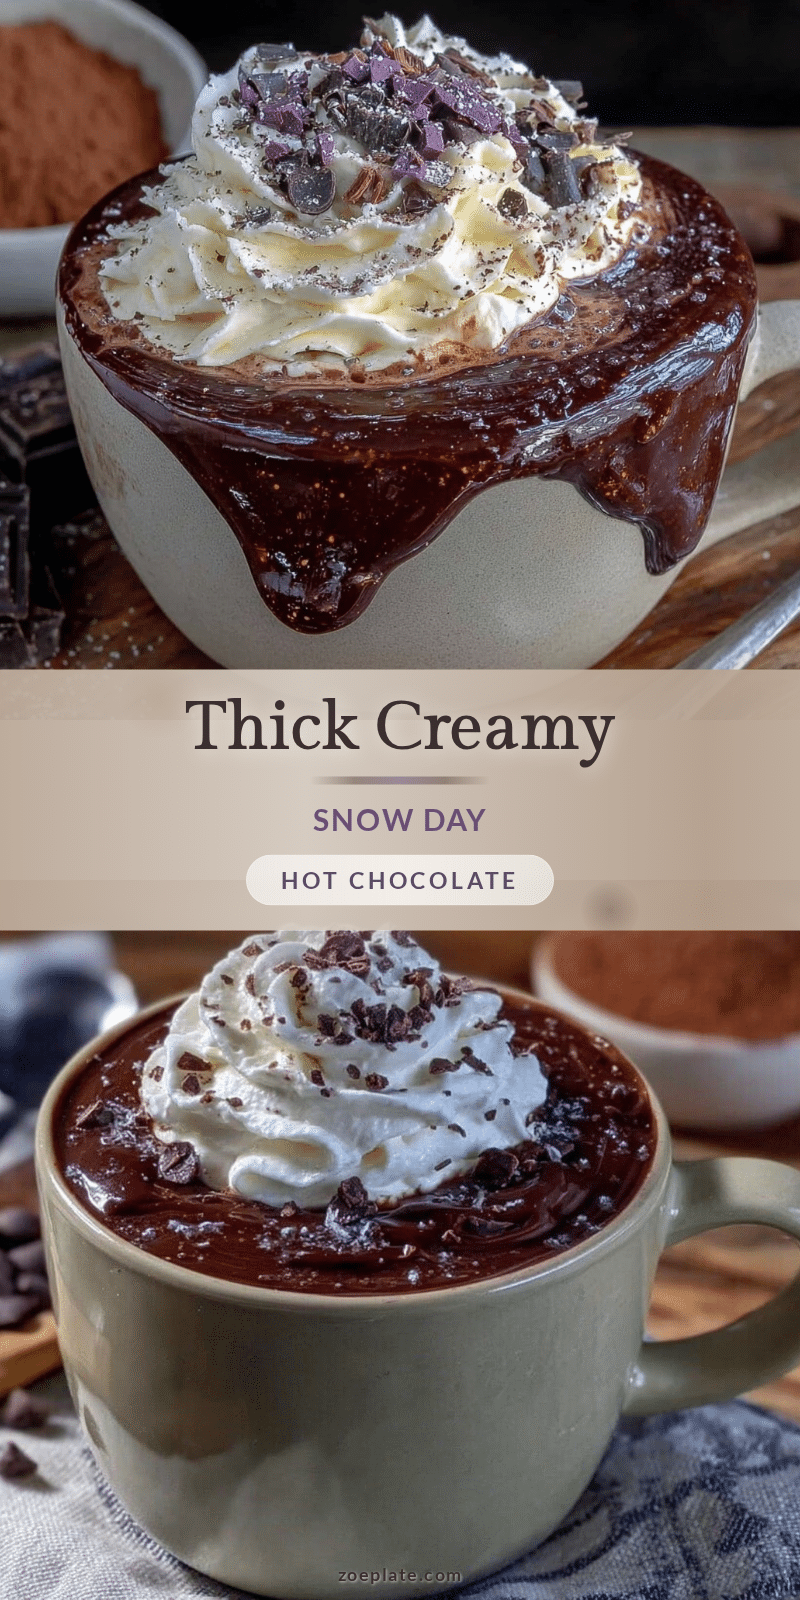
Creamy Snow Day Hot Chocolate Recipe Easy Homemade from Scratch

A rich, velvety homemade hot chocolate made from simple ingredients, perfect for cozy snow days and chilly evenings. This recipe is quick, easy, and customizable for dairy-free or spiced variations.
- Prep Time: 5 minutes
- Cook Time: 5 minutes
- Total Time: 10 minutes
- Yield: 2 servings 1x
- Category: Beverage
- Cuisine: American
Ingredients
- 2 cups (480 ml) whole milk (or any dairy or plant-based milk like oat or almond)
- 3 tablespoons unsweetened cocoa powder (preferably Dutch-processed)
- 2 tablespoons granulated sugar (can substitute coconut sugar or maple syrup)
- Pinch of salt
- 1 teaspoon vanilla extract
- 1 oz (30 g) chopped dark chocolate (optional)
- Whipped cream or marshmallows for topping (optional)
Instructions
- Measure 2 cups (480 ml) of whole milk and pour into a small saucepan.
- In a small bowl, whisk together 3 tablespoons unsweetened cocoa powder, 2 tablespoons sugar, and a pinch of salt.
- Place the saucepan over medium-low heat and slowly warm the milk until hot but not boiling (about 160°F to 180°F).
- Gradually whisk the dry cocoa and sugar mixture into the hot milk, stirring continuously to prevent lumps and dissolve the cocoa powder (about 2-3 minutes).
- Let the mixture simmer gently for another 2 minutes, whisking frequently to thicken slightly and meld flavors, avoiding boiling or scorching.
- Remove from heat and whisk in 1 teaspoon vanilla extract. If using, add 1 oz chopped dark chocolate and stir until melted and smooth.
- Pour into mugs and top with whipped cream or marshmallows if desired. Optionally, sprinkle cocoa powder or chocolate shavings on top.
Notes
Heat milk slowly to avoid burning or curdling. Whisk cocoa powder and sugar together before adding to milk to prevent lumps. Add vanilla extract off the heat to preserve flavor. Stir in chopped dark chocolate at the end for extra richness. Store leftovers in the refrigerator up to 2 days and reheat gently.
Nutrition
- Serving Size: 1 cup (240 ml)
- Calories: 200
- Sugar: 8
- Fat: 10
- Carbohydrates: 20
- Protein: 8
Keywords: hot chocolate, homemade hot chocolate, creamy hot chocolate, snow day drink, easy hot chocolate, dairy-free hot chocolate, cozy drink