My niece, Lily, is the reason this recipe exists. She is the pickiest eater I have ever met. I thought I had seen picky, but Lily took it to another level. She would look at a plate of food like it had personally offended her. So when my sister asked me to help find something, anything, that Lily would actually eat for lunch, I felt the pressure. I spent a weekend making tiny portions of everything I could think of. Most of it ended up in the trash.
Then, I remembered the teriyaki chicken I had made for dinner the night before. It was sticky, sweet, and savory. I chopped it up, mixed it with some leftover rice, and rolled it into a ball. I handed it to Lily, fully expecting her to push it away. She took a bite. Then another. Then she asked for more. I honestly did not think it would work. But those little rice balls were the first time I saw her actually enjoy a meal. It was a quiet victory in my sister’s kitchen.
These Easy Teriyaki Chicken Rice Balls for Kids are now a staple in our family. They are not fancy. They are just simple, good food that kids actually want to eat. The teriyaki flavor is familiar and comforting, and the shape makes them fun. It is the kind of recipe that solves a real problem without any fuss. And honestly, watching a kid clean their plate is a pretty great feeling.
Why You’ll Love This Recipe
I have tested this recipe more times than I can count, tweaking the sauce and the rice ratio until it was just right. It is built for busy parents who need a win at lunchtime. Here is why these rice balls are a game-changer:
- Quick & Easy: You can have these on the table in about 20 minutes. They are perfect for a fast lunch or a fun after-school snack.
- Simple Ingredients: You likely have everything you need in your pantry and fridge right now. No special trips to the store required.
- Perfect for Lunchboxes: These rice balls hold up beautifully in a lunchbox. They do not get soggy, and they taste great at room temperature.
- Kid-Approved: This is the kind of recipe that even the pickiest eaters will love. The familiar teriyaki flavor is a total crowd-pleaser.
- Unbelievably Delicious: The combination of tender chicken, sticky rice, and that sweet-salty glaze is pure comfort food. It is so good, you will want to make extra for yourself.
What makes this different from other recipes is the texture. I use a specific ratio of rice to chicken so the balls hold together perfectly without falling apart. The sauce is not too thick or too thin—it coats every grain of rice just right. This is not just another version of teriyaki chicken; it is the version that actually works for busy families. It is the recipe that makes you feel like a good parent, even on the craziest days.
What Ingredients You Will Need
This recipe uses simple, everyday ingredients to create something special. You probably have most of these in your kitchen already, which is the whole point.
- Cooked White Rice (3 cups): Day-old rice works best because it is slightly drier and holds its shape. Freshly cooked rice is fine too, just let it cool down a bit before you start rolling. I prefer short-grain or medium-grain rice for its stickiness, but long-grain works in a pinch.
- Cooked Chicken (1.5 cups, shredded or finely chopped): This is a great way to use up leftover rotisserie chicken or grilled chicken breasts. I like to chop it into very small pieces so it mixes evenly into the rice. My go-to is a rotisserie chicken from the store—it saves so much time.
- Soy Sauce (3 tablespoons): Use low-sodium soy sauce if you are watching your salt intake. For a gluten-free option, tamari or coconut aminos work beautifully.
- Honey (2 tablespoons): This adds the sweetness that kids love. You can substitute maple syrup or agave nectar if you prefer.
- Rice Vinegar (1 tablespoon): A little acidity balances the sweetness and adds that authentic teriyaki tang. Apple cider vinegar is a good substitute.
- Sesame Oil (1 teaspoon): Just a tiny bit adds a wonderful nutty flavor. It is optional but highly recommended. I love the brand Kadoya for its rich taste.
- Garlic (1 clove, minced): Fresh garlic gives the best flavor, but a pinch of garlic powder works in a pinch.
- Ginger (1/2 teaspoon, grated): Fresh ginger adds a warm, zesty kick. I keep a knob of ginger in the freezer and grate it straight into the pan—it is a lifesaver.
- Cornstarch (1 tablespoon, mixed with 2 tablespoons water): This is your thickening agent. It turns the sauce into a glossy, sticky glaze that clings to the rice and chicken.
- Nori (Seaweed) Sheets (optional): Cutting nori into small strips and wrapping them around the rice balls adds a fun pop of color and a subtle ocean flavor. Kids love the look of it.
- Sesame Seeds (for garnish): A sprinkle of toasted sesame seeds adds a nice crunch and makes the rice balls look extra special.
Equipment Needed
You do not need any fancy gadgets for this recipe. Here is what you will need:
- Medium Skillet or Frying Pan: For making the teriyaki sauce and combining everything. A non-stick pan makes cleanup a breeze.
- Mixing Bowl: A large bowl for combining the rice and chicken mixture.
- Sharp Knife and Cutting Board: For chopping the chicken and mincing the garlic.
- Measuring Cups and Spoons: For accuracy.
- Small Bowl: For mixing the cornstarch slurry.
- Plastic Wrap or Parchment Paper: To prevent the rice from sticking to your hands while rolling. I prefer using plastic wrap—it makes the process so much cleaner.
- Baking Sheet or Plate: To hold the finished rice balls while you roll the rest.
If you do not have a non-stick skillet, a well-seasoned cast iron pan works great. Just be sure to keep an eye on the sauce so it does not burn.
Preparation Method
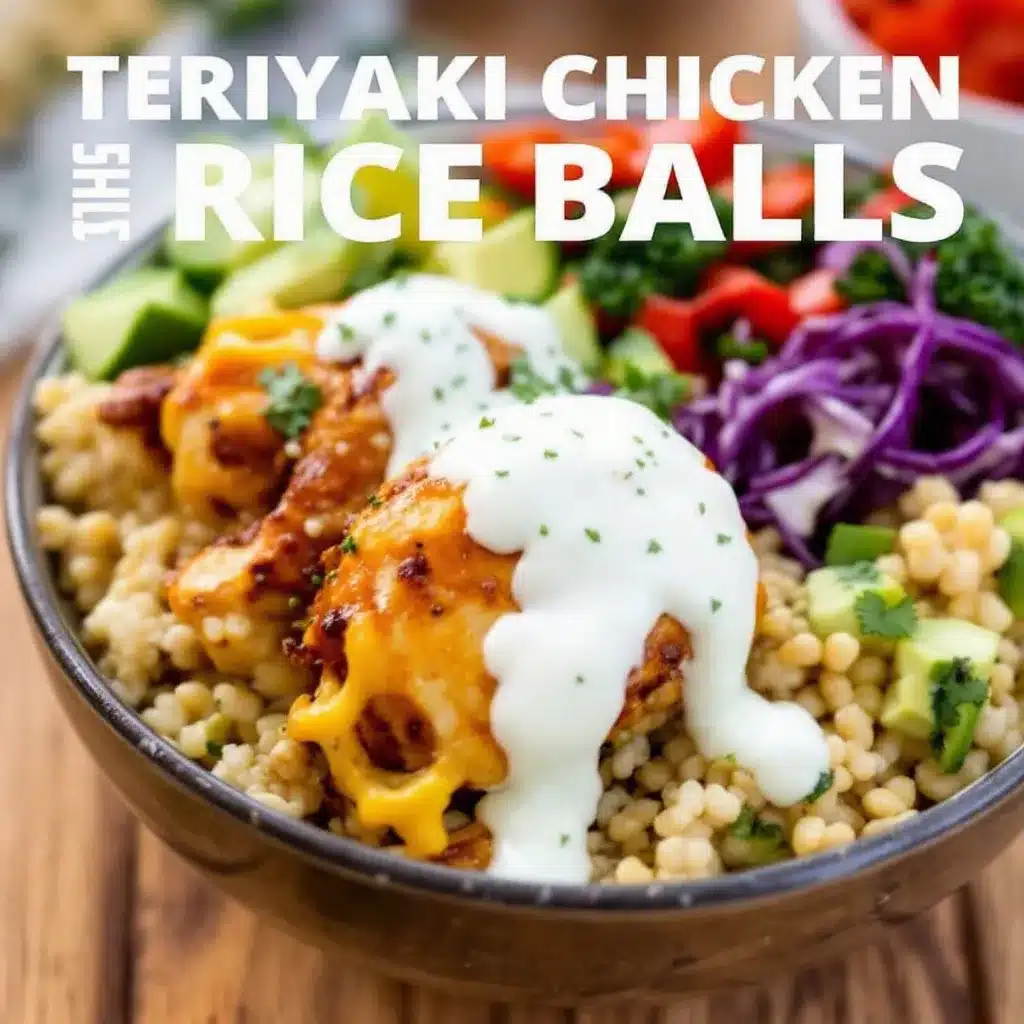
Let us make these Easy Teriyaki Chicken Rice Balls for Kids. It is simpler than you think.
- Make the Teriyaki Sauce: In your medium skillet over medium heat, combine the soy sauce, honey, rice vinegar, sesame oil, minced garlic, and grated ginger. Whisk everything together and let it come to a gentle simmer. This should take about 1-2 minutes. You will smell the garlic and ginger becoming fragrant.
- Thicken the Sauce: In your small bowl, whisk together the cornstarch and water until the cornstarch is fully dissolved. This is your slurry. Pour the slurry into the simmering sauce while whisking continuously. The sauce will thicken almost immediately, turning into a glossy, sticky glaze. Let it cook for another 30 seconds, then remove the pan from the heat. The sauce should coat the back of a spoon.
- Combine Chicken and Sauce: Add your chopped or shredded cooked chicken to the skillet with the teriyaki sauce. Stir well to coat every piece of chicken. Make sure the chicken is evenly covered in that beautiful glaze. Set the skillet aside for a moment.
- Mix with Rice: In your large mixing bowl, add the cooked rice. Pour the teriyaki chicken mixture over the rice. Use a spatula or a fork to gently fold everything together. You want the rice to be evenly coated with the sauce and the chicken distributed throughout. Be careful not to mash the rice. It should look like a sticky, cohesive mixture.
- Prepare to Roll: Lay out a sheet of plastic wrap on your work surface. Place about 1/4 cup of the rice mixture in the center of the plastic wrap. This is a good starting point for kid-sized balls. You can make them smaller or larger depending on the age of your kids.
- Shape the Rice Balls: Gather the corners of the plastic wrap and twist them together to form a tight pouch. Use your hands to gently squeeze and shape the mixture into a ball through the plastic wrap. The plastic wrap prevents the rice from sticking to your fingers and helps you create a nice, round shape. Twist the top to seal it tightly.
- Set the Shape: Place the wrapped rice ball on your baking sheet or plate. Let it sit for a minute or two while you shape the rest. This resting time helps the ball hold its shape better. Repeat steps 5 and 6 until all the mixture is used up. You should get about 8-10 rice balls.
- Garnish (Optional): If you are using nori strips, gently press a strip around the bottom or middle of each rice ball. Sprinkle the tops with toasted sesame seeds. This step is purely for looks and a little extra flavor, but kids really love the presentation.
- Serve or Store: Your Easy Teriyaki Chicken Rice Balls for Kids are ready to eat right away. They are delicious warm, at room temperature, or even cold straight from the fridge.
Cooking Tips & Techniques
I have made a lot of mistakes in the kitchen, and I am happy to share them so you do not have to. Here is what I have learned about these rice balls:
- Use Day-Old Rice: Freshly cooked rice is too moist and sticky. It will turn your rice balls into a mushy mess. Day-old rice that has been refrigerated is drier and holds its shape perfectly. If you only have fresh rice, spread it out on a baking sheet and let it cool completely before using.
- Do Not Overmix: When combining the rice and chicken, fold gently. Overmixing can break down the rice grains and make the mixture gummy. You want to see distinct grains of rice.
- Wet Your Hands (or Use Plastic Wrap): Rice is incredibly sticky. Trying to roll it with bare hands is a recipe for frustration. Plastic wrap is my secret weapon. It makes the process mess-free and the balls come out perfectly round every time.
- Adjust the Sauce Consistency: If your sauce is too thick, add a splash of water. If it is too thin, let it simmer for another minute to reduce. The perfect sauce should coat the back of a spoon and drip off slowly.
- Season to Taste: Taste the rice mixture before you start rolling. You might want a little more soy sauce for saltiness or a pinch of sugar for sweetness. Adjust it to your family’s preference.
- Make Them Bite-Sized: For toddlers, make smaller, bite-sized balls. For older kids, you can make them larger. The size is totally up to you.
Variations & Adaptations
This recipe is super flexible. Here are a few ways to change it up:
- Veggie-Packed Version: Finely grate a carrot or some zucchini and sauté it before adding it to the rice mixture. You can also add some finely chopped steamed broccoli or peas. The kids will never notice the extra veggies.
- Spicy Kick for Adults: Add a teaspoon of sriracha or a pinch of red pepper flakes to the teriyaki sauce. It turns these rice balls into a tasty adult snack.
- Gluten-Free Option: Use tamari or coconut aminos instead of soy sauce. Everything else in the recipe is naturally gluten-free. Just double-check your rice is certified gluten-free if that is a concern.
- Baked Version: If you want a slightly firmer exterior, you can bake the rice balls. Place them on a parchment-lined baking sheet and bake at 375°F (190°C) for 10-12 minutes. The outside gets a little crispy, which is a nice texture change.
- Different Protein: Swap the chicken for cooked ground turkey, ground pork, or even flaked salmon. Tofu crumbles are a great vegetarian option. I have tried it with leftover hibachi shrimp fried rice ingredients, and it worked surprisingly well.
Serving & Storage Suggestions
These rice balls are best served at room temperature or slightly warm. They are perfect for lunchboxes because they do not need to be reheated.
Serving Ideas:
- Serve them with a side of steamed edamame or a simple cucumber salad.
- Pair them with some fresh fruit like apple slices or grapes for a balanced meal.
- Drizzle a little extra teriyaki sauce on the side for dipping.
- They are also great alongside a bowl of creamy miso butter ramen for a fun Japanese-inspired meal.
Storage Instructions:
- Refrigerator: Store leftover rice balls in an airtight container in the refrigerator for up to 3 days. They will stay fresh and tasty.
- Freezer: These freeze beautifully. Place the rice balls on a baking sheet and freeze them for an hour until they are solid. Then transfer them to a freezer-safe bag or container. They will keep for up to 2 months.
- Reheating: To reheat, microwave them for 20-30 seconds, or steam them for a few minutes to restore moisture. You can also eat them cold straight from the fridge—my nephew actually prefers them that way.
The flavors actually meld together even more after a day in the fridge. They taste just as good, if not better, the next day.
Nutritional Information & Benefits
These Easy Teriyaki Chicken Rice Balls for Kids are a balanced and satisfying meal. Here is a rough estimate per serving (about 2-3 rice balls):
- Calories: 280-320
- Protein: 18g
- Carbohydrates: 45g
- Fat: 5g
- Fiber: 1g
- Sugar: 8g
Health Benefits:
- Protein-Packed: The chicken provides lean protein, which is essential for growing kids. It helps keep them full and energized.
- Energy from Rice: The white rice provides quick, easily digestible carbohydrates for energy. It is perfect for active children.
- Ginger and Garlic: These ingredients are known for their anti-inflammatory and immune-boosting properties.
- Dietary Considerations: This recipe can easily be made gluten-free and dairy-free. It is nut-free as written, making it a safe option for many school lunchboxes.
I love that this recipe feels like a treat but is actually a well-rounded meal. It is comfort food that you can feel good about serving.
Conclusion
These Easy Teriyaki Chicken Rice Balls for Kids are more than just a recipe. They are a solution to the daily lunchbox struggle. They are proof that simple ingredients, put together with a little care, can make a huge difference. The first time my niece asked for seconds, I knew I had stumbled onto something special.
I encourage you to make these your own. Add your favorite veggies, tweak the sauce, or make them with a different protein. That is the beauty of a simple recipe like this. It is a starting point for your own family traditions.
If you give these a try, I would love to hear how they turned out. Leave a comment below and let me know if your kids loved them as much as mine did. And do not forget to share your own variations! Happy cooking, and here is to stress-free, delicious lunches.
Frequently Asked Questions
Can I use brown rice instead of white rice?
Yes, you can. Brown rice works, but it is less sticky than white rice. The balls may be a little more prone to falling apart. Make sure your brown rice is well-cooked and slightly cooled before mixing. You might also want to add a little extra cornstarch to the sauce to help bind everything together.
How do I prevent the rice balls from sticking to my hands?
The best way is to use plastic wrap. Place the rice mixture in the center of a square of plastic wrap, gather the corners, and twist to form a ball. If you prefer to use your hands, lightly wet them with water before rolling. The water creates a barrier between the sticky rice and your skin.
Can I make these ahead of time for a party or lunch prep?
Absolutely. These are perfect for meal prep. Make the rice balls up to 3 days in advance and store them in the refrigerator. They taste great cold or at room temperature. You can also freeze them for up to 2 months. Just thaw them in the fridge overnight before serving.
My rice balls keep falling apart. What am I doing wrong?
This usually happens for two reasons. First, your rice might be too dry or too fresh. Day-old, slightly sticky rice is ideal. Second, your sauce might be too thin. Make sure the sauce is thick and glossy before mixing it with the rice. The cornstarch slurry is key here. If the mixture still seems loose, add a little more cornstarch to the sauce next time.
What can I serve with these rice balls for a complete meal?
These rice balls are quite filling on their own, but they pair beautifully with simple sides. Try a fresh creamy cucumber dill Greek yogurt salad for a cool, refreshing contrast. Steamed edamame, a simple seaweed salad, or some fresh fruit like mango or apple slices are also great choices. For a heartier meal, serve them alongside a bowl of quick Korean bulgogi ground beef rice bowls for a fun Asian-inspired feast.
Pin This Recipe!
Easy Teriyaki Chicken Rice Balls: Best Kid-Friendly Lunch
These Easy Teriyaki Chicken Rice Balls are a simple, kid-friendly lunch solution made with leftover chicken and rice, coated in a sweet and savory homemade teriyaki glaze. They are perfect for lunchboxes and picky eaters.
- Prep Time: 10 minutes
- Cook Time: 10 minutes
- Total Time: 20 minutes
- Yield: 4 servings (about 8-10 rice balls) 1x
- Category: Main Course
- Cuisine: Japanese
Ingredients
- 3 cups cooked white rice (day-old preferred)
- 1.5 cups cooked chicken, shredded or finely chopped
- 3 tablespoons soy sauce (low-sodium recommended)
- 2 tablespoons honey
- 1 tablespoon rice vinegar
- 1 teaspoon sesame oil
- 1 clove garlic, minced
- 1/2 teaspoon grated fresh ginger
- 1 tablespoon cornstarch mixed with 2 tablespoons water (slurry)
- Nori (seaweed) sheets, cut into strips (optional)
- Toasted sesame seeds for garnish
Instructions
- Make the Teriyaki Sauce: In a medium skillet over medium heat, combine soy sauce, honey, rice vinegar, sesame oil, minced garlic, and grated ginger. Whisk and bring to a gentle simmer for 1-2 minutes until fragrant.
- Thicken the Sauce: In a small bowl, whisk together cornstarch and water until dissolved. Pour the slurry into the simmering sauce while whisking continuously. Cook for 30 seconds until the sauce thickens into a glossy glaze, then remove from heat.
- Combine Chicken and Sauce: Add the chopped or shredded cooked chicken to the skillet with the teriyaki sauce. Stir well to coat every piece evenly.
- Mix with Rice: In a large mixing bowl, add the cooked rice. Pour the teriyaki chicken mixture over the rice and gently fold together with a spatula until the rice is evenly coated and the chicken is distributed. Be careful not to mash the rice.
- Prepare to Roll: Lay out a sheet of plastic wrap on your work surface. Place about 1/4 cup of the rice mixture in the center.
- Shape the Rice Balls: Gather the corners of the plastic wrap and twist to form a tight pouch. Gently squeeze and shape the mixture into a ball through the plastic wrap. Twist the top to seal.
- Set the Shape: Place the wrapped rice ball on a baking sheet or plate. Let it rest for a minute while you shape the rest. Repeat until all mixture is used (makes about 8-10 rice balls).
- Garnish (Optional): If using, press nori strips around the bottom or middle of each rice ball. Sprinkle tops with toasted sesame seeds.
- Serve or Store: Serve immediately warm, at room temperature, or cold. Store leftovers in an airtight container in the refrigerator for up to 3 days or freeze for up to 2 months.
Notes
Use day-old rice for best texture. If using fresh rice, let it cool completely. Plastic wrap is key for mess-free rolling. Adjust sauce consistency with a splash of water if too thick. For gluten-free, use tamari or coconut aminos. For a baked version, place rice balls on a parchment-lined baking sheet and bake at 375°F (190°C) for 10-12 minutes.
Nutrition
- Serving Size: 2-3 rice balls
- Calories: 280320
- Sugar: 8
- Sodium: 600
- Fat: 5
- Saturated Fat: 1
- Carbohydrates: 45
- Fiber: 1
- Protein: 18
Keywords: teriyaki chicken rice balls, kid-friendly lunch, easy lunchbox recipe, picky eater recipe, homemade teriyaki, rice balls for kids


