My friend Marianne swore by this combination—pumpkin and banana in the same loaf—and I told her she was wrong for years. Not to her face, obviously. I just nodded along while she raved about how the banana kept the pumpkin bread moist without needing a ton of oil, and how the pumpkin made the banana bread somehow fluffier. In my head, I was thinking, Pick a lane, Marianne. Pumpkin bread is for October. Banana bread is for using up sad brown bananas. They don’t need to be friends.
Then I showed up at her place one drizzly Sunday morning, and she handed me a slice of this very loaf, still warm, with butter melting into the cracks. I took a bite to be polite. And then I took another bite because my brain was trying to figure out what was happening. It wasn’t muddled or confused about which flavor was which. The banana gave it this tender, almost creamy crumb, and the pumpkin added that cozy, earthy depth without screaming “fall spice mix” in your face. It was, honestly, the best loaf of quick bread I’d had in months. I asked for the recipe before I finished the slice.
She texted me a photo of a sticky note with scribbled measurements, and I’ve been making this easy one-bowl pumpkin banana bread ever since. No mixer, no fuss, and it comes together so fast you’ll wonder why you haven’t been combining these two fruits your whole life. Trust me—I spent years being wrong about this.
Why You’ll Love This Recipe
This isn’t just another quick bread recipe that promises simplicity and delivers a sink full of dirty dishes. I’ve tested this one at least a dozen times, tweaking the flour ratio and the spice blend until it hit that perfect spot between sturdy enough to slice and tender enough to eat plain. Here is why this one earns a permanent spot in your rotation:
- One Bowl, No Mixer: You don’t need a stand mixer, a hand mixer, or even a whisk if you’re feeling lazy. A fork and a single mixing bowl are all you need. Less cleanup means more time to actually enjoy the bread while it’s warm.
- Pantry-Friendly Ingredients: Canned pumpkin, overripe bananas, flour, sugar, eggs, oil, and basic spices. No weird specialty items that you’ll use once and forget about until you move apartments.
- Perfect for Fall Mornings: This loaf fills your kitchen with that unmistakable autumn smell—warm cinnamon, nutty pumpkin, and sweet banana—without requiring you to actually do anything complicated before 8 a.m.
- Crowd-Pleasing Texture: The banana keeps the crumb extra moist, while the pumpkin adds a soft, almost velvety structure. It is dense enough to hold a generous smear of butter but light enough that you can justify a second slice.
- Freezer-Friendly: This bread freezes beautifully, which means you can make one loaf for now and one for later. Or just eat both. I won’t judge.
What makes this recipe different from the dozens of pumpkin breads and banana breads floating around the internet is the balance. Most pumpkin breads lean too heavily on spice blends that taste like a candle shop. Most banana breads are either greasy or dry by day two. This one walks the line perfectly—the banana mellows out the pumpkin’s earthiness, and the pumpkin keeps the banana from making the bread too dense. It is the kind of recipe that makes you close your eyes after the first bite and quietly reassess everything you thought you knew about quick bread.
What Ingredients You Will Need
This recipe uses simple, everyday ingredients that you probably already have in your kitchen. The magic happens in how they work together, not in fancy add-ons or hard-to-find specialty items.
For the Bread
- 1 ½ cups all-purpose flour (spooned and leveled—don’t scoop straight from the bag or you’ll end up with dry bread)
- 1 teaspoon baking soda (make sure it’s fresh; old baking soda won’t give you that nice rise)
- 1 teaspoon ground cinnamon (I use McCormick for consistent flavor, but any brand works)
- ½ teaspoon ground nutmeg (freshly grated if you have it, but pre-ground is totally fine)
- ½ teaspoon salt (don’t skip this—it balances the sweetness)
- 1 cup pumpkin puree (canned is perfect; just make sure it’s pure pumpkin, not pumpkin pie filling with added sugar and spices)
- 2 large ripe bananas, mashed (about 1 cup—the spottier the better, honestly)
- ⅓ cup vegetable oil (or any neutral oil like canola or avocado; melted coconut oil works too)
- ½ cup granulated sugar
- ¼ cup brown sugar, packed (light or dark—dark gives a deeper molasses flavor)
- 2 large eggs, room temperature (cold eggs will seize up the batter; leave them out for 20 minutes)
- 1 teaspoon vanilla extract
Optional Add-Ins
- ½ cup chopped walnuts or pecans (toasted first for extra crunch)
- ⅓ cup chocolate chips (semi-sweet or dark—milk chocolate gets lost in the spices)
- 2 tablespoons pepitas (pumpkin seeds) for sprinkling on top before baking
A quick note on the pumpkin: I prefer Libby’s canned pumpkin for its consistent texture and mild flavor. Some store brands can be watery or stringy, so if you’re using a generic brand, drain off any excess liquid before measuring. For the bananas, the darker and mushier they are, the sweeter and more flavorful your bread will be. If your bananas are only slightly ripe, you can speed things up by microwaving them for 30 seconds and mashing them well.
If you need a substitution, swap the all-purpose flour with a 1:1 gluten-free baking flour blend for a gluten-free version. Replace the eggs with two flax eggs (2 tablespoons ground flaxseed mixed with 6 tablespoons water, rested for 5 minutes) for a vegan option—though the texture will be slightly denser.
Equipment Needed
You don’t need a fully stocked bakery kitchen for this recipe. Here is what you’ll need:
- One large mixing bowl: Big enough to hold all the ingredients without splashing when you stir.
- A fork or whisk: For mashing the bananas and mixing the batter. A wooden spoon works too.
- A 9×5-inch loaf pan: Standard size. If you use an 8×4-inch pan, you’ll need to bake it a bit longer. If you use a larger pan, the bread will be shorter and bake faster.
- Parchment paper: Optional but highly recommended for easy removal. Leave an overhang on the long sides so you can lift the loaf out cleanly.
- Cooling rack: So the bottom of the bread doesn’t get soggy while it cools. If you don’t have one, just tilt the loaf pan on its side after 10 minutes.
- Measuring cups and spoons: For accuracy—eyeballing flour is a fast track to dense, dry bread.
I have made this bread in a glass loaf pan, a metal one, and even a ceramic dish that was roughly loaf-shaped. Metal pans give you the nicest golden crust. Glass and ceramic take longer to bake and can make the edges over-brown before the center sets. If you’re using a dark non-stick pan, reduce the oven temperature by 25°F to prevent burning.
Preparation Method
Preheat your oven to 350°F (175°C). Grease your 9×5-inch loaf pan with butter or non-stick spray, then line it with a strip of parchment paper leaving an overhang on the two long sides. This little trick makes lifting the finished bread out so much easier than wrestling with a hot pan.
- Mash the bananas: In your large mixing bowl, add the two ripe bananas. Mash them with a fork until they’re mostly smooth with a few small lumps remaining. You want some texture, not baby food. A few chunky bits will melt into the bread as it bakes and add little pockets of sweetness.
- Add the wet ingredients: To the same bowl, add the pumpkin puree, vegetable oil, granulated sugar, brown sugar, eggs, and vanilla extract. Stir everything together with your fork or whisk until it is fully combined and smooth. Don’t overmix—just make sure there are no streaks of egg or pockets of sugar hiding at the bottom. The batter will look thick and glossy at this point.
- Add the dry ingredients: Sprinkle the flour, baking soda, cinnamon, nutmeg, and salt evenly over the wet mixture. Stir gently with a spatula or wooden spoon until just combined. A few streaks of flour are fine—stop stirring as soon as you don’t see any more dry flour. Overmixing at this stage develops gluten and makes the bread tough instead of tender.
- Fold in any add-ins: If you’re using walnuts, pecans, or chocolate chips, gently fold them in with a few quick strokes. Don’t overwork the batter here either. Just distribute them evenly.
- Pour into the pan: Scrape the batter into your prepared loaf pan and spread it into an even layer. The batter will be thick—almost like a muffin batter—so you’ll need to nudge it into the corners. Smooth the top gently with the back of your spatula.
- Optional topping: Sprinkle pepitas or a light dusting of coarse sugar over the top for a crunchy crust. I like to add a few pepitas because they look pretty and add a little nutty crunch against the soft crumb.
- Bake: Place the pan in the center of the preheated oven and bake for 50 to 60 minutes. At the 50-minute mark, start checking for doneness. Insert a toothpick or skewer into the center of the loaf—if it comes out clean or with just a few moist crumbs, it is done. If the toothpick has wet batter on it, give it another 5 to 7 minutes and check again.
- Cool: Let the bread cool in the pan on a wire rack for 15 minutes. Then use the parchment overhang to lift the loaf out of the pan and transfer it directly to the rack to cool completely. If you slice it while it is still warm, it will crumble. I know it is tempting, but waiting those extra 30 minutes makes a huge difference in the texture.
Pro tip from someone who has made this at least 20 times: If the top of your bread is browning too fast but the center isn’t done yet, loosely tent a piece of aluminum foil over the top for the last 15 to 20 minutes of baking. This prevents the crust from burning while the inside finishes cooking.
Cooking Tips & Techniques
I have ruined more quick breads than I care to admit, and every single failure taught me something useful. Here are the lessons I learned the hard way so you don’t have to:
Don’t overmix the batter. I know I said this already, but it deserves repeating because it is the number one mistake people make. Quick bread batter should be stirred until the flour just disappears. If you keep stirring to chase down every tiny lump, you’ll end up with a loaf that is dense and tough instead of light and tender. A few flour streaks are fine—they’ll disappear during baking.
Use room temperature ingredients. Cold eggs and cold bananas will make your batter seize up and create an uneven texture. Leave your eggs on the counter for 20 minutes before starting. If you forgot to plan ahead, place the eggs in a bowl of warm water for 5 minutes. For the bananas, if they’re cold from the fridge, mash them and let them sit for 10 minutes before mixing.
Measure your flour correctly. This is a small thing that makes a huge difference. Spoon the flour into your measuring cup, then level it off with the back of a knife. Scooping directly from the bag packs the flour down and adds an extra 20 to 30 percent more flour than the recipe calls for. That extra flour will suck the moisture right out of your bread.
Let it cool completely before slicing. I once cut into a loaf 10 minutes after it came out of the oven because I couldn’t wait. The center was still steaming and the whole thing fell apart into a pile of delicious but ugly crumbs. The bread continues to set as it cools, and the flavors meld together. Patience pays off here.
Trust your senses over the timer. Ovens run at different temperatures. A toothpick test is more reliable than the clock. If your kitchen smells like warm pumpkin and banana and the top is golden brown and springy to the touch, it is probably done. The toothpick is just confirmation.
Variations & Adaptations
This recipe is forgiving enough to handle plenty of tweaks. Here are a few ways I’ve adapted it depending on what I had in the pantry or who I was baking for:
Chocolate Chip Pumpkin Banana Bread: Fold in ⅓ cup of semi-sweet chocolate chips along with the dry ingredients. The chocolate adds a little richness that plays beautifully with the warm spices. My kids prefer this version and honestly, so do I sometimes.
Gluten-Free Version: Substitute the all-purpose flour with a 1:1 gluten-free baking blend that contains xanthan gum. I’ve tested this with King Arthur Measure for Measure and Bob’s Red Mill 1-to-1, and both worked well. The texture is slightly more crumbly, but the flavor is just as good.
Vegan Version: Replace the two eggs with flax eggs (2 tablespoons ground flaxseed mixed with 6 tablespoons water, left to thicken for 5 minutes). Use coconut oil or a neutral vegetable oil instead of butter. The bread will be a little denser and slightly less fluffy, but still delicious and moist.
Spice It Up: Add ¼ teaspoon ground ginger and a pinch of cloves along with the cinnamon and nutmeg for a more complex spice profile. This turns it into something closer to a pumpkin pie bread, which is perfect for holiday breakfasts.
Nut-Free Option: Skip the walnuts or pecans and add pumpkin seeds or sunflower seeds for crunch instead. Or just leave the add-ins out entirely—the bread is perfectly good on its own.
I once made this with a mashed sweet potato instead of pumpkin (I was out of canned pumpkin and desperate) and it worked surprisingly well. The sweet potato made the bread a little denser and slightly sweeter, but the texture was still tender and moist. So if you’re in a pinch, sweet potato is a solid backup.
Serving & Storage Suggestions
This bread is at its absolute best the day it is baked, still slightly warm from the oven with a thin slather of salted butter melting into every crevice. That is the gold standard. But it stays remarkably good for several days after, too.
Room Temperature: Wrap the cooled loaf tightly in plastic wrap or store it in an airtight container at room temperature for up to 4 days. The flavor actually improves after day one as the spices settle and the banana flavor deepens. I actually prefer the bread on day two—it is somehow more moist and the flavors are more rounded.
Refrigerator: If you live in a warm or humid climate, you can store the bread in the fridge for up to a week. Just wrap it well to prevent it from drying out. Let slices come to room temperature before eating, or warm them briefly in the microwave for 10 to 15 seconds.
Freezer: This bread freezes beautifully. Wrap the completely cooled loaf tightly in plastic wrap, then in a layer of aluminum foil, and freeze for up to 3 months. You can also slice the bread before freezing and pull out individual slices as needed. To thaw, leave the wrapped loaf on the counter for a few hours or unwrap a slice and microwave for 20 seconds.
Reheating: For that fresh-from-the-oven experience, reheat slices in a toaster oven at 350°F for 5 to 7 minutes, or in a skillet with a little butter for a crispy edge. The microwave works in a pinch but will make the bread softer and slightly gummy.
What to serve with it: A hot cup of coffee or chai tea is the obvious pairing. For a more indulgent breakfast, serve it with a dollop of Greek yogurt and a drizzle of honey. For dessert, warm a slice and top it with vanilla ice cream and a sprinkle of cinnamon. If you’re hosting a brunch, this bread pairs beautifully with a creamy overnight crème brûlée French toast bake for a spread that covers both classic and creative.
Nutritional Information & Benefits
Here is the estimated nutritional breakdown for one slice of this pumpkin banana bread (based on 10 slices, without add-ins):
| Nutrient | Amount Per Slice |
|---|---|
| Calories | 215 |
| Total Fat | 9g |
| Saturated Fat | 1.5g |
| Carbohydrates | 33g |
| Fiber | 2g |
| Sugar | 17g |
| Protein | 4g |
| Vitamin A | 65% DV |
| Potassium | 180mg |
Pumpkin is loaded with vitamin A, which supports eye health and immune function. Bananas contribute potassium and vitamin B6, which help with heart health and energy metabolism. This bread is not exactly health food, but it uses significantly less oil than many traditional quick bread recipes thanks to the moisture from the pumpkin and banana. If you’re looking for a lower-sugar option, you can reduce the granulated sugar to ⅓ cup and the brown sugar to 2 tablespoons—the bananas will still provide plenty of sweetness.
For a healthier twist that still satisfies your sweet tooth, try pairing this with a healthy low-sugar zucchini banana muffin for a breakfast that feels indulgent but is actually pretty balanced.
Conclusion
This easy one-bowl pumpkin banana bread is the kind of recipe that becomes a habit. It uses ingredients you already have, takes about 10 minutes to prep, and fills your kitchen with a smell that makes everyone wander in asking what you’re baking. It is forgiving enough for beginner bakers and reliable enough for experienced ones who just want a no-fuss loaf that turns out right every time.
The combination of pumpkin and banana might sound unusual if you haven’t tried it, but trust me—it works. The banana keeps everything tender and sweet, while the pumpkin adds a cozy, earthy depth that makes this bread feel like fall in every bite. Whether you eat it for breakfast with coffee, as an afternoon snack with butter, or as a simple dessert with a scoop of ice cream, it delivers every single time.
I would love to hear how this turns out for you. Did you add chocolate chips? Swap in pecans? Try it with sweet potato? Drop a comment below and let me know your favorite variation. And if you make this for a gathering, share a photo and tag me—I always love seeing your bakes. Happy baking, friends!
Frequently Asked Questions
Can I use fresh pumpkin instead of canned?
Yes, you can. Roast a small sugar pumpkin, scoop out the flesh, and puree it until smooth. Just make sure to drain off any excess liquid before measuring, because fresh pumpkin can be more watery than canned. You want a thick puree, not a runny one.
Why did my bread sink in the middle?
This usually happens for one of three reasons: the batter was overmixed, the oven door was opened too early, or the bread was underbaked. Make sure your oven is fully preheated, don’t open the door for the first 40 minutes, and always do the toothpick test before pulling it out.
Can I make this into muffins instead of a loaf?
Absolutely. Grease a 12-cup muffin tin or line it with paper liners. Divide the batter evenly among the cups and bake at 350°F for 18 to 22 minutes, or until a toothpick inserted in the center comes out clean. Muffins will bake faster than a loaf, so start checking at 18 minutes.
How do I know when my bananas are ripe enough?
Look for bananas that are heavily spotted with brown patches or even fully brown. They should be soft to the touch and smell sweet. If your bananas are still yellow with green tips, they aren’t ripe enough to mash properly and won’t give you enough sweetness or moisture.
Can I reduce the sugar in this recipe?
Yes, you can reduce the granulated sugar to ⅓ cup and the brown sugar to 2 tablespoons without major issues. The bread will be less sweet, but the bananas and pumpkin still provide natural sweetness. If you reduce it further, the texture may become slightly drier, so I wouldn’t recommend going lower than that.
PrintEasy One-Bowl Pumpkin Banana Bread Recipe (Perfect Fall Treat)
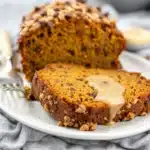
This easy one-bowl pumpkin banana bread combines the best of both worlds: the moist tenderness of banana bread with the cozy, earthy depth of pumpkin. No mixer needed, just a fork and a bowl for a perfectly spiced, crowd-pleasing loaf.
- Prep Time: 10 minutes
- Cook Time: 55 minutes
- Total Time: 1 hour 5 minutes
- Yield: 10 servings 1x
- Category: Dessert
- Cuisine: American
Ingredients
- 1 ½ cups all-purpose flour (spooned and leveled)
- 1 teaspoon baking soda
- 1 teaspoon ground cinnamon
- ½ teaspoon ground nutmeg
- ½ teaspoon salt
- 1 cup pumpkin puree (canned, not pumpkin pie filling)
- 2 large ripe bananas, mashed (about 1 cup)
- ⅓ cup vegetable oil (or canola, avocado, or melted coconut oil)
- ½ cup granulated sugar
- ¼ cup brown sugar, packed (light or dark)
- 2 large eggs, room temperature
- 1 teaspoon vanilla extract
- ½ cup chopped walnuts or pecans (optional)
- ⅓ cup chocolate chips (optional, semi-sweet or dark)
- 2 tablespoons pepitas (pumpkin seeds) for topping (optional)
Instructions
- Preheat oven to 350°F (175°C). Grease a 9×5-inch loaf pan with butter or non-stick spray, then line with parchment paper leaving an overhang on the two long sides.
- In a large mixing bowl, mash the bananas with a fork until mostly smooth with a few small lumps.
- Add pumpkin puree, vegetable oil, granulated sugar, brown sugar, eggs, and vanilla extract to the bowl. Stir until fully combined and smooth.
- Sprinkle flour, baking soda, cinnamon, nutmeg, and salt evenly over the wet mixture. Stir gently with a spatula or wooden spoon until just combined (a few streaks of flour are fine).
- If using, fold in walnuts, pecans, or chocolate chips with a few quick strokes.
- Pour batter into prepared loaf pan and spread evenly. Sprinkle pepitas on top if desired.
- Bake for 50 to 60 minutes, until a toothpick inserted in the center comes out clean or with a few moist crumbs. If top browns too quickly, tent with foil for the last 15-20 minutes.
- Cool in pan on a wire rack for 15 minutes, then lift out using parchment overhang and cool completely on rack before slicing.
Notes
For best results, use room temperature eggs and very ripe bananas. Do not overmix the batter. If using a dark non-stick pan, reduce oven temperature by 25°F. The bread freezes well for up to 3 months.
Nutrition
- Serving Size: 1 slice
- Calories: 215
- Sugar: 17
- Sodium: 180
- Fat: 9
- Saturated Fat: 1.5
- Carbohydrates: 33
- Fiber: 2
- Protein: 4
Keywords: pumpkin banana bread, easy one-bowl recipe, fall quick bread, moist pumpkin bread, banana pumpkin loaf


