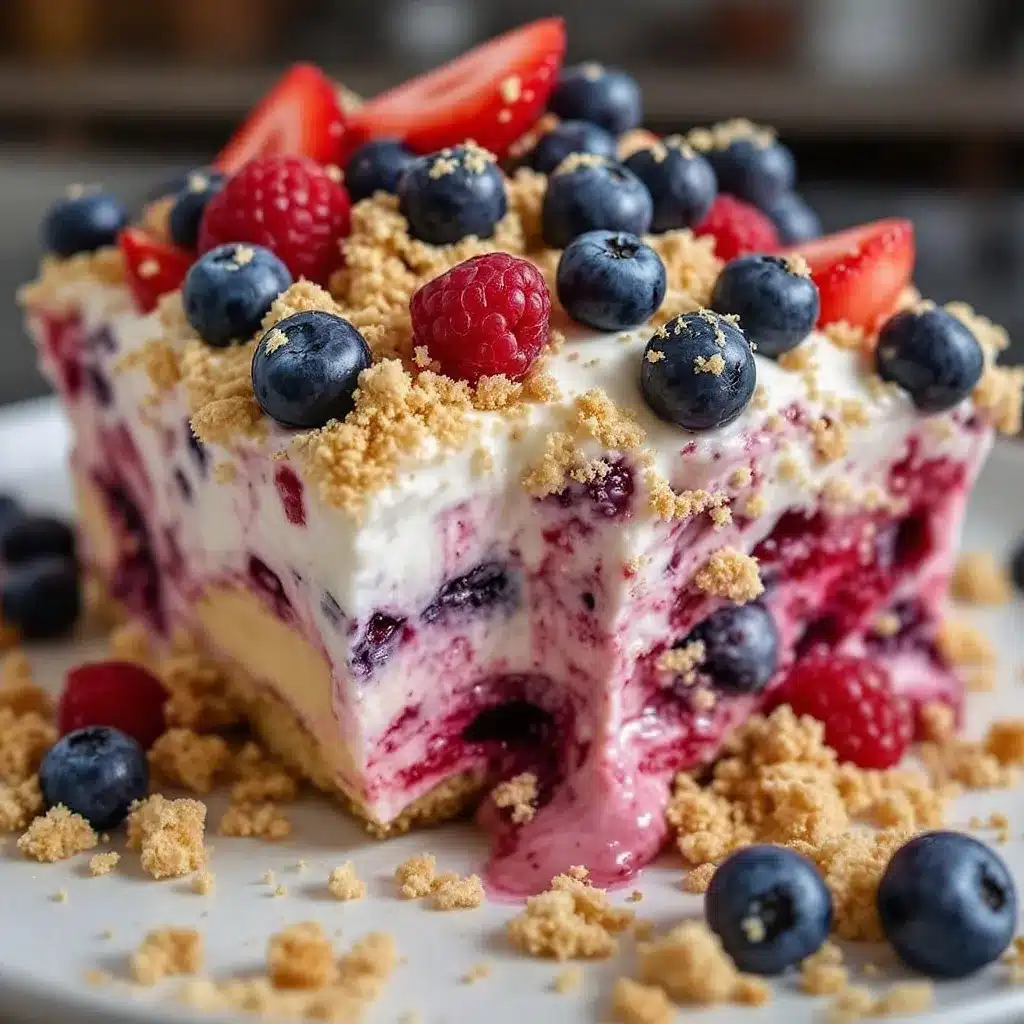
The bowl came back to the kitchen completely empty. Not a single blueberry left, no cream residue, nothing. My sister-in-law actually licked her spoon clean before handing it over. That’s when I knew this red, white, and blue berry trifle was something special.
It wasn’t supposed to be a big deal, honestly. Labor Day weekend was creeping up, and I needed a dessert that looked impressive but didn’t require sweating over a hot oven for hours. You know how those late summer afternoons get—the last thing anyone wants is to turn on the oven when the AC is already struggling. I had some fresh berries from the farmers’ market, a block of cream cheese, and a box of angel food cake I’d picked up on a whim. The whole thing came together in about twenty minutes, and I nearly didn’t photograph it because I figured it was too simple to share.
But then people started asking for the recipe. Not the polite “oh, this is good” kind of asking, but the genuine “I need this for my own cookout” kind. My neighbor texted me at 9 PM for the details. My cousin requested it for her end-of-summer barbecue. The best red, white, and blue berry trifle for Labor Day had accidentally become my most requested dessert of the season, and I hadn’t even meant to create anything special.
That’s usually how the good ones happen, isn’t it? When you’re not trying to impress anyone, when you’re just throwing things together with what you have, that’s when the magic shows up. So here it is—the dessert that stole the show at our cookout without even trying.
Why You’ll Love This Recipe
I’ve tested this trifle at four different gatherings now, and it has never let me down. Here is why this version stands out from every other berry dessert you will find online:
- No Oven Required : You don’t even need to turn on the stove. This is a true no-bake dessert that comes together in under 30 minutes with zero heat. Perfect for those sweltering late summer afternoons when you need something cold and sweet.
- Simple Ingredients : Everything comes from a regular grocery store. No specialty baking supplies, no obscure extracts, no trips to three different stores. You probably have half of these things already.
- Perfect for Labor Day : The colors speak for themselves. Red strawberries, white cream, and blueberries make this the ultimate patriotic dessert without any artificial coloring or themed sprinkles. It looks like you planned it for the holiday, even if you didn’t.
- Crowd-Pleaser : I watched a group of six adults demolish an entire trifle bowl in under fifteen minutes. Kids love it too, which is rare for a dessert that isn’t chocolate-based.
- Make-Ahead Friendly : This actually gets better after sitting in the fridge for a few hours. You can assemble it the morning of your cookout and forget about it until dessert time.
What makes this version different is the cream layer. Most trifles use plain whipped cream or instant pudding, but I blend cream cheese with stabilized whipped cream for a filling that holds its shape, doesn’t get soggy, and has that perfect tangy sweetness that cuts through all the fruit. It is not the quickest shortcut, but trust me on this one—the texture difference is worth the extra few minutes.
This is the kind of dessert that makes people close their eyes after the first bite. It is simple, honest, and exactly what you want at the end of a long summer day spent with people you love.
What Ingredients You Will Need
This recipe uses straightforward ingredients that work together to create something greater than the sum of their parts. The magic is in the balance—sweet cream, tart berries, and light cake all layered together.
For the Cream Layer
- 8 oz cream cheese, softened to room temperature (I prefer Philadelphia brand for its consistent texture)
- 1 cup powdered sugar, sifted (this prevents lumps in the cream)
- 2 cups heavy whipping cream, cold (look for at least 36% milk fat for best results)
- 1 teaspoon vanilla extract (use pure vanilla, not imitation, for the cleanest flavor)
- Pinch of salt (this balances the sweetness and makes the flavors pop)
For the Berry Layers
- 2 cups fresh strawberries, hulled and sliced (about 1 pound)
- 2 cups fresh blueberries (about 6 ounces)
- 1 tablespoon granulated sugar (optional, only if your berries are tart)
- 1 teaspoon lemon juice (this brightens the berries without making them sour)
For the Cake Layer
- 1 store-bought angel food cake, cut into 1-inch cubes (about 10-12 ounces)
- Alternatively, you can use 1 pound cake or 1 batch of homemade vanilla sponge cake if you prefer a denser texture
For Garnish
- Fresh mint leaves (optional, but adds a beautiful pop of green)
- Extra berries for the top layer
- White chocolate shavings (optional, for a fancy touch)
A few ingredient notes from my experience: If your berries are out of season and lack sweetness, toss them with the sugar and lemon juice and let them sit for 10 minutes before layering. This maceration process draws out their natural juices and makes them taste like summer again. For the cream cheese, do not skip the softening step. Cold cream cheese will leave you with lumpy cream that never fully comes together. Set it out on the counter about an hour before you start.
If you want to lighten things up, you can use low-fat cream cheese and still get good results, though the texture won’t be quite as luxurious. For a dairy-free version, use a high-quality vegan cream cheese and canned coconut cream whipped to stiff peaks. The flavor changes slightly, but it still works beautifully.
Equipment Needed
You do not need any fancy equipment for this recipe, which is part of why I love it so much. Here is what you will need:
- Large trifle bowl or glass serving dish (a 4-quart bowl works perfectly; a clear glass one shows off the beautiful layers)
- Electric hand mixer or stand mixer (you can whip the cream by hand, but your arm will thank you for using a mixer)
- Large mixing bowl for the cream mixture
- Medium mixing bowl for the berries
- Sharp knife for slicing strawberries and cutting the cake
- Cutting board
- Rubber spatula for folding the cream and scraping every last bit
- Measuring cups and spoons
If you don’t have a trifle bowl, any large glass bowl will work. I have used a glass salad bowl in a pinch, and it looked just as pretty. The key is transparency—you want people to see those red, white, and blue stripes before they even take a bite. If you are making this for a potluck, a disposable clear plastic container works fine too. I have done that for picnics, and nobody complained.
Preparation Method
Let me walk you through this step by step. The whole process takes about 25 minutes of active time, plus chilling time. I have included all the little details that make the difference between a good trifle and a great one.
Step 1: Prepare the Berries
Rinse the strawberries and blueberries under cold water and pat them dry with paper towels. Wet berries will make the cream watery, so take this step seriously. Hull the strawberries and slice them into even pieces, about a quarter-inch thick. If your berries seem tart, toss them in a bowl with the granulated sugar and lemon juice. Let them sit while you prepare the cream. You will notice the berries releasing their juice, which will soak into the cake layers beautifully.
Step 2: Make the Cream Cheese Base
In a large mixing bowl, beat the softened cream cheese with an electric mixer on medium speed until it is completely smooth and fluffy, about 2 minutes. Scrape down the sides of the bowl halfway through. Add the sifted powdered sugar and beat on low speed until incorporated, then increase to medium and beat for another minute. The mixture should look light and airy with no lumps. Add the vanilla extract and pinch of salt, and mix until combined.
Step 3: Whip the Heavy Cream
In a separate bowl (or in the same bowl if you transfer the cream cheese mixture to another container), pour the cold heavy whipping cream. Using clean beaters, whip the cream on medium-high speed until soft peaks form. You are looking for the cream to hold its shape when you lift the beaters, but still be soft and billowy. This takes about 3-4 minutes with a hand mixer. Be careful not to overwhip, or you will end up with butter.
Step 4: Fold Everything Together
Add the whipped cream to the cream cheese mixture in two additions. Using a rubber spatula, gently fold the cream into the cream cheese. Do not stir or mix vigorously. You want to maintain as much air as possible. Fold until just combined—a few streaks of white are fine. The final mixture should be smooth, creamy, and thick enough to hold its shape when spooned.
Step 5: Cut the Cake
Take your angel food cake and cut it into 1-inch cubes. Do not worry about being perfect here. Rough cubes work great and create interesting texture. If you are using pound cake, cut slightly smaller cubes since pound cake is denser. You should end up with about 6 cups of cake cubes total.
Step 6: Layer the Trifle
Now comes the fun part. Start with a layer of cake cubes at the bottom of your trifle bowl. Use about one-third of the cake. Spread them out evenly. Spoon about one-third of the cream mixture over the cake and spread it gently. You do not need to press down—the cake will absorb moisture from the cream naturally. Add a layer of strawberries, then a layer of blueberries. Repeat the layers: cake, cream, berries. Finish with a final layer of cake, then the remaining cream on top. Spread the cream so it covers the top completely and reaches the edges of the bowl. This seals the cake underneath and keeps everything moist.
Step 7: Garnish and Chill
Arrange the remaining fresh berries on top of the cream in a decorative pattern. I like to create alternating rows of strawberries and blueberries, or a ring of strawberries around the edge with blueberries in the center. Add a few mint leaves for color if you have them. Cover the trifle loosely with plastic wrap and refrigerate for at least 4 hours, but overnight is better. The chilling time allows the flavors to meld and the cake to soften into the cream.
Pro tip from my kitchen : If you are in a rush, you can serve this immediately, but the texture will be different. The cake will be firmer, and the layers will be more distinct. It is still delicious, but the magic really happens after a few hours in the fridge. I once served it after only 2 hours of chilling, and while everyone still loved it, the next-day leftovers were noticeably better.
Cooking Tips & Techniques
After making this trifle about a dozen times over the past month, I have learned a few things the hard way. Here are the tips that will save you from my mistakes.
Do not skip the cream cheese stabilization. I tried making this with just whipped cream once, thinking it would save time. The result was a soupy mess that collapsed within an hour. The cream cheese gives the cream structure and prevents it from weeping into the cake layers. It also adds that subtle tang that makes the dessert taste more sophisticated than it actually is.
Pat your berries dry. This seems like a small detail, but wet berries release water that thins out your cream and makes the whole trifle runny. I learned this lesson when I made a trifle for a potluck and arrived with a dessert that had turned into soup. Wash your berries, lay them on a clean kitchen towel, and let them air dry for 15 minutes before slicing.
Let the trifle sit before serving. I know I mentioned this already, but it bears repeating. The first time I made this, I served it after only an hour of chilling, and the cake cubes were still firm and chewy. By the next morning, the cake had softened into this dreamy, custard-like texture that was infinitely better. Give it time.
Use cold cream for whipping. Heavy cream whips best when it is straight from the refrigerator. If your cream is even slightly warm, it will take longer to whip and may never reach stiff peaks. I keep my cream in the coldest part of the fridge until the moment I need it.
Layer with intention. The order of your layers matters. Putting berries directly against the glass creates the most dramatic visual effect. When you press the berries against the sides of the bowl, they create those beautiful stripes of red and blue that make this dessert so photogenic. Take an extra minute to arrange the berries along the glass as you add each layer.
One mistake I still make : Overfilling the bowl. Trifle bowls look smaller than they are, and I have overflowed more than one. Leave at least an inch of space at the top for your garnish layer. Trust me, you do not want to be scraping cream off your counter at 10 PM.
Variations & Adaptations
One of the best things about this trifle is how adaptable it is. Here are some variations I have tried and loved:
Mixed Berry Medley : Swap the blueberries and strawberries for any combination of fresh berries. Raspberries, blackberries, and sliced peaches all work beautifully. In late summer, I add sliced nectarines and raspberries for a different flavor profile. The colors shift to gold and red, but the taste is just as good.
Lemon Berry Trifle : Add the zest of one lemon to the cream cheese mixture and substitute lemon curd for one of the berry layers. The bright citrus notes cut through the richness of the cream and complement the berries perfectly. I made this version for a bridal shower, and it was the first thing to disappear.
Gluten-Free Option : Use a gluten-free angel food cake or gluten-free pound cake. Most store-bought angel food cakes are naturally gluten-free since they are made primarily from egg whites and sugar, but always check the label. You can also use gluten-free vanilla cake cubes if you prefer a denser texture.
Dairy-Free Version : Replace the cream cheese with a high-quality vegan cream cheese and use chilled coconut cream instead of heavy whipping cream. The coconut cream needs to be whipped when very cold, and it will not be as stable as dairy cream, so serve the trifle within a few hours of assembling. The coconut flavor is subtle and actually pairs nicely with the berries.
Individual Servings : Instead of one large trifle, layer the ingredients in small mason jars or clear dessert cups. These individual servings are perfect for parties where people are standing and mingling. They also make great take-home favors if you have leftovers. I made these for a Fourth of July picnic, and everyone loved having their own personal trifle.
Serving & Storage Suggestions
This trifle is best served cold, straight from the refrigerator. The contrast between the chilled cream and the soft, soaked cake is what makes every bite special. I like to let the trifle sit at room temperature for about 10 minutes before serving, just to take the edge off the cold, but that is entirely optional.
For presentation, use a large serving spoon that can reach the bottom of the bowl and scoop through all the layers. You want each serving to have a bit of everything—cake, cream, and berries. If you are serving this at a party, set out small dessert plates and forks, or use clear cups for individual portions.
This dessert pairs beautifully with a cup of coffee or iced tea. If you are serving it for a Labor Day cookout, it goes wonderfully with grilled meats and fresh salads. I often serve it after my street corn pasta salad or alongside tomato tortellini soup for a lighter meal. The creaminess of the trifle balances the savory elements of the main course.
Storage : Cover the trifle tightly with plastic wrap and store it in the refrigerator for up to 3 days. The texture will continue to soften over time, but it remains delicious. I actually prefer the trifle on day two, when the cake has fully absorbed the cream and the flavors have melded completely.
Freezing : I do not recommend freezing this trifle. The cream cheese mixture will separate when thawed, and the berries will release too much water, leaving you with a watery, grainy mess. If you need to make this ahead, assemble it up to 24 hours in advance and keep it refrigerated.
Reheating : This is a cold dessert, so no reheating is needed. If you have leftovers that have been sitting out for more than 2 hours, discard them. The dairy and berries do not do well at room temperature for extended periods.
Nutritional Information & Benefits
While this is definitely a treat, it does offer some nutritional benefits worth noting. Here is the estimated nutritional breakdown per serving (based on 12 servings):
| Nutrient | Amount Per Serving |
|---|---|
| Calories | 285 |
| Total Fat | 18g |
| Saturated Fat | 11g |
| Cholesterol | 65mg |
| Sodium | 210mg |
| Total Carbohydrates | 29g |
| Dietary Fiber | 2g |
| Sugars | 20g |
| Protein | 4g |
| Vitamin C | 35% DV |
| Calcium | 8% DV |
The fresh berries in this recipe provide a good dose of vitamin C and antioxidants. Blueberries are particularly rich in anthocyanins, which have been linked to heart health and cognitive function. Strawberries are an excellent source of vitamin C and manganese. The cream cheese and heavy cream add calcium and protein, though they also bring saturated fat, so this is definitely an occasional treat rather than an everyday dessert.
If you are watching your sugar intake, you can reduce the powdered sugar in the cream layer by half and skip the sugar on the berries. The natural sweetness of the fruit and cake will still carry the dessert. For a lower-calorie version, use low-fat cream cheese and light whipped topping instead of homemade whipped cream, though the texture will be less luxurious.
This recipe contains dairy and gluten (from the angel food cake). For allergen-friendly alternatives, see the variations section above.
Conclusion
This red, white, and blue berry trifle has become my go-to summer dessert for a reason. It is simple enough to throw together on a lazy Sunday afternoon, yet impressive enough to serve at a holiday gathering. The colors are stunning, the flavors are balanced, and the texture is pure comfort.
What I love most about this recipe is how forgiving it is. You can swap berries, change the cake, adjust the sweetness, and it still turns out beautifully. It does not demand perfection—it just asks for good ingredients and a little patience while it chills. That is my kind of dessert.
I would love to hear how this trifle turns out for you. Did you try any variations? Did your family fight over the last spoonful? Drop a comment below and let me know. And if you are looking for another no-bake dessert to add to your summer rotation, try my no-bake banana pudding eclair icebox cake—it has the same creamy, layered magic with a completely different flavor profile.
Happy Labor Day, and may your cookout be filled with good food, cold drinks, and the people who make summer worth waiting for.
Frequently Asked Questions
Can I use frozen berries instead of fresh?
Fresh berries work best for this recipe because frozen berries release too much water as they thaw, which will make your cream layer runny and watery. If you must use frozen berries, thaw them completely, drain off all the liquid, and pat them very dry before using. The texture will still be softer than fresh berries, but it will work in a pinch.
How far in advance can I make this trifle?
You can assemble this trifle up to 24 hours in advance. In fact, it tastes better after sitting in the refrigerator overnight because the flavors have time to meld and the cake softens into the cream. I would not recommend making it more than 24 hours ahead, as the berries can start to break down and release moisture after that point.
Can I use a different type of cake?
Absolutely. While angel food cake gives the lightest, fluffiest texture, you can use pound cake, vanilla sponge cake, or even ladyfingers. Pound cake will give a denser, more substantial texture that holds up well to the cream. Ladyfingers create a more delicate, tiramisu-style texture. Each option changes the final result slightly, but all are delicious.
Why did my cream layer turn out runny?
Runny cream usually happens for one of three reasons: the cream cheese was not fully softened before beating, the heavy cream was overwhiped or underwhiped, or the berries were too wet when added. Make sure your cream cheese is at room temperature, whip the cream to soft peaks (not liquid, not butter), and pat your berries completely dry before layering.
Can I make this into a low-sugar version?
Yes, you can reduce the sugar in this recipe without major issues. Use a sugar substitute like monk fruit sweetener or erythritol in place of the powdered sugar in the cream layer. Skip the sugar on the berries entirely. Choose a low-sugar or sugar-free angel food cake if available. The dessert will be less sweet but still delicious, especially if your berries are naturally sweet and in season.
Pin This Recipe!
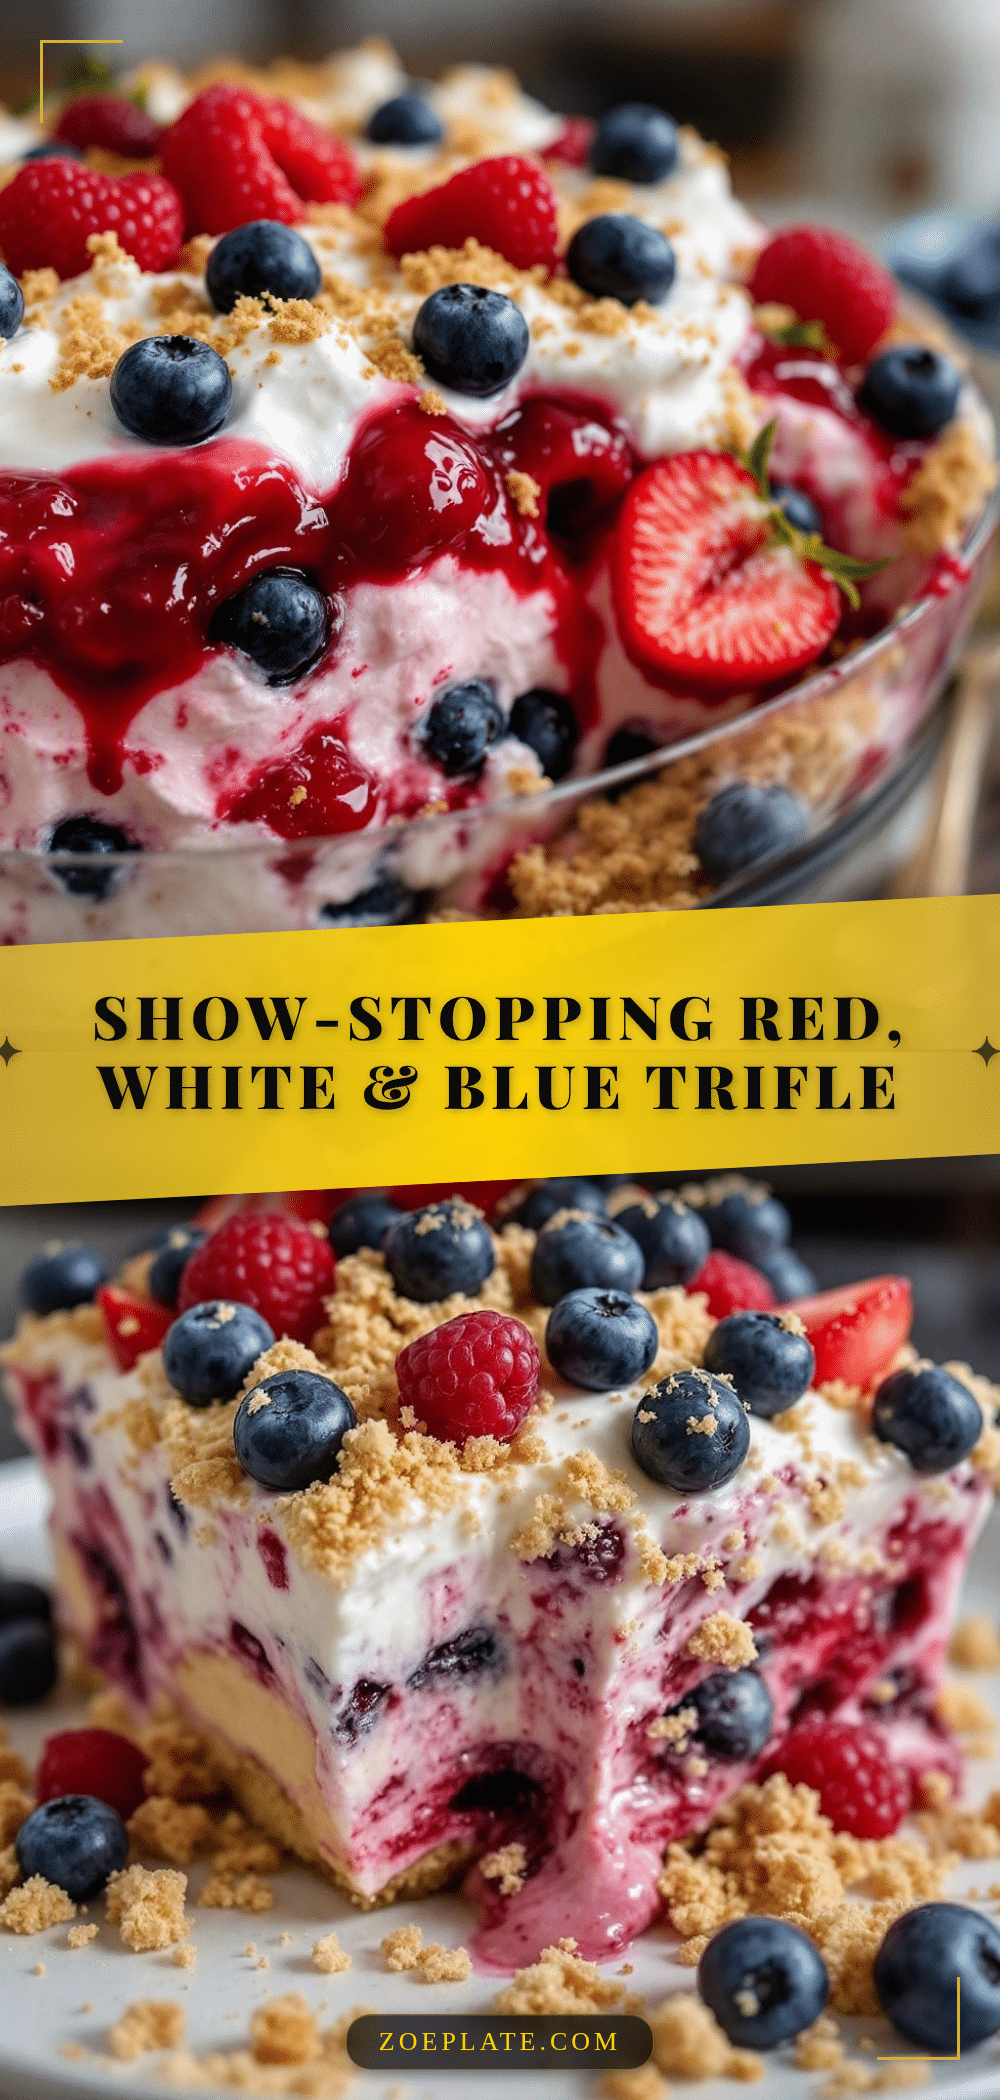
Best Red, White & Blue Berry Trifle – Easy Labor Day Dessert

A stunning no-bake berry trifle with layers of angel food cake, fresh strawberries and blueberries, and a creamy cream cheese whipped topping. Perfect for Labor Day or any summer gathering, this dessert comes together in under 30 minutes and gets even better after chilling.
- Prep Time: 25 minutes
- Cook Time: 0 minutes
- Total Time: 4 hours 25 minutes (includes chilling)
- Yield: 12 servings 1x
- Category: Dessert
- Cuisine: American
Ingredients
- 8 oz cream cheese, softened to room temperature
- 1 cup powdered sugar, sifted
- 2 cups heavy whipping cream, cold
- 1 teaspoon vanilla extract
- Pinch of salt
- 2 cups fresh strawberries, hulled and sliced (about 1 pound)
- 2 cups fresh blueberries (about 6 ounces)
- 1 tablespoon granulated sugar (optional, only if berries are tart)
- 1 teaspoon lemon juice
- 1 store-bought angel food cake, cut into 1-inch cubes (about 10–12 ounces)
- Fresh mint leaves for garnish (optional)
- Extra berries for garnish
- White chocolate shavings for garnish (optional)
Instructions
- Rinse the strawberries and blueberries under cold water and pat them dry with paper towels. Hull the strawberries and slice them into even pieces, about a quarter-inch thick. If your berries seem tart, toss them in a bowl with the granulated sugar and lemon juice. Let them sit while you prepare the cream.
- In a large mixing bowl, beat the softened cream cheese with an electric mixer on medium speed until completely smooth and fluffy, about 2 minutes. Scrape down the sides of the bowl halfway through. Add the sifted powdered sugar and beat on low speed until incorporated, then increase to medium and beat for another minute. Add the vanilla extract and pinch of salt, and mix until combined.
- In a separate bowl, pour the cold heavy whipping cream. Using clean beaters, whip the cream on medium-high speed until soft peaks form, about 3-4 minutes. Be careful not to overwhip.
- Add the whipped cream to the cream cheese mixture in two additions. Using a rubber spatula, gently fold the cream into the cream cheese until just combined. The final mixture should be smooth, creamy, and thick enough to hold its shape when spooned.
- Cut the angel food cake into 1-inch cubes. You should end up with about 6 cups of cake cubes.
- Layer the trifle: Start with a layer of cake cubes at the bottom of your trifle bowl (about one-third of the cake). Spoon about one-third of the cream mixture over the cake and spread gently. Add a layer of strawberries, then a layer of blueberries. Repeat the layers: cake, cream, berries. Finish with a final layer of cake, then the remaining cream on top. Spread the cream so it covers the top completely and reaches the edges of the bowl.
- Arrange the remaining fresh berries on top of the cream in a decorative pattern. Add a few mint leaves for color if desired. Cover the trifle loosely with plastic wrap and refrigerate for at least 4 hours, but overnight is better.
Notes
Do not skip the cream cheese stabilization; it prevents the cream from weeping. Pat berries dry to avoid runny cream. Let the trifle sit for at least 4 hours (overnight is better) for the cake to soften. Use cold cream for whipping. Layer berries against the glass for the best visual effect. Leave at least an inch of space at the top for garnish.
Nutrition
- Serving Size: 1 serving (1/12 of r
- Calories: 285
- Sugar: 20
- Sodium: 210
- Fat: 18
- Saturated Fat: 11
- Carbohydrates: 29
- Fiber: 2
- Protein: 4
Keywords: red white and blue trifle, labor day dessert, no bake dessert, berry trifle, patriotic dessert, summer dessert, cream cheese trifle, angel food cake dessert