I need a Halloween dessert that actually looks like it belongs at the party, not just something orange and pumpkin-spiced thrown on a plate. That’s the thought running through my head as I stare at my mixing bowl, and honestly, I’m tired of the same old ghost-shaped cookies that crumble the second you look at them. These black cat chocolate cupcakes hit me like a lightning bolt—dark, rich, and completely recognizable as a little feline face staring up from a cupcake liner. I wanted something that would make my niece squeal when she saw it on the dessert table, and let me tell you, the first time I piped those little ears and added candy eyes, I knew I’d stumbled onto something special.
The chocolate base came from a late-night craving when I was testing a new cocoa powder I’d bought on a whim. I kept tweaking the batter until it was moist enough to hold up under frosting without crumbling into a mess, because nothing ruins a cute cupcake faster than structural failure. There’s something deeply satisfying about taking a simple chocolate cupcake and turning it into a character that makes people smile before they even take a bite. These aren’t just cupcakes—they’re little edible black cats ready to haunt your Halloween party in the best possible way.
I’ve made these for three Halloweens now, and they never fail to get that double-take reaction. The first bite usually comes with a laugh, which is exactly what I want from a holiday dessert. They’re the kind of treat that makes you feel like you actually put in effort, even though the decorating is surprisingly forgiving. Trust me on this one.
Why You’ll Love This Recipe
These black cat chocolate cupcakes solve the eternal Halloween problem—you want something that looks impressive but doesn’t require an art degree to decorate. I’ve tested this recipe on total beginners and experienced bakers, and everyone ends up with a tray of cats that actually look like cats.
- Quick & Easy : From start to finish, you’re looking at about 45 minutes. The decorating takes maybe 10 minutes once the cupcakes cool.
- Simple Ingredients : Nothing weird here. Cocoa powder, butter, sugar, eggs—the usual suspects that are probably already in your pantry.
- Perfect for Halloween Parties : These steal the show at any gathering. Kids love them, adults pretend they’re too cool but eat three anyway.
- Crowd-Pleaser : I brought these to a potluck last year and watched a grown man carefully remove the candy eyes before eating the cupcake with reverence.
- Unbelievably Delicious : The chocolate base is moist, rich, and not too sweet. The frosting is a silky buttercream that balances perfectly with the dark cocoa.
What makes these different from every other Halloween cupcake out there is the technique. I figured out that using a specific piping tip for the ears makes them look like actual cat ears instead of sad little frosting blobs. Plus, I add a touch of espresso powder to the batter that deepens the chocolate flavor without making it taste like coffee. It’s those little details that turn a good cupcake into the one people ask for year after year.
This is comfort food with a costume on. It’s the dessert that makes you close your eyes after the first bite, then open them and laugh because there’s a tiny cat face staring back at you. Perfect for impressing guests without the stress, or turning a simple Halloween gathering into something memorable.
What Ingredients You Will Need
This recipe uses simple, wholesome ingredients to deliver bold chocolate flavor and a moist, tender crumb. Most of these are pantry staples, which means you can whip these up on a whim without a special trip to the store.
For the Chocolate Cupcakes
- 1 ½ cups all-purpose flour (spooned and leveled for accuracy)
- 1 cup granulated sugar
- ½ cup unsweetened cocoa powder (I prefer Ghirardelli for its deep color and rich flavor)
- 1 teaspoon baking soda
- ½ teaspoon baking powder
- ½ teaspoon salt
- 1 teaspoon espresso powder (optional but highly recommended—it deepens the chocolate without adding coffee flavor)
- 1 cup buttermilk (room temperature—this is key for a tender crumb)
- ½ cup vegetable oil (keeps the cupcakes moist for days)
- 2 large eggs (room temperature)
- 1 teaspoon vanilla extract
- ½ cup hot water (this helps bloom the cocoa powder for a richer flavor)
For the Black Buttercream Frosting
- 1 cup unsalted butter (softened to room temperature)
- 3 ½ cups powdered sugar
- ¼ cup heavy cream (or whole milk in a pinch)
- 1 teaspoon vanilla extract
- 2-3 tablespoons black cocoa powder (this gives the frosting that true black color without staining your teeth)
- Black gel food coloring (optional, for a deeper shade)
For Decorating the Black Cat Faces
- Candy eyes (the half-sphere kind work best—they look more realistic than flat ones)
- Pink candy melts or pink frosting (for the little noses and inner ears)
- Black licorice strings (cut into small pieces for whiskers—or use black frosting if you prefer)
- Piping bag with a small round tip (for the ears and details)
If you don’t have buttermilk, you can make a quick substitute by adding 1 tablespoon of lemon juice or white vinegar to 1 cup of milk and letting it sit for 5 minutes. For the black cocoa powder, I really recommend tracking some down—it’s what gives the frosting that deep, almost charcoal color that makes the cats look like actual black cats instead of grayish brown ones. You can find it at most baking supply stores or online.
Equipment Needed
You don’t need a professional bakery setup for these, but having the right tools makes the process smoother. Here’s what I use every time I make these black cat chocolate cupcakes.
- Standard 12-cup muffin tin (non-stick is ideal)
- Cupcake liners (black or orange liners add to the Halloween vibe, but white works fine too)
- Large mixing bowls (one for dry ingredients, one for wet)
- Whisk and rubber spatula
- Electric hand mixer or stand mixer (for the frosting—you can whisk by hand, but your arm will hate you)
- Piping bags (disposable ones are fine, or reusable if you’re eco-conscious)
- Piping tips (a large round tip for the main frosting body, and a small round tip for the ears and details)
- Cooling rack (essential for even cooling—don’t skip this)
- Small offset spatula (helps smooth the frosting if you’re not piping)
If you don’t have piping bags, you can use a sturdy zip-top bag with the corner snipped off. It’s not as precise, but it works in a pinch. I’ve done it more times than I care to admit.
Preparation Method
Let’s get into the actual process. I’ve broken this down into clear steps with all the little notes I wish someone had told me the first time I made these.
Step 1: Preheat and Prepare
Preheat your oven to 350°F (175°C). Line your muffin tin with cupcake liners—this recipe makes exactly 12 standard cupcakes, so no weird math required. Set the tin aside while you mix the batter.
Step 2: Mix the Dry Ingredients
In a large bowl, whisk together the flour, sugar, cocoa powder, baking soda, baking powder, salt, and espresso powder. Make sure there are no lumps—cocoa powder loves to clump, so really get in there with the whisk. I usually sift mine if I’m feeling fancy, but whisking vigorously works just as well.
Step 3: Combine the Wet Ingredients
In a separate bowl, whisk together the buttermilk, vegetable oil, eggs, and vanilla extract until smooth. The mixture should look uniform and slightly thick. If your eggs are cold, they’ll seize up the buttermilk, so make sure everything is at room temperature. I learned this the hard way when my batter looked like curdled sadness.
Step 4: Bring It All Together
Pour the wet ingredients into the dry ingredients and stir with a rubber spatula until just combined. Do not overmix—stop as soon as you don’t see any more streaks of flour. A few lumps are totally fine. Now add the hot water and stir gently until the batter is smooth and thin. It will look very liquidy, but that’s exactly what you want. This hot water technique is what gives these cupcakes that ultra-moist, almost fudgy texture.
Step 5: Fill the Liners
Divide the batter evenly among the 12 cupcake liners. I use a ¼-cup measuring cup for this, filling each liner about two-thirds full. Don’t overfill them, or you’ll get muffin tops that don’t look cat-like later. Trust me on this one.
Step 6: Bake
Bake for 18-22 minutes, or until a toothpick inserted into the center comes out with just a few moist crumbs. The tops should spring back when lightly pressed. Rotate the pan halfway through baking if your oven runs hot. Let the cupcakes cool in the pan for 5 minutes, then transfer them to a cooling rack to cool completely. Do not frost warm cupcakes—the frosting will slide right off and you’ll end up with a sad, melted mess.
Step 7: Make the Black Buttercream
While the cupcakes cool, make the frosting. Beat the softened butter with an electric mixer on medium speed until smooth and creamy, about 2 minutes. Add the powdered sugar one cup at a time, beating on low speed after each addition. Pour in the heavy cream and vanilla extract, then increase the speed to medium-high and beat for 3-4 minutes until light and fluffy. Add the black cocoa powder and beat until fully incorporated. If the color isn’t dark enough for your liking, add a tiny bit of black gel food coloring—but start with a toothpick amount, because a little goes a long way.
Step 8: Pipe the Frosting
Transfer the frosting to a piping bag fitted with a large round tip. Pipe a generous swirl onto each cooled cupcake, starting from the outside and working your way inward. You want a nice rounded dome shape for the cat’s head. Smooth it slightly with an offset spatula if needed.
Step 9: Create the Cat Faces
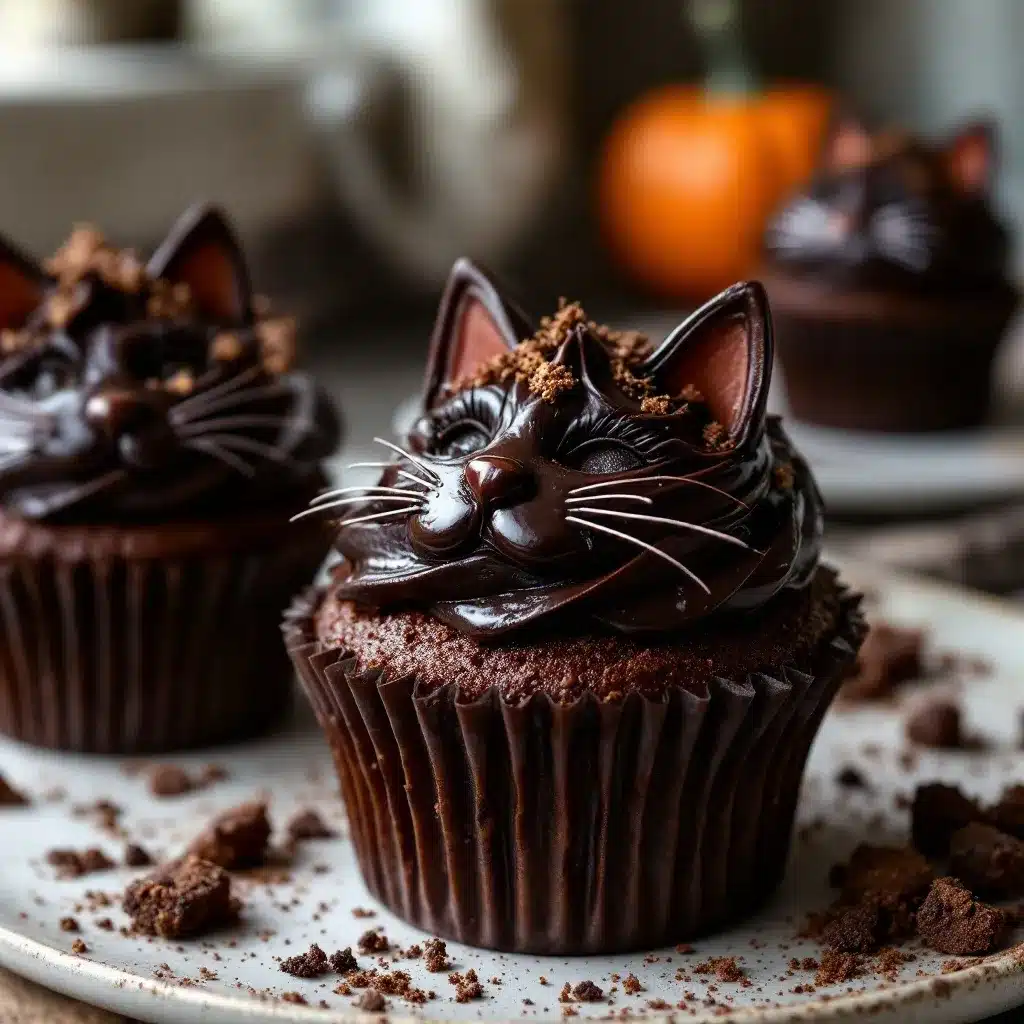
Now for the fun part. Use a small round tip or a zip-top bag with a tiny corner cut off to pipe two small triangles on top of the cupcake for ears. I pipe them slightly angled outward for that classic cat silhouette. Press two candy eyes into the frosting, positioning them about halfway down the face. Pipe a tiny pink nose in the center, just below the eyes. For the whiskers, I use small pieces of black licorice string pressed gently into the frosting, three on each side. You can also pipe whiskers with black frosting if you prefer.
Step 10: Add the Final Details
Pipe a small pink dot inside each ear for the inner ear detail. This little touch makes a huge difference in making them look like actual cats instead of just black blobs with eyes. Let the decorated cupcakes sit for 10 minutes to set the frosting slightly before serving.
Cooking Tips & Techniques
I’ve made these black cat chocolate cupcakes more times than I can count, and I’ve learned a few things the hard way. Here’s what I wish I’d known from the start.
Don’t skip the espresso powder. I know it sounds weird in a kid-friendly Halloween treat, but it doesn’t make the cupcakes taste like coffee. It enhances the chocolate flavor and makes it taste deeper and more complex. You can find instant espresso powder in the coffee aisle of most grocery stores.
Room temperature ingredients matter more than you think. Cold eggs and cold buttermilk will make your batter lumpy and your cupcakes dense. Take everything out of the fridge 30 minutes before you start baking. Set a timer if you have to—I’ve forgotten and ended up with sad, flat cupcakes more than once.
The hot water trick is non-negotiable. This is what makes these cupcakes so moist. The hot water helps bloom the cocoa powder, releasing its full flavor and creating a tender crumb. Don’t skip it, and don’t use cold water thinking it won’t matter—it absolutely does.
My biggest failure came when I tried to rush the cooling process. I was in a hurry for a party and popped the warm cupcakes in the fridge to speed things up. The frosting slid right off and I ended up with a tray of sad, bald-looking cupcakes. Let them cool completely at room temperature. It takes about an hour, but it’s worth the wait.
For the frosting, beat it longer than you think you need to. The extra 3-4 minutes of beating makes it light, fluffy, and easy to pipe. If your frosting is too thick, add a splash more cream. If it’s too thin, add more powdered sugar a tablespoon at a time.
When piping the ears, hold the piping bag at a 45-degree angle and squeeze gently as you pull upward. This creates a natural triangle shape that looks like real cat ears. Practice on a piece of parchment paper first if you’re nervous.
Variations & Adaptations
One of the best things about this recipe is how flexible it is. Here are some variations I’ve tried and loved.
Gluten-Free Version: Substitute the all-purpose flour with a 1:1 gluten-free baking flour blend. I’ve used Bob’s Red Mill with great results. The texture is slightly more delicate, so handle the cupcakes gently when frosting.
Dairy-Free Option: Use almond milk or oat milk mixed with 1 teaspoon of apple cider vinegar instead of buttermilk. Substitute the butter in the frosting with vegan butter sticks (not the tub kind, which has too much water). Use coconut cream instead of heavy cream.
Spooky Spider Variation: Instead of cat faces, pipe the frosting into a dome shape and press eight black licorice legs into the sides. Add candy eyes on top. These are faster to decorate and equally cute.
Pumpkin Cat Twist: Add ½ cup of pumpkin puree to the wet ingredients and reduce the buttermilk to ¾ cup. The pumpkin adds moisture and a subtle fall flavor that pairs beautifully with the chocolate. Decorate with orange frosting accents instead of pink.
Mini Cat Cupcakes: Use a mini muffin tin and bake for 10-12 minutes instead of 18-22. These are perfect for kids’ parties or for when you want to offer a smaller treat. You’ll get about 24 mini cupcakes from this recipe.
I tried a matcha version once for a friend who doesn’t eat chocolate, and honestly, it was a disaster. Stick with the chocolate base—it’s what makes these cats look like black cats instead of weird green blobs.
Serving & Storage Suggestions
These black cat chocolate cupcakes are best served at room temperature, which lets the frosting soften slightly and the cake stay tender. If you’ve refrigerated them, let them sit out for 20 minutes before serving.
They pair beautifully with a glass of cold milk for the kids, or a strong cup of coffee for the adults. I also love serving them alongside a warm mug of spiced apple cider for a cozy Halloween treat. If you’re hosting a party, arrange them on a black or orange platter with some fake cobwebs and plastic spiders for extra effect.
For storage, keep the cupcakes in an airtight container at room temperature for up to 2 days. After that, move them to the refrigerator for up to 5 days. The frosting will firm up in the fridge, so let them come back to room temperature before serving.
You can freeze the unfrosted cupcakes for up to 3 months. Wrap each one tightly in plastic wrap, then place them in a freezer-safe bag. When you’re ready to decorate, thaw them at room temperature for about an hour, then frost as directed. I’ve done this for Halloween parties when I wanted to prep ahead, and they taste just as good as fresh.
The flavors actually develop overnight. I’ve found that the chocolate taste deepens and the texture becomes even more moist the day after baking. So don’t stress about making them the morning of your party—they’re actually better if you bake them the day before.
Nutritional Information & Benefits
Let’s be real—these are a treat, not a health food. But here’s the breakdown if you’re curious. Per cupcake (with frosting and decorations), you’re looking at approximately 380 calories, 18 grams of fat, 52 grams of carbohydrates, and 4 grams of protein.
The cocoa powder is actually a decent source of antioxidants, specifically flavonoids, which can help reduce inflammation and support heart health. The espresso powder adds a tiny amount of caffeine—not enough to keep anyone awake, but enough to give a subtle energy boost.
For dietary considerations, these cupcakes contain gluten, dairy, and eggs. They are nut-free if you don’t add any nut-based decorations. The black cocoa powder is naturally vegan and gluten-free, so the frosting can be made dairy-free with the substitutions I mentioned earlier.
I’m not a nutritionist, and I don’t pretend to be one on this blog. These are Halloween treats meant to be enjoyed in moderation. Make them for the joy they bring, not for the nutritional profile. Your inner child will thank you.
Conclusion
These black cat chocolate cupcakes are the Halloween dessert you’ve been looking for. They’re fun to make, adorable to look at, and genuinely delicious to eat. The chocolate base is moist and rich, the frosting is silky and sweet, and the decorating process is forgiving enough that anyone can create a tray of cute cat faces.
I love making these because they remind me that Halloween doesn’t have to be about store-bought candy and plastic decorations. There’s something special about pulling a tray of these out at a party and watching people’s faces light up. They’re conversation starters, photo-worthy treats, and honestly, they taste better than anything you’ll find in a wrapper.
I encourage you to customize the faces based on your own style. Give them different expressions, add little bows, or make them look grumpy—it all adds to the charm. The first time I made these, I accidentally gave one a lopsided ear and it ended up being everyone’s favorite because it looked like a grumpy cat.
If you make these, I’d love to hear about it. Drop a comment below with your decorating ideas, tag me in your photos, or share your own variations. And if you’re looking for more Halloween treats, check out my crispy air fryer churro bites for another crowd-pleasing dessert. Happy Halloween, and happy baking!
Frequently Asked Questions
Can I make these cupcakes ahead of time?
Absolutely. Bake the cupcakes up to 2 days in advance and store them in an airtight container at room temperature. Frost and decorate them the day you plan to serve them for the best presentation. You can also freeze the unfrosted cupcakes for up to 3 months.
Why did my frosting turn gray instead of black?
This usually happens when you use regular cocoa powder instead of black cocoa powder. Regular cocoa gives a brownish-gray color. Black cocoa powder is darker and has a more intense color. If you can’t find it, add a small amount of black gel food coloring to regular cocoa powder frosting.
Can I use a different type of frosting?
Yes. Cream cheese frosting works well and adds a tangy contrast to the chocolate. You can also use a chocolate ganache for a more sophisticated look. Just keep in mind that the color might not be as dark, so adjust your decorating accordingly.
How do I prevent the candy eyes from falling off?
Press the candy eyes into the frosting while it’s still soft, right after piping. If the frosting has started to crust over, dip the back of each candy eye in a tiny bit of frosting before attaching it to the cupcake. This acts like edible glue.
Can I use a box cake mix instead of making from scratch?
You can, but the texture and flavor won’t be the same. The homemade version is moister and has a deeper chocolate flavor thanks to the hot water technique. If you’re short on time, use a dark chocolate cake mix and add 1 teaspoon of espresso powder to the batter. It won’t be as good, but it’ll still be cute.
Pin This Recipe!
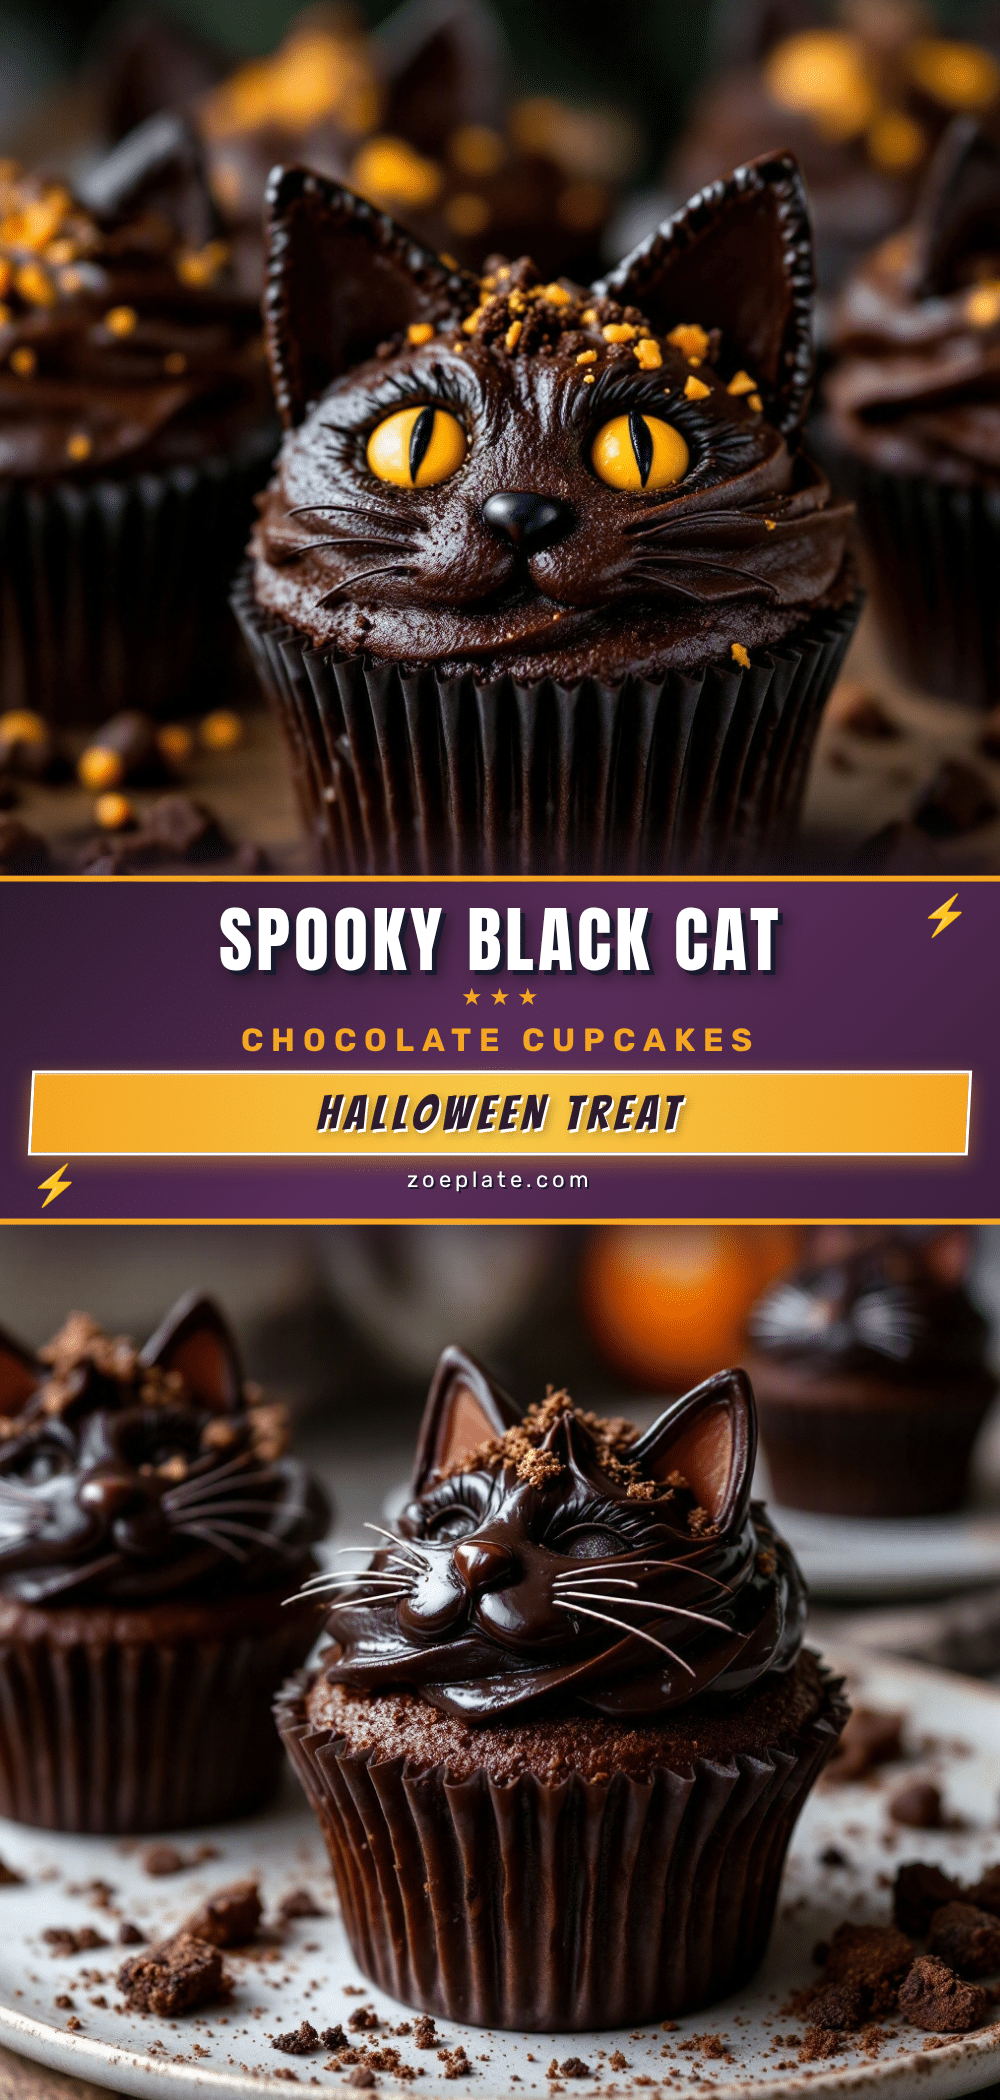
Perfect Black Cat Cupcakes Easy Halloween Treats
These black cat chocolate cupcakes are moist, rich, and decorated to look like adorable feline faces. Perfect for Halloween parties, they’re easy to make and guaranteed to impress guests of all ages.
- Prep Time: 15 minutes
- Cook Time: 20 minutes
- Total Time: 45 minutes
- Yield: 12 servings 1x
- Category: Dessert
- Cuisine: American
Ingredients
- 1 ½ cups all-purpose flour (spooned and leveled)
- 1 cup granulated sugar
- ½ cup unsweetened cocoa powder (preferably Ghirardelli)
- 1 teaspoon baking soda
- ½ teaspoon baking powder
- ½ teaspoon salt
- 1 teaspoon espresso powder (optional but recommended)
- 1 cup buttermilk (room temperature)
- ½ cup vegetable oil
- 2 large eggs (room temperature)
- 1 teaspoon vanilla extract
- ½ cup hot water
- 1 cup unsalted butter (softened)
- 3 ½ cups powdered sugar
- ¼ cup heavy cream (or whole milk)
- 1 teaspoon vanilla extract
- 2–3 tablespoons black cocoa powder
- Black gel food coloring (optional)
- Candy eyes (half-sphere type)
- Pink candy melts or pink frosting
- Black licorice strings (cut into small pieces)
Instructions
- Preheat oven to 350°F (175°C). Line a 12-cup muffin tin with cupcake liners.
- In a large bowl, whisk together flour, sugar, cocoa powder, baking soda, baking powder, salt, and espresso powder until no lumps remain.
- In a separate bowl, whisk together buttermilk, vegetable oil, eggs, and vanilla extract until smooth.
- Pour wet ingredients into dry ingredients and stir with a rubber spatula until just combined. Do not overmix.
- Add hot water and stir gently until batter is smooth and thin.
- Divide batter evenly among the 12 liners, filling each about two-thirds full.
- Bake for 18-22 minutes, or until a toothpick inserted into the center comes out with a few moist crumbs. Cool in pan for 5 minutes, then transfer to a cooling rack to cool completely.
- For frosting: Beat softened butter with an electric mixer on medium speed until smooth and creamy, about 2 minutes.
- Add powdered sugar one cup at a time, beating on low after each addition. Add heavy cream and vanilla extract, then beat on medium-high for 3-4 minutes until light and fluffy.
- Add black cocoa powder and beat until fully incorporated. Add black gel food coloring if desired for a deeper shade.
- Transfer frosting to a piping bag fitted with a large round tip. Pipe a generous swirl onto each cooled cupcake.
- Use a small round tip to pipe two small triangles on top for ears, angled outward.
- Press two candy eyes into the frosting about halfway down the face.
- Pipe a tiny pink nose in the center below the eyes.
- Add three small pieces of black licorice string on each side for whiskers.
- Pipe a small pink dot inside each ear for inner ear detail. Let set for 10 minutes before serving.
Notes
Don’t skip the espresso powder—it deepens the chocolate flavor without tasting like coffee. Room temperature ingredients are crucial for a tender crumb. The hot water technique makes the cupcakes ultra-moist. Let cupcakes cool completely before frosting to prevent melting. For the frosting, beat longer than you think for a light, fluffy texture. When piping ears, hold the bag at a 45-degree angle and squeeze gently as you pull upward.
Nutrition
- Serving Size: 1 cupcake
- Calories: 380
- Sugar: 38
- Sodium: 280
- Fat: 18
- Saturated Fat: 9
- Carbohydrates: 52
- Fiber: 2
- Protein: 4
Keywords: Halloween cupcakes, black cat cupcakes, chocolate cupcakes, easy Halloween treats, spooky desserts


