My nephew’s third birthday party was coming up, and I had promised a dessert that would actually impress a room full of preschoolers and their parents. I scrolled through the usual suspects—cupcakes, cookies, a sheet cake—and felt completely uninspired. I needed something that looked like pure magic but didn’t require a pastry degree. Something colorful, fun, and undeniably festive. That’s when I remembered the candy corn. Not the actual candy (though I do have a soft spot for those little triangles), but the idea of those perfect stripes of orange, yellow, and white. Could I make a jello version of that? Something that would make the kids gasp and the adults ask for the recipe?
A few test batches later, and these Perfect Candy Corn Layered Jello Cups were born. They were the hit of the party—the kids loved the wiggly, jiggly layers, and the parents were genuinely impressed by the clean, distinct stripes. Honestly, I was pretty proud of myself. It’s one of those recipes that looks like you spent hours fussing in the kitchen, but the secret is just patience and a little bit of planning. The layers set one at a time, and that’s really the only trick. It’s not difficult, it just needs a little time.
For a while, I just accepted that holiday-themed desserts for kids meant either a mess of frosting or something that tasted more like food coloring than actual food. These jello cups changed that. They taste exactly like the fruit flavors they promise—bright, sweet, and clean. And they look like a little piece of Halloween candy art. I’ve made them for every fall gathering since, and they never fail to get that same delighted reaction. It’s a quiet kind of satisfaction, knowing you’ve got a recipe that’s both a showstopper and a genuinely easy win.
Why You’ll Love This Recipe
These Perfect Candy Corn Layered Jello Cups are more than just a pretty face. They’re a dessert that delivers on every level, from the wow factor to the simple, straightforward process. I’ve tested this recipe more times than I can count to make sure the layers stay sharp and the flavors sing.
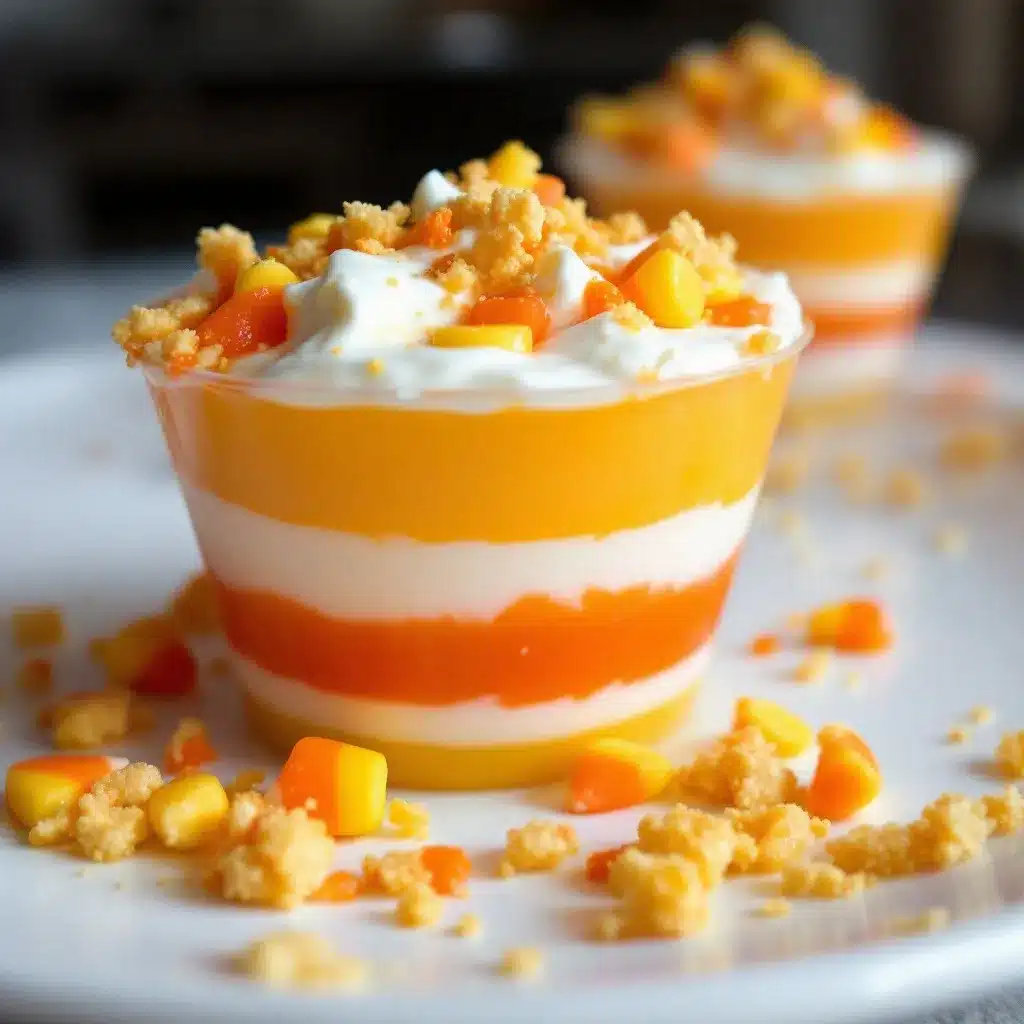
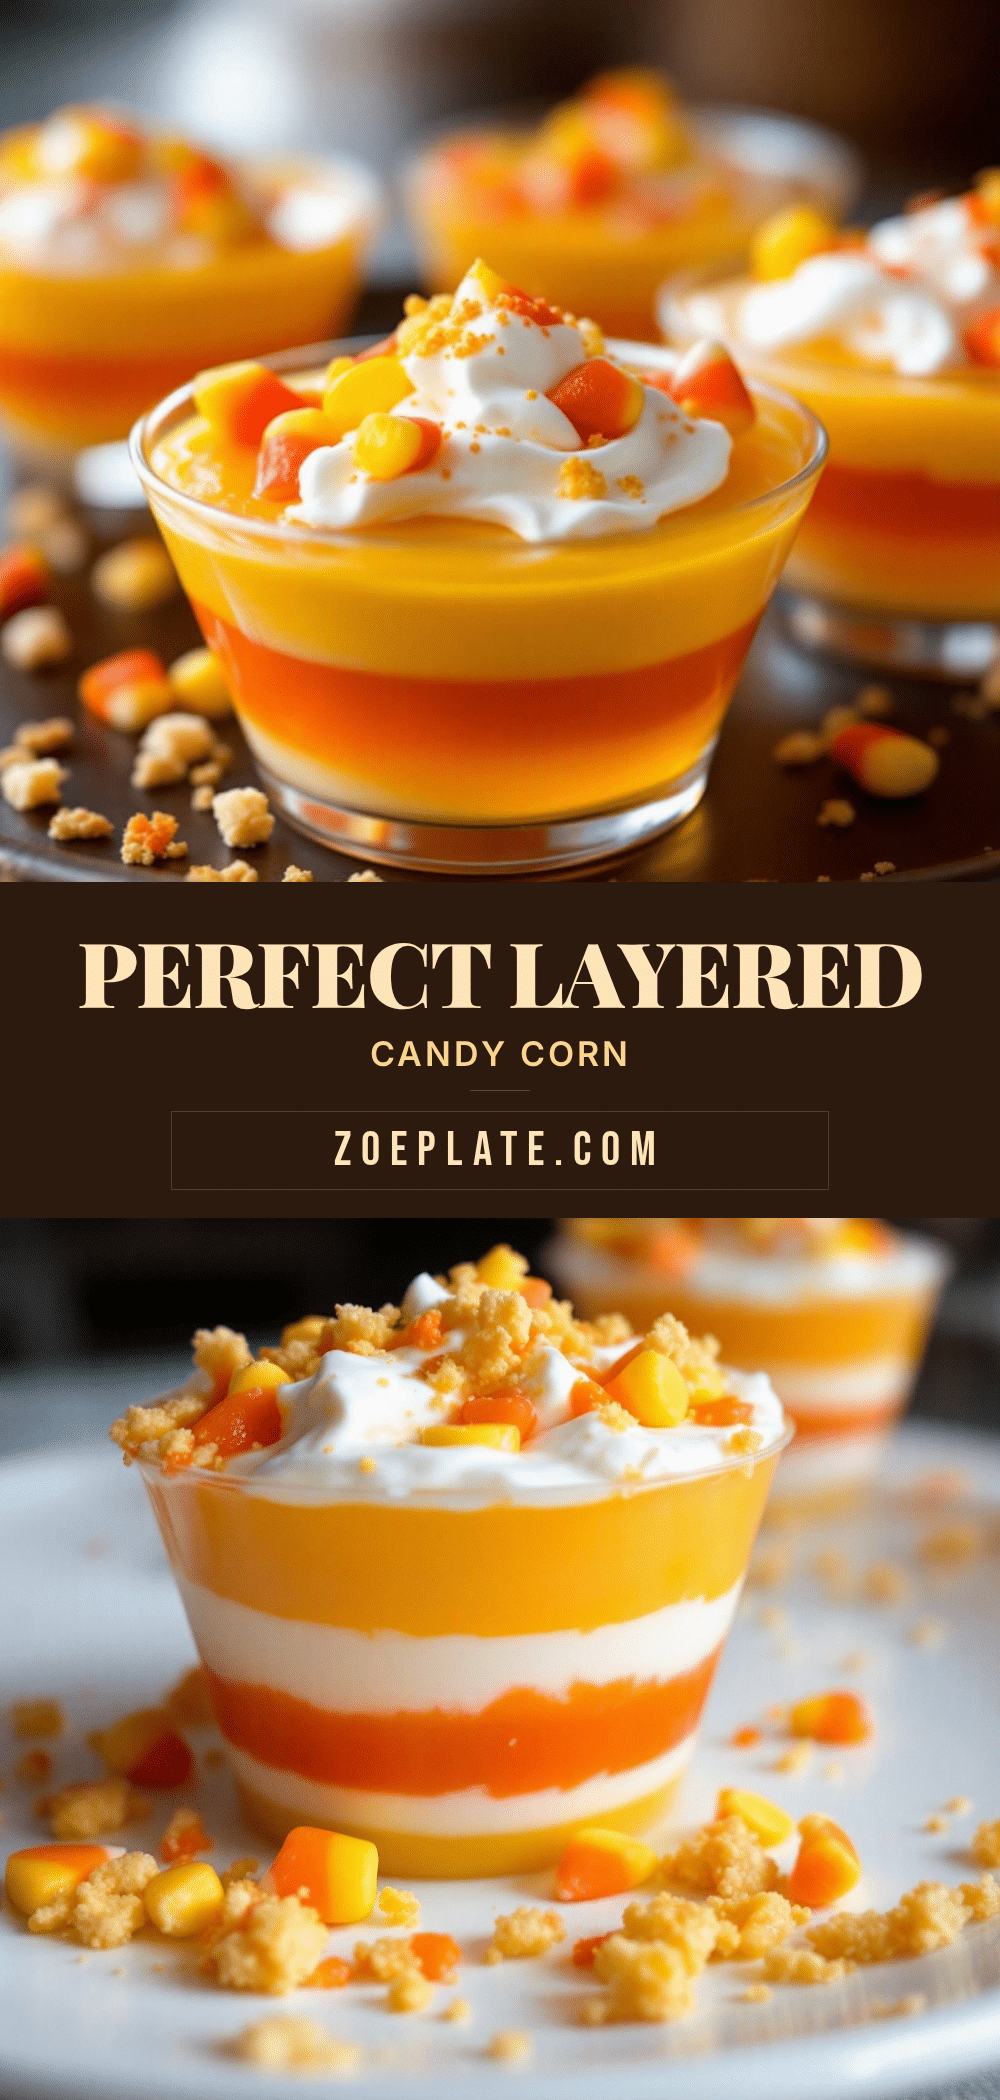
- Stunning Presentation: The three distinct layers of white, orange, and yellow create a perfect candy corn look that’s guaranteed to be the star of any Halloween party, fall gathering, or Thanksgiving kids’ table.
- Deceptively Simple: Despite the impressive look, this recipe uses only a few basic ingredients. There’s no baking, no complicated techniques, and no special equipment required. It’s all about the order of operations.
- Perfect for Parties: These individual cups are ideal for serving a crowd. No slicing, no mess, and every guest gets their own perfect little dessert. They’re also fantastic for making ahead of time.
- Crowd-Pleaser for All Ages: Kids are mesmerized by the colorful layers, and adults appreciate the nostalgic candy corn theme without the sticky, chewy texture. It’s a win-win for any age group.
- Endlessly Customizable: You can swap out the flavors to match any holiday or theme. Think red, white, and blue for the Fourth of July or green, white, and red for Christmas. The technique is the same, but the possibilities are endless.
This isn’t just another jello recipe. The key is using the right ratio of water to gelatin for each layer and giving each one enough time to set fully before adding the next. This is the method I landed on after a few frustrating attempts where the colors bled together into a muddy mess. Trust me, this version is foolproof. It’s the kind of dessert that makes you close your eyes after the first wobbly bite—a perfect little burst of fruity nostalgia that feels like fall in a cup.
What Ingredients You Will Need
This recipe uses simple, readily available ingredients to create its stunning visual effect. The magic is in the layering, not in any hard-to-find items. Each layer has a specific purpose, from creating the opaque white base to the bright, translucent fruit flavors on top.
For the White (Cream) Layer
- 1 (0.25 oz) packet unflavored gelatin: This is the key to the opaque white layer. It provides structure without adding any color or flavor, allowing the sweetened condensed milk to create a creamy, solid base. I always use Knox brand for consistent results.
- 1/4 cup cold water: Used to bloom the gelatin before dissolving it. This step is crucial for a smooth, lump-free texture.
- 1/2 cup sweetened condensed milk: This adds the rich, creamy sweetness and the opaque white color that mimics the tip of a candy corn. Don’t substitute with evaporated milk, as it won’t provide the same thickness or sweetness.
- 1/2 cup boiling water: Used to dissolve the bloomed gelatin completely.
For the Orange Layer
- 1 (3 oz) box orange-flavored gelatin (like Jell-O): This provides both the vibrant orange color and the classic fruity flavor. You can use any brand, but the flavor is a classic choice for this candy corn look.
- 1 cup boiling water: To dissolve the gelatin powder completely.
- 1/2 cup cold water: To cool the mixture down and help it set properly.
For the Yellow Layer
- 1 (3 oz) box lemon-flavored gelatin (like Jell-O): The bright yellow color is a perfect match for the middle section of a candy corn. The lemon flavor also provides a nice, slightly tart contrast to the sweet white layer.
- 1 cup boiling water: To dissolve the gelatin powder.
- 1/2 cup cold water: To cool the mixture down for layering.
Ingredient Tips & Sourcing: I prefer using name-brand gelatin for the most reliable setting power, especially for the unflavored packet. For the flavored gelatins, feel free to experiment! You can use peach or apricot gelatin for the orange layer and pineapple for the yellow layer for a slightly different flavor profile. Just make sure the colors match your candy corn vision. If you are making this for a party, picking up a few extra boxes of gelatin is always a good idea—just in case a layer doesn’t set as planned or you want to double the batch.
Equipment Needed
You don’t need any fancy gadgets for this recipe, which is part of its charm. A few basic kitchen tools are all it takes to create these stunning layered desserts.
- Clear Plastic or Glass Cups (6-8 oz): These are essential for showing off the beautiful layers. I prefer using 7 oz clear plastic cups for parties—they’re sturdy, disposable, and make the colors pop. Glass tumblers or small mason jars work perfectly too.
- Small Mixing Bowls: You’ll need one for each layer to prepare the gelatin mixtures.
- Liquid Measuring Cup: For accurately measuring boiling and cold water.
- Whisk or Fork: For stirring the gelatin until it’s completely dissolved.
- Measuring Spoons: For the unflavored gelatin, if needed.
- Refrigerator: The most important piece of equipment! You need a flat, stable spot in your fridge where the cups can sit undisturbed for at least 30-45 minutes between each layer.
Budget-Friendly Alternatives: If you don’t have small cups, you can use a large, clear glass dish or a loaf pan to make a single large jello mold. Once set, you can slice it into squares or fun shapes using cookie cutters. If you don’t have a whisk, a fork works just fine for stirring the gelatin. The key is to ensure everything is fully dissolved. I’ve also used small, repurposed yogurt containers in a pinch—just make sure they’re clean and clear enough to see the layers!
Preparation Method
This is where the magic happens. The process is simple, but patience is your most important ingredient. Follow these steps carefully, and you’ll be rewarded with perfect, Instagram-worthy layers.
- Prepare the White (Cream) Layer First: In a small bowl, sprinkle the packet of unflavored gelatin over 1/4 cup of cold water. Let it sit for 5 minutes to bloom. It will look like a firm, rubbery mass. This is a good thing. Then, pour 1/2 cup of boiling water over the bloomed gelatin and whisk until it is completely dissolved. Whisk in the 1/2 cup of sweetened condensed milk until the mixture is smooth and completely combined. It should be a uniform, opaque white.
- Pour the First Layer: Divide the white mixture evenly among your 6-8 cups. You want to fill each cup about 1/3 of the way. Place the cups on a tray and carefully transfer them to the refrigerator. Let them set for at least 45 minutes, or until the layer is firm to the touch. It should not be jiggly when you gently tilt the cup. This is the most critical step—a fully set bottom layer prevents the colors from bleeding.
- Prepare the Orange Layer: While the white layer is setting, you can get the orange layer ready. In a separate bowl, empty the box of orange gelatin. Add 1 cup of boiling water and whisk for 2 minutes, until the powder is completely dissolved. Then, stir in 1/2 cup of cold water. Set the bowl aside at room temperature. Do not refrigerate it, or it will start to set before you’re ready to pour it.
- Add the Orange Layer: Once the white layer is completely firm, take the cups out of the fridge. Gently pour the orange gelatin mixture over the back of a spoon onto the white layer. This helps to disperse the liquid and prevents it from breaking the surface of the set white layer. Fill each cup another 1/3 of the way. Return the cups to the refrigerator and let this layer set for another 45 minutes, until firm.
- Prepare the Yellow Layer: Just like the orange layer, empty the box of lemon gelatin into a bowl. Add 1 cup of boiling water and whisk until dissolved. Stir in 1/2 cup of cold water. Let it sit at room temperature.
- Add the Yellow Layer: Once the orange layer is completely firm, remove the cups from the fridge. Again, pour the yellow gelatin mixture over the back of a spoon onto the orange layer. Fill the cups to the top. Return to the refrigerator for the final set. This layer needs at least 2 hours, but overnight is best.
- Serve and Enjoy: Once fully set, the jello cups are ready to serve. They will be firm but jiggly. You can serve them as is, or add a dollop of whipped cream and a few candy corn pieces on top for an extra festive touch.
Troubleshooting Tip: If your layers are bleeding together, it’s because the previous layer wasn’t set firmly enough. Give each layer a full 45 minutes, or even an hour if your fridge is crowded. A warm fridge can also cause problems. For the most reliable results, make these the day before your event. The extra setting time in the fridge makes the layers incredibly stable and clean.
Cooking Tips & Techniques
Over the years, I’ve learned a few tricks that make this recipe foolproof. These little details are the difference between a good jello cup and a perfect one.
- The Spoon Trick is Non-Negotiable: I cannot stress this enough. Pouring the hot gelatin mixture directly onto the set layer will create a crater and cause the colors to mix. Always, always pour it over the back of a spoon. It gently disperses the liquid and protects the surface below.
- Room Temperature is Key for the Next Layer: When you’re ready to add a new layer, the gelatin mixture you’re pouring should be at room temperature—cool, but not cold or starting to set. If it’s too hot, it can melt the layer below. If it’s too cold, it will be lumpy. Let it sit out while the previous layer sets.
- Don’t Over-Whisk the Layers: Whisking too vigorously can introduce air bubbles into your gelatin. While they’ll rise to the top, they can create an uneven surface. A gentle but thorough whisk is all you need.
- Patience is a Virtue (and a Necessity): The first time I made these, I tried to rush the process. I put the cups in the coldest part of the freezer to speed things up. The result was a frozen, separated mess. The refrigerator is your friend. Slow and steady wins this race. Set a timer for each layer and don’t be tempted to peek by tilting the cups.
- Use a Level Surface in Your Fridge: Before you start, clear a flat, level spot in your refrigerator. If your tray is tilted, your layers will set at an angle, ruining the straight candy corn stripes. A baking sheet works perfectly for this.
Variations & Adaptations
Once you master the basic technique, the possibilities are endless. This is a canvas for your creativity, perfect for any holiday or occasion.
- Holiday & Themed Variations:
- Fourth of July: Use red (strawberry or cherry), white (cream layer), and blue (berry blue) gelatin for a patriotic treat.
- Christmas: Layer red (cherry), white (cream), and green (lime) gelatin for a festive look.
- Easter: Use pastel shades like pink, white, and yellow or purple, white, and green.
- Rainbow: Use four or five layers of different colors for a fun, colorful dessert. Just remember each layer needs its own setting time.
- Dietary Adaptations:
- Sugar-Free: Use sugar-free gelatin mixes and sugar-free sweetened condensed milk (or a homemade version with a sugar substitute like allulose). The process is exactly the same.
- Dairy-Free: For the white layer, you can substitute the sweetened condensed milk with a dairy-free version made from coconut milk or oat milk. The texture will be slightly different, but it will still set and look beautiful.
- Flavor Twists:
- Instead of lemon, try peach or apricot gelatin for the yellow layer for a sweeter, less tart flavor.
- For the orange layer, mango or tangerine gelatin are fantastic alternatives.
- Add a splash of vanilla extract to the white cream layer for a richer flavor.
- Personal Variation: My favorite twist is adding a thin layer of crushed graham crackers or vanilla wafer crumbs on top of the white layer before adding the orange. It adds a subtle crunch and a little bit of a “crust” effect, turning it into a deconstructed jello parfait. It’s a small change that makes a big difference in texture.
Serving & Storage Suggestions
These jello cups are best served chilled, straight from the refrigerator. The cool, wobbly texture is part of the experience.
Serving: Serve the cups as they are, or get creative with toppings. A generous dollop of freshly whipped cream is a classic choice. You can also add a few pieces of real candy corn on top for garnish, or a sprinkle of colorful sprinkles. For a more grown-up presentation, serve them in elegant glassware with a mint leaf. They are the perfect dessert for a Halloween party, a Thanksgiving kids’ table, or a fall-themed potluck. They pair wonderfully with a warm slice of banana bread for a cozy autumn dessert spread.
Storage: These jello cups are incredibly make-ahead friendly. In fact, they are better when made a day in advance, as the extra time allows the layers to set perfectly. Store them in the refrigerator, tightly covered with plastic wrap or a lid, for up to 5 days. Do not freeze them, as freezing will ruin the gelatin structure and make them watery and grainy upon thawing.
Reheating: There is no reheating required for this recipe. They are meant to be served cold.
Flavor Development: The flavors will meld together slightly over time, but the layers will remain visually distinct if they were set properly. The gelatin will also continue to firm up, becoming less jiggly and more firm after a day or two. This is perfectly normal and still delicious.
Nutritional Information & Benefits
While this is a treat meant for enjoyment, it’s good to know what’s in it. The nutritional information is an estimate and will vary based on the specific brands you use.
Estimated Nutritional Values (per serving, 1 cup):
- Calories: 180-220
- Fat: 3-5g
- Carbohydrates: 35-40g
- Protein: 4-6g
- Sugar: 30-35g
Health Benefits: Gelatin itself is a great source of protein and is known for its benefits to skin, hair, nails, and joint health. The sweetened condensed milk provides calcium. Of course, this is a dessert, so it should be enjoyed in moderation as part of a balanced diet.
Dietary Considerations: This recipe is naturally gluten-free and nut-free. It can be made sugar-free and dairy-free with the substitutions mentioned above. Potential Allergens: Contains milk (from the sweetened condensed milk). Always check the labels on your gelatin packets if you have specific concerns.
I love that this dessert allows me to indulge my sweet tooth while also getting a little bit of protein from the gelatin. It feels a bit more substantial than a plain bowl of jello, making it a more satisfying treat. For a lighter option, you can easily pair it with a fresh Mediterranean chickpea salad for a balanced meal.
Conclusion
These Perfect Candy Corn Layered Jello Cups are more than just a pretty dessert—they are a testament to the fact that you don’t need to be a pastry chef to create something truly spectacular. With a little patience and a few simple ingredients from the grocery store, you can make a dessert that will be the talk of your next party. The clean, vibrant layers are incredibly satisfying to look at, and the sweet, fruity flavors are a nostalgic hit for everyone.
I encourage you to make this recipe your own. Experiment with different color combinations and flavors for every holiday. Try adding a crunchy layer or a dollop of whipped cream. The basic technique is a foundation for endless creativity. I absolutely love making these for my family’s fall gatherings. They are a guaranteed smile-maker, and that’s the best kind of recipe to have in your back pocket.
I’d love to hear how yours turn out! Leave a comment below and let me know what flavor combinations you tried. Did you make them for a Halloween party or a Thanksgiving dinner? Share your photos and tag me—I can’t wait to see your beautiful, colorful creations. Happy layering!
Frequently Asked Questions (FAQs)
Can I use a different type of milk for the white layer?
You can, but it will change the texture. Sweetened condensed milk is essential for the opaque, creamy, and sweet white layer. Using regular milk will result in a more translucent, less stable layer that might not set as firmly and will have a different flavor.
My layers are bleeding together. What did I do wrong?
This is the most common issue. The most likely culprit is that you didn’t let the previous layer set long enough. Each layer needs to be completely firm to the touch before you pour the next one. A warm fridge or pouring the new layer too quickly can also cause bleeding. Give each layer a full 45 minutes to an hour.
Can I make these in a large dish instead of individual cups?
Absolutely! You can use a clear glass dish or a loaf pan. Just follow the same layering process. Once fully set, you can slice the jello into squares or use cookie cutters to cut out fun shapes. This is a great option for a party platter.
How far in advance can I make these jello cups?
You can make them up to 5 days in advance. In fact, they are perfect for making the day before your event. The extra time in the fridge only helps the layers set more firmly and become more stable. Just keep them covered in the refrigerator.
Can I use sugar-free gelatin to make this a low-sugar dessert?
Yes, you can! Use sugar-free gelatin mixes for the orange and yellow layers. For the white layer, you will need to find a sugar-free sweetened condensed milk, or you can make your own by simmering a sugar substitute like allulose with unsweetened almond milk until it reduces and thickens. The process is the same, but the texture of the white layer may be slightly less creamy.
Pin This Recipe!
Perfect Candy Corn Layered Jello Cups Easy Dessert
These stunning layered jello cups mimic the iconic candy corn stripes with white, orange, and yellow layers. They are a deceptively simple, no-bake dessert that is perfect for Halloween parties and fall gatherings.
- Prep Time: 15 minutes
- Cook Time: 0 minutes
- Total Time: 3 hours 45 minutes (includes setting time)
- Yield: 6-8 servings 1x
- Category: Dessert
- Cuisine: American
Ingredients
- 1 (0.25 oz) packet unflavored gelatin
- 1/4 cup cold water
- 1/2 cup sweetened condensed milk
- 1/2 cup boiling water
- 1 (3 oz) box orange-flavored gelatin (like Jell-O)
- 1 cup boiling water
- 1/2 cup cold water
- 1 (3 oz) box lemon-flavored gelatin (like Jell-O)
- 1 cup boiling water
- 1/2 cup cold water
Instructions
- Prepare the White (Cream) Layer First: In a small bowl, sprinkle the packet of unflavored gelatin over 1/4 cup of cold water. Let it sit for 5 minutes to bloom. Then, pour 1/2 cup of boiling water over the bloomed gelatin and whisk until completely dissolved. Whisk in the 1/2 cup of sweetened condensed milk until smooth and combined.
- Pour the First Layer: Divide the white mixture evenly among 6-8 cups, filling each about 1/3 full. Place cups on a tray and refrigerate for at least 45 minutes, until firm to the touch.
- Prepare the Orange Layer: In a separate bowl, empty the box of orange gelatin. Add 1 cup of boiling water and whisk for 2 minutes until dissolved. Stir in 1/2 cup of cold water. Set aside at room temperature.
- Add the Orange Layer: Once the white layer is firm, remove cups from the fridge. Gently pour the orange gelatin mixture over the back of a spoon onto the white layer. Fill each cup another 1/3 full. Refrigerate for 45 minutes until firm.
- Prepare the Yellow Layer: In a bowl, empty the box of lemon gelatin. Add 1 cup of boiling water and whisk until dissolved. Stir in 1/2 cup of cold water. Let sit at room temperature.
- Add the Yellow Layer: Once the orange layer is firm, remove cups from the fridge. Pour the yellow gelatin mixture over the back of a spoon onto the orange layer, filling cups to the top. Refrigerate for at least 2 hours, preferably overnight.
- Serve and Enjoy: Once fully set, serve chilled as is or with whipped cream and candy corn pieces.
Notes
Ensure each layer is fully set before adding the next to prevent colors from bleeding. Pour new layers over the back of a spoon to avoid disturbing the set layer. For best results, make a day in advance.
Nutrition
- Serving Size: 1 cup
- Calories: 200
- Sugar: 33
- Sodium: 100
- Fat: 4
- Saturated Fat: 2.5
- Carbohydrates: 38
- Protein: 5
Keywords: candy corn, jello cups, layered jello, Halloween dessert, no-bake dessert, fall dessert, kids dessert


