That first bite of a warm cookie, the one where the edge shatters just a little and the middle gives way like a soft hug — that’s what I was chasing the night I finally got this recipe right. It was a Tuesday, I think, and I had already ruined two batches. The first one spread into a single sad pancake on the sheet. The second came out cakey, which is fine for some things but not what I wanted. I wanted chewy. I wanted that slight tug when you pull the cookie apart. And honestly, I wanted a recipe that didn’t leave me with three dozen cookies I’d have to give away or eat over the course of a week. I wanted just enough. A small batch. Enough for a movie night, a late-night craving, or a quiet Tuesday when you need something sweet. This perfect small-batch chewy chocolate chip cookies recipe is the result of that night — and about ten more after it. It’s the one I make when I need a sure thing. No fuss, no giant mixing bowls, just a handful of ingredients and a cookie that tastes like it came from a bakery, but better because you made it yourself.
Why You’ll Love This Recipe
Let me tell you why this one is different. I’ve tested this recipe more times than I care to count, tweaking the ratio of brown to white sugar, the resting time, even the brand of butter. What I landed on is a cookie that delivers every single time.
- Small Batch, No Waste: This makes exactly six to eight cookies. Perfect for when you want fresh-baked cookies without committing to a full batch that goes stale before you finish them.
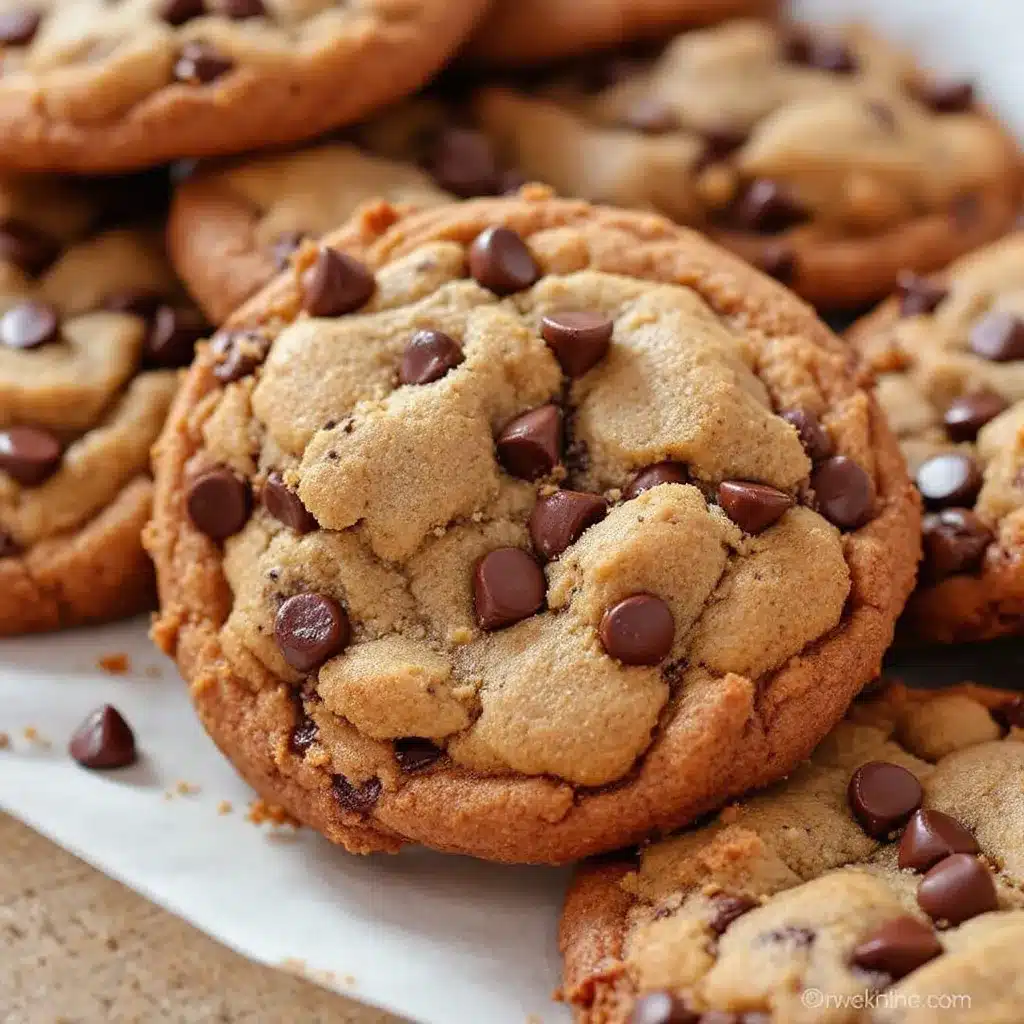
- Seriously Chewy: The texture is the star here. A slightly higher ratio of brown sugar to white gives you that soft, chewy center with edges that are just a tiny bit crisp. No cakey cookies here.
- Simple Pantry Ingredients: You probably have everything you need right now. Butter, sugars, an egg, flour, baking soda, salt, and chocolate chips. That’s it.
- Ready in Under 30 Minutes: From the moment you pull out the butter to the moment you’re biting into a warm cookie, you’re looking at about 25 minutes. This is instant gratification at its finest.
- Foolproof for Beginners: If you’ve ever been intimidated by cookie recipes that require chilling or special techniques, this one is for you. No mixer needed. No complicated steps. Just good cookies.
What makes this recipe stand out from every other chocolate chip cookie recipe out there? It’s the technique of browning the butter. Don’t worry, it sounds fancy, but it’s incredibly simple and it adds a nutty, caramelized depth that you just can’t get from plain melted butter. It’s the secret weapon that makes these cookies taste like you spent hours on them when you really didn’t.
This is the kind of cookie that makes you close your eyes after that first bite. It’s comfort in its purest form — warm, sweet, and exactly what you needed.
What Ingredients You Will Need
This recipe uses simple, humble ingredients, but each one plays a specific role in creating that perfect chewy texture. Don’t skip the browning step for the butter — it’s where the magic happens.
- Unsalted Butter (5 tablespoons / 70g): We’re browning this, so unsalted is important to control the salt level. The browning process cooks off the water in the butter and toasts the milk solids, giving you an incredible nutty flavor. I use Kerrygold for its rich flavor, but any good unsalted butter works.
- Dark Brown Sugar (¼ cup + 2 tablespoons / 75g), packed: This is your chewy secret. Brown sugar has molasses in it, which adds moisture and that soft, dense texture. Pack it firmly into your measuring cup. Light brown sugar works too, but dark gives you a deeper, almost toffee-like flavor.
- Granulated Sugar (2 tablespoons / 25g): Just a little white sugar helps the cookies spread slightly and gives those edges a gentle crispness. It balances the moisture from the brown sugar.
- Large Egg Yolk (1): Here’s a little trick. Using just the yolk (and not the white) adds richness and fat without extra water, which helps keep the cookie dense and chewy. Save the egg white for scrambled eggs tomorrow.
- Vanilla Extract (1 teaspoon): Pure vanilla extract makes a difference. The artificial stuff can taste a bit harsh. It rounds out all the flavors.
- All-Purpose Flour (½ cup + 2 tablespoons / 80g): Standard all-purpose flour gives the perfect structure. Don’t over-measure it. Spoon the flour into your measuring cup and level it off with a knife. Scooping directly from the bag can pack it down and give you too much flour, leading to dry cookies.
- Baking Soda (¼ teaspoon): This is our leavener. It helps the cookies spread just a little and gives them a nice lift. Make sure it’s fresh — old baking soda won’t work as well.
- Salt (¼ teaspoon): Salt isn’t just for flavor; it balances the sweetness and enhances the chocolate. I use fine sea salt for the dough and a sprinkle of flaky sea salt on top before baking.
- Semi-Sweet Chocolate Chips (⅓ cup / 60g): I love semi-sweet for its balance. It’s not too sweet and not too bitter. You can use dark chocolate chips or even chop up a good quality chocolate bar for those melty puddles. Ghirardelli or Guittard are my go-to brands.
Equipment Needed
You don’t need a stand mixer or any fancy gadgets for this recipe. Here’s what you’ll need:
- Small Skillet or Saucepan: For browning the butter. A light-colored pan is best so you can see the milk solids turn amber.
- Mixing Bowls: One medium bowl for the wet ingredients and one small bowl for the dry. A glass or ceramic bowl is fine.
- Whisk: For combining everything. A fork works in a pinch.
- Rubber Spatula: For folding in the chocolate chips and scraping down the bowl.
- Baking Sheet: A standard half-sheet pan is perfect. Line it with parchment paper for easy cleanup.
- Cookie Scoop or Tablespoon: For portioning the dough evenly. A #50 cookie scoop (about 1.5 tablespoons) is ideal for this size cookie.
- Cooling Rack: So the bottoms of the cookies don’t steam and get soggy.
If you don’t have a cookie scoop, just use two spoons to drop the dough. It doesn’t have to be perfect — rustic cookies are charming!
Preparation Method
Let’s get to it. This whole process takes about 25 minutes from start to finish. Preheat your oven to 350°F (175°C) and line your baking sheet with parchment paper.
- Brown the butter: Place the 5 tablespoons of butter in your small skillet over medium heat. Let it melt completely, then swirl the pan occasionally. You’ll hear it crackle and pop — that’s the water evaporating. After a minute or two, the crackling will stop and the butter will start to foam. Watch carefully. The milk solids on the bottom of the pan will turn from pale yellow to golden to a deep amber. You’ll smell a nutty, toasty aroma. This takes about 3-4 minutes total. As soon as it turns amber and smells amazing, remove it from the heat immediately and pour it into a heatproof mixing bowl (including all the brown bits at the bottom — that’s pure flavor). Let it cool for 2-3 minutes. It should still be warm but not scorching hot.
- Mix the sugars and butter: Add the packed dark brown sugar and granulated sugar to the warm browned butter. Whisk vigorously until everything is combined and looks like a thick, grainy paste. It won’t be smooth, and that’s okay.
- Add the egg yolk and vanilla: Drop in the egg yolk and the teaspoon of vanilla extract. Whisk until the mixture becomes smooth, glossy, and slightly lighter in color. This takes about 30 seconds of good whisking. The mixture will look a bit like caramel.
- Combine the dry ingredients: In a small separate bowl, whisk together the ½ cup plus 2 tablespoons of all-purpose flour, ¼ teaspoon of baking soda, and ¼ teaspoon of salt. Make sure there are no lumps.
- Add the dry to the wet: Pour the flour mixture into the butter-sugar mixture. Use your rubber spatula to fold everything together gently. Stir just until you no longer see streaks of flour. Do not overmix! Overworking the dough can develop the gluten and make your cookies tough instead of tender.
- Add the chocolate chips: Fold in the ⅓ cup of semi-sweet chocolate chips. Distribute them evenly throughout the dough. The dough will be quite soft and a little sticky — that’s exactly what you want.
- Portion the dough: Using your cookie scoop or a tablespoon, drop rounded balls of dough onto the prepared baking sheet, spacing them about 2 inches apart. You should get 6 to 8 cookies depending on how big you make them. I usually make 7. For that bakery-style look, press a few extra chocolate chips onto the tops of the dough balls.
- Bake: Place the baking sheet on the middle rack of your preheated oven. Bake for 9-11 minutes. The cookies will look puffy, golden around the edges, and still very soft and slightly underdone in the center. This is key! They will continue to bake on the hot sheet after you take them out. If you wait until they look fully done in the oven, they’ll be overbaked and crunchy.
- Cool on the sheet: Let the cookies cool on the baking sheet for exactly 5 minutes. This allows them to set up without overbaking. After 5 minutes, transfer them to a wire cooling rack. If you want to add a sprinkle of flaky sea salt, do it right when they come out of the oven while the tops are still warm.
Pro Tip: The dough is soft, so if you find it too sticky to handle, pop the bowl in the fridge for 10 minutes before scooping. It firms up just enough to make portioning easier without needing a full chill.
Cooking Tips & Techniques
I’ve made every mistake in the book so you don’t have to. Here are the things I learned the hard way.
Don’t skip the butter browning. The first time I tried this, I got distracted and let the butter go a little too dark. It smelled burned, not nutty. You want a deep amber color, like the color of a brown ale. If it starts smoking, you’ve gone too far. Start over. It’s only five tablespoons of butter. The nutty flavor it adds is the backbone of this whole cookie.
Measure your flour correctly. This is the number one reason cookies turn out dry or cakey. Spoon the flour into your measuring cup and level it off. Don’t scoop directly from the bag. I promise, this one change will improve your baking instantly.
Watch the bake time like a hawk. Ovens run differently. My oven runs a little hot, so 9 minutes is perfect. Yours might need 10 or 11. Start checking at 9 minutes. The edges should be set and golden, but the center should still look soft and a little puffy. It shouldn’t look wet or raw, just not fully set.
Let them rest. Those 5 minutes on the hot baking sheet are not optional. The residual heat finishes baking the centers and allows the structure to set. If you try to move them immediately, they’ll fall apart. Be patient.
Room temperature ingredients matter. I know, it’s annoying. But the egg yolk and butter need to be at a similar temperature to emulsify properly. If your egg yolk is straight from the fridge, the warm butter will seize up slightly. Let the egg sit out for 15 minutes before you start.
Variations & Adaptations
This base recipe is fantastic on its own, but it’s also a great starting point for your own creations.
- Double Chocolate Chip: Replace 1 tablespoon of the all-purpose flour with 1 tablespoon of unsweetened cocoa powder. Fold in white chocolate chips or dark chocolate chips for a rich, fudgy twist.
- Nutty Crunch: Add ¼ cup of toasted, chopped pecans or walnuts along with the chocolate chips. Toast them in a dry pan for 2-3 minutes first to bring out their oils and flavor.
- Gluten-Free Option: Substitute the all-purpose flour with a good quality 1:1 gluten-free baking flour blend (like Bob’s Red Mill or King Arthur). The texture will be slightly more delicate, but still deliciously chewy.
- Spiced Chai: Add ½ teaspoon of ground cinnamon, ¼ teaspoon of ground ginger, and a pinch of cardamom to the dry ingredients. It pairs beautifully with the brown butter and dark chocolate.
- Mint Chocolate: Use ½ teaspoon of peppermint extract instead of the vanilla, and fold in dark chocolate chips or Andes mint pieces. A classic holiday favorite.
I once made a version with browned butter and chopped-up bits of a dark chocolate bar with sea salt. The puddles of melted chocolate were incredible. It’s a fun way to use up leftover chocolate from a baking project.
Serving & Storage Suggestions
These cookies are best enjoyed warm, obviously. But they’re also fantastic at room temperature the next day — if they last that long.
Serving: Serve them slightly warm with a cold glass of milk, a scoop of vanilla ice cream, or a strong cup of coffee. For a real treat, sandwich two cookies with a scoop of ice cream for an instant ice cream sandwich. The contrast of the soft cookie and cold ice cream is unbeatable.
Storage: Store any leftover cookies in an airtight container at room temperature for up to 3 days. To keep them soft, add a slice of plain bread to the container. The bread absorbs excess air and releases moisture, keeping the cookies chewy. Replace the bread slice every day if you’re storing them longer.
Freezing: You can freeze the baked cookies for up to 3 months. Wrap them individually in plastic wrap and place them in a freezer bag. Thaw at room temperature for about 15 minutes. You can also freeze the raw dough balls. Scoop them onto a parchment-lined baking sheet and freeze until solid, then transfer them to a freezer bag. Bake from frozen, adding 2-3 minutes to the bake time. This is my favorite trick for having fresh cookies on demand.
Reheating: Pop a cookie in the microwave for 10 seconds for that fresh-from-the-oven warmth. Or, warm them in a 300°F (150°C) oven for 3-4 minutes.
The flavors actually deepen overnight. The brown butter flavor becomes more pronounced, and the cookie gets even chewier. So don’t be sad if you have leftovers — they’re a different kind of wonderful the next day.
Nutritional Information & Benefits
Let’s be real — these are cookies. They’re a treat. But here’s a rough idea of what you’re working with per cookie (based on 7 cookies):
- Calories: Approximately 220-250 calories per cookie
- Fat: 14g
- Carbohydrates: 28g
- Protein: 3g
- Sugar: 18g
Dietary Considerations: This recipe contains dairy (butter), eggs, and gluten (flour). For a dairy-free version, use a high-quality vegan butter stick (not spreadable margarine) and dairy-free chocolate chips. For a gluten-free version, use the 1:1 flour blend mentioned above. This recipe is not suitable for a vegan diet as written due to the egg yolk, but you could experiment with a flax egg.
Health Perspective: I believe in balance. A cookie isn’t a health food, and it shouldn’t pretend to be. But using real butter, good chocolate, and simple ingredients means you’re eating something made from scratch with love. That’s a kind of nourishment too. Enjoy the cookie, savor it, and don’t feel guilty. That’s the healthiest way to eat dessert.
Conclusion
This perfect small-batch chewy chocolate chip cookies recipe is the one I turn to again and again. It’s reliable, it’s quick, and it delivers exactly what it promises: a warm, chewy, deeply flavorful cookie that tastes like it took way more effort than it did. Whether you’re baking for yourself on a quiet night, surprising your family on a weeknight, or just need a little comfort in cookie form, this recipe won’t let you down.
I love how forgiving this recipe is. It doesn’t require precision or patience. It just requires a little butter, a little sugar, and a little time. And the reward is so, so worth it.
I’d love to hear how yours turn out. Did you add nuts? Switch up the chocolate? Bake them for a special occasion? Drop a comment below and let me know. And if you loved this recipe, share it with a friend who needs a good cookie in their life. Happy baking!
Frequently Asked Questions
Can I make these cookies without browning the butter?
You can, but they won’t have the same depth of flavor. The brown butter adds a nutty, caramelized taste that makes these cookies special. If you’re short on time, just melt the butter and let it cool slightly before using. The cookies will still be good, just not as complex.
Why are my cookies flat and spread out?
This usually happens if the butter was too warm when you mixed the dough, or if you didn’t use enough flour. Make sure your browned butter has cooled for a few minutes before adding the sugars. Also, double-check your flour measurement — spoon and level it!
Can I double this recipe?
Absolutely! This recipe scales up perfectly. Just double all the ingredients and use a whole egg instead of just the yolk. You may need to bake in batches since the dough is best baked fresh. The baked cookies freeze wonderfully.
How do I get that bakery-style look with the big chocolate puddles?
Instead of using standard chocolate chips, chop up a high-quality chocolate bar into shards and chunks. The irregular pieces melt into beautiful puddles. Press a few extra pieces onto the top of each dough ball before baking for that picture-perfect look.
My cookies came out cakey instead of chewy. What went wrong?
This is almost always due to too much flour or overmixing the dough. Measure your flour by spooning it into the cup and leveling it off. And when you add the dry ingredients to the wet, mix just until combined. Stop as soon as you don’t see any more flour streaks. Overmixing develops gluten, which leads to a cakey texture.
Pin This Recipe!
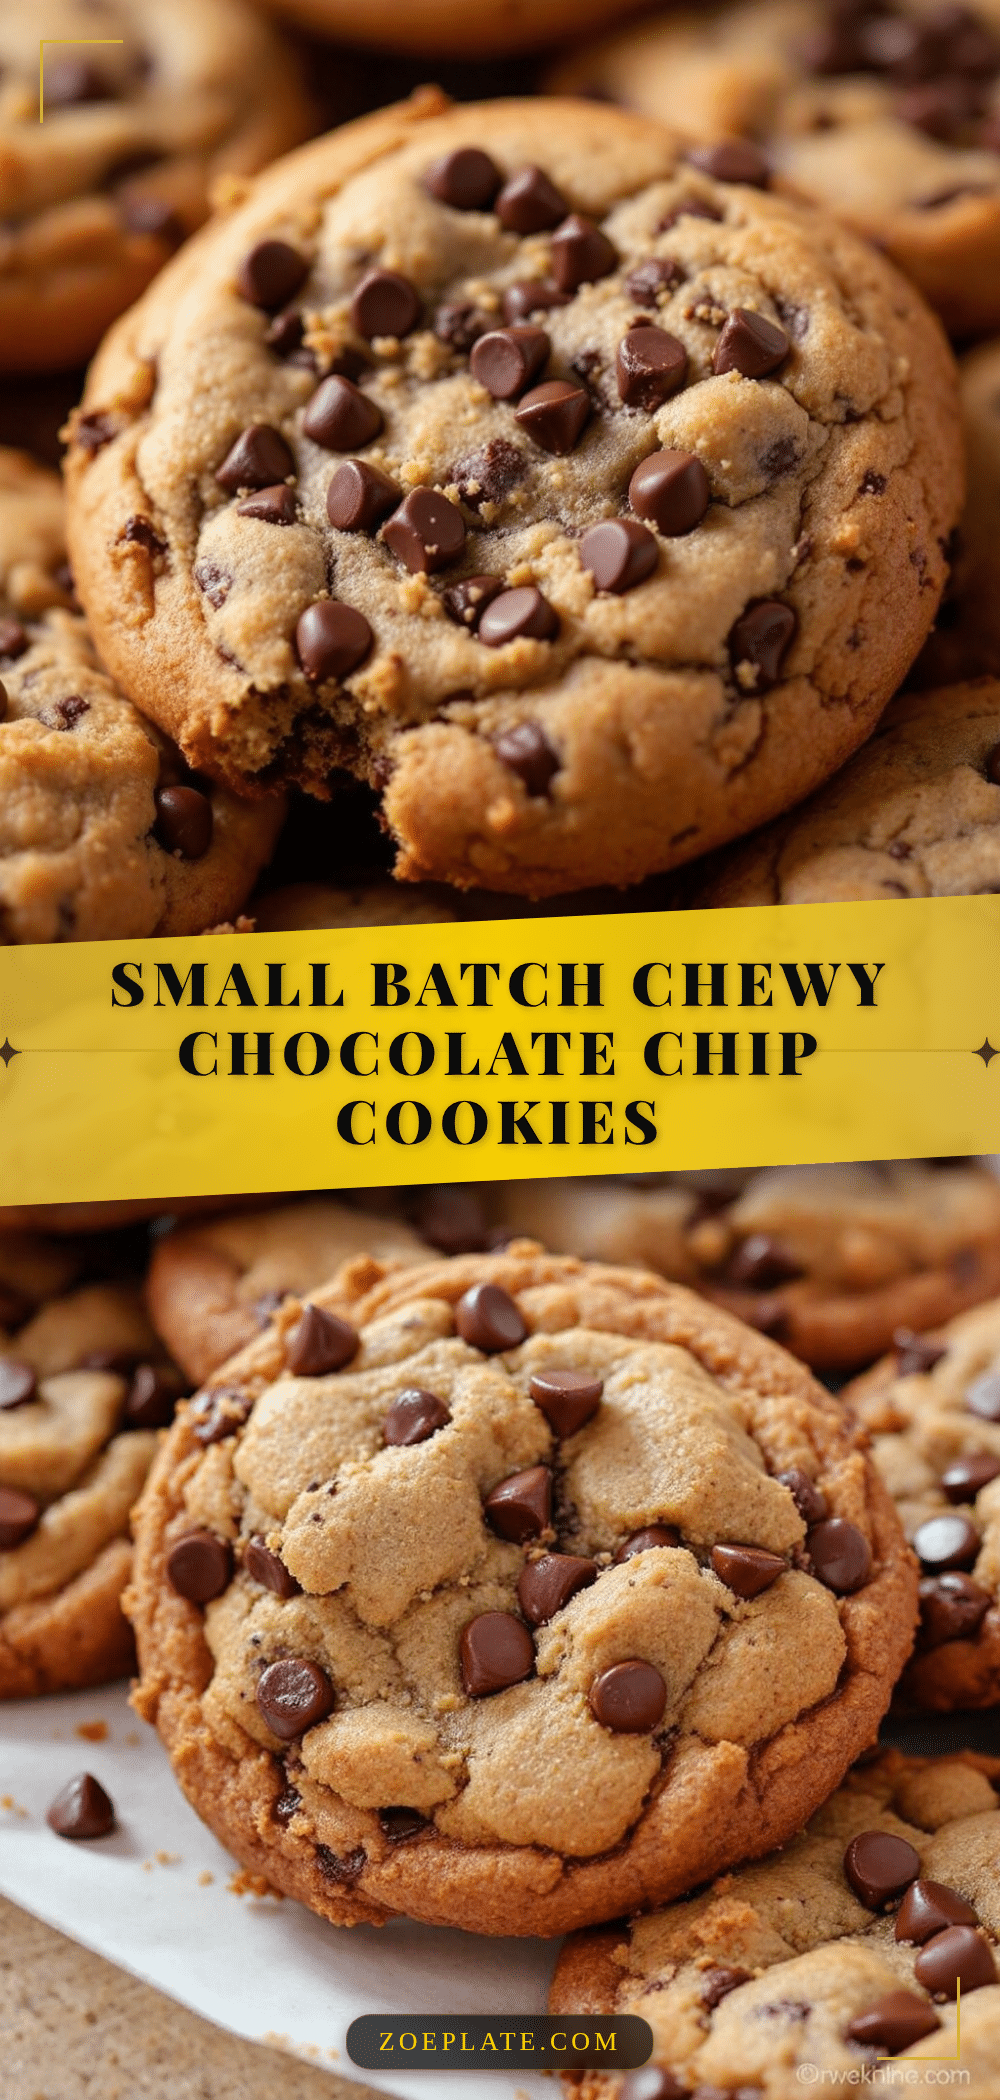
Perfect Small-Batch Chewy Chocolate Chip Cookies (Best Easy Recipe)

This perfect small-batch chewy chocolate chip cookies recipe delivers a warm, chewy, deeply flavorful cookie that tastes like it took way more effort than it did. It’s reliable, quick, and perfect for a movie night, late-night craving, or a quiet Tuesday when you need something sweet.
- Prep Time: 10 minutes
- Cook Time: 9-11 minutes
- Total Time: 25 minutes
- Yield: 6-8 cookies 1x
- Category: Dessert
- Cuisine: American
Ingredients
- 5 tablespoons (70g) unsalted butter
- 1/4 cup + 2 tablespoons (75g) dark brown sugar, packed
- 2 tablespoons (25g) granulated sugar
- 1 large egg yolk
- 1 teaspoon vanilla extract
- 1/2 cup + 2 tablespoons (80g) all-purpose flour
- 1/4 teaspoon baking soda
- 1/4 teaspoon salt
- 1/3 cup (60g) semi-sweet chocolate chips
Instructions
- Preheat oven to 350°F (175°C) and line a baking sheet with parchment paper.
- Brown the butter: Place 5 tablespoons of butter in a small skillet over medium heat. Melt completely, swirling occasionally. Cook until the milk solids turn amber and you smell a nutty aroma, about 3-4 minutes. Immediately remove from heat and pour into a heatproof mixing bowl, including all brown bits. Let cool for 2-3 minutes.
- Mix the sugars and butter: Add packed dark brown sugar and granulated sugar to the warm browned butter. Whisk vigorously until combined into a thick, grainy paste.
- Add the egg yolk and vanilla: Drop in the egg yolk and vanilla extract. Whisk until smooth, glossy, and slightly lighter in color, about 30 seconds.
- Combine the dry ingredients: In a small separate bowl, whisk together flour, baking soda, and salt until no lumps remain.
- Add the dry to the wet: Pour the flour mixture into the butter-sugar mixture. Fold gently with a rubber spatula just until no streaks of flour remain. Do not overmix.
- Add the chocolate chips: Fold in the chocolate chips until evenly distributed. The dough will be soft and slightly sticky.
- Portion the dough: Using a cookie scoop or tablespoon, drop rounded balls of dough onto the prepared baking sheet, spacing them about 2 inches apart. You should get 6 to 8 cookies. Press a few extra chocolate chips onto the tops if desired.
- Bake: Place the baking sheet on the middle rack and bake for 9-11 minutes. The cookies should look puffy, golden around the edges, and still soft in the center.
- Cool on the sheet: Let the cookies cool on the baking sheet for exactly 5 minutes. Then transfer to a wire cooling rack. If desired, sprinkle with flaky sea salt while still warm.
Notes
For best results, don’t skip browning the butter. Measure flour correctly by spooning into the cup and leveling off. Watch bake time carefully; cookies continue to bake on the hot sheet. Let the egg yolk come to room temperature before using. If dough is too sticky, refrigerate for 10 minutes before scooping.
Nutrition
- Serving Size: 1 cookie
- Calories: 220250
- Sugar: 18
- Sodium: 150
- Fat: 14
- Saturated Fat: 8
- Carbohydrates: 28
- Fiber: 1
- Protein: 3
Keywords: small batch cookies, chewy chocolate chip cookies, easy cookie recipe, brown butter cookies, quick cookies