I burned my first apple crisp so badly the sugar caramelized into a black, brittle shell that had to be chiseled out of the baking dish with a butter knife. That was eight years ago, and honestly, I almost gave up on the whole idea of making fruit crisps altogether. But here’s the thing—I kept coming back to it because even that burnt, smoky mess smelled incredible while it was baking. There was something about the way the cinnamon and apples filled my tiny apartment kitchen that felt like a warm blanket wrapped around the whole space.
That first attempt taught me something important: apple crisp looks deceptively simple, but the ratio of topping to fruit, the texture of the oat crumble, and the doneness of the apples all need to be just right. I spent the next few autumns testing batch after batch, tweaking the butter temperature, adjusting the brown sugar amount, and figuring out why some crisps turn out soupy while others get that perfect jammy consistency. This Classic Cinnamon Apple Crisp with Oat Crumble is what emerged from all those trials—the version I now make without looking at a recipe, the one my family requests for every fall gathering, and the dessert that finally made me forgive myself for that first disaster.
What I love most about this recipe is how forgiving it is once you understand a few basic principles. You don’t need a pastry bag or a stand mixer or any fancy techniques. You just need good apples, a little patience, and the willingness to trust your senses—the way the topping looks when it’s properly clumpy, the sound of the filling bubbling through the cracks, the smell that tells you it’s almost done before the timer even goes off. This is the dessert that taught me to cook with my hands instead of just following instructions, and I think it might teach you the same thing.
Why You’ll Love This Recipe
Let me tell you why this particular apple crisp has earned a permanent spot in my dessert rotation. I’ve tested versions with different fats, various sweeteners, and all sorts of add-ins, and this combination consistently delivers the most satisfying results with the least amount of fuss.
- Quick & Easy: From start to oven in about 20 minutes. No pie crust to roll, no dough to chill, no complicated steps. Just slice, mix, crumble, and bake.
- Simple Ingredients: You probably have most of these in your pantry right now. No specialty flours, no obscure extracts, no trips to three different stores.
- Perfect for Fall Gatherings: This is the dessert that disappears at Thanksgiving, Friendsgiving, Sunday dinners, and cozy weeknights when you just need something warm and sweet.
- Crowd-Pleaser: I’ve served this to kids who claim they don’t like cooked fruit, adults who are picky about desserts, and everyone in between. It gets eaten every single time.
- Unbelievably Delicious: The contrast between the tender, cinnamon-spiced apples and the crunchy, buttery oat topping is pure comfort food magic. And the smell? It’s basically fall in a baking dish.
What makes this version different from the rest is the technique for the oat crumble. I use melted butter instead of cold, which creates these gorgeous, craggy clusters that stay crunchy even after the crisp sits overnight. The apples get a quick toss with a touch of cornstarch to thicken their juices without making the filling gluey, and the cinnamon ratio is balanced so it warms without overwhelming. This isn’t just another apple crisp recipe—it’s the one that makes you close your eyes after the first bite and forget about everything else for a minute.
What Ingredients You Will Need
This recipe uses straightforward ingredients that work together to create something genuinely special. Here’s what you’ll need and why each one matters.
For the Apple Filling
- Apples, 6 medium (about 2.5 pounds or 1.1 kg): I prefer a mix of Granny Smith and Honeycrisp. The Granny Smiths hold their shape and provide tartness, while the Honeycrisps break down slightly and add natural sweetness. You can also use Braeburn, Pink Lady, or Jonagold—just avoid Red Delicious, which turn into mush.
- Granulated sugar, 1/3 cup (65 g): Just enough to coax the juices out of the apples without making the filling syrupy.
- Light brown sugar, 1/4 cup (50 g), packed: Adds depth and a subtle molasses note that plays beautifully with the cinnamon.
- All-purpose flour, 2 tablespoons (16 g): Helps thicken the juices. You can substitute cornstarch or arrowroot powder if you prefer.
- Ground cinnamon, 1 1/2 teaspoons: The star spice here. I use Vietnamese cinnamon for its intense, sweet heat, but any good-quality cinnamon works.
- Ground nutmeg, 1/4 teaspoon: Optional but recommended. It adds a warmth that cinnamon alone can’t quite achieve.
- Lemon juice, 1 tablespoon (15 ml): Prevents the apples from browning and brightens the overall flavor.
- Vanilla extract, 1 teaspoon (5 ml): Rounds out the sweetness and adds a cozy undertone.
- Salt, 1/4 teaspoon: Don’t skip this—it makes all the flavors pop.
For the Oat Crumble Topping
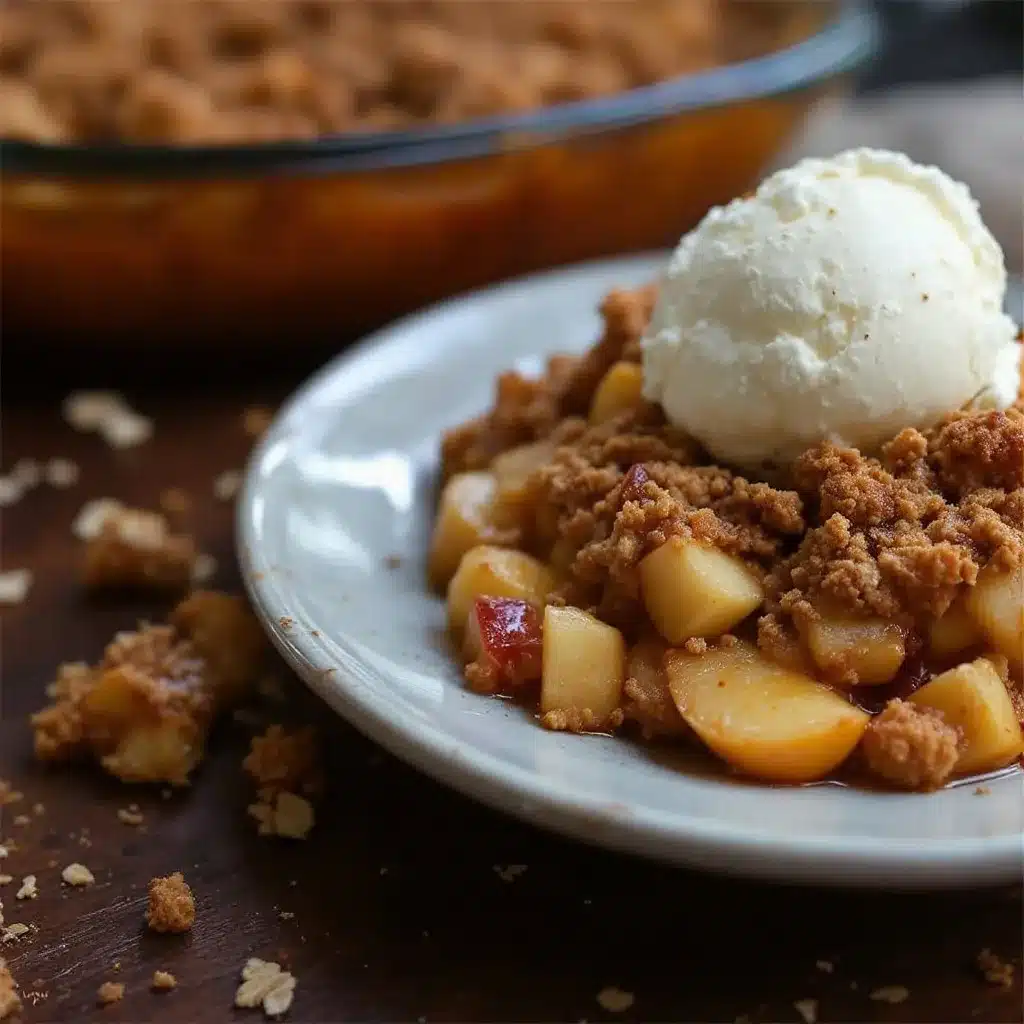
- Old-fashioned rolled oats, 1 cup (90 g): Not quick oats or steel-cut. Old-fashioned oats give the best texture—chewy, crunchy, and substantial.
- All-purpose flour, 3/4 cup (95 g): Provides structure for the crumble.
- Light brown sugar, 1/2 cup (100 g), packed: More brown sugar in the topping for that deep, caramelized sweetness.
- Granulated sugar, 1/4 cup (50 g): Balances the brown sugar and helps create crispy edges.
- Ground cinnamon, 1 teaspoon: Reinforces the cinnamon flavor from the filling.
- Salt, 1/4 teaspoon: Essential for balancing sweetness.
- Unsalted butter, 1/2 cup (113 g), melted: This is my secret—melted butter creates larger, more satisfying clusters than cold butter cut in. Use a good brand like Kerrygold for the best flavor.
- Vanilla extract, 1 teaspoon (5 ml): Adds another layer of warmth to the topping.
Ingredient Tips from My Kitchen
I’ve learned a few things from making this crisp dozens of times. First, always use unsalted butter so you control the salt level. If you only have salted butter, reduce the added salt to 1/8 teaspoon in both the filling and topping. Second, don’t skip the lemon juice—I once forgot it and the apples turned an unappetizing brown before they even hit the oven. Third, if you’re using particularly tart apples like Granny Smith, you might want to add an extra tablespoon of brown sugar to the filling.
Equipment Needed
You don’t need a lot of fancy equipment for this recipe, which is part of its charm. Here’s what you’ll need:
- 9×13-inch baking dish (or 2.5-quart baking dish): Glass or ceramic works best because they distribute heat evenly. I use a Pyrex dish and love how I can see the filling bubbling through the sides.
- Large mixing bowls (2): One for the apple filling and one for the oat crumble.
- Sharp knife and cutting board: For slicing the apples. A vegetable peeler is helpful but not essential if you leave the peels on.
- Measuring cups and spoons: For accurate measurements, especially for the flour and oats.
- Wooden spoon or rubber spatula: For mixing the filling and the topping.
- Pastry cutter or fork: If you’re using the cold butter method for the crumble, though with melted butter you just need a spoon.
- Cooling rack: Lets air circulate under the dish so the bottom doesn’t get soggy.
If you don’t have a 9×13 dish, you can use a 10-inch cast iron skillet or a 2-quart round baking dish. Just adjust the baking time slightly—a deeper dish will need a few extra minutes. I’ve also made this in individual ramekins for a fancy presentation, which takes about 25 minutes at the same temperature.
Preparation Method
Let me walk you through this step by step. I promise it’s straightforward, but I’ll include all the little details I wish someone had told me when I was burning my first crisps.
Step 1: Preheat and Prep
Preheat your oven to 350°F (175°C) with a rack in the center position. Lightly grease your 9×13-inch baking dish with butter or nonstick spray. This step is important—ungreased dishes can cause the apple juices to stick and burn.
Step 2: Prepare the Apples
Peel the apples, then cut them into 1/2-inch thick slices. I aim for slices that are all roughly the same size so they cook evenly. You should end up with about 6 to 7 cups of sliced apples. Put them in a large bowl and toss with the lemon juice immediately to prevent browning.
Step 3: Make the Apple Filling
To the bowl of apples, add the granulated sugar, packed brown sugar, flour, cinnamon, nutmeg, vanilla extract, and salt. Use a wooden spoon or your hands to toss everything together until the apples are evenly coated. Let this sit for about 5 minutes while you make the topping. This resting time lets the sugar start drawing out the apple juices, which creates that wonderful syrupy filling.
Step 4: Make the Oat Crumble
In a separate medium bowl, combine the old-fashioned oats, all-purpose flour, packed brown sugar, granulated sugar, cinnamon, and salt. Whisk them together until evenly distributed. Pour the melted butter and vanilla extract over the dry ingredients and stir with a fork or spatula until the mixture forms clumps. You want it to look like wet, chunky sand with some larger clusters. If it seems too dry, add a tablespoon more melted butter. If it seems too wet, add a tablespoon more flour.
Step 5: Assemble the Crisp
Pour the apple filling into the prepared baking dish and spread it into an even layer. Don’t pack it down too hard—you want some air gaps for the juices to bubble through. Sprinkle the oat crumble evenly over the top, covering all the apples. Use your fingers to break up any very large clumps, but leave most of the clusters intact. Those big bits will turn into the most delicious crunchy pieces.
Step 6: Bake
Place the dish on a baking sheet to catch any drips—trust me on this one. Bake for 40 to 45 minutes, or until the topping is golden brown and the filling is bubbling up around the edges. The apples should be tender when pierced with a fork, but not mushy. If the topping is browning too quickly around the 30-minute mark, tent the dish loosely with foil for the remaining time.
Step 7: Cool and Serve
Remove the crisp from the oven and let it cool on a wire rack for at least 15 to 20 minutes. This resting time is crucial—it allows the filling to set up so you get clean slices instead of a soupy mess. Serve warm, preferably with a scoop of vanilla ice cream or a drizzle of heavy cream.
Cooking Tips & Techniques
Over the years, I’ve made every mistake you can imagine with apple crisp, and I’m sharing them so you don’t have to.
Don’t overmix the topping. I used to stir the crumble until it was perfectly uniform, which resulted in a dense, sandy topping instead of those beautiful, crunchy clusters. Now I stop mixing as soon as the butter is incorporated, leaving some floury pockets and larger oat clumps. The imperfections create texture.
Watch your baking time closely. Every oven runs slightly differently. My old oven would crisp the topping perfectly in 40 minutes, but my current one takes 45. Start checking at 35 minutes and look for visual cues: the topping should be deep golden brown, and the filling should be visibly bubbling through the cracks. If you don’t see bubbles, give it another 5 minutes.
Let it rest. I cannot stress this enough. The first few times I made apple crisp, I served it immediately out of the oven and wondered why it was so runny. The filling needs time to set up as it cools. Fifteen minutes is the minimum, but 30 minutes is even better. The topping also gets crunchier as it cools, so patience pays off here.
Use a mix of apple varieties. This was a game-changer for me. Using all Granny Smith gave me a crisp that was too tart and firm, while all Honeycrisp turned into applesauce. The combination gives you the best of both worlds: structure and tenderness, tartness and sweetness.
Toast your oats first. If you want an extra-nutty flavor in your topping, spread the oats on a baking sheet and toast them at 350°F for 5 to 7 minutes before mixing them into the crumble. Let them cool completely before proceeding. This adds a deeper, more complex flavor that takes the crisp to another level.
Variations & Adaptations
One of the best things about this recipe is how easily it adapts to different tastes and dietary needs. Here are some variations I’ve tried and loved.
Gluten-Free Version: Substitute the all-purpose flour in both the filling and topping with a 1:1 gluten-free baking flour blend. Bob’s Red Mill and King Arthur both make excellent options. Make sure your oats are certified gluten-free as well, since regular oats can be cross-contaminated.
Dairy-Free Version: Use melted coconut oil or a plant-based butter substitute in place of the butter. I’ve had great results with Miyoko’s European Style Cultured Vegan Butter. The topping won’t be quite as crispy, but it’s still delicious.
Spiced Apple Crisp: Add 1/2 teaspoon of ground ginger and 1/4 teaspoon of ground cardamom to the apple filling along with the cinnamon. This gives the crisp a warm, chai-like flavor that’s perfect for holiday gatherings.
Pear Apple Crisp: Replace half the apples with firm, ripe pears (Bosc or Anjou work well). Pears are more delicate than apples, so reduce the baking time by about 5 minutes. This combination is absolutely lovely—the pears add a subtle floral sweetness that complements the apples beautifully.
Nutty Crumble: Add 1/2 cup of chopped pecans or walnuts to the oat crumble mixture. Toast them with the oats for extra flavor. The nuts add a wonderful crunch and richness that pairs perfectly with the apples.
Lower Sugar Option: Reduce the granulated sugar in the filling to 1/4 cup and the brown sugar in the topping to 1/3 cup. The crisp will be less sweet, but the natural sweetness of the apples will still shine through. If you’re using very sweet apples like Fuji or Gala, you can even reduce the sugar further.
Serving & Storage Suggestions
This apple crisp is at its absolute best served warm, about 15 to 20 minutes after it comes out of the oven. The contrast between the warm, tender apples and the cold, creamy ice cream is pure magic.
Serving Ideas:
- Top with vanilla bean ice cream, cinnamon ice cream, or salted caramel ice cream
- Drizzle with heavy cream or crème fraîche for a less sweet option
- Serve with a dollop of freshly whipped cream and a sprinkle of cinnamon
- Pair with a warm mug of spiced cider or a cup of strong coffee
- For a brunch twist, serve leftover crisp with a scoop of Greek yogurt
Storage Instructions:
Cover the baking dish tightly with foil or plastic wrap and store in the refrigerator for up to 4 days. The topping will lose some of its crunch over time, but the flavor actually improves as the spices meld with the apples. To reheat, place individual portions in a 350°F oven for 10 to 15 minutes, or microwave for about 60 seconds (though the topping will be softer).
Freezer Instructions:
You can freeze the unbaked crisp for up to 3 months. Assemble the crisp in a freezer-safe dish, cover tightly with foil, and freeze. When ready to bake, add about 15 minutes to the baking time and cover with foil for the first 30 minutes to prevent the topping from burning. You can also freeze the baked crisp—just cool it completely, wrap tightly, and freeze. Thaw overnight in the refrigerator and reheat in the oven.
One thing I’ve noticed is that the flavors deepen after a day in the fridge. The second-day crisp often tastes even better than the first, with the cinnamon and brown sugar fully melding into the apples. If you can resist eating it all the first night, you’re in for a treat.
Nutritional Information & Benefits
While apple crisp is definitely a treat, it does have some redeeming qualities. Here’s a rough estimate per serving (based on 8 servings):
- Calories: 380
- Total Fat: 16g
- Saturated Fat: 10g
- Carbohydrates: 58g
- Fiber: 4g
- Sugar: 38g
- Protein: 4g
- Sodium: 180mg
Apples are a good source of dietary fiber and vitamin C, and they contain antioxidants like quercetin that support heart health. Oats provide soluble fiber, which can help lower cholesterol levels. Cinnamon has anti-inflammatory properties and may help regulate blood sugar. Of course, the butter and sugar add calories and fat, so this is best enjoyed as an occasional indulgence rather than an everyday breakfast.
For a slightly lighter version, you can reduce the butter in the topping by half and add a tablespoon of applesauce or Greek yogurt to help bind it. The texture will be less crispy but still satisfying. If you’re watching your sugar intake, consider using a sugar substitute like monk fruit sweetener in the filling, though I can’t vouch for how it will affect the topping’s texture.
Conclusion
This Classic Cinnamon Apple Crisp with Oat Crumble has become my go-to dessert for every fall occasion, from casual weeknight cravings to Thanksgiving dinner. It’s the recipe that taught me that simple ingredients, treated with care and attention, can create something genuinely extraordinary. The combination of tender, spiced apples and crunchy, buttery oat topping never gets old, and the way it fills your kitchen with the smell of cinnamon and brown sugar is worth the price of admission alone.
I hope you’ll make this crisp your own. Adjust the spices, try different apple varieties, add nuts or skip them—the beauty of this recipe is how forgiving and adaptable it is. And if your first attempt isn’t perfect, don’t give up. I burned mine to a crisp and now I can’t imagine fall without it.
I’d love to hear how yours turns out. Leave a comment below and let me know what variations you tried, or tag me in your photos on social media. Happy baking, friends!
Frequently Asked Questions
Can I use quick oats instead of old-fashioned oats?
You can, but the texture won’t be the same. Quick oats are cut into smaller pieces and will absorb more moisture, resulting in a softer, less crunchy topping. If that’s all you have, go ahead and use them, but reduce the melted butter by 1 tablespoon to compensate for the extra absorption.
Do I have to peel the apples?
No, you don’t have to, but I recommend it. The peels can become tough and chewy during baking, especially if you’re using Granny Smith apples. If you’re short on time or prefer the rustic look, you can leave the peels on—just make sure to wash the apples thoroughly and slice them thinly so the peels soften more.
Why is my apple crisp watery?
This usually happens for one of two reasons: either you didn’t let the crisp rest long enough after baking, or you used apples that release too much liquid. Letting the crisp rest for at least 15 to 20 minutes allows the cornstarch to thicken the juices properly. If you’re using very juicy apples like McIntosh or Gala, try adding an extra tablespoon of flour to the filling.
Can I make this ahead of time?
Absolutely. You can assemble the crisp up to 24 hours in advance and keep it covered in the refrigerator. When you’re ready to bake, add about 10 minutes to the baking time since you’re starting from cold. You can also bake it completely, let it cool, and reheat individual portions in the oven or microwave.
What if I don’t have a 9×13 dish?
No problem at all. You can use a 10-inch cast iron skillet, a 2.5-quart round or oval baking dish, or even individual ramekins. Just adjust the baking time accordingly—smaller dishes will bake faster, and deeper dishes will need a few more minutes. The visual cues (bubbling filling, golden topping) are your best guide regardless of the dish size.
Pin This Recipe!

Classic Cinnamon Apple Crisp with Easy Oat Crumble

This Classic Cinnamon Apple Crisp features tender, spiced apples topped with a crunchy, buttery oat crumble. It’s a simple, forgiving dessert that fills your kitchen with the cozy aroma of fall and is perfect for any gathering.
- Prep Time: 20 minutes
- Cook Time: 45 minutes
- Total Time: 1 hour 5 minutes
- Yield: 8 servings 1x
- Category: Dessert
- Cuisine: American
Ingredients
- 6 medium apples (about 2.5 pounds or 1.1 kg), a mix of Granny Smith and Honeycrisp recommended
- 1/3 cup (65 g) granulated sugar
- 1/4 cup (50 g) light brown sugar, packed
- 2 tablespoons (16 g) all-purpose flour
- 1 1/2 teaspoons ground cinnamon
- 1/4 teaspoon ground nutmeg (optional)
- 1 tablespoon (15 ml) lemon juice
- 1 teaspoon (5 ml) vanilla extract
- 1/4 teaspoon salt
- 1 cup (90 g) old-fashioned rolled oats
- 3/4 cup (95 g) all-purpose flour
- 1/2 cup (100 g) light brown sugar, packed
- 1/4 cup (50 g) granulated sugar
- 1 teaspoon ground cinnamon
- 1/4 teaspoon salt
- 1/2 cup (113 g) unsalted butter, melted
- 1 teaspoon (5 ml) vanilla extract
Instructions
- Preheat your oven to 350°F (175°C) with a rack in the center position. Lightly grease a 9×13-inch baking dish with butter or nonstick spray.
- Peel the apples and cut them into 1/2-inch thick slices. Place them in a large bowl and toss with the lemon juice immediately to prevent browning.
- To the bowl of apples, add the granulated sugar, packed brown sugar, flour, cinnamon, nutmeg, vanilla extract, and salt. Toss until the apples are evenly coated. Let sit for about 5 minutes while you make the topping.
- In a separate medium bowl, combine the old-fashioned oats, all-purpose flour, packed brown sugar, granulated sugar, cinnamon, and salt. Whisk together. Pour the melted butter and vanilla extract over the dry ingredients and stir until the mixture forms clumps (like wet, chunky sand).
- Pour the apple filling into the prepared baking dish and spread into an even layer. Sprinkle the oat crumble evenly over the top, leaving most clusters intact.
- Place the dish on a baking sheet to catch drips. Bake for 40 to 45 minutes, or until the topping is golden brown and the filling is bubbling around the edges. If the topping browns too quickly, tent loosely with foil after 30 minutes.
- Remove from the oven and let cool on a wire rack for at least 15 to 20 minutes before serving. Serve warm, preferably with vanilla ice cream or heavy cream.
Notes
For extra-nutty flavor, toast the oats at 350°F for 5-7 minutes before mixing into the crumble. Let the crisp rest for at least 15-20 minutes after baking to allow the filling to set. Use a mix of apple varieties for best texture and flavor.
Nutrition
- Serving Size: 1 serving
- Calories: 380
- Sugar: 38
- Sodium: 180
- Fat: 16
- Saturated Fat: 10
- Carbohydrates: 58
- Fiber: 4
- Protein: 4
Keywords: apple crisp, cinnamon apple crisp, oat crumble, easy apple dessert, fall dessert, apple crisp recipe


