The apple crisp was bubbling away in the oven, filling my tiny apartment with that cozy cinnamon smell, when my phone buzzed. My sister was on her way over—twenty minutes, tops—and she was bringing her new boyfriend. The kitchen looked like a flour bomb went off. The sink was full of dishes. And I had exactly zero finished desserts to show for the hour I’d just spent. I stared at the cooling rack where a batch of graham crackers sat, leftover from another project. Then my eyes landed on the bowl of cream cheese softening on the counter. A no-bake cheesecake base was already forming in my head. But I needed an apple fix without the oven time. So I grabbed a couple of Honeycrisps from the fruit bowl, threw them in a pan with butter and brown sugar, and let them get all jammy and soft while I whipped up the filling. Twenty minutes later, I was layering this gorgeous, rustic no-bake apple cheesecake bar situation into a dish. It wasn’t the plan. It was better. And my sister’s boyfriend? He asked for the recipe before he even finished his first bite. That’s the kind of power these Easy No-Bake Apple Cheesecake Bars have—they turn a kitchen disaster into a total win.
These bars are my go-to when I need a showstopper dessert without turning on the oven. They capture all the fall flavors we crave—warm apples, buttery crust, creamy cheesecake—but they come together on the countertop. No fuss, no heat, no stress. Just pure, delicious payoff.
Why You’ll Love This Recipe
Let me tell you why these bars have become a staple in my kitchen. First off, the 10-minute prep is no joke. I’m not one of those bloggers who says “10 minutes” and means 45. I’ve timed this. You can have the crust pressed in and the filling mixed before your coffee gets cold. That’s a real thing.
- No-Bake Magic: This is the star feature. No oven, no stove (well, just a quick stovetop for the apples), no complicated techniques. Perfect for hot days when you can’t bear to turn on the oven, or for those moments when you need dessert now.
- Simple Ingredients: You probably have most of these in your pantry right now. Graham crackers, cream cheese, butter, sugar, apples, cinnamon. No weird extracts or specialty items that cost a fortune.
- Perfect for Fall Gatherings: These bars are a hit at Thanksgiving, Friendsgiving, Halloween parties, or just a cozy Sunday afternoon. They travel beautifully, too—I’ve brought them to potlucks and they always disappear first.
- Crowd-Pleaser: Kids love the creamy, sweet filling. Adults appreciate the sophisticated apple flavor. Even my picky aunt, who “doesn’t do desserts,” went back for seconds.
- Unbelievably Delicious: The texture is what gets me every time. That buttery, crunchy graham cracker crust against the silky, tangy cheesecake filling, topped with soft, cinnamon-spiced apples. It’s a symphony of textures and flavors that just works.
What makes this recipe different from all the other apple cheesecake bars out there? It’s the method. Instead of a complicated apple compote that requires constant stirring, I use a quick stovetop sauté that gives you perfectly tender apples in under 10 minutes. And the cheesecake filling? It’s stabilized with a touch of lemon juice and vanilla, so it sets up firm enough to slice cleanly but stays luxuriously creamy. This isn’t just another version—it’s the best version, born from a moment of kitchen desperation and perfected over many happy test batches.
What Ingredients You Will Need
These Easy No-Bake Apple Cheesecake Bars use simple, wholesome ingredients to deliver that big, bold fall flavor. Most of these are pantry staples, which is exactly what you want in a recipe like this. Let me walk you through what you’ll need and why each one matters.
For the Crust:
- 2 cups graham cracker crumbs (about 14-16 full sheets) — The foundation of our bars. You can buy pre-made crumbs, but I prefer crushing my own in a zip-top bag with a rolling pin. It gives you a more rustic texture. I recommend Nabisco Original Graham Crackers for the best flavor.
- ½ cup unsalted butter, melted — This binds the crumbs together and adds that rich, buttery flavor. Use real butter here, not margarine. It makes a difference.
- ¼ cup granulated sugar — A little sweetness to balance the salty butter. You can reduce this slightly if you prefer a less sweet crust.
- ¼ teaspoon salt — Don’t skip this! A pinch of salt in the crust makes the whole bar taste more complex and balanced.
For the Cheesecake Filling:
- 16 ounces cream cheese, softened to room temperature — This is non-negotiable. Cold cream cheese will leave you with lumps. Take it out of the fridge at least 30 minutes before you start. I prefer Philadelphia brand for its consistent creaminess.
- ½ cup granulated sugar — Sweetens the filling just enough. You can adjust this up or down depending on your sweetness preference.
- 1 teaspoon vanilla extract — Pure vanilla extract, not imitation. It adds warmth and depth.
- 2 tablespoons lemon juice, freshly squeezed — This is my secret ingredient. The acidity brightens the filling and helps it set up firmer. It also cuts through the richness beautifully.
- 1 cup heavy whipping cream — This gets whipped to soft peaks and folded into the cream cheese mixture. It creates that light, airy, mousse-like texture that makes these bars so addictive. (Use Horizon Organic or Organic Valley for the best results.)
For the Apple Topping:
- 3 medium apples, peeled, cored, and diced — I recommend a mix of sweet and tart apples. Honeycrisp and Granny Smith are my go-to combo. The Honeycrisp adds sweetness, while the Granny Smith brings that classic apple tartness. Fuji or Gala also work well.
- 3 tablespoons unsalted butter — For sautéing the apples. It adds a rich, nutty flavor.
- ¼ cup brown sugar, packed — Light or dark brown sugar works. The molasses in brown sugar gives the apples a deeper, more caramel-like flavor.
- 1 teaspoon ground cinnamon — The star spice of fall. Use fresh cinnamon for the best flavor. I love Simply Organic or Penzey’s cinnamon.
- ¼ teaspoon ground nutmeg — A little goes a long way. It adds warmth and complexity.
- Pinch of salt — Balances the sweetness and enhances the apple flavor.
For a gluten-free option, use gluten-free graham crackers or crushed gluten-free cookies. You can also swap the heavy cream for full-fat coconut cream (chilled overnight) for a dairy-free version, though the texture will be slightly different.
Equipment Needed
You don’t need a fancy kitchen to make these bars. Here’s what you’ll need:
- 9×9-inch baking dish — This is the perfect size for these bars. An 8×8-inch dish works too, but your layers will be slightly thicker. You can also use a 9-inch springform pan for a more elegant presentation.
- Parchment paper — Line your dish with parchment paper, leaving some overhang on two sides. This makes lifting the bars out a breeze. Trust me on this one.
- Mixing bowls — You’ll need a few: one for the crust, one for the cream cheese mixture, and one for whipping the cream.
- Electric mixer — A hand mixer works great for this recipe. You could do it by hand with a whisk, but your arm will thank you for using a mixer. A stand mixer with the whisk attachment also works beautifully.
- Rolling pin or food processor — For crushing the graham crackers. A rolling pin and a zip-top bag is my preferred method—it’s oddly satisfying. A food processor makes it even faster.
- Medium skillet — For sautéing the apples. A non-stick or stainless steel skillet works well.
- Spatula — For folding the whipped cream into the cream cheese mixture. A rubber spatula is best for this.
If you don’t have a 9×9 dish, you can use a 9-inch pie plate or even a loaf pan. Just adjust your expectations for the shape and thickness. I’ve made these in a loaf pan before, and they turned out like adorable little cheesecake bars—perfect for a smaller crowd.
Preparation Method
Alright, let’s get to the fun part. Here’s how to make these Easy No-Bake Apple Cheesecake Bars step by step. I’ve included all my little tips and tricks to make sure yours turn out perfect every time.
- Prepare Your Pan (5 minutes): Line your 9×9-inch baking dish with parchment paper. Make sure you leave about 2 inches of overhang on two opposite sides. This will be your “handle” to lift the bars out later. Lightly grease the parchment with a little butter or cooking spray—just a thin layer.
- Make the Crust (5 minutes): In a medium bowl, combine 2 cups graham cracker crumbs, ¼ cup granulated sugar, and ¼ teaspoon salt. Pour in ½ cup melted unsalted butter and stir with a fork until the mixture looks like wet sand. Every crumb should be coated. Press this mixture firmly into the bottom of your prepared pan. I use the bottom of a flat measuring cup to really pack it down. A firm crust is key to clean slices later. Pop this in the refrigerator while you work on the filling.
- Whip the Cream (3 minutes): In a chilled bowl, pour in 1 cup heavy whipping cream. Using an electric mixer on medium-high speed, whip the cream until soft peaks form. You’re looking for peaks that flop over slightly when you lift the beaters. Be careful not to over-whip—you don’t want butter! Set this aside in the refrigerator while you make the cream cheese mixture.
- Make the Cheesecake Filling (5 minutes): In a large bowl, beat 16 ounces softened cream cheese with ½ cup granulated sugar until smooth and creamy. Scrape down the sides of the bowl with a spatula. Add 1 teaspoon vanilla extract and 2 tablespoons lemon juice, and beat until combined. The mixture should be completely smooth with no lumps. If you see lumps, keep beating—they will eventually disappear.
- Fold in the Whipped Cream (2 minutes): Take your whipped cream out of the fridge. Add about a third of it to the cream cheese mixture and fold gently with a rubber spatula. This lightens the mixture and makes it easier to fold in the rest. Then add the remaining whipped cream and fold until just combined. Don’t overmix—you want to keep as much air in the mixture as possible. The filling should look light, fluffy, and mousse-like.
- Assemble the First Layers (2 minutes): Take your crust-lined pan out of the fridge. Spoon the cheesecake filling over the crust and spread it into an even layer using an offset spatula or the back of a spoon. Tap the pan gently on the counter a few times to release any air bubbles. Return the pan to the refrigerator while you cook the apples.
- Cook the Apple Topping (8-10 minutes): Peel, core, and dice 3 medium apples into ½-inch cubes. In a medium skillet over medium heat, melt 3 tablespoons unsalted butter. Add the diced apples, ¼ cup packed brown sugar, 1 teaspoon cinnamon, ¼ teaspoon nutmeg, and a pinch of salt. Stir to coat the apples. Cook for 6-8 minutes, stirring occasionally, until the apples are tender but still hold their shape. You don’t want apple mush—you want soft but distinct pieces. Remove from heat and let them cool for 5 minutes.
- Top and Chill (4+ hours): Spoon the cooked apples over the cheesecake filling, spreading them into an even layer. Gently press them down slightly so they adhere to the filling. Cover the pan with plastic wrap and refrigerate for at least 4 hours, but preferably overnight. This is the hardest part—the waiting. But trust me, the bars need this time to set up properly. Overnight is best for clean, perfect slices.
- Slice and Serve (5 minutes): Once fully chilled, use the parchment paper overhang to lift the entire block of bars out of the pan. Place it on a cutting board. Use a sharp knife to slice into 9 or 16 squares (depending on how generous you’re feeling). For clean slices, wipe the knife clean between cuts. Serve cold or at room temperature—both are delicious.
Sensory Cue: When you press the crust into the pan, it should feel like compacted sand—firm and cohesive. The filling should be silky and smooth, with a slight resistance when you spread it. The apples should release a warm, cinnamon-spiced aroma as they cook, and they should look glossy and caramelized when done.
Cooking Tips & Techniques
After making these bars more times than I can count, I’ve learned a few things the hard way. Here are my best tips to make sure your bars turn out perfect.
Room Temperature Cream Cheese is Crucial: I cannot stress this enough. Cold cream cheese will give you a lumpy filling that no amount of beating can fully fix. Take it out of the fridge at least 30-40 minutes before you start. If you’re in a hurry, cut it into small cubes and microwave it in 10-second bursts until just softened, but be careful not to melt it.
Don’t Skip the Lemon Juice: I know it seems like a small detail, but that lemon juice does two important things. First, it brightens the flavor and cuts through the richness of the cream cheese. Second, the acidity helps the filling set up firmer. Without it, your bars might be a little too soft to slice cleanly.
Whip Your Cream to Soft Peaks Only: If you over-whip the cream, it will turn into butter and your filling will be grainy. Stop as soon as the cream holds soft peaks that flop over slightly. If you see it starting to look curdled, you’ve gone too far. Start over with fresh cream.
Press the Crust Firmly: A loose crust will crumble when you try to slice the bars. Use the flat bottom of a measuring cup or a glass to really pack those crumbs down. I press firmly until the crust feels solid and doesn’t shift when I tilt the pan.
Cool the Apples Completely: If you add hot apples to the cheesecake filling, they’ll melt it and create a soupy mess. Let the apples cool for at least 10-15 minutes after cooking. You can even pop them in the fridge for a few minutes to speed things up.
Patience is Key: I know it’s tempting to dig in after an hour or two, but these bars really need at least 4 hours to set. Overnight is best. The filling needs time to firm up, and the flavors need time to meld together. Trust the process.
One Mistake I Made: The first time I made these, I used cold cream cheese straight from the fridge. The filling was lumpy and I had to keep beating it, which overworked the mixture and made it grainy. The bars still tasted good, but the texture was off. Now I always set my cream cheese out ahead of time, and my bars come out silky smooth every time.
Variations & Adaptations
One of the best things about this recipe is how versatile it is. Here are some of my favorite variations to keep things interesting.
Caramel Apple Cheesecake Bars
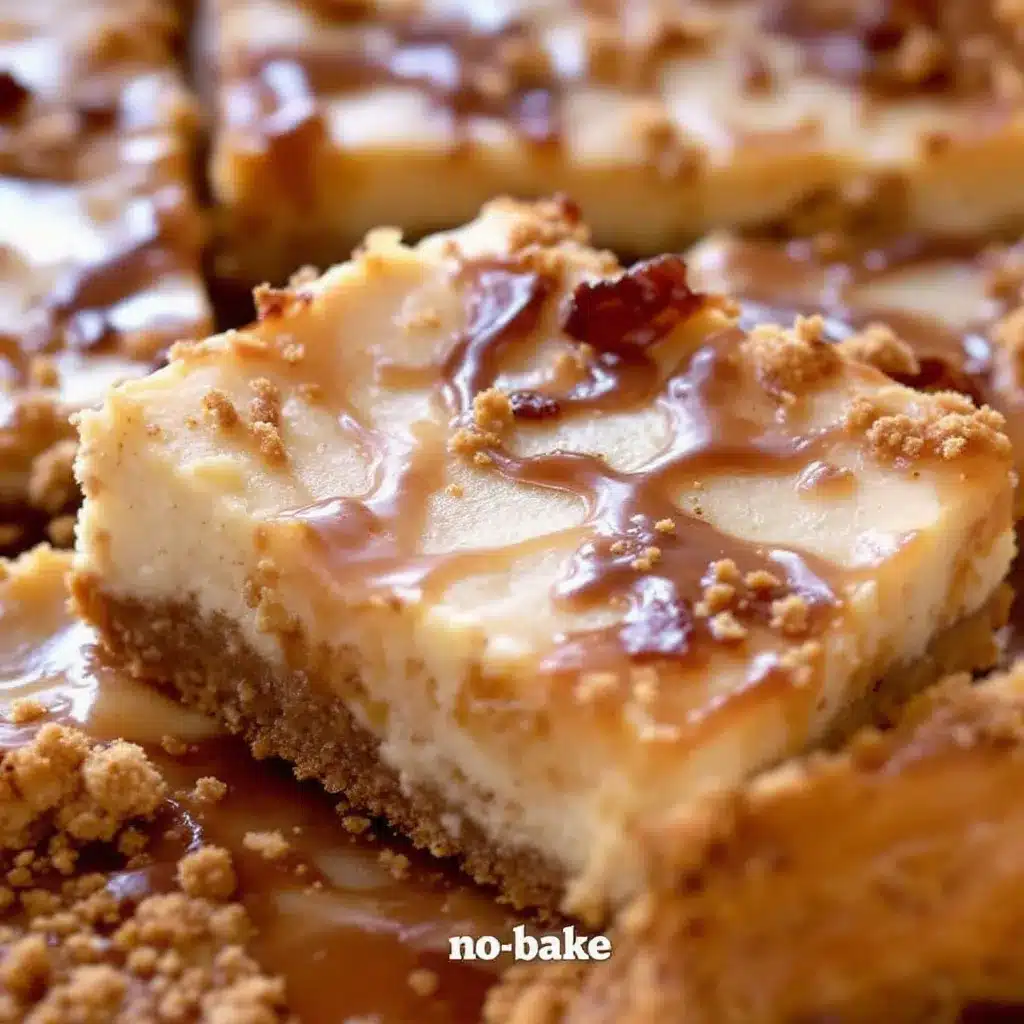
After you’ve spread the apple topping, drizzle about ¼ cup of good-quality caramel sauce over the top. I love Trader Joe’s Fleur de Sel Caramel Sauce for this. The salty-sweet combination is absolutely divine. You can also swirl the caramel into the cheesecake filling before adding the apples for a marbled effect.
Pumpkin Spice Cheesecake Bars
Swap the apples for a pumpkin layer. Mix 1 cup pumpkin puree with ¼ cup brown sugar, 1 teaspoon pumpkin pie spice, and a pinch of salt. Spread this over the cheesecake filling instead of the apples. It’s a perfect fall twist, and it pairs beautifully with the small batch pumpkin cinnamon rolls I love making for holiday brunch.
Gluten-Free Version
Use gluten-free graham crackers or crushed gluten-free vanilla cookies for the crust. Everything else in the recipe is naturally gluten-free. I’ve tested this with Kinnikinnick gluten-free graham crackers, and they work perfectly.
Dairy-Free Version
Use dairy-free cream cheese (like Kite Hill or Tofutti) and coconut cream instead of heavy cream. Chill a can of full-fat coconut milk overnight, then scoop out the solid cream and whip it until fluffy. The texture will be slightly different, but it’s still delicious.
Individual Mini Bars
Press the crust into a muffin tin lined with paper liners, then fill with the cheesecake mixture and top with apples. These mini bars are perfect for parties or portion control. They set up faster too—about 2 hours in the fridge.
Nutty Crunch Version
Toast ½ cup of chopped pecans or walnuts and sprinkle them over the apple topping before chilling. The crunch adds a wonderful texture contrast. I did this for a Thanksgiving dessert table once, and it was a huge hit alongside the pumpkin dump cake with pecan crumble.
Serving & Storage Suggestions
These Easy No-Bake Apple Cheesecake Bars are best served cold, straight from the refrigerator. The filling is firm but creamy, and the apples are perfectly tender. If you prefer a slightly softer texture, let them sit at room temperature for 10-15 minutes before serving.
For a beautiful presentation, I like to garnish the bars with a light dusting of cinnamon, a drizzle of caramel sauce, and a few thin apple slices arranged on top. A dollop of freshly whipped cream on the side never hurts either.
These bars pair beautifully with a warm cup of coffee, a cozy pumpkin chai latte with oat milk, or a glass of cold milk. For a more indulgent dessert, serve them alongside a scoop of vanilla bean ice cream.
Storage Instructions
- Refrigerator: Store the bars in an airtight container in the refrigerator for up to 5 days. The crust will stay crisp, and the filling will remain creamy. I like to place a piece of parchment paper between layers to prevent sticking.
- Freezer: These bars freeze beautifully! Wrap individual slices tightly in plastic wrap, then place them in a freezer-safe bag or container. They’ll keep for up to 3 months. To thaw, transfer a slice to the refrigerator overnight or let it sit at room temperature for about 30 minutes.
- Reheating: I don’t recommend reheating these bars—they’re meant to be served cold. But if you want a warm apple flavor, you can microwave a slice for about 10-15 seconds. Just be aware that the filling will soften significantly.
Flavor Development: These bars actually taste better the next day. The flavors meld together overnight, and the texture becomes even more cohesive. If you can, make them a day ahead of time. Your future self will thank you.
Nutritional Information & Benefits
While these Easy No-Bake Apple Cheesecake Bars are definitely a treat, they do have some redeeming qualities. Here’s a rough estimate of the nutritional breakdown per serving (based on 9 servings):
| Nutrient | Amount per Serving |
|---|---|
| Calories | ~380 kcal |
| Fat | ~26 g |
| Saturated Fat | ~16 g |
| Carbohydrates | ~34 g |
| Sugar | ~24 g |
| Protein | ~5 g |
| Fiber | ~2 g |
Health Benefits: The apples provide a good dose of fiber and vitamin C, especially if you leave the peel on (though I prefer them peeled for texture). Cinnamon is packed with antioxidants and has anti-inflammatory properties. The cream cheese and heavy cream offer some calcium and protein, though they’re also the main source of fat and calories. This is a dessert, after all—it’s meant to be enjoyed in moderation.
Dietary Considerations: This recipe is vegetarian. For gluten-free and dairy-free options, see the variations section above. It contains dairy, wheat (in the graham crackers), and may contain traces of nuts depending on your ingredients.
I believe in balance. These bars are a celebration dessert, not an everyday snack. They’re perfect for holidays, birthdays, or any time you want to treat yourself and your loved ones to something special. Enjoy every bite without guilt.
Frequently Asked Questions
Can I use a different type of crust?
Absolutely! While graham cracker crust is classic, you can use crushed vanilla wafers, shortbread cookies, or even ginger snaps for a spicier flavor. The ratio is generally the same: 2 cups crumbs to ½ cup melted butter. For a nutty twist, try using crushed pecans or almonds mixed with a little butter and sugar.
How do I know when the apples are done cooking?
You want the apples to be tender but still hold their shape. They should be easily pierced with a fork but not falling apart. The cooking time will vary depending on the type of apple you use. Softer apples like McIntosh will cook faster, while firmer apples like Granny Smith will take a bit longer. Watch for a glossy, caramelized look and that irresistible cinnamon-spiced aroma.
Can I make these bars vegan?
Yes, with some modifications. Use vegan cream cheese (like Kite Hill), coconut cream instead of heavy cream, and a vegan butter substitute. For the crust, use vegan graham crackers or cookies. The texture will be slightly different, but the flavor will still be delicious. I’ve tested this with Miyoko’s vegan cream cheese, and it worked beautifully.
Why did my cheesecake filling turn out lumpy?
This usually happens when the cream cheese is too cold. Make sure it’s at room temperature before you start. If you still get lumps, try beating the mixture for an extra minute or two. You can also press it through a fine-mesh sieve to remove any remaining lumps, though this is a bit of a hassle. The best solution is to plan ahead and let your cream cheese soften naturally.
Can I use frozen apples?
I don’t recommend it. Frozen apples release a lot of water when they cook, which can make your topping watery and your crust soggy. Fresh apples are really the best choice here. If you only have frozen apples, thaw them completely and pat them dry with paper towels before cooking. You may need to cook them a little longer to evaporate the excess moisture.
Conclusion
These Easy No-Bake Apple Cheesecake Bars are proof that you don’t need an oven, a ton of time, or a culinary degree to make something truly spectacular. They’re the kind of dessert that feels fancy but is secretly simple—the kind that makes people think you spent hours in the kitchen when you really just threw it together in 10 minutes and let the fridge do the work.
I love how forgiving this recipe is. You can swap out the apples for pears, use a different crust, or add your favorite toppings. It’s a canvas for your creativity. And honestly? It’s the dessert I turn to again and again because it always delivers. Creamy, crunchy, sweet, tangy, spiced—every bite has something to love.
So go ahead and give these bars a try. Make them for your next gathering, your family dinner, or just because it’s Tuesday and you deserve something special. And when you do, I’d love to hear about it. Drop a comment below and tell me how they turned out, what variations you tried, or just share your favorite fall dessert memory. Your stories make this community so special.
Happy no-baking, friends. You’ve got this.
Pin This Recipe!
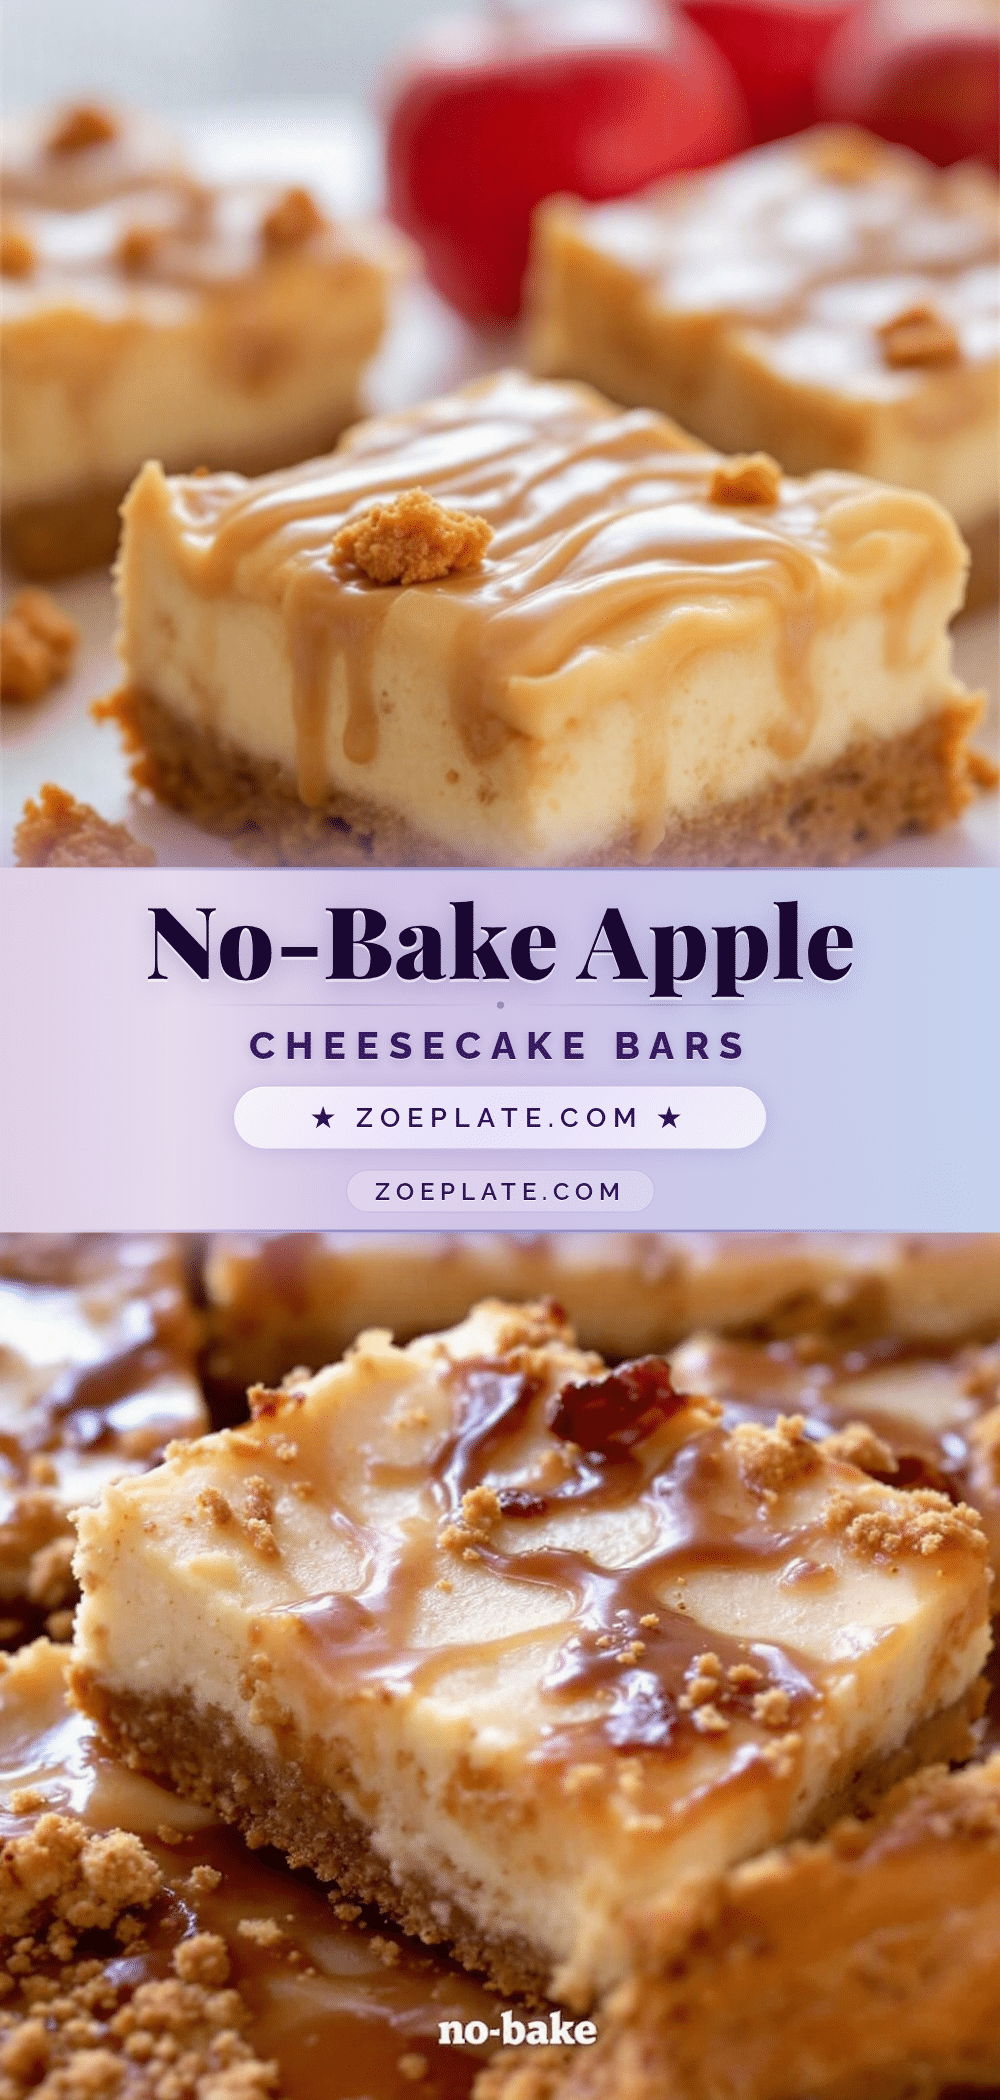
Easy No-Bake Apple Cheesecake Bars
These no-bake apple cheesecake bars feature a buttery graham cracker crust, a creamy cheesecake filling, and a cinnamon-spiced apple topping. They come together in just 10 minutes of prep and are perfect for fall gatherings or any time you need a quick, impressive dessert.
- Prep Time: 10 minutes
- Cook Time: 10 minutes
- Total Time: 4 hours 20 minutes (includes chilling)
- Yield: 9 servings 1x
- Category: Dessert
- Cuisine: American
Ingredients
- 2 cups graham cracker crumbs (about 14–16 full sheets)
- ½ cup unsalted butter, melted
- ¼ cup granulated sugar
- ¼ teaspoon salt
- 16 ounces cream cheese, softened to room temperature
- ½ cup granulated sugar
- 1 teaspoon vanilla extract
- 2 tablespoons lemon juice, freshly squeezed
- 1 cup heavy whipping cream
- 3 medium apples, peeled, cored, and diced (Honeycrisp and Granny Smith recommended)
- 3 tablespoons unsalted butter
- ¼ cup brown sugar, packed
- 1 teaspoon ground cinnamon
- ¼ teaspoon ground nutmeg
- Pinch of salt
Instructions
- Line a 9×9-inch baking dish with parchment paper, leaving about 2 inches of overhang on two opposite sides. Lightly grease the parchment.
- In a medium bowl, combine 2 cups graham cracker crumbs, ¼ cup granulated sugar, and ¼ teaspoon salt. Pour in ½ cup melted unsalted butter and stir until the mixture looks like wet sand. Press firmly into the bottom of the prepared pan. Refrigerate while making the filling.
- In a chilled bowl, whip 1 cup heavy whipping cream with an electric mixer on medium-high speed until soft peaks form. Set aside in the refrigerator.
- In a large bowl, beat 16 ounces softened cream cheese and ½ cup granulated sugar until smooth. Add 1 teaspoon vanilla extract and 2 tablespoons lemon juice, and beat until combined.
- Fold about one-third of the whipped cream into the cream cheese mixture to lighten it, then fold in the remaining whipped cream until just combined.
- Spread the cheesecake filling evenly over the crust. Tap the pan gently to release air bubbles. Return to the refrigerator.
- Peel, core, and dice 3 medium apples into ½-inch cubes. In a medium skillet over medium heat, melt 3 tablespoons unsalted butter. Add the apples, ¼ cup packed brown sugar, 1 teaspoon cinnamon, ¼ teaspoon nutmeg, and a pinch of salt. Cook for 6-8 minutes, stirring occasionally, until tender but still holding their shape. Let cool for 5 minutes.
- Spoon the cooked apples over the cheesecake filling and spread into an even layer. Cover with plastic wrap and refrigerate for at least 4 hours, preferably overnight.
- Use the parchment overhang to lift the bars out of the pan. Slice into 9 or 16 squares with a sharp knife, wiping the knife clean between cuts. Serve cold or at room temperature.
Notes
For clean slices, chill overnight. Use room temperature cream cheese to avoid lumps. Let apples cool completely before adding to the filling. For a gluten-free version, use gluten-free graham crackers. For a dairy-free version, use dairy-free cream cheese and coconut cream.
Nutrition
- Serving Size: 1 bar (based on 9 se
- Calories: 380
- Sugar: 24
- Fat: 26
- Saturated Fat: 16
- Carbohydrates: 34
- Fiber: 2
- Protein: 5
Keywords: no-bake apple cheesecake bars, easy apple dessert, fall dessert, no-bake dessert, apple cheesecake bars, 10-minute prep


