The gloss of it. That deep, almost mahogany sheen that catches the kitchen light just right, with tiny bubbles of fat winking on the surface. That’s what I made this gravy for. Everything else—the turkey, the mashed potatoes, the stuffing—is just a vehicle for that moment when the gravy boat hits the table and everyone goes quiet for a second. I know because I spent years chasing that gloss.
For the longest time, my Thanksgiving gravy was a last-minute panic. The turkey would be resting, and I’d be scraping a hot pan, whisking frantically, and hoping the lumps would disappear. And they usually did, but the stress? That stuck around. Honestly, it took a ruined Christmas dinner (the gravy broke, the dog ate the rolls, and I may have cried into the cranberry sauce) to make me rethink everything.
That’s when I started playing with the idea of make-ahead gravy. Not the kind from a box, but the real deal, built from actual drippings, only made a day or two early. I tested it on a random Tuesday with a roasted chicken, then again with turkey wings, then for a full dry-run Thanksgiving in October. The neighbors thought I was nuts. But that gloss—the one that tells you the gravy is rich, silky, and packed with flavor—showed up every single time. And the best part? No frantic whisking on the big day.
This is the best make-ahead turkey gravy from drippings you’ll ever make. It’s the one that lets you actually enjoy your holiday meal instead of sweating over the stove. And trust me, once you taste that first spoonful, you’ll wonder why you ever did it any other way.
Why You’ll Love This Recipe
Look, I’ve tested a lot of gravy recipes. Some were good, some were terrible, and some were just… fine. But this one? This one is the keeper. It’s the recipe I turn to for every holiday, and here’s why it’ll become yours too.
- Stress-Free Holiday Cooking : Make it up to three days ahead and cross one major thing off your to-do list. No more juggling the turkey and the gravy at the same time.
- Real Turkey Flavor : We’re using actual drippings, not broth from a carton. The difference is night and day. This gravy tastes like Thanksgiving, not like a can.
- Silky, Lump-Free Texture : No lumps, no broken sauce, no panic. The whisking technique is foolproof, and I’ll walk you through every step.
- Simple Pantry Ingredients : You likely have everything you need already. Butter, flour, drippings, and a little seasoning. That’s it.
- Freezer-Friendly : Make a double batch and freeze half for later. It’s a lifesaver for quick weeknight dinners or a spontaneous roast chicken.
- Better Than Store-Bought : Honestly, once you make this, you’ll never go back to the jarred stuff. The depth of flavor is incredible.
This isn’t just another gravy recipe. It’s the one that saves your sanity and impresses your guests. The first time I served it, my mother-in-law asked for the recipe. That’s when I knew I had something special.
What Ingredients You Will Need
This recipe uses simple, wholesome ingredients to create a gravy that’s rich, savory, and deeply satisfying. The magic is in the technique, not a long list of fancy items. Here’s what you’ll need.
For the Turkey Drippings
- 1 whole turkey (12-14 pounds) , roasted with your favorite seasonings. The drippings are the star of the show here.
- 2 cups turkey or chicken broth , low-sodium (I prefer Swanson or Kitchen Basics). You’ll use this to deglaze the roasting pan.
- 1 cup dry white wine (optional, but highly recommended). A crisp Sauvignon Blanc or Pinot Grigio works beautifully. It adds acidity and depth.
For the Gravy Base
- 1/2 cup unsalted butter . Don’t use salted butter here; you want to control the salt level yourself. I like Kerrygold for its richness.
- 1/2 cup all-purpose flour . Regular white flour works best for a smooth roux. For a gluten-free option, use a 1:1 gluten-free flour blend.
- 4 cups turkey drippings , strained and defatted. This is the liquid gold from your roasting pan.
- 1 cup turkey or chicken broth , additional, if needed for thinning.
- Salt and freshly ground black pepper , to taste.
- 1/2 teaspoon dried thyme (or 1 teaspoon fresh). It adds a subtle herbaceous note that pairs perfectly with turkey.
- 1 bay leaf . For simmering. Don’t skip it; it adds a layer of complexity.
Optional Add-Ins
- 1/4 cup heavy cream , for a richer, creamier gravy. I add this when I’m feeling extra indulgent.
- 1 tablespoon balsamic vinegar , for a touch of acidity and depth. It’s a trick I learned from a chef friend.
- Fresh herbs , like chopped parsley or sage, for garnish.
Ingredient Selection Tips
For the best results, use a good-quality turkey. I prefer a free-range, organic bird from a local farm. The drippings will be more flavorful. If you’re short on drippings, supplement with good-quality broth. Also, look for a dry white wine that you’d actually drink. The flavor concentrates as it cooks, so avoid anything too sweet or oaky.
Equipment Needed
You don’t need a fancy kitchen to make this gravy. Here’s what you’ll need.
- Roasting pan with a rack. The pan is essential for collecting drippings.
- Fat separator (or a large glass measuring cup and a spoon). This is the best tool for removing fat from the drippings.
- Fine-mesh strainer . For straining the drippings and ensuring a smooth gravy.
- Large saucepan or Dutch oven . For making the gravy.
- Whisk . A good, sturdy whisk is your best friend here. It prevents lumps.
- Wooden spoon or spatula . For deglazing the roasting pan.
- Measuring cups and spoons . Accuracy matters, especially with the flour and liquid.
- Storage containers . Airtight containers for refrigerating or freezing the gravy.
Budget-Friendly Alternatives
If you don’t have a fat separator, let the drippings sit in a glass measuring cup for a few minutes. The fat will rise to the top, and you can skim it off with a spoon. A fine-mesh strainer is nice but not essential; you can also use cheesecloth or a clean kitchen towel. I’ve made this gravy with a basic whisk and a cheap saucepan, and it turned out just as good. The technique matters more than the tools.
Preparation Method
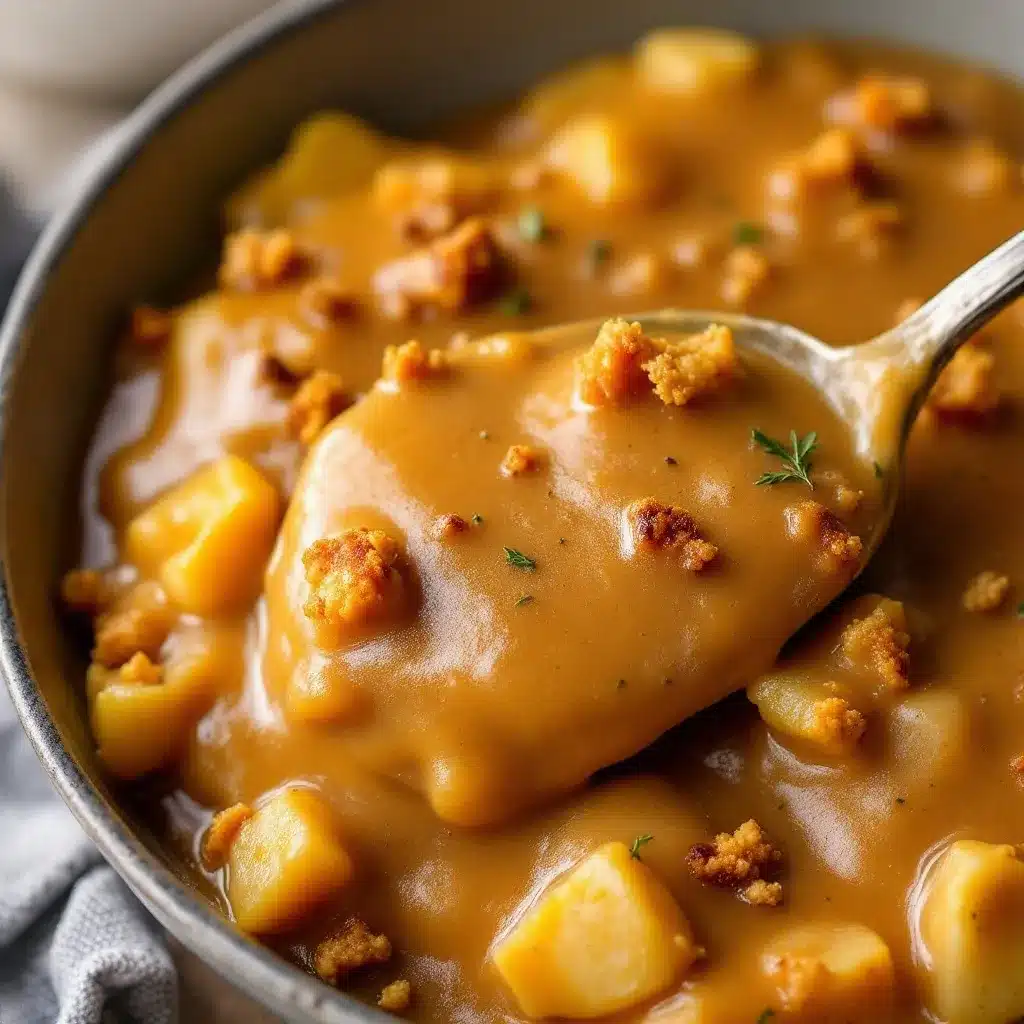
This method is broken down into two parts: making the drippings and making the gravy. The beauty of this recipe is that you can do the first part on Thanksgiving Day and the second part a day or two later.
Part 1: Collecting the Drippings
- Roast the turkey as you normally would. I season mine with salt, pepper, and a little garlic powder, and I stuff the cavity with onions, apples, and fresh herbs.
- Once the turkey is done , transfer it to a cutting board to rest. Pour the drippings from the roasting pan through a fine-mesh strainer into a fat separator or a large glass measuring cup. Let it sit for 5-10 minutes.
- Skim off the fat . If using a fat separator, pour the defatted drippings into a bowl or container. If using a measuring cup, spoon off the fat that rises to the top. Reserve the fat if you want to use it for roasting potatoes later.
- Deglaze the roasting pan . Place the roasting pan over two burners on medium heat. Add the white wine (if using) and 1 cup of broth. Use a wooden spoon to scrape up all the browned bits from the bottom of the pan. This is where so much flavor lives.
- Strain again . Pour the deglazed liquid through the strainer into the container with the defatted drippings. You should have about 4 cups of liquid. If you’re short, top it off with more broth.
- Cool and store . Let the drippings cool completely, then cover and refrigerate for up to 3 days. The fat will solidify on top, making it even easier to remove later.
- Remove the drippings from the fridge . Scrape off any solidified fat from the top. You don’t need to remove every last bit, but most of it should go.
- Melt the butter in a large saucepan over medium heat. Once it’s foaming, add the flour. Whisk constantly for 2-3 minutes until the roux is a light golden color. It should smell nutty, not raw.
- Slowly add the drippings , whisking constantly. Start with about 1 cup, whisk until smooth, then add the rest. This is the key to a lump-free gravy. Don’t dump it all in at once.
- Add the broth, thyme, and bay leaf . Whisk to combine. Bring the gravy to a gentle simmer, then reduce the heat to low. Let it cook for 10-15 minutes, stirring occasionally, until it thickens to your liking. It will continue to thicken as it cools.
- Season with salt and pepper . Taste it. Adjust the seasoning. Remember that the flavors will concentrate as it sits, so go easy on the salt at first.
- Remove the bay leaf . If you’re adding cream or balsamic vinegar, stir it in now. Cook for another minute.
- Cool and store . Let the gravy cool completely, then transfer to an airtight container. Refrigerate for up to 3 days or freeze for up to 3 months.
- Don’t rush the roux . Cooking the flour and butter for a few minutes removes the raw flour taste and gives the gravy a better flavor. You want it to smell like toasted nuts, not paste.
- Whisk, whisk, whisk . When you add the liquid to the roux, whisk constantly. This is the only way to guarantee a smooth gravy. If you stop whisking, lumps will form.
- Use cold or room-temperature liquid . Adding cold liquid to a hot roux can cause it to seize up. I take my drippings out of the fridge about 30 minutes before I start cooking.
- Taste as you go . The amount of salt you need will depend on your turkey and broth. I always start with less and add more at the end.
- Don’t boil the gravy . A gentle simmer is all you need. Boiling can cause the gravy to break or become gluey.
- My biggest failure : I once tried to make this gravy with a gluten-free flour blend that was mostly rice flour. It turned into a gritty, pasty mess. Stick with all-purpose flour or a blend specifically designed for sauces.
- Giblet Gravy : While the turkey is roasting, simmer the giblets (neck, heart, gizzard) in a cup of water with a bay leaf for 30 minutes. Chop the cooked giblets and add them to the finished gravy. My dad loves this version.
- Mushroom Gravy : Sauté 8 ounces of sliced cremini mushrooms in butter until golden brown. Add them to the gravy after you’ve added the drippings. It’s perfect for a vegetarian Thanksgiving or a hearty shepherd’s pie.
- Herb-Infused Gravy : Add a sprig of fresh rosemary and a few sage leaves to the gravy while it simmers. Remove them before serving. The flavor is incredible.
- Gluten-Free Option : Use a 1:1 gluten-free flour blend (like Bob’s Red Mill) in place of the all-purpose flour. The texture will be slightly different, but it’s still delicious.
- Dairy-Free Option : Use a high-quality vegan butter or olive oil in place of the butter. The flavor will change slightly, but it’s still a great gravy.
- Spicy Gravy : Add a pinch of cayenne pepper or a dash of hot sauce at the end. It adds a nice warmth without being overpowering.
- Serve it hot, right out of the saucepan or a warmed gravy boat.
- It’s perfect over mashed potatoes, stuffing, turkey, and even roasted vegetables.
- Leftover gravy is amazing on open-faced turkey sandwiches or a hot turkey melt. I’ve even used it as a base for a turkey pot pie.
- For a special touch, garnish with a few fresh herbs or a crack of black pepper.
- Refrigerator : Store in an airtight container for up to 3 days. The gravy will thicken as it sits, so you’ll need to thin it when reheating.
- Freezer : Store in a freezer-safe container or zip-top bag for up to 3 months. I like to freeze it in 1-cup portions so I can defrost just what I need.
- Reheating : Thaw frozen gravy in the refrigerator overnight. Reheat in a saucepan over low heat, whisking occasionally. Add a splash of broth or water to thin it to your desired consistency.
- Turkey drippings contain collagen and gelatin, which are good for joint and skin health.
- Using homemade broth (if you make your own) adds minerals and nutrients.
- This gravy is relatively low in carbohydrates, making it suitable for low-carb diets in moderation.
- Contains gluten (flour). Use a gluten-free blend for a GF option.
- Contains dairy (butter). Use vegan butter for a dairy-free option.
- Always check your broth for hidden ingredients if you have specific allergies.
Part 2: Making the Make-Ahead Gravy
Reheating Instructions
To reheat, transfer the gravy to a saucepan and warm over low heat, whisking occasionally. If it’s too thick, thin it with a splash of broth or water. If it’s too thin, let it simmer for a few more minutes to reduce.
Cooking Tips & Techniques
I’ve made this gravy more times than I can count, and I’ve learned a few things along the way. Here are my best tips.
Timing and Multitasking
I usually make the drippings on Thanksgiving morning while the turkey is resting. Then, I make the gravy the next day while the leftovers are being reheated. It’s a great system. You can also make the entire thing a week ahead and freeze it. Just thaw it in the fridge overnight before reheating.
Variations & Adaptations
This recipe is a fantastic base, and you can easily adapt it to your tastes or dietary needs.
A Personal Variation
Last year, I added a splash of bourbon to the gravy along with the wine. It was a game-changer. The smoky, sweet notes from the bourbon paired beautifully with the turkey. I’m definitely doing that again this year.
Serving & Storage Suggestions
This gravy is incredibly versatile. Here’s how to serve and store it.
Serving Suggestions
Storage Instructions
How Flavors Develop
This gravy actually gets better after a day or two in the fridge. The flavors meld together, and the texture becomes even silkier. It’s a perfect example of why make-ahead recipes are so great.
Nutritional Information & Benefits
While gravy isn’t typically considered a health food, it does have some redeeming qualities. Here’s a rough estimate per 1/4 cup serving.
| Nutrient | Amount |
|---|---|
| Calories | 120 |
| Total Fat | 9g |
| Saturated Fat | 5g |
| Cholesterol | 25mg |
| Sodium | 350mg |
| Total Carbohydrates | 7g |
| Dietary Fiber | 0g |
| Sugars | 0g |
| Protein | 2g |
Health Benefits
Dietary Considerations
Personal Wellness Perspective
I believe in enjoying food without guilt. This gravy is a special-occasion treat, and I’d rather have a small serving of the real thing than a larger serving of a low-fat version that doesn’t taste as good. Moderation is the key.
Conclusion
This make-ahead turkey gravy from drippings is more than just a recipe. It’s a strategy for a stress-free holiday. It’s the confidence that comes from knowing one of the most important parts of the meal is already done. And honestly, it’s the taste of real, homemade comfort.
I love this recipe because it lets me focus on what matters: spending time with family and friends, not hovering over the stove. The rich, silky texture and deep turkey flavor are unmatched. You can customize it with herbs, mushrooms, or even a splash of bourbon. It’s your gravy now.
I’d love to hear how it turns out for you. Did you add your own twist? Did it save your Thanksgiving? Drop a comment below and share your story. And if you found this helpful, please share it with a friend who needs a little less stress and a lot more flavor in their life. Happy cooking!
Frequently Asked Questions
Can I make this gravy without actual turkey drippings?
Yes, you can. Use 4 cups of good-quality turkey or chicken broth instead. You’ll miss some of the depth, but it will still be a tasty gravy. For a richer flavor, roast some turkey wings or drumsticks in the oven and use their drippings.
How do I fix lumpy gravy?
Don’t panic. Pour the gravy through a fine-mesh strainer into a clean saucepan. Press on the lumps with a spoon to break them up. If it’s still lumpy, use an immersion blender to smooth it out.
Can I freeze this gravy?
Absolutely. Let the gravy cool completely, then transfer to a freezer-safe container. It will keep for up to 3 months. Thaw in the refrigerator overnight before reheating.
My gravy is too thin. How do I thicken it?
Let it simmer for longer to reduce. If it’s still too thin, mix 1 tablespoon of cornstarch with 2 tablespoons of cold water to make a slurry. Whisk the slurry into the simmering gravy and cook for another minute until it thickens.
My gravy is too salty. Can I fix it?
Add a splash of unsalted broth or water to dilute the salt. You can also add a squeeze of lemon juice or a splash of vinegar to balance the flavor. If it’s really salty, add a peeled raw potato to the gravy and let it simmer for 10 minutes. The potato will absorb some of the salt.
Pin This Recipe!
Best Make-Ahead Turkey Gravy from Drippings

This make-ahead turkey gravy from drippings is rich, silky, and packed with flavor. Make it up to three days ahead for a stress-free holiday meal.
- Prep Time: 15 minutes
- Cook Time: 30 minutes
- Total Time: 45 minutes
- Yield: 4 cups (16 servings of 1/4 cup each) 1x
- Category: Sauce
- Cuisine: American
Ingredients
- 1 whole turkey (12–14 pounds), roasted with your favorite seasonings
- 2 cups turkey or chicken broth, low-sodium
- 1 cup dry white wine (optional, such as Sauvignon Blanc or Pinot Grigio)
- 1/2 cup unsalted butter
- 1/2 cup all-purpose flour
- 4 cups turkey drippings, strained and defatted
- 1 cup turkey or chicken broth, additional for thinning
- Salt and freshly ground black pepper, to taste
- 1/2 teaspoon dried thyme (or 1 teaspoon fresh)
- 1 bay leaf
- 1/4 cup heavy cream (optional)
- 1 tablespoon balsamic vinegar (optional)
- Fresh herbs like chopped parsley or sage for garnish (optional)
Instructions
- Roast the turkey as you normally would. Season with salt, pepper, and garlic powder; stuff cavity with onions, apples, and fresh herbs.
- Once turkey is done, transfer to a cutting board to rest. Pour drippings from roasting pan through a fine-mesh strainer into a fat separator or large glass measuring cup. Let sit for 5-10 minutes.
- Skim off the fat. If using a fat separator, pour defatted drippings into a bowl. If using a measuring cup, spoon off fat. Reserve fat if desired.
- Deglaze the roasting pan: Place pan over two burners on medium heat. Add white wine (if using) and 1 cup broth. Use a wooden spoon to scrape up browned bits from bottom.
- Strain again: Pour deglazed liquid through strainer into container with defatted drippings. You should have about 4 cups. If short, top off with more broth.
- Cool and store: Let drippings cool completely, then cover and refrigerate for up to 3 days. Fat will solidify on top.
- Remove drippings from fridge. Scrape off any solidified fat.
- Melt butter in a large saucepan over medium heat. Once foaming, add flour. Whisk constantly for 2-3 minutes until roux is light golden and smells nutty.
- Slowly add drippings, whisking constantly. Start with 1 cup, whisk until smooth, then add the rest.
- Add broth, thyme, and bay leaf. Whisk to combine. Bring to a gentle simmer, then reduce heat to low. Cook for 10-15 minutes, stirring occasionally, until thickened.
- Season with salt and pepper to taste. Remove bay leaf. If using cream or balsamic vinegar, stir in now and cook for another minute.
- Cool completely, then transfer to an airtight container. Refrigerate for up to 3 days or freeze for up to 3 months.
- To reheat: Transfer to saucepan and warm over low heat, whisking occasionally. Thin with broth or water if too thick.
Notes
For best results, use a good-quality turkey. If short on drippings, supplement with good-quality broth. The gravy thickens as it cools; thin when reheating. Can be frozen for up to 3 months.
Nutrition
- Serving Size: 1/4 cup
- Calories: 120
- Sodium: 350
- Fat: 9
- Saturated Fat: 5
- Carbohydrates: 7
- Protein: 2
Keywords: make-ahead turkey gravy, turkey gravy from drippings, Thanksgiving gravy, homemade gravy, gravy recipe


