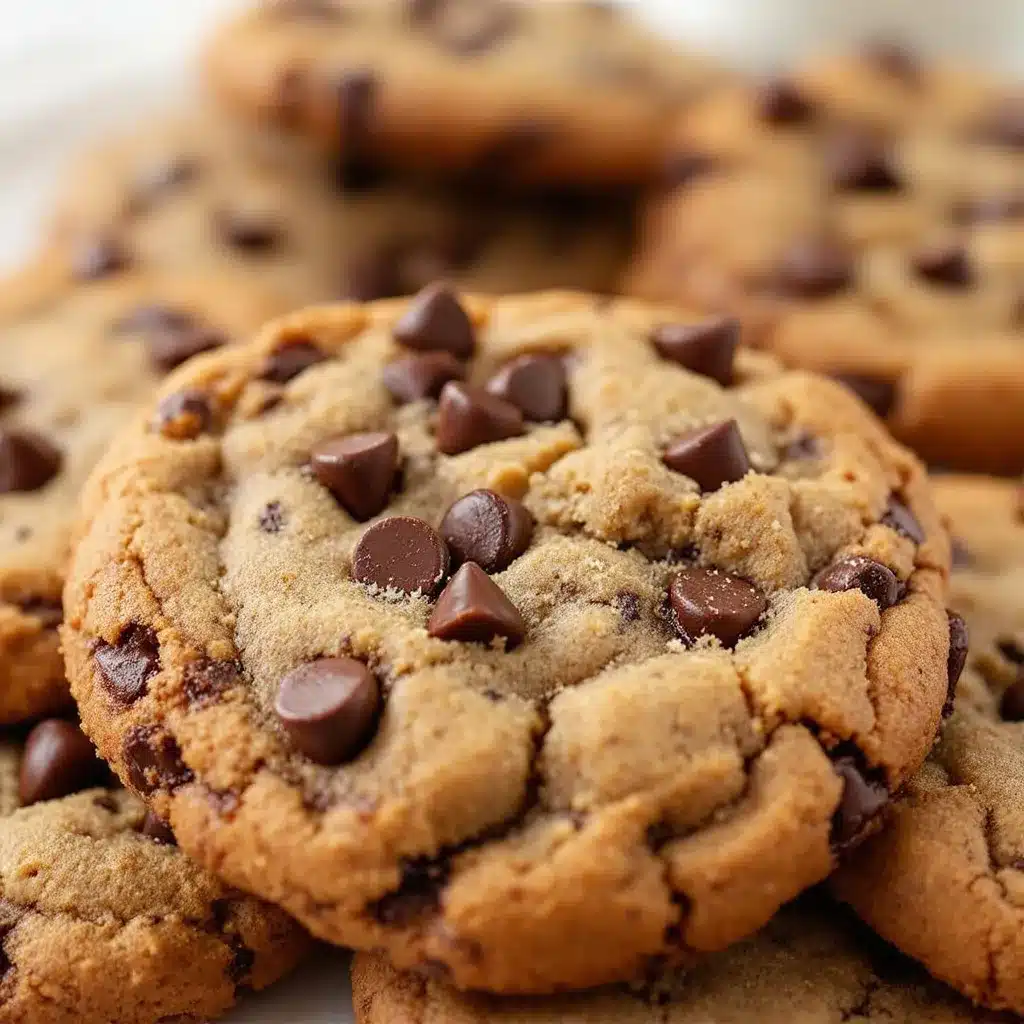
I figured the perfect chewy chocolate chip cookie was a myth, something food bloggers chased but normal people could never actually make at home. It took about three batches of sad, flat discs and one batch of hockey pucks for that assumption to fall apart completely. The problem wasn’t my oven or my butter—it was my patience, honestly. I was rushing, skipping the chilling step because who has time for that, and using melted butter when I should have known better. The kitchen smelled amazing every single time, but the cookies? They crumbled, they spread into one giant cookie sheet, or they turned into crunchy little rocks that were only good for dunking in milk (and even then, they fought back). I was about to give up and just buy the tube stuff from the store when a friend—the kind of baker who never measures anything and it still comes out perfect—watched me one afternoon and said, “You’re overthinking it. Just let the dough rest.” That was it. No secret ingredient, no fancy technique. Just a little patience and a few simple tweaks. And suddenly, I had it. The perfect chewy chocolate chip cookie. The kind with that crackly top, a soft center, and edges that give just enough when you bite in. This recipe is the result of all those failures, and I promise you, it works.
Why You Will Love This Recipe
Let me tell you why this is the only chocolate chip cookie recipe you will ever need. I have tested this thing into the ground—baked it at high altitude, at sea level, in a humid kitchen, and in a dry one. I have handed it to friends who swear they cannot bake, and they text me photos of perfect cookies. It works because it is built on a few key principles that deliver texture every single time.
- Perfectly Chewy Texture: The combination of melted butter and an extra egg yolk creates a dense, soft center with just enough chew. No cakey cookies here.
- Simple Pantry Ingredients: You probably have everything already. Butter, sugar, eggs, flour, baking soda, salt, and chocolate chips. No weird stuff like corn syrup or pudding mix.
- No Mixer Required: You can make the dough with a wooden spoon and a bowl. Seriously. Your arms will get a little workout, but it is worth it.
- Crowd-Pleaser Guaranteed: I have brought these to potlucks, birthday parties, and casual hangouts. They disappear faster than anything else on the table. Kids love them, adults love them, and people who claim they are “not dessert people” eat three.
- Freezer-Friendly Dough: You can make the dough now and bake cookies whenever the craving hits. It is the ultimate emergency dessert.
What makes this recipe different from the rest? It is the resting time. That hour in the fridge is not optional—it is the secret to the chewy texture and the deep, caramelized flavor. The dough relaxes, the flavors meld, and the butter solidifies just enough so the cookies spread at the perfect rate. Trust me on this one. It is the kind of cookie that makes you close your eyes after the first bite. It is comfort food, perfected.
What Ingredients You Will Need
This recipe uses simple, wholesome ingredients to deliver that bakery-style chew and rich flavor without any fuss. Most of these are pantry staples, but a few notes will help you get the best results.
- 2 ¼ cups (280g) all-purpose flour – Spoon and level it. Do not scoop directly from the bag or you will pack in too much flour and get dry cookies.
- 1 teaspoon baking soda – Make sure it is fresh. If it does not fizz when you drop a pinch into vinegar, toss it and buy new.
- 1 teaspoon salt – I use fine sea salt. It balances the sweetness perfectly.
- 1 cup (2 sticks, 226g) unsalted butter, melted and slightly cooled – This is the key to chewy cookies. Melted butter creates a denser, chewier texture than creamed butter. Let it cool for about 5 minutes so it does not cook the eggs.
- 1 cup (200g) packed light brown sugar – Brown sugar adds moisture and that deep, almost molasses-like flavor. Do not substitute white sugar entirely.
- ½ cup (100g) granulated sugar – White sugar helps with spreading and gives the edges a slight crispness.
- 2 large eggs, room temperature – Cold eggs will seize the melted butter. If you forgot to take them out, place them in a bowl of warm water for 5 minutes.
- 1 large egg yolk – This extra yolk is the secret to extra chewiness. It adds fat and richness without thinning the dough.
- 2 teaspoons vanilla extract – Pure vanilla is best, but imitation works fine in a pinch.
- 2 cups (340g) semi-sweet chocolate chips – I prefer Ghirardelli or Guittard for the best flavor and melt. You can also chop up a chocolate bar for bigger puddles of chocolate.
Ingredient Substitutions: If you are out of brown sugar, you can mix 1 cup of white sugar with 2 tablespoons of molasses. For a dairy-free version, use vegan butter sticks (not margarine) and a flax egg (1 tablespoon ground flaxseed mixed with 3 tablespoons water). The texture will be slightly different but still delicious.
Equipment Needed
You do not need a fancy kitchen for these cookies. Here is what you will need:
- Large mixing bowl – Any bowl will do, but a wide one makes mixing easier.
- Wooden spoon or silicone spatula – For mixing the dough. A hand mixer works too, but I like the control of a spoon.
- Measuring cups and spoons – For accuracy. A kitchen scale is even better for the flour.
- Baking sheets – Two standard 13×18 inch sheets. Light-colored metal pans work best for even browning.
- Parchment paper or silicone baking mats – Non-stick is essential. I prefer parchment for the crispiest bottoms.
- Cooling rack – Lets the cookies cool without steaming and getting soggy.
- Cookie scoop (about 2 tablespoons) – Not required, but it makes perfectly even cookies. A regular spoon works fine.
Budget-Friendly Tip: If you do not have a cookie scoop, use two spoons to shape the dough into balls. It takes a little longer but works just as well.
Preparation Method
This is where the magic happens. Follow these steps closely, and you will have perfect cookies every time.
- Whisk the dry ingredients. In a medium bowl, whisk together the flour, baking soda, and salt. Set aside. This ensures the leavening agent is evenly distributed.
- Mix the wet ingredients. In a large bowl, combine the melted butter (cooled!), brown sugar, and granulated sugar. Whisk until smooth and no lumps remain. It will look like wet sand.
- Add the eggs and vanilla. Add the whole eggs, the extra egg yolk, and the vanilla extract. Whisk vigorously for about 30 seconds until the mixture is pale, thick, and glossy. This is where you build the structure of the cookie.
- Combine wet and dry. Pour the dry ingredients into the wet mixture. Switch to a wooden spoon or spatula and fold gently until just combined. A few streaks of flour are okay—overmixing develops gluten and makes tough cookies.
- Fold in the chocolate chips. Add the chocolate chips and fold a few times until evenly distributed. The dough will be thick and slightly sticky.
- Chill the dough. Cover the bowl with plastic wrap and refrigerate for at least 1 hour. This is non-negotiable for chewy cookies. Chilling solidifies the butter, which prevents excessive spreading and deepens the flavor. You can chill for up to 72 hours for even better results.
- Preheat the oven. When ready to bake, preheat your oven to 350°F (175°C). Line two baking sheets with parchment paper.
- Scoop the dough. Use a 2-tablespoon cookie scoop to portion the dough. Roll each portion into a smooth ball. Place them on the prepared baking sheets about 3 inches apart. They will spread.
- Bake. Bake one sheet at a time for 10-12 minutes. The edges should be golden brown and set, but the centers will look slightly underdone and puffy. That is exactly what you want. They will continue to cook on the hot pan.
- Cool on the pan. Let the cookies rest on the baking sheet for 5 minutes. This allows them to set without breaking. Then transfer to a wire rack to cool completely.
Sensory Cue: Your kitchen should smell like brown butter and vanilla. The cookies will look puffy and pale in the center when you pull them out. Do not be tempted to bake them longer—the carryover heat will finish the job.
Cooking Tips & Techniques
I have made every mistake in the book so you do not have to. Here is what I learned the hard way:
- Do not skip the chill. I know it is tempting to bake right away, but warm dough spreads into thin, crispy discs. The chill is what gives you that thick, soft center.
- Use room temperature eggs. If your eggs are cold, the melted butter will seize up and clump. It is a mess. Just warm them in a bowl of water for 5 minutes.
- Measure flour correctly. Fluff the flour with a fork, then spoon it into your measuring cup and level it off. Scooping directly from the bag can add 20% more flour, which makes dry, crumbly cookies.
- Bake one sheet at a time. If you put two sheets in the oven, the heat does not circulate properly. The bottom sheet will burn, and the top sheet will be underdone. Just do it in batches.
- Underbake slightly. The best cookies come out of the oven looking slightly underdone. They will set up perfectly as they cool. Overbaked cookies are crunchy, not chewy.
- Use a cookie scoop for even sizes. This ensures all the cookies bake at the same rate. No more tiny burnt ones next to giant raw ones.
One time, I forgot the salt. I realized it after the dough was already baked. The cookies were edible, but they tasted flat and one-dimensional. Salt is not just for flavor—it enhances the sweetness and balances the richness of the butter. Do not skip it.
Variations & Adaptations
This base dough is incredibly versatile. Here are some of my favorite ways to change it up:
- Chocolate Lover’s: Swap ¼ cup of flour for ¼ cup of unsweetened cocoa powder. Use dark chocolate chips or chunks. You get a double chocolate cookie that is dangerously good.
- Nutty Delight: Add 1 cup of toasted chopped walnuts or pecans along with the chocolate chips. Toast them in a dry pan for 3-4 minutes first for extra flavor.
- Peanut Butter Swirl: Drop small spoonfuls of creamy peanut butter onto the dough balls before baking. Swirl it in with a toothpick. Salty and sweet perfection.
- Gluten-Free: Substitute the all-purpose flour with a 1:1 gluten-free baking flour blend (I like King Arthur’s). Add 1 teaspoon of xanthan gum if your blend does not include it. The texture will be slightly more tender but still chewy.
- Vegan: Use vegan butter sticks and a flax egg (1 tablespoon ground flaxseed + 3 tablespoons water, let sit for 5 minutes). The cookies will be a bit flatter but still delicious.
- Sea Salt Finish: Sprinkle a few flakes of flaky sea salt on top of each cookie right after they come out of the oven. It takes them from good to absolutely irresistible.
I personally love the sea salt version. The contrast between the sweet, chewy cookie and the salty crunch on top is just perfect. It is my go-to for guests.
Serving & Storage Suggestions
These cookies are best served warm, right after the 5-minute rest on the baking sheet. The chocolate is still melty, and the edges are perfectly crisp. If you want to go all out, serve them with a cold glass of milk or a scoop of vanilla ice cream for an indulgent dessert.
For storage, keep the baked cookies in an airtight container at room temperature for up to 5 days. I like to add a slice of bread to the container—it absorbs excess moisture and keeps the cookies soft. Replace the bread slice every other day.
To freeze baked cookies: Cool them completely, then layer them in a freezer-safe container with parchment paper between layers. They will keep for up to 3 months. Thaw at room temperature for about 15 minutes, or pop them in a 300°F oven for 5 minutes to re-crisp the edges.
To freeze raw dough: Scoop the dough into balls and place them on a parchment-lined baking sheet. Freeze until solid, then transfer the balls to a freezer bag. Bake from frozen, adding 2-3 minutes to the baking time. It is the ultimate emergency cookie.
The flavors actually develop more over time. Day-old cookies are often even better than fresh ones because the brown sugar and vanilla have had time to meld. If you can resist eating them all on day one, you are in for a treat.
Nutritional Information & Benefits
Let us be real—these are cookies, not health food. But here is the approximate nutritional breakdown per cookie (based on 24 cookies):
- Calories: 210
- Fat: 11g
- Carbohydrates: 28g
- Protein: 3g
- Sugar: 18g
- Fiber: 1g
Health Highlights: Dark chocolate is rich in antioxidants, and the eggs provide a good source of protein and healthy fats. The brown sugar contains a small amount of molasses, which has trace minerals like calcium and iron. That said, these are a treat, and they are meant to be enjoyed in moderation. I believe in balance—eat a salad for lunch, and then have two of these cookies for dessert without any guilt.
Dietary Considerations: This recipe contains gluten, dairy, and eggs. For gluten-free or vegan options, see the variations section above. The cookies are not low-carb or keto-friendly, but they are a wonderful occasional indulgence.
Conclusion
This perfect chewy chocolate chip cookie recipe is the result of trial, error, and a whole lot of butter. It is simple enough for a beginner but delivers the kind of texture that makes people think you spent hours in the kitchen. The secret is in the melted butter, the extra yolk, and that crucial hour of chill time. You can customize it with nuts, chocolate variations, or a sprinkle of sea salt. I love this recipe because it is forgiving, it is reliable, and it makes people happy. Every time I bake a batch, I remember that friend who told me to just let the dough rest. She was right.
I would love to hear how these turn out for you. Leave a comment below and tell me about your cookie adventures—did you add nuts? Did you double the chocolate chips? Did you manage to save any for the next day? And if you are looking for another fun dessert to try, check out these ultimate game day football-shaped chocolate chip cookie cake for a show-stopping party treat. Or, if you want to use up some zucchini, this best double chocolate zucchini muffins with cream cheese swirl is a fantastic option. Happy baking, friends!
Frequently Asked Questions
Can I use salted butter instead of unsalted?
Yes, you can. Just reduce the added salt in the recipe to ½ teaspoon to account for the salt in the butter. The cookies will still be perfectly balanced.
Why did my cookies spread too much?
This usually happens when the dough is too warm or the butter was too hot when mixed. Make sure your melted butter is cooled to room temperature, and do not skip the chilling step. Also, check that your baking soda is fresh.
Can I use margarine instead of butter?
I do not recommend it. Margarine has a higher water content, which can make the cookies spread too much and turn out greasy. Stick with real butter for the best texture and flavor.
How do I make the cookies extra thick?
For thicker cookies, chill the dough for at least 2 hours (or up to 72 hours). You can also roll the dough into taller, less wide balls. And bake them from cold—do not let the dough come to room temperature before baking.
Can I use milk chocolate chips instead of semi-sweet?
Absolutely. Milk chocolate chips will make the cookies sweeter and creamier. If you prefer a less sweet cookie, stick with semi-sweet or use dark chocolate chips. You can also use a mix of both!
Pin This Recipe!
Perfect Chewy Chocolate Chip Cookies Recipe: Easy Homemade

This recipe delivers perfectly chewy chocolate chip cookies with a crackly top, soft center, and edges that give just enough when you bite in. Made with simple pantry ingredients and no mixer required, these cookies are a crowd-pleaser every time.
- Prep Time: 15 minutes
- Cook Time: 12 minutes
- Total Time: 1 hour 27 minutes
- Yield: 24 cookies 1x
- Category: Dessert
- Cuisine: American
Ingredients
- 2 ¼ cups (280g) all-purpose flour
- 1 teaspoon baking soda
- 1 teaspoon salt
- 1 cup (2 sticks, 226g) unsalted butter, melted and slightly cooled
- 1 cup (200g) packed light brown sugar
- ½ cup (100g) granulated sugar
- 2 large eggs, room temperature
- 1 large egg yolk
- 2 teaspoons vanilla extract
- 2 cups (340g) semi-sweet chocolate chips
Instructions
- Whisk the dry ingredients: In a medium bowl, whisk together the flour, baking soda, and salt. Set aside.
- Mix the wet ingredients: In a large bowl, combine the melted butter (cooled!), brown sugar, and granulated sugar. Whisk until smooth and no lumps remain.
- Add the eggs and vanilla: Add the whole eggs, the extra egg yolk, and the vanilla extract. Whisk vigorously for about 30 seconds until the mixture is pale, thick, and glossy.
- Combine wet and dry: Pour the dry ingredients into the wet mixture. Switch to a wooden spoon or spatula and fold gently until just combined. A few streaks of flour are okay.
- Fold in the chocolate chips: Add the chocolate chips and fold a few times until evenly distributed. The dough will be thick and slightly sticky.
- Chill the dough: Cover the bowl with plastic wrap and refrigerate for at least 1 hour. This is non-negotiable for chewy cookies.
- Preheat the oven: When ready to bake, preheat your oven to 350°F (175°C). Line two baking sheets with parchment paper.
- Scoop the dough: Use a 2-tablespoon cookie scoop to portion the dough. Roll each portion into a smooth ball. Place them on the prepared baking sheets about 3 inches apart.
- Bake: Bake one sheet at a time for 10-12 minutes. The edges should be golden brown and set, but the centers will look slightly underdone and puffy.
- Cool on the pan: Let the cookies rest on the baking sheet for 5 minutes. Then transfer to a wire rack to cool completely.
Notes
Do not skip the chilling step—it is essential for chewy texture. Use room temperature eggs to prevent butter from seizing. Measure flour correctly by spooning and leveling. Bake one sheet at a time for even results. Underbake slightly for soft centers.
Nutrition
- Serving Size: 1 cookie
- Calories: 210
- Sugar: 18
- Sodium: 150
- Fat: 11
- Saturated Fat: 6
- Carbohydrates: 28
- Fiber: 1
- Protein: 3
Keywords: chocolate chip cookies, chewy cookies, easy cookies, homemade cookies, dessert, baking


