It was the third time I made these Simple One-Bowl Pumpkin Snickerdoodle Cookies in a single weekend, and honestly, the kitchen smelled like a bakery had exploded. I started with the intention of making just one batch. You know how it goes, right? You see a recipe that looks too good to be true, and you think, “I’ll try it once.” But then the second batch comes out, and they’re slightly chewier in the center. Then the third batch, and you realize the cinnamon-sugar coating is doing something magical to the edges.
I didn’t plan to eat them all myself. I really didn’t. But by Sunday afternoon, the cookie jar was empty except for a few crumbs I was too lazy to sweep up. There’s a specific kind of madness that sets in when you find a recipe that works on the first try every time. Usually, baking is a gamble. You hope the oven is calibrated correctly. You hope the butter isn’t too soft. But with this one-bowl method, there’s no creaming stage to overwork. There’s no separate bowl for dry ingredients to mess up the ratio. It’s just dump, stir, scoop, and bake.
The obsession wasn’t just about the pumpkin flavor, though that warm, spiced aroma is hard to resist. It was about the texture. Snickerdoodles are supposed to be soft and pillowy, not crisp and hard like a traditional sugar cookie. These came out with that perfect crackly top and a center that was still doughy after 10 minutes. I kept checking the clock, afraid I’d ruin them, but they were forgiving. If you leave them in a minute too long, they firm up. If you pull them early, they collapse slightly as they cool, which is exactly what you want.
I remember standing by the oven window, watching the cookies spread into those beautiful, rustic circles. The house smelled like cinnamon rolls and autumn. My partner walked in, sniffed the air, and just nodded. No words needed. We’ve had pumpkin bread before. We’ve had pumpkin bars. But this? This felt different. It felt like the ultimate comfort food shortcut. I’m not saying you should bake these every day for the rest of your life, but for a few weeks in October, they might just become your new reality. And that’s okay. Really, it is.
Why You’ll Love This Recipe
Let’s be real for a second. Baking can be a hassle. You know the drill: washing three bowls, measuring cups, and then trying to scrape the last bit of flour out of a sifter. This Simple One-Bowl Pumpkin Snickerdoodle Cookie recipe changes the game because it respects your time. It’s designed for people who want the homemade taste without the 45-minute prep time. I’ve tested this recipe at least five times now, tweaking the spice ratios and the baking time, and this is the version that consistently delivers.
Here is why this recipe is going to become a staple in your fall baking rotation:
- Quick & Easy: You can have these in the oven in under 15 minutes. The dough comes together in one bowl, meaning less cleanup and more eating. It’s perfect for those busy weeknights when you need a treat but don’t want to spend the evening at the counter.
- Simple Ingredients: You likely have almost everything you need in your pantry right now. Flour, sugar, butter, pumpkin puree, and cinnamon. No fancy, hard-to-find ingredients. It’s accessible baking at its finest.
- Perfect for Fall Gatherings: Whether it’s a last-minute dinner party, a school bake sale, or just a cozy night in, these cookies are a crowd-pleaser. They bring that seasonal warmth without being overly heavy or dense.
- Crowd-Pleaser: I’ve handed these out to neighbors, coworkers, and strangers at the grocery store line. The response is always the same: wide eyes and immediate requests for the recipe. Kids love the cinnamon sugar, and adults love the subtle spice kick.
- Unbelievably Delicious: The texture is the star here. Soft, chewy centers with a crisp, sugary exterior. It’s the best of both worlds. The pumpkin keeps them moist for days, so they don’t go stale like regular cookies do.
What makes this recipe different from the rest is the simplicity of the method combined with the richness of the flavor profile. Most pumpkin cookies are dense, almost cake-like. These are light and airy, thanks to the baking soda and cream of tartar reaction. It’s that classic snickerdoodle tang, but dressed up in pumpkin spice attire. It’s comfort food reimagined—healthier, faster, but with the same soul-soothing satisfaction. It’s the kind of recipe that makes you feel like a pro baker, even if you’ve never touched a rolling pin.
What Ingredients You Will Need
This recipe relies on simple, wholesome ingredients to deliver bold flavor and satisfying texture without the fuss. The magic happens in the balance between the wet pumpkin puree and the dry flour, bound together by fat and sugar. You don’t need specialty items here, just good quality basics. If you have a favorite brand of butter, stick with it, but unsalted is key so you can control the saltiness.
- All-Purpose Flour: The base of the cookie. Don’t go for whole wheat unless you want a dense, hearty cookie. All-purpose gives that classic tender crumb. (About 2 1/4 cups)
- Unsalted Butter: Softened to room temperature. This is crucial for the texture. If it’s too cold, it won’t mix in. If it’s melted, the cookies will spread too much. (1 cup or 2 sticks)
- Granulated Sugar: For the dough itself. It provides structure and sweetness. (1 1/2 cups)
- Brown Sugar: Packed. This adds moisture and a hint of molasses flavor, which pairs perfectly with pumpkin. (1/2 cup)
- Pumpkin Puree: Make sure this is 100% pure pumpkin, not pumpkin pie filling. Pie filling has added sugar and spices that will throw off the balance. (1/2 cup)
- Eggs: Large eggs, room temperature. They act as the binder. (1 large egg)
- Vanilla Extract: Use real vanilla. The cheap stuff tastes like alcohol and chemicals. (1 teaspoon)
- Baking Soda: For lift. (1 teaspoon)
- Cream of Tartar: This is the secret weapon for snickerdoodles. It gives that tangy flavor and helps keep the cookies soft. (1/2 teaspoon)
- Salt: Just a pinch to balance the sweetness. (1/2 teaspoon)
- Pumpkin Pie Spice: Or you can make your own mix with cinnamon, ginger, nutmeg, and cloves. (1 1/2 teaspoons)
For the coating, you’ll need more granulated sugar and plenty of cinnamon. I recommend using a high-quality ground cinnamon like Saigon or Ceylon, as it has a more robust flavor. (1/2 cup sugar and 1 tablespoon cinnamon for rolling)
Can I use pumpkin pie filling instead of puree?
No, you really shouldn’t. Pie filling is much sweeter and has a different consistency. It will make the cookies cakey and overly sweet. Stick to the can of pure pumpkin.
Do I need cream of tartar?
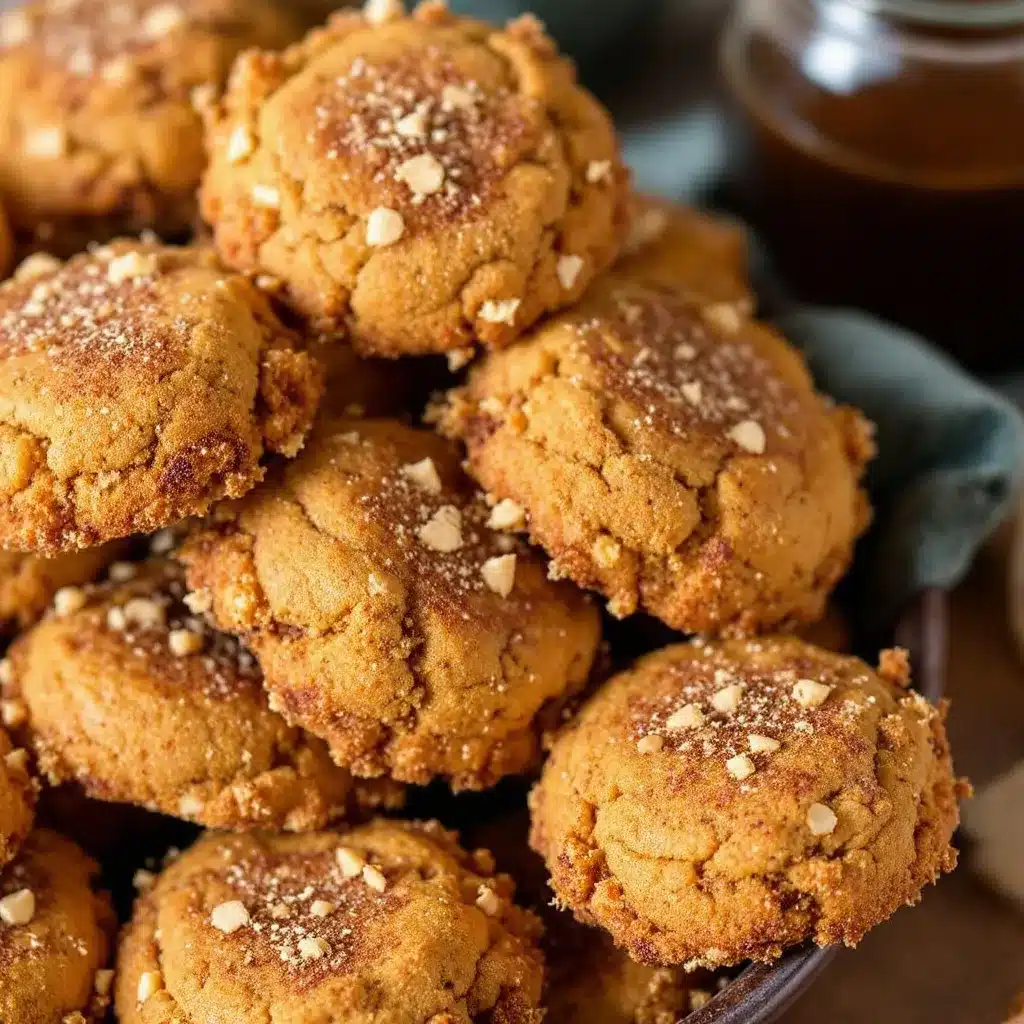
Technically, you can skip it, but you lose that classic snickerdoodle tang. If you don’t have it, a tiny bit more lemon juice in the dough can help, but cream of tartar is best for that authentic taste.
Equipment Needed
You don’t need a lot of fancy gadgets for this. In fact, the beauty of this recipe is how minimal the equipment list is. Here is what you’ll need to get started.
- One Large Mixing Bowl: A glass or ceramic bowl is nice because you can see the consistency, but a large metal bowl works fine too. Make sure it’s big enough to handle the dough without splattering.
- Electric Hand Mixer or Stand Mixer: While you can mix this by hand, it takes some elbow grease. A hand mixer is perfect for this quantity. If you use a stand mixer, use the paddle attachment on low speed.
- Rubber Spatula: Essential for scraping down the sides of the bowl to ensure everything is incorporated. Don’t skip this step, or you’ll get pockets of flour.
- Baking Sheets: Standard half-sheet pans. I recommend using light-colored aluminum pans. Dark pans can cause the bottoms to burn, so you might need to lower the oven temperature by 25 degrees if you use dark non-stick sheets.
- Parchment Paper: This is non-negotiable for easy cleanup and even baking. It prevents sticking and helps the cookies bake uniformly.
- Medium Mixing Bowl: For the cinnamon-sugar coating. A small bowl makes it easier to roll the cookies around without spilling.
- Cooling Rack: To transfer the cookies after baking. This stops the cooking process and prevents the bottoms from getting soggy from trapped steam.
Pro Tip: If you don’t have parchment paper, you can use silicone baking mats, but they can sometimes cause cookies to spread too much. Parchment gives you that perfect lift. Also, keep an eye on your mixer beaters. If they’re coated in sticky dough, wipe them clean between mixing stages for a cleaner look.
Preparation Method
Let’s get into the nitty-gritty. This process is straightforward, but there are a few nuances that will make the difference between a good cookie and a great one. Follow these steps carefully, and you’ll be rewarded.
- Preheat and Prep: Start by preheating your oven to 350°F (175°C). This is important. If the oven isn’t hot enough when the cookies go in, they will spread too thin. Line your baking sheets with parchment paper. Set aside.
- Cream the Butter and Sugars: In your large mixing bowl, combine the softened unsalted butter, granulated sugar, and brown sugar. Using your electric mixer on medium-high speed, beat this mixture for about 2-3 minutes. You want it to look light, fluffy, and pale yellow. This step incorporates air, which helps the cookies rise. If you’re doing this by hand, it will take about 5 minutes of vigorous stirring.
- Add Wet Ingredients: Add the room temperature egg, vanilla extract, and pumpkin puree to the butter mixture. Mix on low speed just until combined. Be careful not to overmix here. You just want it smooth. Scrape down the sides of the bowl with your spatula to make sure no pumpkin is hiding at the bottom.
- Mix Dry Ingredients: In a separate small bowl (or just add directly if you’re in a rush, but separating ensures even distribution), whisk together the flour, baking soda, cream of tartar, salt, and pumpkin pie spice. I like to whisk them separately first to break up any clumps of cinnamon or nutmeg.
- Combine Wet and Dry: Gradually add the dry ingredients to the wet ingredients. Mix on low speed until just combined. The dough will be thick and slightly sticky. This is normal. Do not add more flour unless it’s a complete mess. The pumpkin puree adds moisture, so the dough should feel soft.
- Prepare the Coating: In your medium bowl, mix the 1/2 cup of granulated sugar with the 1 tablespoon of cinnamon. Stir until well combined. This is your rolling station.
- Scoop and Roll: Use a cookie scoop or a tablespoon to portion out the dough. Roll each ball of dough in the cinnamon-sugar mixture until fully coated. Make sure the entire surface is covered. This ensures that crispy, spiced crust on every single cookie.
- Schedule on Sheets: Place the coated dough balls on the prepared baking sheets, leaving about 2 inches between them. They will spread. Bake for 10-12 minutes. You want the edges to be set and slightly golden, but the centers should still look soft and puffy. They will firm up as they cool.
- Cool: Let the cookies sit on the baking sheet for 5 minutes. This is crucial. If you move them immediately, they will break. After 5 minutes, transfer them to a cooling rack to cool completely. Or, eat them warm. I won’t judge.
Common Issue: If your cookies spread too much, your butter might have been too soft. Next time, chill the dough balls for 15 minutes before baking. If they stay too puffy and don’t spread at all, your oven might be too cool, or you might have too much baking soda. Adjust accordingly.
Cooking Tips & Techniques
Baking is a science, but it’s also a bit of an art. Here are some tips I’ve learned through trial and error to help you nail these cookies every time.
- Butter Temperature is Key: As mentioned, your butter should be soft but not melted. You should be able to press your finger into it and leave an indent, but it shouldn’t be oily. If you’re in a hurry, you can cube the butter and microwave it for 10-second bursts, but watch it closely.
- Don’t Overbake: This is the most common mistake. Pumpkin cookies retain moisture. If you bake them until they look dry, they will be hard when they cool. Pull them when the edges are just starting to turn golden. The center should look slightly underdone. It will set as it cools.
- Chill the Dough: While not strictly necessary, chilling the dough for 30 minutes to an hour can help prevent spreading. It also allows the flavors to meld, resulting in a deeper, more complex taste. If you’re impatient, skip it, but know that the cookies might be flatter.
- Measure Flour Correctly: If you scoop flour directly from the bag with your measuring cup, you’re likely packing it in, which leads to dry cookies. Instead, fluff the flour with a spoon, then spoon it into the measuring cup, and level it off with a knife. This “spoon and level” method ensures the right amount of flour.
- Use a Cookie Scoop: It seems like a small thing, but using a scoop ensures uniform size. This means they all bake at the same rate. If you make some big and some small, the small ones will burn before the big ones are cooked.
- Rotate Your Pan: Ovens often have hot spots. Halfway through the baking time, rotate your baking sheet 180 degrees. This ensures even browning on all cookies.
Personal Failures: I once tried to make these with canned pumpkin pie filling because I was lazy. The cookies turned out cakey and overly sweet. I had to throw them out. Don’t make my mistake. Use pure puree. Also, I once baked them at 375°F instead of 350°F. They burned on the bottom before the tops were done. Stick to the temperature.
Variations & Adaptations
One of the best things about this recipe is how adaptable it is. Once you have the base down, you can play around with flavors and textures. Here are a few variations I’ve tried and loved.
- White Chocolate Chip: Fold in 1/2 cup of white chocolate chips after the dough is mixed. The sweetness of the white chocolate pairs beautifully with the pumpkin spice. This is my personal favorite variation.
- Pecan Praline: Add 1/2 cup of chopped pecans to the dough. Toast the pecans in a dry pan for a minute before adding them for extra flavor. The crunch contrasts nicely with the soft cookie.
- Gluten-Free: You can substitute the all-purpose flour with a 1:1 gluten-free flour blend. Make sure the blend contains xanthan gum, or add 1/2 teaspoon of it to the dry ingredients. The texture might be slightly more crumbly, but they’ll still taste great.
- Dairy-Free: Use a high-quality vegan butter stick instead of regular butter. The results are surprisingly similar, though the spread might be slightly different. You may need to chill the dough longer.
- Maple Glaze: Drizzle the cooled cookies with a simple glaze made from powdered sugar, milk, and a drop of maple extract. This adds an extra layer of sweetness and moisture.
I also tried adding a swirl of cream cheese to the center of some cookies before baking. It was delicious, but it made the dough wetter, so I had to reduce the pumpkin puree slightly. If you’re experimenting, start with small batches.
Can I freeze the dough?
Yes! Scoop the dough balls, roll them in the sugar, and freeze them on a baking sheet. Once solid, transfer them to a freezer bag. You can bake them straight from frozen, just add 1-2 minutes to the baking time.
Serving & Storage Suggestions
These cookies are best enjoyed warm, right out of the oven. Serve them with a cold glass of milk or a hot cup of coffee. They also pair well with a slice of sharp cheddar cheese if you’re going for a sweet-and-savory combo.
- Room Temperature: Store leftovers in an airtight container at room temperature for up to 3 days. Place a slice of bread in the container with the cookies to keep them soft. The bread will absorb moisture from the air, keeping the cookies fresh.
- Refrigerator: You can store them in the fridge for up to a week, but they might firm up a bit. Let them come to room temperature before eating.
- Freezer: These cookies freeze very well. Once completely cool, place them in a single layer in a freezer-safe container. They will last for up to 3 months. Thaw at room temperature for about 30 minutes.
- Reheating: If you have leftovers, microwave a cookie for 10-15 seconds to warm it up. It will feel fresh-baked again.
Flavor Development: Interestingly, these cookies often taste better on the second day. The spices have had time to meld with the pumpkin, and the texture becomes even more chewy. If you can wait that long, you’ll be rewarded.
Nutritional Information & Benefits
While these are definitely a treat, they do have some nutritional benefits. Pumpkin is rich in Vitamin A, fiber, and antioxidants. It adds moisture without adding too many calories compared to using more fat. Cinnamon has anti-inflammatory properties and can help regulate blood sugar levels. However, these are still cookies, so enjoy them in moderation.
- Calories: Approximately 180-200 calories per cookie.
- Fat: About 9g per cookie, mostly from butter.
- Carbohydrates: Around 25g, with 15g of sugar.
- Protein: Roughly 2g per cookie.
For those watching their sugar intake, you can reduce the sugar in the dough by 1/4 cup, though it may affect the texture. The cinnamon-sugar coating adds extra sugar, so you can skip that or use a sugar substitute if needed.
Conclusion
These Simple One-Bowl Pumpkin Snickerdoodle Cookies are more than just a recipe. They’re a mood. They’re the smell of autumn in your kitchen and the comfort of a warm, spiced treat. I hope you try them and find that same obsession I did. They’re easy enough for a Tuesday night but special enough for a holiday gathering.
Feel free to customize them with your favorite mix-ins. Add chocolate chips, nuts, or even a drizzle of caramel. Make them your own. And if you do make them, I’d love to hear how they turned out. Leave a comment below with your thoughts, or share a photo on social media and tag me. Let’s see those beautiful, crinkly tops!
Happy baking, and don’t forget to save a few for later. You’ll want them.
FAQs
Can I use pumpkin pie filling instead of puree?
No, you really shouldn’t. Pie filling is much sweeter and has a different consistency. It will make the cookies cakey and overly sweet. Stick to the can of pure pumpkin.
Do I need cream of tartar?
Technically, you can skip it, but you lose that classic snickerdoodle tang. If you don’t have it, a tiny bit more lemon juice in the dough can help, but cream of tartar is best for that authentic taste.
Can I freeze the cookie dough?
Yes! Scoop the dough balls, roll them in the sugar, and freeze them on a baking sheet. Once solid, transfer them to a freezer bag. You can bake them straight from frozen, just add 1-2 minutes to the baking time.
Why did my cookies spread too much?
This usually happens if the butter was too soft or melted, or if the oven wasn’t preheated properly. Make sure your butter is room temperature but firm, and preheat your oven for at least 10 minutes before baking.
How do I keep the cookies soft?
Don’t overbake them. Pull them when the edges are just set and the centers still look soft. Also, storing them with a slice of bread in an airtight container will help maintain their chewiness.
If you enjoyed this recipe, you might also like my healthy Greek yogurt pumpkin bread for a breakfast option, or check out this cozy sausage stuffed acorn squash for a main course that pairs well with fall flavors. For a drink to go with your cookies, try the cozy spiced apple cider margarita.
Pin This Recipe!
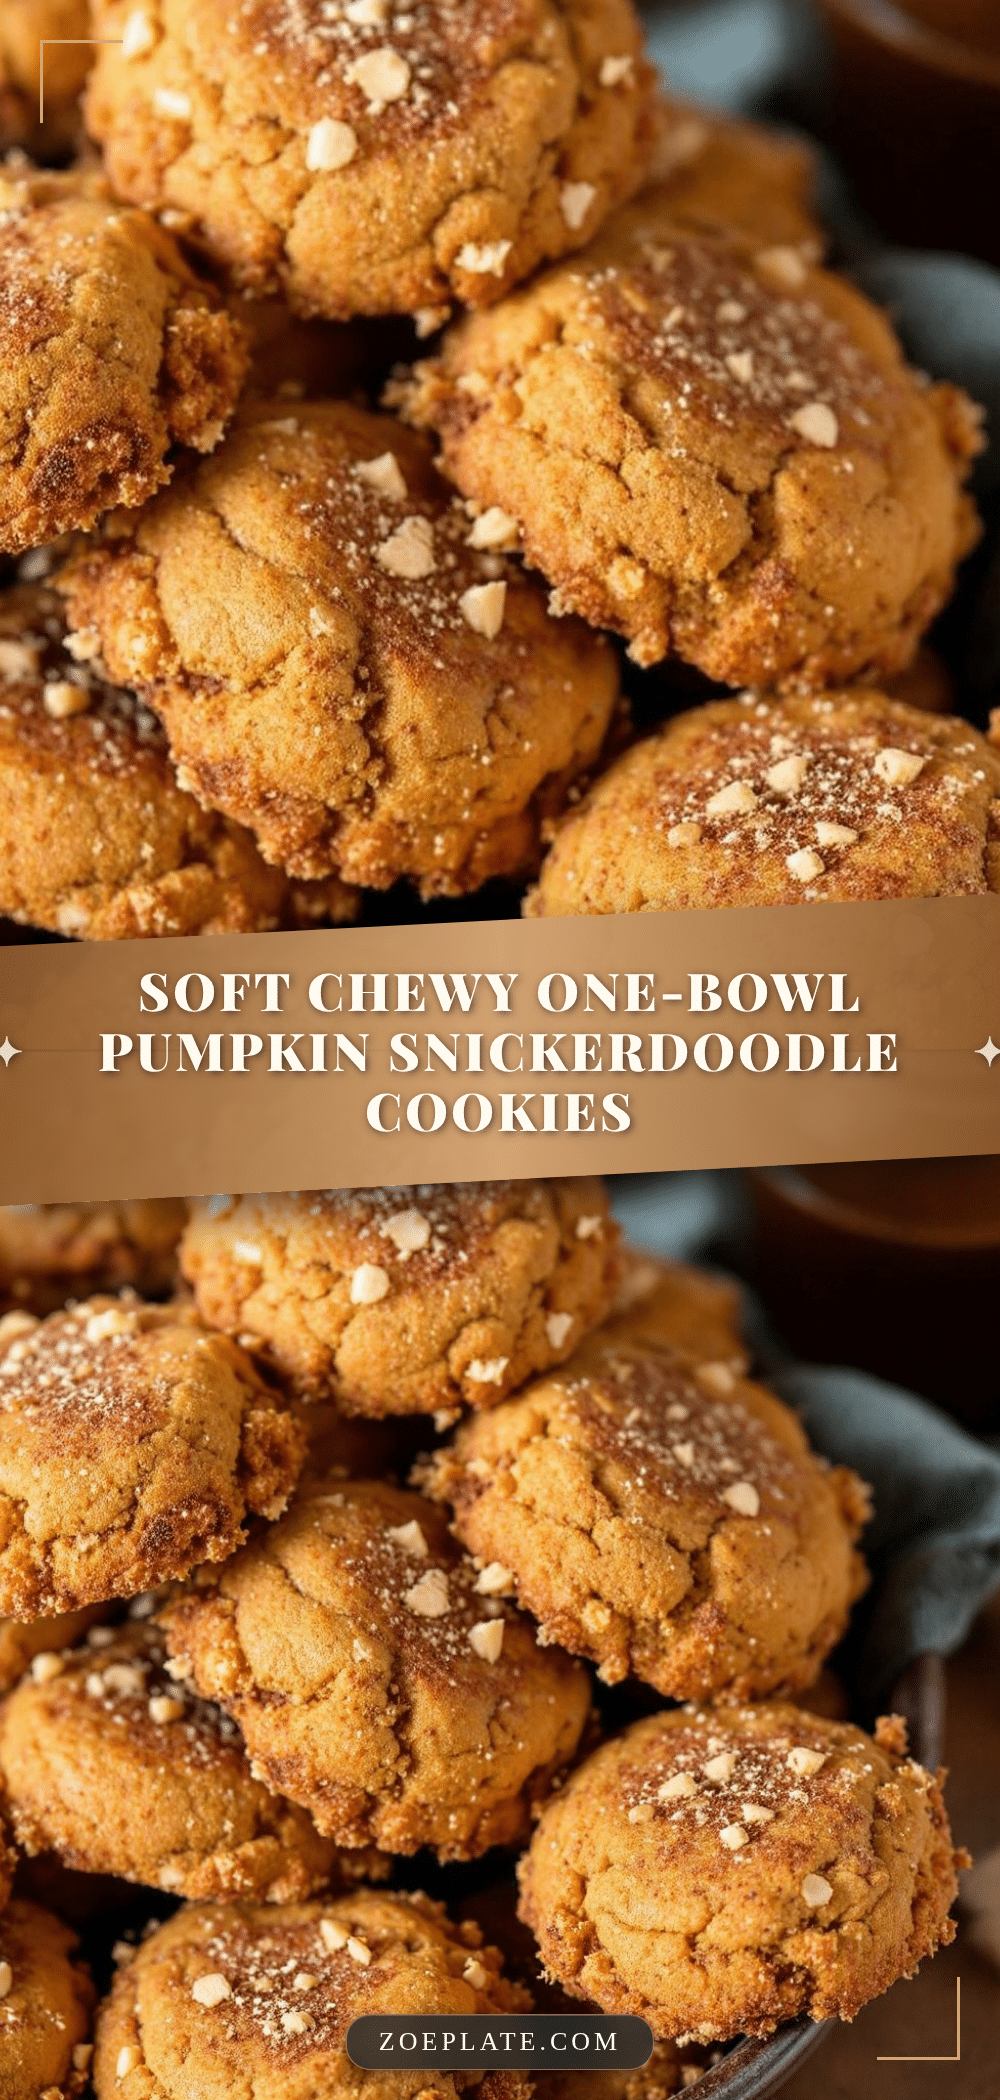
Simple One-Bowl Pumpkin Snickerdoodle Cookies
Soft, chewy pumpkin cookies with a classic snickerdoodle cinnamon-sugar coating, made easily in just one bowl for minimal cleanup and maximum flavor.
- Prep Time: 15 minutes
- Cook Time: 10-12 minutes
- Total Time: 25 minutes
- Yield: Approximately 24 cookies 1x
- Category: Dessert
- Cuisine: American
Ingredients
- 2 1/4 cups All-Purpose Flour
- 1 cup Unsalted Butter (softened to room temperature)
- 1 1/2 cups Granulated Sugar (divided)
- 1/2 cup Brown Sugar (packed)
- 1/2 cup Pumpkin Puree (100% pure, not pie filling)
- 1 large Egg (room temperature)
- 1 teaspoon Vanilla Extract
- 1 teaspoon Baking Soda
- 1/2 teaspoon Cream of Tartar
- 1/2 teaspoon Salt
- 1 1/2 teaspoons Pumpkin Pie Spice
- 1 tablespoon Ground Cinnamon (for coating)
Instructions
- Preheat oven to 350°F (175°C) and line baking sheets with parchment paper.
- In a large mixing bowl, cream the softened butter, granulated sugar, and brown sugar using an electric mixer on medium-high speed for 2-3 minutes until light and fluffy.
- Add the egg, vanilla extract, and pumpkin puree to the butter mixture. Mix on low speed just until combined, scraping down the sides of the bowl.
- In a separate small bowl, whisk together the flour, baking soda, cream of tartar, salt, and pumpkin pie spice.
- Gradually add the dry ingredients to the wet ingredients, mixing on low speed until just combined. The dough will be thick and slightly sticky.
- In a medium bowl, mix 1/2 cup of granulated sugar with the 1 tablespoon of cinnamon to create the coating.
- Scoop or spoon the dough into balls and roll them in the cinnamon-sugar mixture until fully coated.
- Place dough balls on prepared baking sheets, leaving about 2 inches between them.
- Bake for 10-12 minutes until edges are set and slightly golden, but centers still look soft.
- Let cookies cool on the baking sheet for 5 minutes before transferring to a wire rack to cool completely.
Notes
Ensure butter is softened but not melted to prevent excessive spreading. Do not use pumpkin pie filling; use 100% pure pumpkin puree. For softer cookies, do not overbake. Store with a slice of bread to maintain moisture. Cookies can be frozen before or after baking.
Nutrition
- Serving Size: 1 cookie
- Calories: 190
- Sugar: 15
- Sodium: 150
- Fat: 9
- Saturated Fat: 5
- Carbohydrates: 25
- Fiber: 1
- Protein: 2
Keywords: pumpkin cookies, snickerdoodle, one-bowl recipe, fall baking, easy cookies, cinnamon sugar, pumpkin spice


