I figured stuffing was just bread cubes tossed with broth and baked until dry. It took about twenty minutes for that theory to fall apart completely when I tried making it the night before Thanksgiving. The texture turned into a dense, soggy brick that no amount of reheating could fix. Honestly, I stared at that gray, heavy mess and realized I had basically created an edible sponge. I had assumed that because it was a side dish, it didn’t require the same precision as the main course. You know, just throw it in the oven and hope for the best.
That failure changed everything for me. I spent the next three years tweaking ratios, testing different breads, and learning why moisture control is actually the secret weapon here. The difference between a dry crouton and a fluffy, savory cloud comes down to one specific technique: making it ahead of time properly. This isn’t about convenience alone; it’s about flavor development that happens while you sleep. When you let the sage and sausage infuse the bread overnight, the taste becomes something you can’t rush.
I still remember the first time I served this version to my family. My brother-in-law, who usually picks at the green beans, took three helpings. He didn’t even notice I had prepped it the day before. That’s the magic of this recipe. It takes the stress out of holiday cooking by doing the hard work while you’re relaxing. You get the crispy top and the soft, flavorful interior without the last-minute panic.
Now, I never make stuffing any other way. It has become the anchor of our holiday table, sitting comfortably alongside the cozy sausage-stuffed acorn squash we love in winter. The richness of the sausage pairs perfectly with the earthy notes of fresh sage. It’s not just a side dish; it’s the part of the meal people actually fight over. And once you try it, you’ll probably never go back to making it from scratch on the day of the event.
Why You’ll Love This Recipe
This make-ahead sausage and sage stuffing isn’t just another holiday side dish; it is the result of years of trial, error, and a lot of tasting. I’ve tested dozens of versions, from dry mixes to elaborate gourmet styles, and this one hits the sweet spot every time. It combines the savory depth of browned sausage with the aromatic punch of fresh sage, all bound together by a perfectly moist bread base. Here is why this recipe stands out in a crowded field of holiday classics:
- Stress-Free Holiday Hosting: The biggest advantage is that you assemble it the day before. This means your oven space is free for the turkey or other mains on the big day. You just pop it in for the final bake, freeing up your hands and your sanity.
- Deep, Developed Flavor: Unlike stuffing made on the day of, letting the ingredients sit overnight allows the flavors to meld. The sausage fat renders into the bread, and the sage infuses every crumb. The result is a more complex, savory taste that you can’t achieve with a quick mix.
- Perfect Texture Every Time: Many people fear soggy stuffing. This recipe solves that by using day-old, dried bread and a precise broth ratio. You get a crispy, golden crust on top and a tender, fluffy interior. It’s the best of both worlds.
- Family Favorite: This is the kind of recipe that disappears fast. Kids love the savory sausage bits, and adults appreciate the herbal notes. It’s a crowd-pleaser that works for Thanksgiving, Christmas, or even a fancy Sunday dinner.
- Simple, Accessible Ingredients: You don’t need hard-to-find gourmet items. This uses standard grocery store sausage, fresh herbs from your garden or local market, and affordable bread. It’s comfort food that feels elevated but remains approachable.
What makes this truly different is the balance of moisture. I’ve learned through experience that too much broth makes it mushy, while too little makes it dry. This recipe finds that perfect middle ground, ensuring every bite is flavorful without being heavy. It’s the kind of dish that makes you close your eyes after the first bite, feeling that warm, cozy satisfaction only holiday cooking can provide.
What Ingredients You Will Need
This recipe relies on high-quality, simple ingredients to build a robust flavor profile. The key is balancing the richness of the meat with the brightness of the herbs and the absorbency of the bread. You don’t need fancy pantry items, but the quality of what you use matters. Here is what you need to get started:
- Bread: You need about 12 to 14 cups of cubed bread. Stale or day-old bread is best because it absorbs broth without turning to mush. I recommend using a rustic sourdough or a hearty Italian loaf. Avoid soft sandwich bread, as it lacks the structure needed for this texture. If you can’t find day-old bread, cube fresh bread and toast it in a 300°F oven for 10 minutes to dry it out.
- Sausage: One pound of Italian sausage works wonders. I prefer sweet Italian sausage for its fennel and pepper notes, but hot sausage adds a nice kick if you like spice. Look for sausage in casings rather than pre-crumbled, as it often has better flavor and texture. Squeeze the meat out and brown it well to develop those savory fond bits.
- Fresh Sage: A generous half-cup of fresh sage leaves is non-negotiable. Sage is the star herb here, providing that classic holiday aroma. If you only have dried sage, use one-third cup, but fresh is far superior for this dish. Strip the leaves from the tough stems before chopping them finely.
- Aromatics: One large yellow onion and two large carrots. The onion provides sweetness and depth, while the carrots add a subtle earthiness and color. Dice them finely so they cook down and blend seamlessly into the stuffing.
- Garlic: Four cloves of garlic, minced. Garlic adds a necessary pungent note that cuts through the richness of the sausage fat. Don’t skimp on this; it’s essential for a robust flavor profile.
- Broth: Four to five cups of low-sodium chicken broth. Using low-sodium gives you control over the final salt level, especially since the sausage is already seasoned. Warm the broth before pouring it over the bread; this helps the bread absorb it more evenly.
- Eggs: Two large eggs. These act as a binder, holding the stuffing together so it doesn’t fall apart when you scoop it. Room temperature eggs blend more easily into the mixture.
- Fat: Two tablespoons of unsalted butter. I use butter for its rich flavor, but olive oil works if you need a dairy-free option. This is used to sauté the onions, carrots, and sage.
- Seasonings: One teaspoon of black pepper and one-half teaspoon of salt (adjust to taste). You may also add a pinch of thyme if you like, but sage is the primary flavor driver here.
For the best results, I recommend using a high-quality chicken broth like Swanson or Pacific Foods. The difference in taste is noticeable, especially when the broth is the main liquid component. Also, look for firm, small-curd cottage cheese if you want to add a creamy twist, though this traditional version relies on eggs and broth for moisture.
Do I need to use day-old bread?
Yes, day-old or dried bread is crucial. Fresh bread is too moist and will turn into a paste. If you must use fresh bread, cube it and bake it at 300°F for 10-15 minutes until it is dry and crisp.
Can I use turkey sausage?
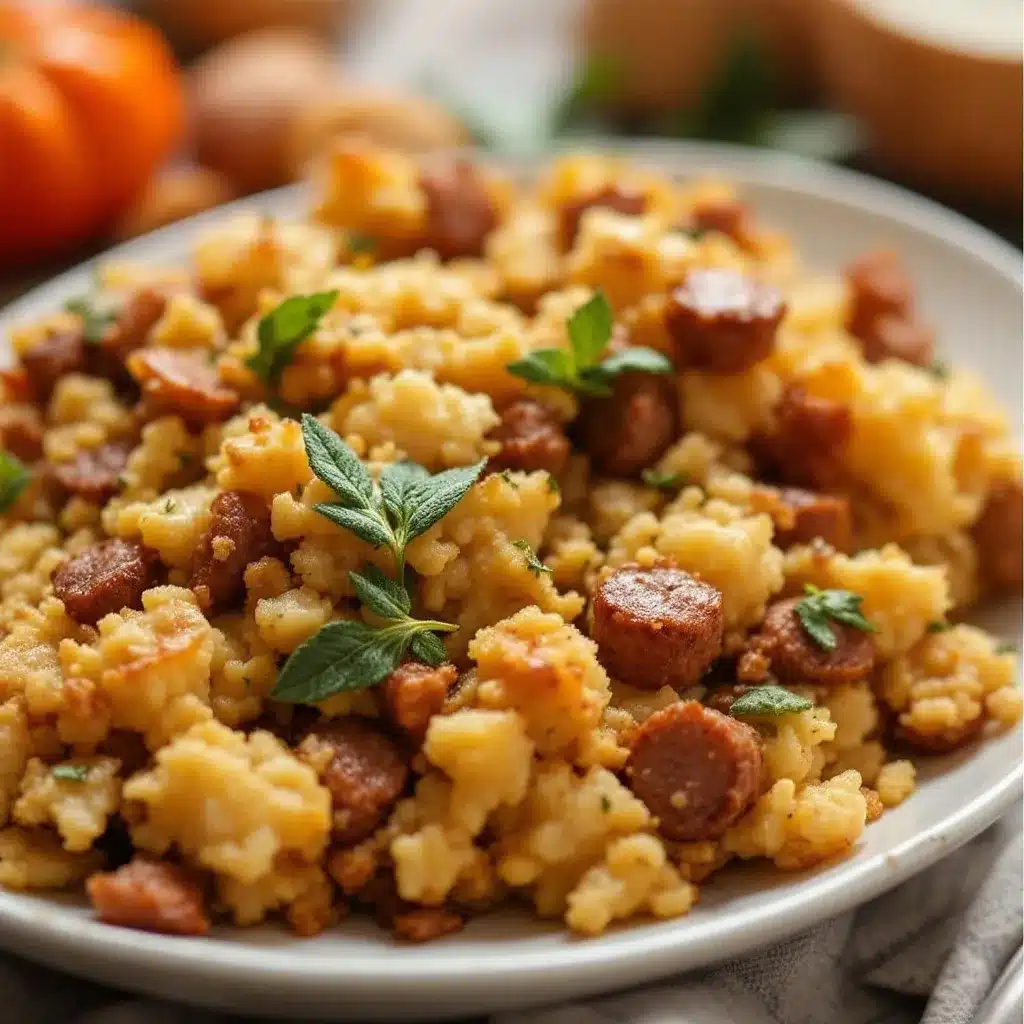
Absolutely. Turkey sausage is a leaner option and works well if you prefer lighter flavors. Just note that it may be less flavorful than pork sausage, so you might want to add a bit more seasoning or herbs.
Equipment Needed
You don’t need a fancy kitchen to make this stuffing, but having the right tools makes the process much smoother. Here is what you will need:
- Large Skillet: A 12-inch cast-iron skillet or a large stainless steel pan is ideal for browning the sausage and sautéing the vegetables. Cast iron retains heat well, ensuring the sausage gets a good sear.
- Large Mixing Bowl: A bowl at least 6 quarts in size is necessary to hold all the bread, vegetables, and liquid. A bowl with a wide mouth makes it easier to toss everything together.
- Measuring Cups and Spoons: Standard measuring tools for accuracy. Liquid and dry measures should be on hand.
- Knife and Cutting Board: For dicing onions, carrots, and chopping sage. A sharp chef’s knife makes this task much faster.
- Baking Dish: A 9×13 inch baking dish is standard for this quantity. If you want a crispier top, use a shallower dish. For a softer texture, a deeper dish works fine.
- Fork: For breaking up the sausage and mixing the ingredients.
If you don’t have a large skillet, you can use two smaller ones. Also, consider using a silicone baking mat if you are worried about sticking, though a well-greased dish usually works fine. I personally love using my cast-iron skillet for this because it adds a nice rustic touch and even heating.
Preparation Method
Follow these steps carefully to ensure your stuffing turns out perfectly moist and flavorful. The process is broken down into manageable stages.
- Prepare the Bread: Start by cubing your day-old bread into 1-inch pieces. Spread them out on a large baking sheet and let them air dry for an hour, or toast them in a 300°F oven for 10 minutes. You want them dry but not hard as rocks. This step prevents soggy stuffing. (Time: 10-60 minutes)
- Cook the Sausage: Heat your large skillet over medium-high heat. Add the sausage meat, breaking it up with a fork as it cooks. Cook until browned and no pink remains, about 8-10 minutes. Drain excess fat if there is a lot, but leave about a tablespoon for flavor. Remove the sausage from the pan and set it aside on a plate. (Time: 10 minutes)
- Sauté the Vegetables: In the same skillet, add the butter. Once melted, add the diced onions and carrots. Cook over medium heat for 5-7 minutes until softened and translucent. Add the minced garlic and chopped sage in the last minute of cooking. Be careful not to burn the garlic. (Time: 8 minutes)
- Combine Dry Ingredients: In your large mixing bowl, combine the dried bread cubes, cooked sausage, and the sautéed vegetable mixture. Toss everything together gently to distribute the ingredients evenly. (Time: 2 minutes)
- Prepare the Wet Mixture: In a separate bowl or measuring cup, whisk together the warm chicken broth, eggs, black pepper, and salt. Whisk until the eggs are fully incorporated into the broth. (Time: 2 minutes)
- Combine Wet and Dry: Slowly pour the broth mixture over the bread mixture while gently tossing with a fork. You want to ensure every piece of bread is moistened. Add broth gradually; you may not need all of it, depending on how dry your bread was. (Time: 3 minutes)
- Rest the Stuffing: Cover the bowl tightly with plastic wrap or transfer the mixture to your baking dish and cover with foil. Refrigerate for at least 4 hours, or overnight. This resting period is critical for flavor development. (Time: 4+ hours)
- Bake the Stuffing: Preheat your oven to 350°F. If you refrigerated in the bowl, transfer to a greased 9×13 baking dish. Cover with foil and bake for 30 minutes. Remove the foil and bake for another 15-20 minutes until the top is golden brown and crispy. (Time: 50 minutes)
Keep an eye on the stuffing during the final bake. If the top is browning too quickly, tent it loosely with foil. The internal temperature should reach 165°F to ensure it is safe to eat.
Cooking Tips & Techniques
Having made this stuffing many times, I have learned a few tricks that make a huge difference. First, never skip the step of drying the bread. It seems tedious, but it is the most important factor in texture. Second, when browning the sausage, let it sit undisturbed for a minute or two to get a good crust. That fond (the browned bits) in the pan adds incredible flavor to the vegetables.
Another common mistake is adding too much broth. Always start with less and add more if needed. The bread will continue to absorb moisture as it rests in the fridge. If you add too much at the start, it will be soupy by the time you bake it. Also, taste the vegetable mixture before combining it with the bread. If it needs more salt or pepper, adjust it now. It is harder to season the stuffing after it has baked.
For a crispier top, brush the surface with a little melted butter or olive oil before baking. This helps the breadcrumbs brown evenly. I also recommend letting the stuffing rest for 10 minutes after taking it out of the oven. This allows it to set, making it easier to scoop and serve without falling apart.
Variations & Adaptations
This recipe is versatile and can be adapted to suit different tastes and dietary needs. Here are a few variations I enjoy:
- Vegetarian Option: Swap the sausage for chopped mushrooms and walnuts. Sauté the mushrooms until they release their moisture and brown well. This provides a similar umami depth and chewy texture. You can add a splash of soy sauce to mimic the savory notes of the meat.
- Gluten-Free: Use gluten-free bread cubes and ensure your sausage and broth are certified gluten-free. Many gluten-free breads are drier, so you may need slightly more broth. Check the texture before baking.
- Spicy Kick: Use hot Italian sausage and add a pinch of red pepper flakes to the vegetable mixture. This adds a nice heat that pairs well with the sage.
- Apple and Walnut: Add one diced apple and half a cup of toasted walnuts to the mixture. The sweetness of the apple balances the savory sausage, and the walnuts add crunch. This is a personal favorite of mine.
You can also experiment with different herbs. Thyme, rosemary, or parsley can be added alongside the sage for a more complex herbal profile. Just remember that sage is the dominant flavor, so keep it as the star.
Serving & Storage Suggestions
Serve this stuffing warm, right out of the oven. It pairs beautifully with roasted turkey, ham, or even the cozy roasted butternut squash soup for a vegetarian main. Garnish with fresh parsley or extra sage leaves for a pop of color.
Leftovers can be stored in an airtight container in the refrigerator for up to 4 days. To reheat, place portions in a baking dish, cover with foil, and warm in a 350°F oven for 15-20 minutes. You can also reheat individual portions in the microwave for 1-2 minutes. For a crispier texture, reheat in the oven.
Stuffing also freezes well. Wrap portions tightly in plastic wrap and foil, and freeze for up to 3 months. Thaw in the refrigerator overnight before reheating. The flavors often develop even more after a day or two in the fridge, making leftovers just as good as the original batch.
Nutritional Information & Benefits
While stuffing is a rich dish, it can be part of a balanced meal. Here is an estimated nutritional breakdown per serving (assuming 8 servings):
- Calories: 350-400 kcal
- Fat: 18g
- Carbohydrates: 35g
- Protein: 12g
- Fiber: 3g
Sage is known for its antioxidant properties and may support brain health. The broth provides hydration and minerals, while the bread offers energy. If you use turkey sausage or reduce the amount of butter, you can lower the fat content. This dish is naturally gluten-free if you use gluten-free bread, and it can be made vegetarian for plant-based diets. Moderation is key, as it is a calorie-dense side dish, but the flavors make it worth the occasional indulgence.
Conclusion
This make-ahead sausage and sage stuffing is a game-changer for holiday cooking. It takes the stress out of the big day by allowing you to prep everything in advance. The result is a flavorful, moist, and crispy stuffing that everyone will love. I encourage you to try this recipe and customize it with your favorite add-ins like apples or nuts. It’s a dish that brings warmth and comfort to any table.
If you make this, I’d love to hear how it turned out! Leave a comment below with your thoughts or share your own variations. Don’t forget to pin this recipe to your holiday board for easy access later. Happy cooking, and enjoy every bite of this delicious side dish!
FAQs
Can I make this stuffing the night before?
Yes, this recipe is specifically designed to be made ahead. Assemble it the night before, cover it, and refrigerate. This allows the flavors to meld and the bread to absorb the broth properly.
How do I prevent the stuffing from being soggy?
Use day-old or dried bread cubes. Ensure the bread is dry before adding the broth. Also, avoid adding too much broth; add it gradually until the bread is moist but not swimming in liquid.
Can I freeze the stuffing?
Yes, you can freeze the assembled, unbaked stuffing. Wrap it tightly in plastic wrap and foil. Freeze for up to 3 months. Thaw in the refrigerator before baking.
What type of sausage is best?
Sweet or hot Italian sausage works best. Both have fennel and pepper notes that pair well with sage. Avoid plain pork sausage if you want that classic herb flavor.
Can I use a slow cooker for this?
While baking is best for a crispy top, you can cook it in a slow cooker. Transfer the mixture to a greased slow cooker, cover, and cook on low for 3-4 hours. The top will not get as crispy, but the flavor will still be excellent.
Pin This Recipe!
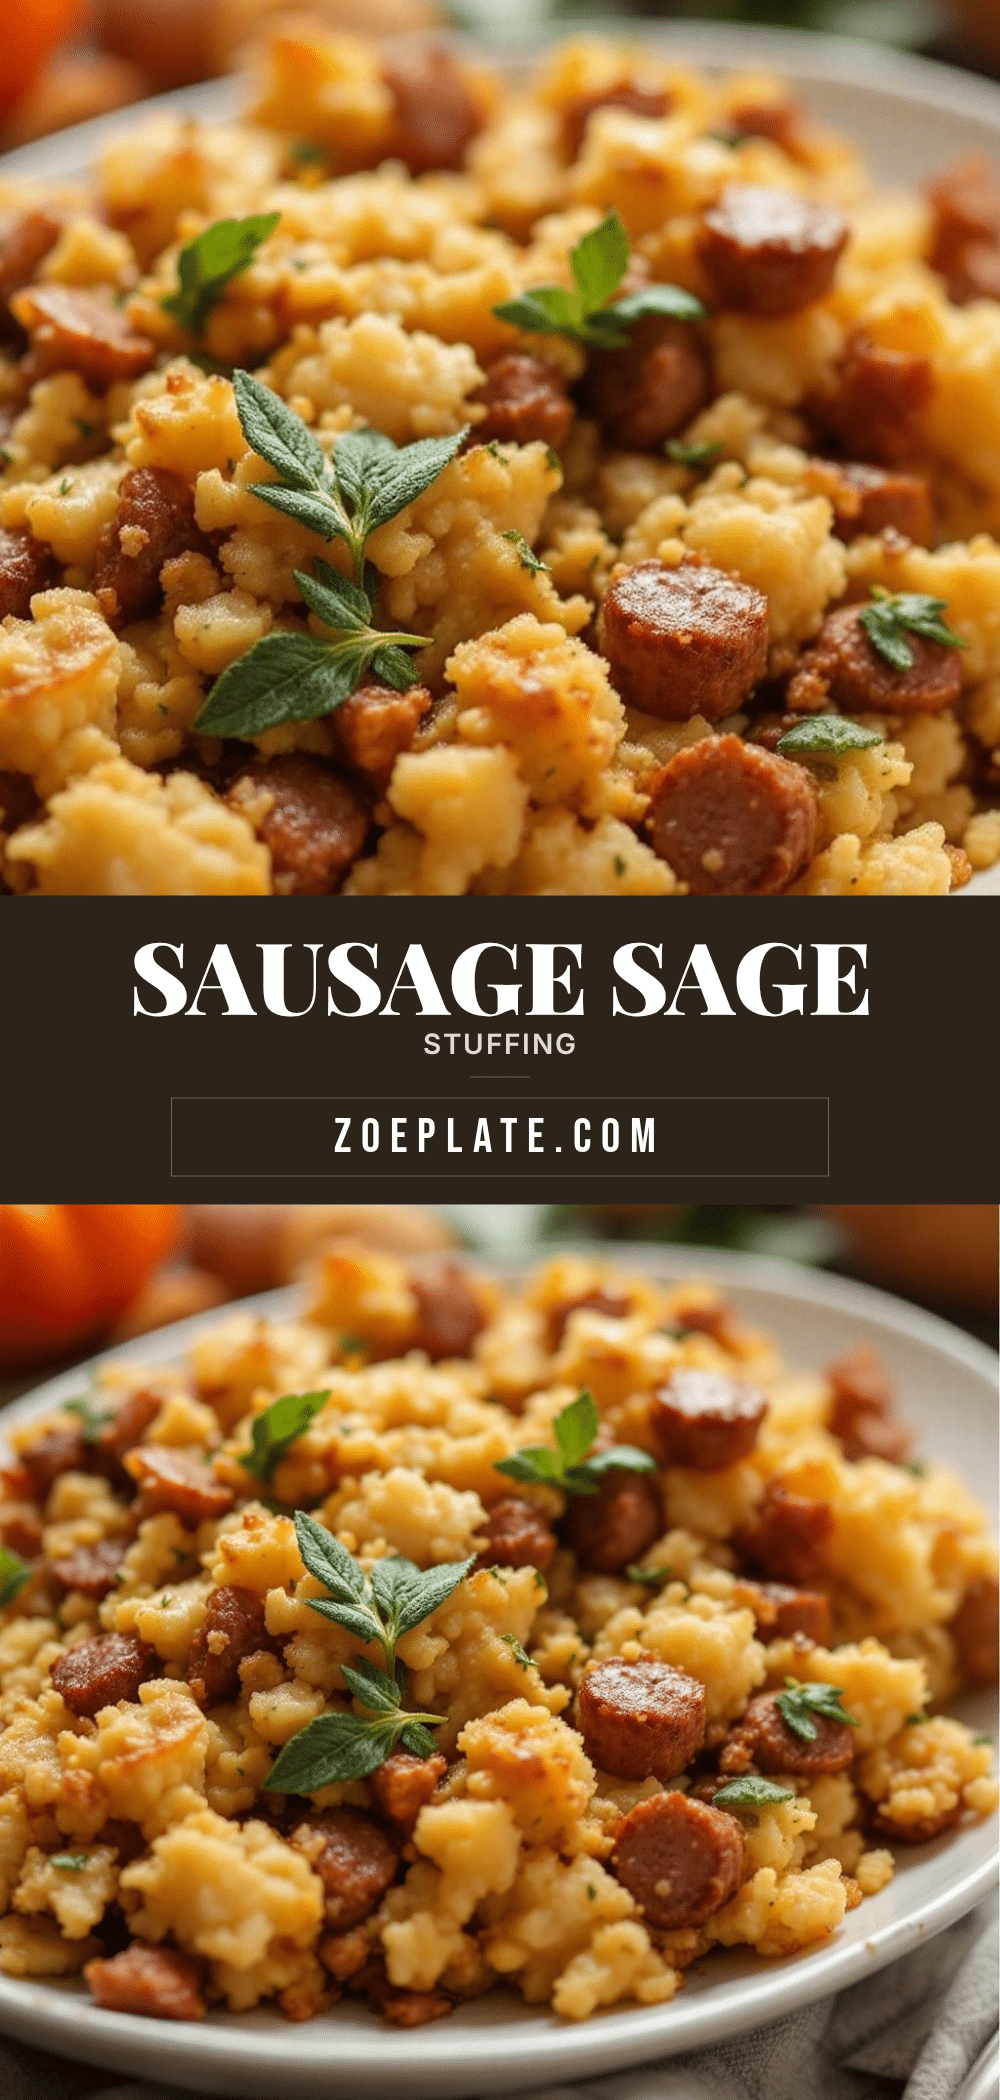
Make-Ahead Sausage and Sage Stuffing: Best Easy Holiday Side

This stress-free holiday side dish features savory Italian sausage and fresh sage infused into dried bread overnight. The result is a stuffing with a crispy golden crust and a moist, flavorful interior that develops deep flavor while resting.
- Prep Time: 30 minutes
- Cook Time: 50 minutes
- Total Time: 80 minutes
- Yield: 8 servings 1x
- Category: Side Dish
- Cuisine: American
Ingredients
- 12–14 cups cubed day-old or dried bread (sourdough or Italian loaf)
- 1 pound Italian sausage (sweet or hot), casings removed
- 1/2 cup fresh sage leaves, chopped
- 1 large yellow onion, diced
- 2 large carrots, diced
- 4 cloves garlic, minced
- 4–5 cups low-sodium chicken broth, warmed
- 2 large eggs
- 2 tablespoons unsalted butter
- 1 teaspoon black pepper
- 1/2 teaspoon salt (adjust to taste)
Instructions
- Preheat oven to 300°F. Cube bread and toast on a baking sheet for 10 minutes until dry but not hard. Let cool.
- Heat a large skillet over medium-high heat. Brown the sausage, breaking it up with a fork, for 8-10 minutes. Drain excess fat, leaving about 1 tablespoon. Remove sausage and set aside.
- In the same skillet, melt butter over medium heat. Sauté onions and carrots for 5-7 minutes until softened. Add garlic and sage in the last minute.
- In a large mixing bowl (at least 6 quarts), combine dried bread cubes, cooked sausage, and sautéed vegetable mixture.
- In a separate bowl, whisk together warm chicken broth, eggs, pepper, and salt.
- Slowly pour the broth mixture over the bread mixture, tossing gently with a fork to moisten evenly. Add broth gradually as needed.
- Cover the mixture tightly with plastic wrap or foil and refrigerate for at least 4 hours or overnight.
- Preheat oven to 350°F. Transfer stuffing to a greased 9×13 inch baking dish.
- Cover with foil and bake for 30 minutes. Remove foil and bake for another 15-20 minutes until the top is golden brown and crispy.
- Ensure internal temperature reaches 165°F. Let rest for 10 minutes before serving.
Notes
Use day-old or dried bread to prevent soggy texture. If using fresh bread, toast it at 300°F for 10 minutes. Add broth gradually to avoid mushiness. For a crispier top, brush with melted butter before baking. Can be made vegetarian by swapping sausage for mushrooms and walnuts.
Nutrition
- Serving Size: 1 cup
- Calories: 375
- Sugar: 2
- Sodium: 650
- Fat: 18
- Saturated Fat: 6
- Carbohydrates: 35
- Fiber: 3
- Protein: 12
Keywords: make-ahead stuffing, sausage stuffing, sage stuffing, holiday side dish, Thanksgiving stuffing, easy stuffing recipe, crispy stuffing


