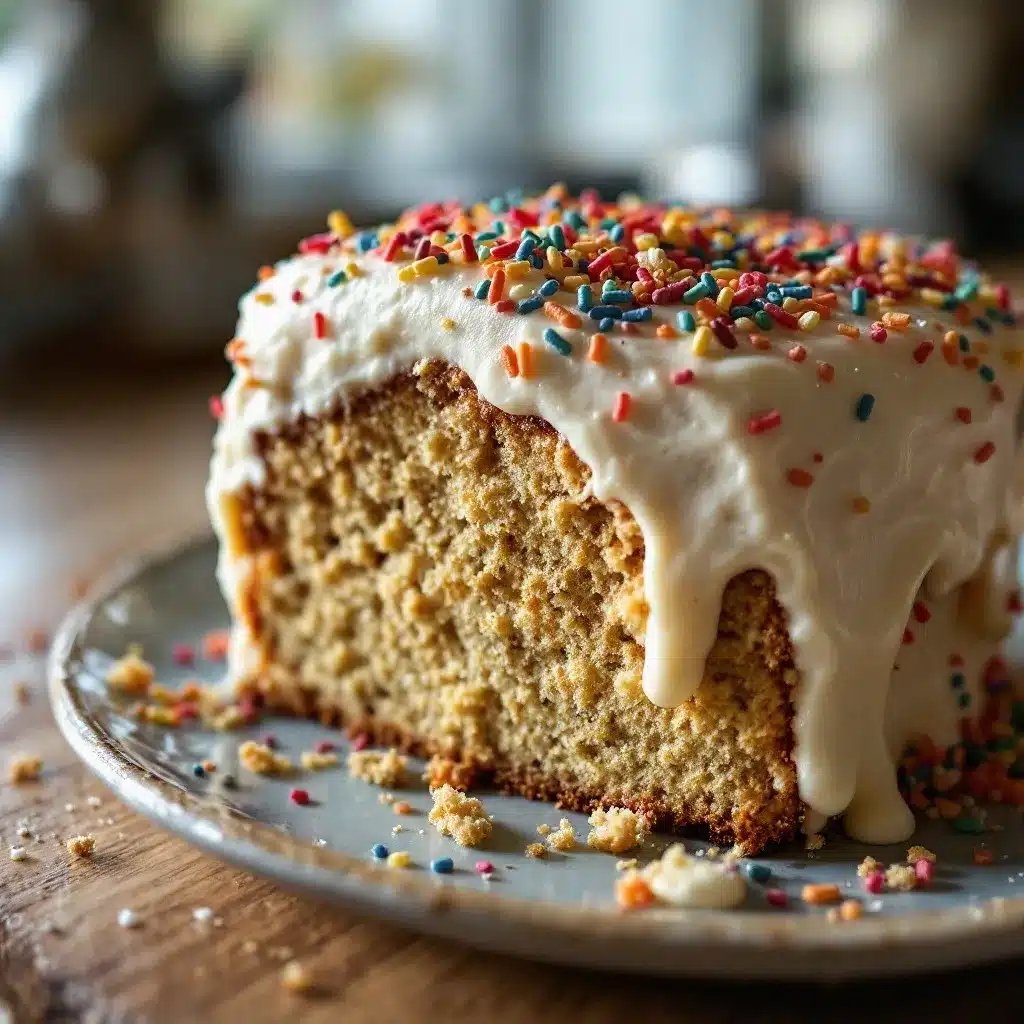
The cake stand was empty. I blinked at the crumbs scattered on the parchment paper, then looked over at my nephew, who was already eyeing the frosting bowl like it held the secrets to the universe. “Can we make another one?” he asked, crumbs on his chin. “The best one.” That was the third time that week I’d pulled this Classic Birthday Cake with Sprinkles out of the oven. Honestly, I didn’t even mind that I hadn’t gotten a proper slice for myself. Seeing that kind of pure, unfiltered joy is its own kind of reward, even if it means you’re scraping the last bit of vanilla buttercream off the spoon at 10 PM.
It started with a request from my sister-in-law who wanted something “not too fancy” but still memorable for her kid’s sixth birthday. She didn’t want fondant or intricate piping designs that would crack by the time the party started. She wanted nostalgia. She wanted the taste of a birthday party that actually feels like a birthday party. So, I went back to basics. No fancy flours, no complicated techniques. Just the kind of cake that tastes like childhood summers and sticky fingers.
I’ve made hundreds of cakes over the years, but there’s something humbling about how hard it is to get this one right. It’s not about showing off. It’s about consistency. It’s about knowing that when you cut into it, the crumb is tender, the flavor is balanced, and the sprinkles don’t just fall off but actually stick. People assume it’s easy because it looks simple. But trust me, there’s a reason this specific ratio of butter to sugar to flour keeps coming back around. It’s the anchor of any good celebration.
I still remember the first time I made it for my own niece. I was nervous. What if it was too dry? What if the frosting was too sweet? But when she took that first bite, her eyes went wide, and she just smiled. That moment stuck with me. It wasn’t about the aesthetics. It was about the feeling. And that’s why I keep coming back to it. It’s reliable. It’s comforting. And it works every single time, even when you’re tired or distracted or just running on caffeine.
Why You’ll Love This Recipe
Let’s be real for a second. There are a thousand cake recipes out there. You could spend hours reading about sour cream chiffon cakes or flourless chocolate tortes. But sometimes, you just want the classic. You want the version that doesn’t require a degree in pastry arts to pull off. This Classic Birthday Cake with Sprinkles is the answer to that desire. It’s not trying to be something it’s not. It’s just a really, really good vanilla cake.
Here is why this recipe sticks in your head long after the last plate is washed:
- Quick & Easy: You don’t need to spend all day in the kitchen. From mixing to baking, you’re looking at about an hour total. It’s perfect for those weeknights when you want to celebrate something small, or for last-minute weekend gatherings where you forgot to buy a dessert.
- Simple Ingredients: No weird grocery runs. You likely have everything in your pantry right now. Flour, sugar, butter, eggs, milk, vanilla. That’s it. No obscure extracts or expensive chocolates. This is cooking for real people, with real pantries.
- Perfect for Celebrations: Whether it’s a kid’s birthday, a teacher appreciation party, or just because it’s Tuesday, this cake fits. It’s versatile enough to be dressed up with rainbow sprinkles for a party or kept simple for a quiet coffee break.
- Crowd-Pleaser: I’ve served this to picky eaters and dessert snobs alike. Kids love the sweetness and the colorful sprinkles. Adults appreciate the balanced vanilla flavor that isn’t cloyingly sweet. It’s a safe bet that always gets rave reviews.
- Unbelievably Delicious: The texture is what gets people. It’s moist but firm enough to hold its shape. The crumb is fine and tender, not dense or heavy. It melts in your mouth in a way that feels like a hug.
What makes this different from the box mix versions you might be used to? It’s the technique. We’re creaming the butter and sugar properly to incorporate air, which gives it that lift. We’re using buttermilk (or a buttermilk substitute) to tenderize the gluten, ensuring it doesn’t turn out tough. And we’re using real vanilla bean paste or high-quality extract, which makes all the difference in the world. It’s not just “vanilla.” It’s fragrant and complex.
I tested this recipe over three different weekends. I tried adding too much flour (dry cake). I tried under-baking it (gummy center). I tried skipping the rest time (dense cake). Each failure taught me something. And now, this is the version that works. It’s the version I trust. It’s the kind of recipe that makes you close your eyes after the first bite and think, “Yeah. This is it. This is the one.”
What Ingredients You Will Need
This recipe relies on simple, wholesome ingredients to deliver bold flavor and satisfying texture without the fuss. You don’t need a specialty store to make this. You just need to pay attention to quality where it counts. Here is what you’ll need to gather before you start mixing.
For the Cake
- All-Purpose Flour: 2 ½ cups (315g). I use Gold Medal for its consistent protein content. Don’t use self-rising flour unless you adjust the baking powder and salt, but honestly, just stick to all-purpose for reliability.
- Baking Powder: 2 ½ teaspoons. Make sure it’s fresh. Old baking powder is the silent killer of fluffy cakes. If it doesn’t fizz when you drop it in water, toss it.
- Salt: 1 ½ teaspoons. Fine sea salt works best. It’s not there to make the cake salty; it’s there to make the vanilla taste more like vanilla.
- Unsalted Butter: 1 cup (226g), softened. Room temperature butter is non-negotiable. If it’s cold, it won’t cream properly. If it’s melted, the texture will be wrong. Aim for that “soft but not greasy” feel.
- Granulated Sugar: 1 ½ cups (300g). White sugar gives you that classic light crumb. Brown sugar adds moisture, but for this specific classic taste, white is the way to go.
- Eggs: 4 large eggs, room temperature. Cold eggs can cause the butter mixture to split. Let them sit on the counter for 30 minutes before you start.
- Vanilla Extract: 2 teaspoons. I recommend using a dark, rich extract like Nielsen-Massey. It adds a depth that cheap extracts just can’t match.
- Whole Milk: 1 ¼ cups (300ml). Full-fat milk is best for richness. Buttermilk is even better if you have it, as the acidity tenderizes the gluten.
For the Frosting & Topping
- Butter: 1 cup (226g), softened. Same rule applies here. Soft, not melted.
- Confectioners’ Sugar: 4 to 5 cups (480-600g). Sifted is better to avoid lumps. If you’re in a rush, you can pulse it in the food processor.
- Heavy Cream: 2-3 tablespoons. Helps to loosen the frosting and make it pipeable. Adjust based on humidity.
- Vanilla Extract: 1 tablespoon. Double down on the vanilla here. You want the frosting to be fragrant.
- Salt: ¼ teaspoon. Cuts the sweetness.
- Jimmies Sprinkles: ½ cup. I prefer jimmies over nonpareils because they don’t dissolve as quickly into the frosting. They hold their shape and add that crucial crunch.
Substitution Notes
If you need to go gluten-free, a 1:1 gluten-free flour blend works surprisingly well here. Just make sure it contains xanthan gum. For dairy-free, you can swap the butter and milk for high-quality vegan alternatives, but the flavor profile will shift slightly. I personally stick to dairy for this one because the dairy fat is what carries the vanilla flavor so beautifully.
Equipment Needed
You don’t need a lot of fancy gear to make this cake. In fact, keeping it simple helps you focus on the technique. Here is what you’ll need on your counter.
- Two 9-Inch Round Cake Pans: This is standard. If you only have one, you’ll need to bake two batches, which is fine but takes longer. Make sure your pans are dark metal if possible, as they conduct heat evenly. Light pans can lead to pale, undercooked bottoms.
- Stand Mixer or Hand Mixer: A stand mixer is ideal for creaming the butter and sugar. It’s easier and less tiring. But a hand mixer works perfectly fine if you have the arm strength for it.
- Large Mixing Bowls: You’ll need one big bowl for the dry ingredients and another for the wet. Have a third medium bowl ready for the eggs.
- Wire Cooling Rack: Essential. Never leave your cake in the pan to cool completely. It will steam and get soggy. Transfer it to a rack immediately.
- Spatula: A rubber spatula is great for scraping down the sides of the bowl. You want every bit of batter incorporated.
- Offset Spatula: This is the tool for frosting. It makes smoothing the sides and top so much easier than a regular knife.
I used to use glass pans for everything. Big mistake. They retain heat too long and often overcook the edges before the center is done. Metal pans are the way to go for this recipe. If you’re on a budget, you can reuse old pans as long as they aren’t warped. A warped pan means an uneven cake, which means a lopsided top. That’s a headache you don’t need.
Preparation Method
Let’s get into the nitty-gritty. This is where the magic happens. Follow these steps closely, and you’ll have a beautiful cake.
Step 1: Prep Your Pans and Oven
Preheat your oven to 350°F (175°C). This needs to be hot enough to set the cake but not so hot that it burns the outside. While the oven heats, grease your two 9-inch round cake pans with butter or non-stick spray. Then, dust them with a little flour, tapping out the excess. Or, for a foolproof method, line the bottoms with parchment paper circles. This ensures the cake never sticks. It’s a small step that saves you from heartbreak later.
Step 2: Mix the Dry Ingredients
In your medium bowl, whisk together the flour, baking powder, and salt. Whisking isn’t just for mixing; it aerates the flour. That air helps the cake rise. Do this for about 30 seconds. Set it aside. It’s easy to rush this, but giving it a good whisk ensures there are no lumps of baking powder later. You don’t want pockets of bitterness in your sweet cake.
Step 3: Cream the Butter and Sugar
In your large bowl, beat the softened butter and granulated sugar together on medium-high speed. This is the most important step for texture. Beat it for about 3-4 minutes until it looks pale and fluffy. It should look like sand that’s been washed by the ocean. If it looks yellow and dense, keep going. This step incorporates air bubbles that expand in the oven, giving you that light crumb. Don’t skip this. I know it takes time, but it’s worth it.
Step 4: Add Eggs and Vanilla
Reduce the speed to medium. Add the eggs one at a time, beating well after each addition. Scrape down the sides of the bowl with your spatula to ensure everything is mixed. Add the vanilla extract now. The mixture might look a bit curdled or separated at this point. Don’t panic. It will come together when you add the flour and milk. It’s a natural part of the emulsion process.
Step 5: Combine Wet and Dry
Turn the mixer to low speed. Add the dry ingredients in three parts, alternating with the milk in two parts. Start with flour, then milk, then flour, then milk, ending with flour. Mix just until the flour disappears. Overmixing develops gluten, which makes the cake tough. You want tender, not chewy. It should take about 1-2 minutes total. The batter will be thick and smooth.
Step 6: Bake
Divide the batter evenly between your two prepared pans. Use a scale if you have one (about 450g per pan) to ensure they bake evenly. Bake for 25-30 minutes. Check at 25 minutes. Insert a toothpick into the center. If it comes out clean or with just a few moist crumbs, it’s done. If it has wet batter, give it 2-3 more minutes. The cake should spring back when you lightly press the center.
Step 7: Cool
Let the cakes cool in the pans for 10 minutes. Then, run a knife around the edges and invert them onto a wire rack. Peel off the parchment paper. Let them cool completely before frosting. This is the hardest part. You want to wait. If you frost a warm cake, the butter will melt and slide off. It’s messy and frustrating. Patience pays off.
Step 8: Make the Frosting
While the cakes cool, make the buttercream. Beat the softened butter until creamy. Add the sifted confectioners’ sugar, one cup at a time, on low speed. Once all sugar is added, increase speed to high and beat for 3 minutes. Add the heavy cream, vanilla, and salt. Beat on high for another 2 minutes until light and fluffy. If it’s too thick, add another tablespoon of cream. If it’s too thin, add more sugar.
Step 9: Assemble and Decorate
Place one cake layer on your serving plate. Spread a generous layer of frosting on top. Place the second layer on top. Frost the top and sides with the remaining buttercream. Smooth it out with your offset spatula. Finally, press the sprinkles onto the top and sides. They’ll stick to the fresh frosting. Done.
Cooking Tips & Techniques
There are a few tricks I’ve learned along the way that separate the good cakes from the great ones. I’ve made plenty of mistakes, so you don’t have to.
- Room Temperature Ingredients: I can’t stress this enough. Cold eggs and butter will not emulsify properly. Your cake batter will look curdled, and the final texture will be dense. Take your butter and eggs out of the fridge an hour before you start. If you forget, you can warm the eggs in a bowl of warm water for 5 minutes.
- Don’t Overmix: Once you add the flour, mix only until combined. Overmixing creates gluten strands, which leads to a tough, rubbery cake. You want a tender crumb. Gentle hands are key here.
- Check Your Oven: Ovens lie. They often run hotter or cooler than the dial says. Invest in an inexpensive oven thermometer. If your oven runs hot, your cake will burn on the outside and stay raw inside. If it runs cool, it won’t rise properly.
- Rotate Your Cakes: Most ovens have hot spots. Halfway through baking, rotate your pans 180 degrees. This ensures even browning on both sides. It’s a small step that makes a big difference in appearance.
- Let It Cool Completely: I know you want to dig in. But frosting a warm cake is a disaster. The heat melts the butter in the frosting, causing it to slide off. Let the cakes cool on a wire rack for at least an hour. Use that time to clean up or make tea.
I once made this cake on a humid day and the frosting turned into soup. The humidity affects how sugar absorbs moisture. If you’re baking in humid weather, you might need to add a bit more powdered sugar to the frosting to stiffen it. Conversely, in dry weather, you might need a splash more cream. Pay attention to your environment.
Variations & Adaptations
This recipe is a blank canvas. Once you master the base, you can change it up in a million ways. Here are a few variations I love.
- Strawberry Birthday Cake: Swap ½ cup of the flour for dried strawberry powder. It gives a beautiful pink color and a tart strawberry flavor that pairs perfectly with the vanilla. You can also fold in fresh diced strawberries into the batter, but be aware that the extra moisture might require a slightly longer bake time.
- Chocolate Sprinkle Cake: Swap ½ cup of the flour for unsweetened cocoa powder. Add an extra ¼ cup of milk to compensate for the dry cocoa. This gives you a chocolate cake base with rainbow sprinkles. It’s a fun twist that kids adore.
- Lemon Vanilla Cake: Add the zest of two lemons to the butter and sugar mixture. It adds a bright, citrusy note that cuts through the sweetness. It’s perfect for spring birthdays.
- Gluten-Free Option: Use a 1:1 gluten-free flour blend. Ensure it contains xanthan gum. The texture will be slightly more delicate, so handle the batter gently. It still tastes amazing.
- Dairy-Free Version: Use vegan butter and almond milk. The flavor will be slightly different, but the texture will still be good. I prefer using coconut milk for the creaminess, but almond milk works too.
I tried making a lemon version for my daughter’s fifth birthday. She wasn’t sure about it at first, but she loved it. The zest adds a freshness that makes the cake feel less heavy. It’s a great option for summer parties. Don’t be afraid to experiment. Baking is about fun. If you like it, it’s the right recipe.
Serving & Storage Suggestions
How you serve and store this cake matters just as much as how you make it. Here’s how to keep it fresh and tasty.
- Serving Temperature: Serve this cake at room temperature. Cold buttercream is hard and waxy. Room temperature frosting is smooth and creamy. Take the cake out of the fridge 30 minutes before serving if you’ve stored it.
- Complementary Dishes: This cake pairs well with a simple fruit salad or a bowl of whipped cream. It’s also great with a cup of hot coffee or tea. The vanilla flavor complements coffee beautifully.
- Storage: Store leftover cake in an airtight container at room temperature for up to 3 days. If your kitchen is very hot, you can refrigerate it, but let it come to room temperature before serving. Do not freeze the frosted cake unless you plan to eat it quickly after thawing, as the texture of the frosting can change.
- Reheating: You don’t need to reheat this cake. It’s best fresh. But if you must, you can warm individual slices in the microwave for 10 seconds. Just be careful not to melt the frosting.
- Flavors Over Time: The flavors actually meld together after a day. The cake becomes slightly more moist as the frosting penetrates the crumb. This is why leftovers often taste even better than the first slice.
I usually keep the leftovers in the fridge for my husband, who loves a cold slice of cake with his morning coffee. He says it’s his favorite part of the day. It’s nice to know that the cake lasts. It’s not just a one-day wonder.
Nutritional Information & Benefits
Let’s talk about nutrition. This is a dessert, so it’s not exactly a health food. But it’s made with real ingredients, which is something to appreciate.
Each slice (assuming 12 slices) contains approximately 450 calories. It has about 20g of fat, 65g of carbohydrates, and 5g of protein. The sugar content is high, as expected for a birthday cake. However, the butter and eggs provide some protein and healthy fats. The vanilla extract adds antioxidants, though in small amounts.
If you’re watching your sugar intake, you can reduce the sugar in the frosting by ¼ cup. The cake will still be sweet enough. For a lighter version, you can use a cream cheese frosting instead of buttercream. Cream cheese has a tangy flavor that cuts the sweetness and adds a bit of protein.
I always remind my friends that balance is key. Enjoy this cake as a special treat. It’s not something you eat every day. But when you do, make it count. Use good ingredients. Enjoy the moment. That’s the real benefit.
Conclusion
This Classic Birthday Cake with Sprinkles is more than just a recipe. It’s a memory maker. It’s the cake that shows up when you need comfort. It’s the cake that brings people together. It’s simple, reliable, and delicious.
I hope you try this recipe. I hope it becomes a staple in your home. Customize it. Make it yours. Add your favorite sprinkles. Change the flavor. But start with this base. It’s a solid foundation.
Please leave a comment below if you make this cake. I’d love to hear how it turned out. Did you add any variations? Did your kids love it? Share your stories. And if you try it, tag me on social media. I love seeing your creations.
Happy baking!
FAQs
Can I use a box mix for this cake?
You can, but the homemade version tastes significantly better. The homemade cake has a tender crumb and rich vanilla flavor that box mixes struggle to match. If you’re short on time, you can boost a box mix by adding an extra egg and substituting the water for milk, but the from-scratch recipe is worth the effort.
Why did my cake sink in the middle?
This usually happens if the oven door was opened too early, or if the cake was underbaked. Make sure your oven is preheated and check the cake with a toothpick. If it comes out clean, it’s done. Also, avoid opening the oven door for the first 20 minutes of baking.
How do I store leftover cake?
Store leftover cake in an airtight container at room temperature for up to 3 days. If your kitchen is hot, refrigerate it. Let it come to room temperature before serving for the best texture and flavor.
Can I freeze this cake?
It’s best to freeze the cake layers before frosting. Wrap them tightly in plastic wrap and foil. They will keep for up to 3 months. Thaw them in the fridge overnight, then frost and decorate when ready to serve. Frosted cakes don’t freeze as well because the frosting texture can change.
What kind of sprinkles work best?
Jimmies (the elongated sprinkles) work best because they hold their shape and don’t dissolve into the frosting. Nonpareils (the tiny round ones) can bleed color into the frosting, especially if it’s white. If you want bright colors, jimmies are the way to go.
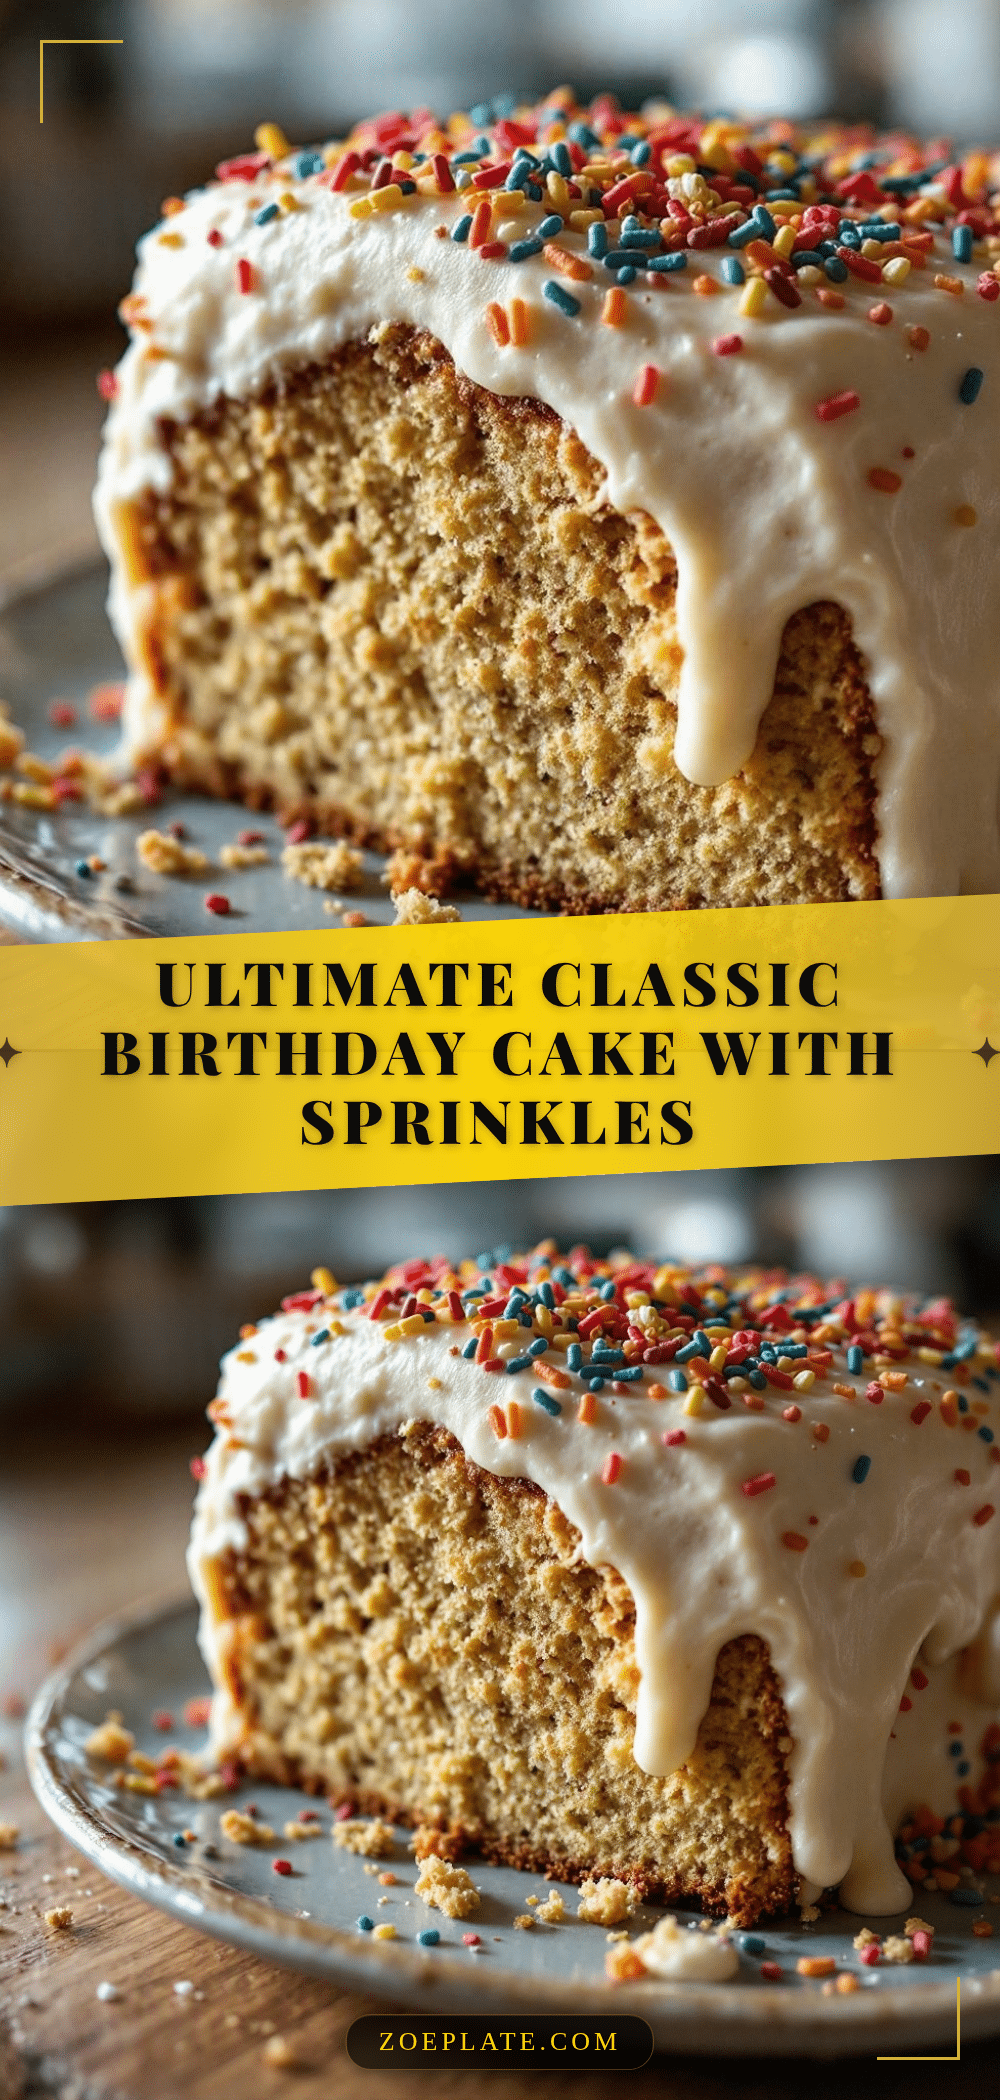
Pin This Recipe!
Classic Birthday Cake with Sprinkles
A reliable, moist vanilla birthday cake with tender crumb and rich vanilla buttercream frosting, topped with colorful sprinkles. Simple ingredients and easy techniques make this a crowd-pleaser for any celebration.
- Prep Time: 30 minutes
- Cook Time: 30 minutes
- Total Time: 1 hour
- Yield: 12 servings 1x
- Category: Dessert
- Cuisine: American
Ingredients
- 2 ½ cups (315g) All-Purpose Flour
- 2 ½ teaspoons Baking Powder
- 1 ½ teaspoons Fine Sea Salt
- 1 cup (226g) Unsalted Butter, softened
- 1 ½ cups (300g) Granulated Sugar
- 4 large Eggs, room temperature
- 2 teaspoons Vanilla Extract
- 1 ¼ cups (300ml) Whole Milk
- 1 cup (226g) Unsalted Butter, softened (for frosting)
- 4 to 5 cups (480-600g) Confectioners’ Sugar, sifted
- 2–3 tablespoons Heavy Cream
- 1 tablespoon Vanilla Extract (for frosting)
- ¼ teaspoon Salt (for frosting)
- ½ cup Jimmies Sprinkles
Instructions
- Preheat oven to 350°F (175°C). Grease two 9-inch round cake pans with butter or non-stick spray, dust with flour, and line bottoms with parchment paper.
- In a medium bowl, whisk together flour, baking powder, and salt for 30 seconds to aerate and remove lumps. Set aside.
- In a large bowl, beat softened butter and granulated sugar on medium-high speed for 3-4 minutes until pale and fluffy.
- Reduce speed to medium. Add eggs one at a time, beating well after each addition. Scrape down sides of the bowl. Add vanilla extract.
- Turn mixer to low. Add dry ingredients in three parts, alternating with milk in two parts (ending with flour). Mix just until combined.
- Divide batter evenly between prepared pans (approx. 450g per pan). Bake for 25-30 minutes, rotating pans halfway through. Test with a toothpick; it should come out clean.
- Let cakes cool in pans for 10 minutes, then invert onto a wire rack to cool completely.
- While cakes cool, make frosting: Beat softened butter until creamy. Add confectioners’ sugar one cup at a time on low speed. Increase to high and beat for 3 minutes.
- Add heavy cream, vanilla extract, and salt. Beat on high for 2 minutes until light and fluffy. Adjust consistency with more cream or sugar if needed.
- Place one cake layer on serving plate. Spread a generous layer of frosting on top. Add second layer. Frost top and sides with remaining buttercream.
- Press sprinkles onto the top and sides of the frosted cake.
Notes
Ensure all ingredients (butter and eggs) are at room temperature for proper emulsification. Do not overmix the batter once flour is added to avoid a tough texture. Rotate pans halfway through baking for even browning. Cool cakes completely before frosting to prevent melting. Store leftovers in an airtight container at room temperature for up to 3 days.
Nutrition
- Serving Size: 1 slice
- Calories: 450
- Sugar: 50
- Sodium: 350
- Fat: 20
- Saturated Fat: 12
- Carbohydrates: 65
- Fiber: 1
- Protein: 5
Keywords: birthday cake, vanilla cake, sprinkles, buttercream frosting, easy cake recipe, celebration cake, homemade cake


