The jagged edge of a graham cracker, dusted with powdered sugar, is what I made this board for — everything else is secondary. You know that feeling when you walk into a room and the air just feels different? Thicker? Warmer? That is exactly what happens when you set down a charcuterie board that has been built with actual intention. It isn’t just a pile of food. It is a landscape. And the first thing you notice isn’t the smell of the cheese, though that is good. It is the visual noise. The contrast between the dark, sticky figs and the pale, creamy brie. The way the walnuts catch the light.
I used to think charcuterie was just fancy cheese and crackers. Honestly, I was wrong. It is about texture. It is about the snap of a fresh apple slice against the soft yield of a ripe pear. It is about the crunch of a pretzel rod that gives way to salty, buttery goodness. When I started building boards for friends, I stopped thinking about flavor profiles and started thinking about mouthfeel. Because let’s face it, we eat with our eyes and our fingers first.
This Ultimate Friendsgiving Charcuterie Board with Fall Fruits was born out of a late-night panic. My apartment was tiny, my oven was small, and I had twelve people coming over for a Thursday night gathering that turned into a full-blown celebration. I didn’t have time to cook a turkey. I didn’t have time to bake a pie. But I had a fridge full of ingredients and a desire to make something that looked like I had tried way harder than I actually had. So I grabbed a wooden board, a knife, and a lot of patience.
What started as a simple snack turned into the centerpiece of the night. People didn’t even sit down to eat immediately. They just stood around the table, grazing, laughing, passing plates. The fall fruits — the pears, the apples, the figs — they brought a freshness that cut through the rich cheeses. The nuts added weight. The meats added salt. It was balanced. It was perfect. And it didn’t require me to stand in front of a stove for three hours.
I still remember the look on my friend Sarah’s face when she took that first bite of prosciutto wrapped around a melon ball. She closed her eyes. She didn’t say anything. She just nodded. That quiet realization is what stuck with me. It wasn’t about the food being gourmet. It was about the food being accessible. It was about bringing people together without the stress of a traditional holiday meal. Now, every time I see a board like this, I don’t just see snacks. I see a moment of pause. A moment of connection. And that is the whole point.
Why You’ll Love This Recipe
I have spent years testing different cheese combinations, cracker types, and fruit arrangements. Some fail. Some are just okay. This one? This one is the gold standard. It is the kind of recipe that feels like a cheat code for hosting. You get all the credit for being a culinary genius, but really, you just bought good stuff and arranged it nicely. Here is why this Ultimate Friendsgiving Charcuterie Board with Fall Fruits is going to become your new go-to for every gathering:
- Quick & Easy: You can put this entire board together in under 20 minutes. No cooking required. No oven space needed. This is perfect for busy weeknights or when you are hosting a last-minute Friendsgiving and realize you have nothing prepared.
- Simple Ingredients: You likely already have half of this in your fridge. Cheese, crackers, fruit, nuts. No fancy grocery trips needed. Just grab what looks good at the market and build.
- Perfect for Socializing: This isn’t a sit-down meal. It is a grazing experience. It allows your guests to mingle, to move around, to chat without being trapped at a table. It’s great for brunches, potlucks, or cozy dinners where you want a relaxed vibe.
- Crowd-Pleaser: Everyone loves cheese. Everyone loves fruit. Even the pickiest eaters or the kids at the party will find something they like. It always gets rave reviews from adults and kids alike because it is customizable.
- Unbelievably Delicious: The texture and flavor combo is next-level comfort food. The crunch of the nuts, the snap of the apple, the creaminess of the cheese. It hits every note.
What makes this different from the rest? It is the balance of fall flavors. Most charcuterie boards are just meat and cheese. This one uses the season. It brings in the sweetness of fall fruits like pears and figs, which pair beautifully with salty cured meats and sharp cheddar. It’s not just another version—it’s your best version. It’s comfort food reimagined—healthier, faster, but with the same soul-soothing satisfaction. It is perfect for impressing guests without stress, or turning a simple meal into something memorable.
What Ingredients You Will Need
This recipe uses simple, wholesome ingredients to deliver bold flavor and satisfying texture without the fuss. The key is variety. You want a mix of textures and flavors to keep things interesting. Here is what you will need to build the ultimate board:
- Hard Cheese: Aged cheddar or gouda. Cut into cubes or slices. (Sharp cheddar adds a nice bite). I recommend Cabot for best texture and flavor consistency.
- Soft Cheese: Brie or camembert. Whole wheel or sliced. (Provides a creamy contrast). Make sure it is at room temperature before serving.
- Soft Cheese: Goat cheese log. (Tangy and bright). Roll in crushed pistachios for extra crunch.
- Cured Meat: Prosciutto or salami. Folded or rolled. (Salty and savory). Look for thin slices of prosciutto di parma.
- Fresh Fruit: Grapes (red and green). (Sweet and juicy). Wash and dry thoroughly.
- Fresh Fruit: Apple slices (Honeycrisp or Fuji). (Crisp and firm). Toss in lemon juice to prevent browning.
- Fresh Fruit: Pear slices (Bosc or Anjou). (Buttery and sweet). Slice thinly for elegance.
- Dried Fruit: Figs or dates. (Chewy and intense). Use fresh figs if in season, otherwise dried is fine.
- Nuts: Walnuts or pecans. (Crunchy and rich). Toast them lightly for better flavor.
- Crackers: Water crackers or baguette slices. (Neutral base). I prefer the rustic, seeded crackers.
- Accents: Honey or fig jam. (Sweet drizzle). Drizzle over cheese for a gourmet touch.
- Extras: Pickles or olives. (Briny pop). Adds a savory kick for some guests.
For the fruit, look for firm, ripe pieces that won’t get mushy. In summer, you can swap in fresh berries instead of figs. For a gluten-free option, use rice crackers or almond flour crackers. If you need dairy-free, swap goat cheese with a coconut-based alternative. Keep this section scannable—grab your ingredients, then get building.
Equipment Needed
You don’t need much, but having the right tools makes the process smoother. A large wooden board or slate platter is essential. It gives you space to arrange things without crowding. If you don’t have a board, a large serving tray works too. I personally love using a live-edge wood slab because it adds warmth and texture to the presentation.
Sharp knives are non-negotiable. You need a cheese knife for the soft cheeses and a serrated knife for the baguette or hard cheeses. A dull knife will crush the brie and make a mess. Keep your knives clean and dry to prevent sticking.
You will also need small bowls or ramekins for the jams, honey, or olives. These act as anchors on the board and help break up the visual flow. Tongs are helpful for serving, especially if you have many guests. They keep your hands clean and make it easier for people to serve themselves.
If you are using fresh fruit, have a cutting board and a small bowl of water with lemon juice ready. This keeps the apples and pears from turning brown while you work. Budget-friendly options? Use whatever plates or bowls you have in your cupboard. You don’t need matching sets. The rustic, mismatched look often feels more inviting and less formal.
Preparation Method
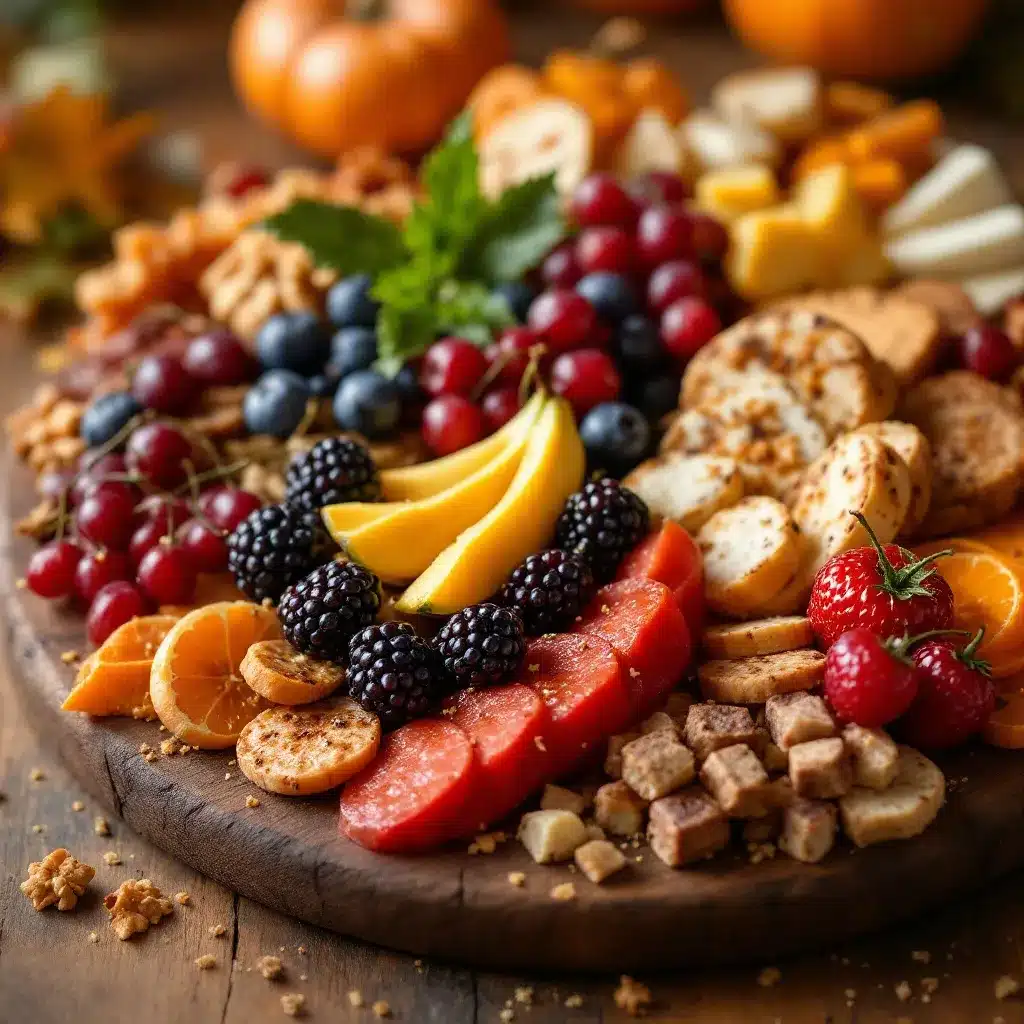
- Prepare the Fruits (5 minutes): Wash and dry all fresh fruits. Slice the apples and pears into thin wedges or rounds. If using figs, quarter them or leave them whole if they are small. Place them in a bowl with a splash of lemon juice to prevent oxidation. This step ensures they stay bright and fresh.
- Arrange the Cheeses (5 minutes): Take your cheeses out of the fridge at least 30 minutes before serving. Cold cheese has no flavor. Place the large cheeses, like the brie wheel or cheddar block, on the board first. These act as anchors. Cut the hard cheese into cubes or slices. Spread the soft goat cheese across a small section of the board.
- Add the Meats (5 minutes): Fold or roll the prosciutto and salami. Don’t just lay them flat. Folding creates height and texture. Scatter them around the cheeses. Leave space between the meats for the fruits and crackers. This prevents the board from looking too crowded.
- Fill in the Gaps (5 minutes): Add the grapes, figs, and nuts. Tuck them into the empty spaces. The goal is to create a continuous flow so guests can grab a bite of everything without reaching too far. Sprinkle the toasted nuts over the goat cheese or around the board for added crunch.
- Add Crackers and Bread (5 minutes): Stand the crackers up against the cheeses or lay them in a fan pattern. Slice the baguette if using. Arrange them so they are easily accessible. You want people to be able to grab a cracker without disturbing the rest of the board.
- Finish with Accents (5 minutes): Add small bowls of honey, jam, or olives. Drizzle honey over the brie or figs. Add pickles or olives in a small dish. These add pops of color and contrasting flavors. Step back and assess. Does it look balanced? Add more fruit or nuts if needed.
Remember, this is a guide, not a rulebook. Trust your eyes. If it looks good, it is good. Take your time. The more you enjoy the process, the better the result will be.
Cooking Tips & Techniques
One common mistake is overcrowding the board. It is tempting to fill every inch, but space is your friend. Empty space allows the eye to rest and highlights the individual items. Less is more. Another mistake is using cold cheese. Always let your cheeses come to room temperature. This releases their aromas and improves their texture. It makes a huge difference.
When slicing fruit, try to keep the pieces uniform. It looks more professional and is easier for guests to eat. Use a sharp knife for clean cuts. For the meats, fold them loosely. Tight rolls can be hard to unwrap. Loose folds invite people to grab a piece.
I once made a board that was all red and brown. It looked like a mud pie. Always include color. Green grapes, red apples, white cheese, brown nuts. Variety in color makes the board more appealing. Also, taste your ingredients before you arrange them. If the cheese is too strong, pair it with sweeter fruits. If the meat is salty, add something neutral like crackers.
Timing is key. Build the board about an hour before serving. This gives the cheeses time to warm up and the fruits time to settle. If you build it too early, the fruits might dry out. If you build it too late, you will be stressed. Plan ahead. Multitask. Have music playing. Make it a fun part of your prep.
Variations & Adaptations
This board is highly adaptable. You can change it based on the season, your dietary needs, or your personal taste. Here are a few variations I love:
- Vegetarian Option: Skip the meats and add more cheeses, roasted vegetables, and hummus. Roasted beet hummus is a great addition. It adds color and earthiness.
- Gluten-Free: Use gluten-free crackers, rice cakes, or fresh vegetable sticks like celery and bell peppers. Most fruits, cheeses, and nuts are naturally gluten-free.
- Dairy-Free: Swap dairy cheeses for high-quality plant-based alternatives. Add more nuts, dried fruits, and olives to fill the gap. Cashew cheese is a good option.
- Sweet Tooth: Add chocolates, cookies, or fresh berries. Chocolate-covered almonds pair well with dark chocolate. This turns the board into a dessert platter.
- Spicy Kick: Add spicy chorizo, jalapeños, or hot honey. Drizzle hot honey over the cheese for a sweet and spicy combo. This is a personal favorite of mine.
Feel free to experiment. The best boards are the ones that reflect your personality and your guests’ preferences. Don’t be afraid to try something new.
Serving & Storage Suggestions
Serve this board at room temperature. It is best enjoyed over the course of an hour or two. Keep it in a cool place if it is very hot outside, as the cheese can melt. Pair it with a crisp white wine, a light red, or a sparkling cider. The bubbles cut through the richness of the cheese.
If you have leftovers, store the cheeses in airtight containers in the fridge. Wrap them in parchment paper first to prevent them from drying out. The fruits should be stored separately in containers. Consume within 2-3 days. The crackers should be kept in a dry place to maintain their crunch.
Reheating is not necessary for this board. It is meant to be eaten cold or at room temperature. The flavors develop over time as the cheeses soften and the fruits meld with the salts. Leftovers can be packed for lunch or snacks the next day. It is a practical and delicious option.
Nutritional Information & Benefits
This charcuterie board is a balanced mix of protein, healthy fats, and carbohydrates. The cheeses provide calcium and protein. The nuts offer healthy fats and fiber. The fruits add vitamins and antioxidants. It is a nutrient-dense option that is satisfying without being heavy.
For those watching their sodium, choose lower-sodium meats and cheeses. For those monitoring sugar, limit the dried fruits and honey. This board can be adapted to fit various dietary needs. It is a flexible and wholesome choice for any gathering. I always feel good about serving this because it is made with real, whole ingredients. It is a way to nourish your body and your soul.
Conclusion
This Ultimate Friendsgiving Charcuterie Board with Fall Fruits is more than just a snack. It is a celebration of community, flavor, and texture. It is easy to make, beautiful to look at, and delicious to eat. I love this recipe because it takes the stress out of hosting. It allows me to be present with my guests instead of stuck in the kitchen. It is a testament to the power of simple ingredients and thoughtful arrangement.
I encourage you to customize this board to your liking. Use your favorite cheeses, fruits, and crackers. Make it your own. And don’t forget to share your creations with me. I love seeing how you adapt this recipe. Leave a comment below with your favorite combination. Share this post with a friend who needs hosting inspiration. And next time you gather with friends, remember the crunch, the salt, and the sweet. It is a moment worth savoring.
Frequently Asked Questions
Can I make this charcuterie board ahead of time?
You can prepare most of the ingredients a day in advance. Slice the fruits and store them in airtight containers. Cut the cheeses and meats and store them separately. Assemble the board about an hour before serving to ensure the cheeses are at the right temperature and the fruits stay fresh.
What cheeses are best for a charcuterie board?
A good mix includes a hard cheese (like cheddar or gouda), a soft cheese (like brie or camembert), and a tangy cheese (like goat cheese). This variety provides different textures and flavors that complement each other well.
How do I keep the fruit from browning?
Toss sliced apples and pears in a mixture of water and lemon juice. This prevents oxidation and keeps them looking fresh. Add them to the board just before serving for the best appearance.
Can I use this board for a holiday dinner?
Absolutely. This board is perfect for Friendsgiving, Thanksgiving, or any holiday gathering. It serves as a great appetizer or a light main course. It pairs well with traditional holiday sides and drinks.
What drinks pair best with this board?
Crisp white wines like Sauvignon Blanc or Pinot Grigio work well. Light reds like Pinot Noir are also a good choice. For non-alcoholic options, try sparkling cider or herbal tea. The carbonation and acidity help cut through the richness of the cheese.
Pin This Recipe!
Ultimate Friendsgiving Charcuterie Board: Best Fall Fruit Platter

A stress-free, visually stunning charcuterie board featuring a balance of fall fruits, artisanal cheeses, cured meats, and crunchy nuts. Perfect for hosting gatherings without the need for cooking.
- Prep Time: 20 minutes
- Cook Time: 0 minutes
- Total Time: 20 minutes
- Yield: 12 servings
- Category: Appetizer
- Cuisine: American
Ingredients
- Hard Cheese (Aged cheddar or gouda), cut into cubes or slices
- Soft Cheese (Brie or camembert), whole wheel or sliced
- Soft Cheese (Goat cheese log), rolled in crushed pistachios
- Cured Meat (Prosciutto or salami), folded or rolled
- Fresh Fruit (Grapes, red and green), washed and dried
- Fresh Fruit (Apple slices, Honeycrisp or Fuji), tossed in lemon juice
- Fresh Fruit (Pear slices, Bosc or Anjou), sliced thinly
- Dried Fruit (Figs or dates), fresh or dried
- Nuts (Walnuts or pecans), lightly toasted
- Crackers (Water crackers or baguette slices), rustic or seeded
- Accents (Honey or fig jam), for drizzling
- Extras (Pickles or olives), for briny pop
Instructions
- Prepare the Fruits: Wash and dry all fresh fruits. Slice apples and pears into thin wedges or rounds. Quarter figs or leave small ones whole. Place in a bowl with a splash of lemon juice to prevent oxidation.
- Arrange the Cheeses: Take cheeses out of the fridge at least 30 minutes before serving. Place large cheeses like brie or cheddar on the board first as anchors. Cut hard cheese into cubes or slices and spread soft goat cheese across a section.
- Add the Meats: Fold or roll prosciutto and salami to create height and texture. Scatter them around the cheeses, leaving space between meats for fruits and crackers.
- Fill in the Gaps: Add grapes, figs, and nuts into empty spaces to create a continuous flow. Sprinkle toasted nuts over goat cheese or around the board.
- Add Crackers and Bread: Stand crackers up against cheeses or lay them in a fan pattern. Slice baguette if using. Arrange for easy access.
- Finish with Accents: Add small bowls of honey, jam, or olives. Drizzle honey over brie or figs. Step back and assess balance, adding more fruit or nuts if needed.
Notes
Let cheeses come to room temperature before serving for best flavor. Build the board about an hour before serving to allow cheeses to warm up. Keep fruits from browning by tossing with lemon juice. This recipe is highly adaptable for dietary restrictions.
Nutrition
- Serving Size: Grazing portions for
- Calories: 350
- Sugar: 18
- Sodium: 600
- Fat: 22
- Saturated Fat: 10
- Carbohydrates: 25
- Fiber: 3
- Protein: 12
Keywords: charcuterie board, friendsgiving, fall fruit platter, cheese board, easy hosting, no cook recipe, autumn snacks, grazing board


