“Hey, can you grab something for the kids to snack on?” my friend texted me just hours before a last-minute backyard hangout. Honestly, I wasn’t prepared for a full spread, and the thought of chopping, cooking, or even assembling a complicated dish felt exhausting. But then, my mind wandered to those chip bags sitting unopened in the pantry — and an idea sparked. I tossed ground beef, beans, cheese, and a few fresh toppings together, poured it all straight into the chip bags, and called it a day.
The first bite was a revelation: crunchy chips, savory taco meat, creamy cheese, and fresh zing all in one handheld delight. The kids loved it, the adults couldn’t stop raving, and best of all — cleanup was a breeze. That simple experiment, fueled by a bit of stress and a pantry raid, became my go-to for casual get-togethers. There’s just something about these easy loaded walking tacos from chip bags that turns a rushed afternoon into a fun, laid-back party moment.
From then on, I found myself making these tacos multiple times a week — honestly, it’s too convenient and tasty not to. The chip bag becomes the perfect edible bowl, which means no extra plates or bowls cluttering the table. Plus, they’re super customizable, so everyone gets to pile on what they like without fuss or mess. It’s an easy way to bring everyone together, no matter how chaotic the day’s been.
What stuck with me most was how this simple recipe made hosting feel less like a production and more like sharing a relaxed moment with friends. So if you’re looking for a crowd-pleasing, fuss-free snack that feels like a little celebration in every bite, these walking tacos might just become your new favorite, too.
Why You’ll Love This Easy Loaded Walking Tacos from Chip Bags Recipe
After making these walking tacos a handful of times, I can say they’ve earned a permanent spot in my recipe rotation. Whether you’re a busy parent juggling dinner plans or a laid-back host wanting something fun and delicious, this recipe checks so many boxes. Here’s why it’s a winner:
- Quick & Easy: You can have these tacos ready in about 20 minutes — perfect for those unexpected gatherings or last-minute cravings.
- Simple Ingredients: No fancy or hard-to-find items needed. You probably have most of these staples already, so no stressful supermarket runs required.
- Perfect for Parties & Casual Get-Togethers: These walking tacos are a hit at potlucks, game days, or even a laid-back weekend lunch outside.
- Crowd-Pleaser: The combo of crunchy chips, savory filling, and fresh toppings delights both kids and adults alike — no complaints here!
- Unbelievably Delicious: The layers of texture and flavor come together in a way that’s familiar yet satisfying, making every bite feel like a treat.
What really sets this recipe apart is the creative twist of using chip bags as edible containers. It’s not just a gimmick — it’s practical and fun. Plus, the seasoning blend I use for the meat is balanced just right to bring out bold flavors without overpowering the chips. It’s neither too spicy nor bland — just that perfect zing that gets you hooked.
And here’s the emotional side: these walking tacos turn simple ingredients into a casual feast that invites sharing and laughter. It’s comfort food without the hassle, a snack that feels special yet approachable. For those times when you want something tasty without the stress, these tacos deliver exactly that.
What Ingredients You Will Need for Easy Loaded Walking Tacos from Chip Bags
This recipe uses simple, wholesome ingredients to deliver bold flavor and satisfying texture without the fuss. Most are pantry staples, making it easy to whip up without special trips. Feel free to customize based on what you have, and I’ll include some substitutions to keep it flexible!
- For the Taco Meat:
- 1 lb (450 g) ground beef (or ground turkey for a leaner option)
- 1 small onion, finely chopped
- 2 cloves garlic, minced
- 1 packet (about 1 oz / 28 g) taco seasoning mix (homemade or store-bought; I like McCormick for consistent flavor)
- ½ cup (120 ml) water
- For the Beans:
- 1 can (15 oz / 425 g) black beans or pinto beans, drained and rinsed
- For the Toppings:
- 2 cups (200 g) shredded cheddar cheese (sharp or mild, depending on preference)
- 1 cup (240 ml) sour cream or Greek yogurt (I often swap Greek yogurt for a tangier, protein-rich boost)
- 1 cup (150 g) diced tomatoes (fresh or canned, drained)
- ½ cup (50 g) chopped green onions
- ½ cup (50 g) sliced black olives (optional, but adds a nice briny contrast)
- Fresh cilantro leaves for garnish
- 1-2 large bags of sturdy tortilla chips or Fritos (choose your favorite brand for texture; Fritos Original Corn Chips work great as edible bowls)
For substitutions: You can use plant-based ground meat or lentils for a vegetarian twist. If you want gluten-free, just double-check your taco seasoning brand — many are naturally gluten-free but some have additives. For dairy-free, swap sour cream for cashew cream or a vegan alternative.
Equipment Needed
- Large skillet or frying pan for cooking the meat and onions
- Medium saucepan or microwave-safe bowl to warm the beans
- Mixing spoon or spatula
- Sharp knife and cutting board for chopping onions, tomatoes, and green onions
- Measuring cups and spoons
- Serving platters or trays (optional, but handy for parties)
- If you don’t have a skillet, a nonstick sauté pan or even a slow cooker can work for the meat (slow cooker method takes longer but is hands-off)
I’ve found that a good nonstick pan helps prevent the meat from sticking or burning, though any well-seasoned skillet will do. For easier cleanup, using silicone spatulas and a splatter guard can save some stress, especially when cooking the seasoned meat.
Preparation Method

- Prepare the Taco Meat: Heat your skillet over medium heat. Add the chopped onion and sauté for about 3 minutes until translucent and fragrant. Toss in the minced garlic and cook for another 30 seconds.
- Add the ground beef (or turkey) to the skillet. Use your spatula to break it up and cook for 6-8 minutes until browned and no longer pink. Drain excess fat if desired.
- Sprinkle the taco seasoning evenly over the meat, then pour in ½ cup (120 ml) water. Stir well to combine everything. Simmer over low heat for 5 minutes, stirring occasionally, until the sauce thickens and coats the meat nicely. If the mixture seems dry, add a splash more water.
- While the meat simmers, warm the beans in a saucepan over low heat or microwave-safe bowl in 1-minute increments until heated through (about 2-3 minutes). Stir occasionally to prevent sticking.
- Once the meat and beans are ready, set up your assembly station: open your chip bags carefully to avoid tearing, and have your toppings within reach.
- To assemble, spoon a generous portion of taco meat directly into each chip bag, followed by a scoop of warm beans.
- Top with shredded cheese, diced tomatoes, green onions, olives, and a dollop of sour cream or Greek yogurt. Garnish with fresh cilantro if desired.
- Serve immediately while chips stay crisp. Hand out napkins — these are delightfully messy but totally worth it!
Pro tip: Don’t overfill the chip bags or they might tear. Also, if you want softer chips, add the toppings a few minutes before eating. But honestly, I like that crunch!
Cooking Tips & Techniques
When I first tried making walking tacos, my biggest mistake was under-seasoning the meat. Taco seasoning packets help, but I usually add a pinch of smoked paprika and cumin for depth. Trust me, those little tweaks make a difference.
Another tip: cook the onions slowly to bring out natural sweetness — it balances the savory meat perfectly. Rushing this step leads to sharper, less mellow flavors.
Warming the beans separately keeps their texture intact. If you add cold beans straight into the chip bag, it cools everything down and sogginess sets in faster.
Timing is key. Prep your toppings before cooking the meat so you can assemble quickly and serve hot. If multitasking, I start warming beans just as the meat simmers.
One last note: handle the chip bags gently when filling. You can slightly widen the opening by folding the top edges, which also makes it easier to eat without spills.
Variations & Adaptations
Walking tacos are endlessly adaptable. Here are some ways I’ve switched things up based on occasion or pantry stock:
- Vegetarian Version: Swap the ground meat for cooked lentils or seasoned black beans. Add sautéed bell peppers and corn for extra color and crunch.
- Spicy Kick: Add chopped jalapeños or a drizzle of your favorite hot sauce. I sometimes mix in a spoonful of chipotle mayo for smoky heat.
- Seasonal Twist: In summer, swap tomatoes for fresh mango salsa or pineapple chunks for a sweet contrast that brightens the dish.
- Gluten-Free: Use corn chips or Fritos, which are naturally gluten-free. Double-check seasoning mixes to be safe.
- Dairy-Free: Replace sour cream with avocado slices or a cashew cream drizzle. Vegan cheese shreds also work well here.
Personally, I once made a batch with vegan cheese and seasoned tofu crumble for a friend’s dairy-free diet — it was surprisingly satisfying and got rave reviews.
Serving & Storage Suggestions
These walking tacos are best served fresh and warm to keep the chips crunchy and the flavors vibrant. I like to set them out on a platter for parties, letting guests customize their own bags with toppings.
Pair them with a crisp salad or a refreshing iced tea for a complete casual meal. For a fun snack table, try adding dips like guacamole or a tangy sour cream salsa.
If you have leftovers, store the taco meat and beans separately in airtight containers in the fridge for up to 3 days. The chips, unfortunately, won’t keep well once filled, so it’s best to assemble just before serving.
To reheat meat and beans, microwave gently or warm on the stovetop with a splash of water to keep moistness. Then, assemble fresh tacos to enjoy that satisfying crunch.
Flavors actually develop nicely if you prep the meat a day ahead, making these a great option for meal prep or quick snack fixes.
Nutritional Information & Benefits
This recipe offers a balanced mix of protein, fiber, and satisfying carbs. The ground beef supplies essential iron and B vitamins, while beans deliver plant-based protein and fiber for digestion.
Using fresh veggies like tomatoes and green onions adds vitamins and antioxidants without extra calories. Choosing Greek yogurt as a sour cream substitute amps up protein and cuts fat.
For gluten-free or dairy-free diets, simple swaps keep this recipe inclusive without sacrificing flavor. Just be mindful of sodium in taco seasoning and canned beans, especially if watching salt intake.
From a wellness perspective, these walking tacos can be a fun way to enjoy comfort food while still fitting into balanced eating habits. They’re a nice alternative to fast-food tacos, and you control the quality of ingredients.
Conclusion
Easy loaded walking tacos from chip bags have become my secret weapon for stress-free entertaining and quick meals. They bring together simple ingredients in a way that feels festive and satisfying without extra hassle. The edible chip bag idea is not just playful — it’s practical and delightful, making snack time feel like a little celebration.
Give this recipe a try and tweak it to your liking — whether that means spicing things up, going vegetarian, or adding your favorite toppings. I love how versatile and forgiving this dish is, and I’m confident you’ll find your own favorite spin.
If you try making these tacos, I’d love to hear how you customize them or what your go-to toppings are. It’s these little shared twists that keep cooking fun and personal.
Here’s to many tasty, easy gatherings with walking tacos in hand!
FAQs about Easy Loaded Walking Tacos from Chip Bags
Can I make walking tacos ahead of time?
Prepare the taco meat and beans in advance and store them separately in the fridge. Assemble the tacos just before serving to keep chips crunchy.
What chip bags work best for walking tacos?
Sturdy corn chip bags like Fritos Original or thick tortilla chips hold up best as edible containers without tearing.
Is this recipe gluten-free?
Yes, as long as you use gluten-free taco seasoning and corn chips. Always check labels to be sure.
Can I make these walking tacos vegetarian?
Absolutely! Swap ground meat for cooked lentils, beans, or plant-based crumbles for a delicious meatless version.
How do I keep the chips from getting soggy?
Assemble tacos just before eating and avoid adding wet toppings too far ahead. Serving warm meat and beans on room temperature chips helps maintain crunch.
For a little extra inspiration, you might enjoy the crispy nutritional yeast popcorn as a snack side or the creamy collagen hot chocolate to warm up post-party. Both keep the vibe casual and comforting!
Pin This Recipe!
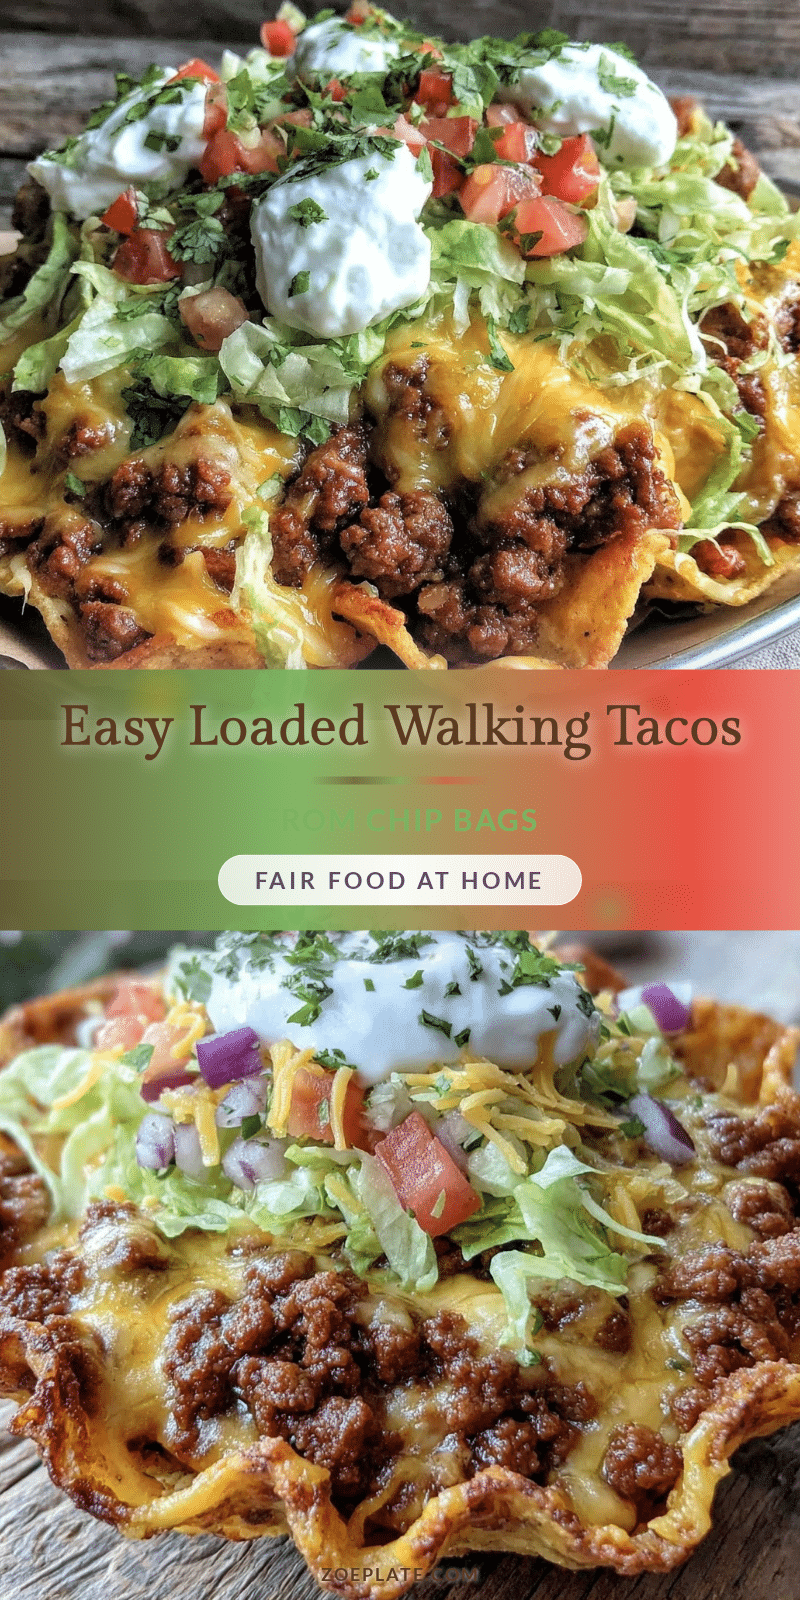
Easy Loaded Walking Tacos from Chip Bags

A quick and easy recipe for loaded walking tacos served directly in chip bags, perfect for casual get-togethers and parties. Combines seasoned ground beef, beans, cheese, and fresh toppings for a handheld delight.
- Prep Time: 10 minutes
- Cook Time: 15 minutes
- Total Time: 25 minutes
- Yield: 6 servings 1x
- Category: Snack
- Cuisine: Mexican
Ingredients
- 1 lb ground beef (or ground turkey for a leaner option)
- 1 small onion, finely chopped
- 2 cloves garlic, minced
- 1 packet (about 1 oz) taco seasoning mix
- ½ cup water
- 1 can (15 oz) black beans or pinto beans, drained and rinsed
- 2 cups shredded cheddar cheese
- 1 cup sour cream or Greek yogurt
- 1 cup diced tomatoes
- ½ cup chopped green onions
- ½ cup sliced black olives (optional)
- Fresh cilantro leaves for garnish
- 1–2 large bags of sturdy tortilla chips or Fritos
Instructions
- Heat skillet over medium heat. Add chopped onion and sauté for about 3 minutes until translucent.
- Add minced garlic and cook for another 30 seconds.
- Add ground beef or turkey, break it up with a spatula, and cook for 6-8 minutes until browned and no longer pink. Drain excess fat if desired.
- Sprinkle taco seasoning over the meat, pour in ½ cup water, stir well, and simmer over low heat for 5 minutes until sauce thickens.
- Warm beans in a saucepan over low heat or microwave-safe bowl until heated through (about 2-3 minutes).
- Open chip bags carefully to avoid tearing and have toppings ready.
- Spoon a generous portion of taco meat into each chip bag, followed by a scoop of warm beans.
- Top with shredded cheese, diced tomatoes, green onions, olives, and a dollop of sour cream or Greek yogurt. Garnish with cilantro.
- Serve immediately while chips stay crisp.
Notes
Do not overfill chip bags to avoid tearing. For softer chips, add toppings a few minutes before eating. Cook onions slowly for natural sweetness. Warm beans separately to keep texture. Handle chip bags gently and fold top edges for easier eating.
Nutrition
- Serving Size: 1 walking taco (1 ch
- Calories: 420
- Sugar: 4
- Sodium: 700
- Fat: 22
- Saturated Fat: 10
- Carbohydrates: 32
- Fiber: 6
- Protein: 25
Keywords: walking tacos, chip bags, party snacks, easy tacos, loaded tacos, quick recipe, ground beef tacos, casual meals