“You have to try these,” my friend texted me late one evening. Honestly, I was skeptical—cookies? At 9 PM? But curiosity got the better of me, and a quick scroll through her photos revealed golden-brown discs glistening with a hint of salt and that almost-too-good-to-be-true crispy edge. I made a mental note, but it wasn’t until I found myself staring at a lonely stick of butter nearing its expiration that this salted brown butter cookies recipe came to life.
I wasn’t aiming for perfection that night—just a quick, comforting treat after a long day of juggling deadlines and dinner prep. The kitchen filled with the rich, nutty aroma of browned butter, a smell so warm and inviting, it almost felt like a hug. But what really caught me off guard was that first bite—the delicate crispiness around the edges, contrasting beautifully with a tender, buttery center, all balanced by just the right touch of salt. It wasn’t just another cookie; it was a little revelation. Now, I find myself making these cookies multiple times a week, sometimes sneaking a batch alongside my soft and chewy oat flour chocolate chip cookies for variety.
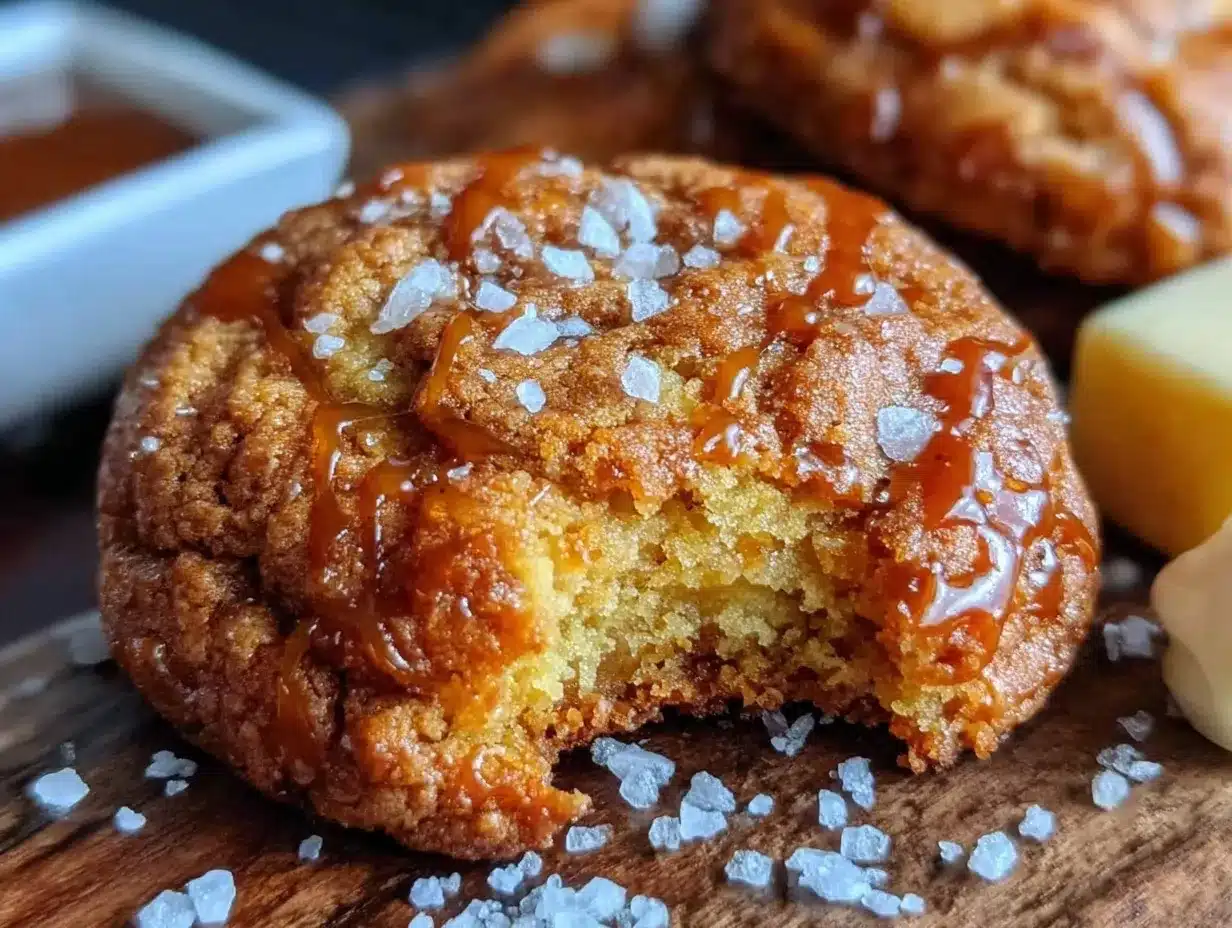
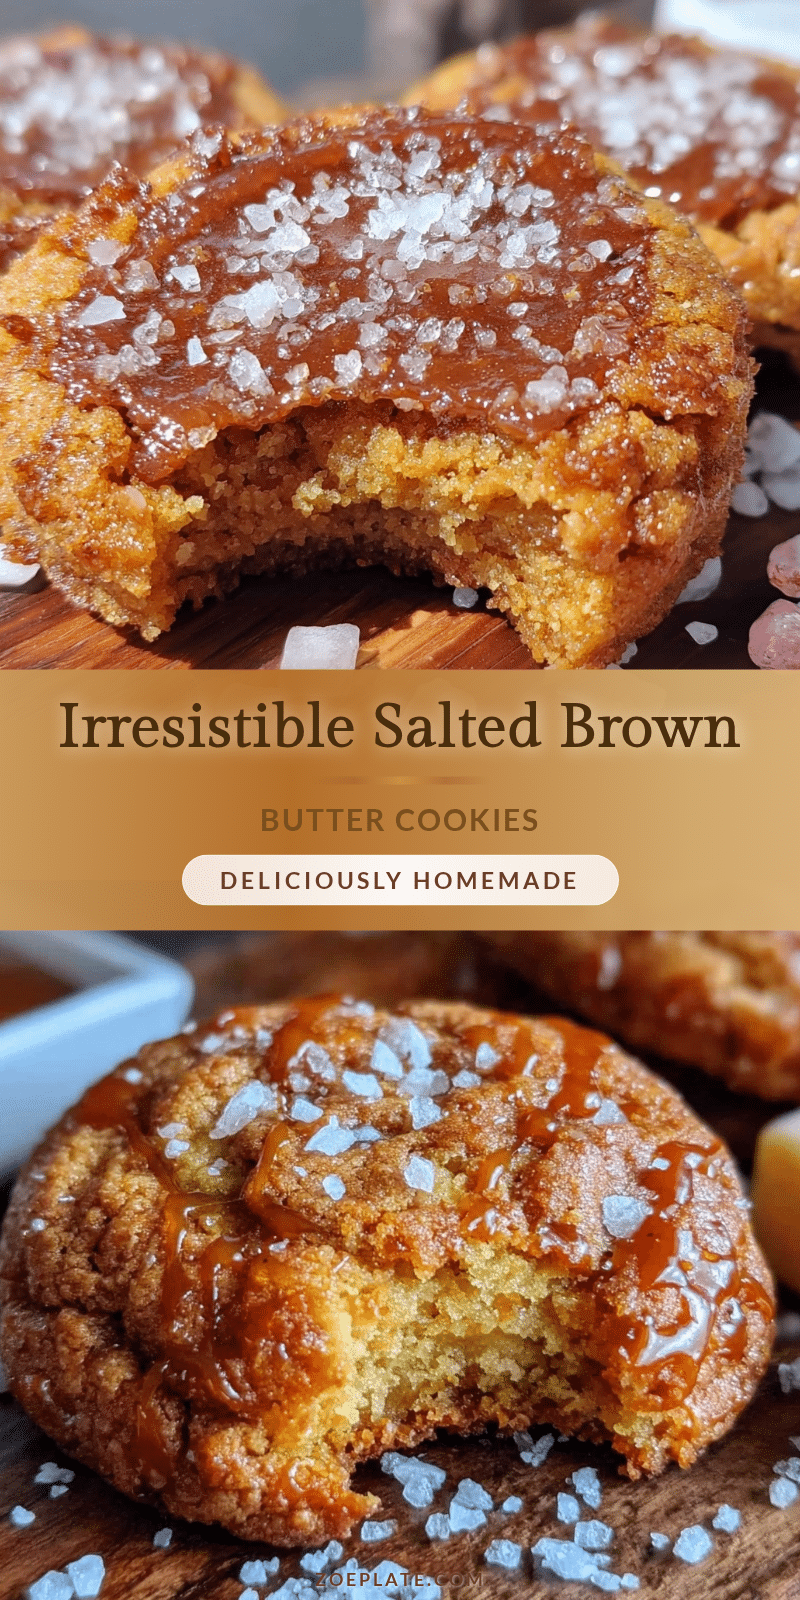
What sticks with me the most is how this recipe transformed a simple pantry staple into a homemade delight that’s perfect for those quiet moments or unexpected guests. The salted brown butter cookies quickly became my go-to when I needed a little pick-me-up or to impress friends without fuss. The crispy edges? Honestly, they’re the showstopper. It’s like the cookie world’s best-kept secret — crispy, slightly caramelized edges with a chewy middle that just melts away.
So here’s the thing: these cookies are more than just a recipe. They’re a reminder that sometimes, the best things come when you least expect them — especially if you take the time to brown your butter properly. And once you taste them, you’ll understand why these cookies have quietly taken over my kitchen.
Why You’ll Love This Recipe
After trying countless cookie recipes over the years, the salted brown butter cookies with crispy edges have become a standout in my kitchen. Here’s why I think you’ll fall for them, too:
- Quick & Easy: From start to finish, these cookies come together in about 30 minutes. Perfect for those busy evenings when you want something homemade but don’t want to spend hours in the kitchen.
- Simple Ingredients: No need for fancy or hard-to-find ingredients. You probably have everything on hand already—just butter, sugar, flour, and a sprinkle of salt.
- Perfect for Any Occasion: Whether it’s a last-minute dessert for a dinner party or a cozy treat with your afternoon tea, these cookies fit the bill.
- Crowd-Pleaser: I’ve shared these at family gatherings and casual get-togethers, and they always disappear first. Kids, adults, cookie aficionados—they all love the balance of sweet and salty.
- Unbelievably Delicious: The browned butter adds a deep, nutty flavor that makes these cookies feel indulgent without being overpowering. The crispy edges provide a delightful texture contrast that’s hard to beat.
What sets this recipe apart is the way it harnesses the magic of browned butter to create a rich, complex flavor. Instead of just melting butter, browning it slowly lets the milk solids caramelize, giving the cookies a toasty, almost caramel-like undertone. Plus, the sprinkle of flaky sea salt on top isn’t just for show—it enhances the sweetness and adds that irresistible savory punch.
Honestly, this isn’t just another cookie recipe tucked away in a binder. It’s the cookie I turn to when I want to feel a little comfort, impress guests without stress, or simply enjoy a moment of indulgence. If you’ve ever wondered how to make cookies that have that perfect crispy edge without drying out the center, this recipe is your answer.
What Ingredients You Will Need
This salted brown butter cookies recipe relies on straightforward, pantry-friendly ingredients that come together to create something truly special. The secret is in the quality and technique, not a long list of extras.
- Unsalted Butter (1 cup / 227g) – browned slowly to develop that rich, nutty flavor. I prefer using Plugrá or Kerrygold for their creamy texture and excellent browning results.
- Granulated Sugar (3/4 cup / 150g) – adds sweetness and helps create those crispy edges.
- Light Brown Sugar (1/2 cup / 100g) – provides moisture and a touch of caramel depth.
- Large Egg (1, room temperature) – binds the dough and adds tenderness.
- Vanilla Extract (1 tsp) – a must for warm, inviting flavor notes.
- All-Purpose Flour (1 3/4 cups / 220g) – the base of the cookie structure. For a gluten-free twist, I’ve had success swapping this with a 1:1 gluten-free flour blend.
- Baking Soda (1/2 tsp) – for a slight lift and lighter texture.
- Fine Sea Salt (1/2 tsp) – balances sweetness throughout the dough.
- Flaky Sea Salt (for sprinkling) – the finishing touch that makes those edges irresistible and savory.
Optional but recommended: A dash of ground cinnamon or a pinch of nutmeg can add warmth if you like a subtle spice twist. When I’ve made these cookies in winter, a little cinnamon felt like a cozy bonus.
For those who want to experiment or need substitutions, try using coconut sugar in place of brown sugar for a slightly different caramel note. And if you’re dairy-free, swap the butter for a plant-based alternative that browns well, like vegan butter sticks from Miyoko’s.
Equipment Needed
- Medium Saucepan – for browning the butter. A light-colored pan helps you watch the color change closely to prevent burning.
- Mixing Bowls – one for wet ingredients, one for dry.
- Electric Hand Mixer or Stand Mixer – makes creaming sugars and eggs easier, though whisking by hand works if you don’t mind a bit of arm work.
- Rubber Spatula – for scraping browned butter into the bowl and folding dough.
- Baking Sheets – lined with parchment paper or silicone baking mats for even baking and easy cleanup.
- Cooling Rack – essential for letting the cookies cool properly so the edges stay crispy.
- Measuring Cups and Spoons – accurate measurements matter especially with baking soda and salt.
If you don’t have a stand mixer, no worries—the hand mixer or even a sturdy whisk will do just fine. When browning butter, patience is key, so a good-quality saucepan that distributes heat evenly can make a difference. My budget pick is a simple stainless steel pan, which I’ve found browns butter beautifully without hotspots.
Preparation Method
- Brown the Butter (about 7-10 minutes): Start by melting unsalted butter over medium heat in a saucepan. Stir constantly as it melts, then watch closely as it begins to foam and turn golden brown with tiny brown specks at the bottom. The aroma will shift from buttery to nutty and fragrant. Remove from heat immediately to avoid burning and pour into a heatproof bowl. Let cool for 10 minutes until just warm.
- Mix Sugars and Browned Butter (5 minutes): Add granulated sugar and light brown sugar to the browned butter. Beat with an electric mixer or whisk vigorously until well combined and slightly fluffy. The sugars will start dissolving into the butter, creating a glossy base.
- Add Egg and Vanilla (2 minutes): Crack in the room-temperature egg and add vanilla extract. Mix until fully incorporated. The dough will look smooth but a bit loose; that’s perfect.
- Combine Dry Ingredients (2 minutes): In a separate bowl, whisk together all-purpose flour, baking soda, and fine sea salt. If you want to add cinnamon or nutmeg, sift it in here as well.
- Fold Dry into Wet (3-4 minutes): Gradually add the dry ingredients to the wet mixture. Use a spatula to fold gently until just combined—don’t overmix or the cookies will turn tough. The dough will be soft but manageable.
- Chill the Dough (optional but recommended, 30-45 minutes): Cover the dough and chill it in the fridge. This firms up the dough, helping control spread and enhancing flavor. If you’re short on time, you can skip this step, but the cookies may be slightly thinner.
- Preheat Oven and Prepare Baking Sheet (5 minutes): Preheat your oven to 350°F (175°C). Line baking sheets with parchment paper or silicone mats.
- Scoop and Shape Cookies (10 minutes): Using a cookie scoop or tablespoon, portion dough onto baking sheets, spacing about 2 inches apart. Lightly press each mound to flatten slightly for even baking and that coveted crispy edge.
- Bake (10-12 minutes): Bake in the preheated oven until edges are golden brown and centers look set but still soft. The smell will be intoxicating—don’t wait too long or they’ll dry out.
- Add Flaky Salt and Cool (10 minutes): Right after removing from oven, sprinkle each cookie with a pinch of flaky sea salt. Transfer cookies to a cooling rack after 5 minutes on the sheet to avoid soggy bottoms. Let cool completely for the best texture.
Pro tip: If you want extra crispy edges, give the dough a quick press before baking and resist the urge to overbake. The cookies will continue setting as they cool, so pulling them out at the right moment is key.
Cooking Tips & Techniques
Browned butter is the star here, and it can be tricky if you’re new to it. Here’s what I’ve learned through trial and error:
- Watch Closely When Browning Butter: Butter can go from browned to burnt in seconds. Stir constantly and use a light pan so you can see the color change. Once you smell that nutty aroma and see amber bits, remove from heat immediately.
- Don’t Skip Chilling: Chilling the dough is a game-changer. It helps the cookies hold their shape and develop flavor. If you’re impatient like me, at least 20 minutes makes a difference.
- Use Flaky Sea Salt: A sprinkle of flaky salt right out of the oven adds bursts of flavor and contrasts with the sweetness—don’t substitute with table salt here.
- Mind Your Oven Temperature: An oven thermometer is worth it. Too hot, and cookies burn on edges before centers bake; too cool, and they spread too much. 350°F (175°C) is a reliable sweet spot.
- Spacing Matters: Give your cookies room to spread. At least 2 inches apart prevents them from merging into one big cookie.
I once baked a batch without chilling and ended up with cookie pancakes. Lesson learned! Also, stirring the sugar into the butter while warm helps dissolve the sugar crystals, contributing to the crispiness.
Variations & Adaptations
This recipe is a great base for customization, so here are a few ways I’ve switched it up over time:
- Chocolate Chip Addition: Adding a half cup of dark or semi-sweet chocolate chips turns these into a classic chocolate chip cookie with a brown butter twist.
- Nutty Upgrade: Fold in toasted pecans or walnuts for crunch and complementary flavors. Toast the nuts lightly before adding for an even deeper flavor.
- Gluten-Free Option: Replace all-purpose flour with a 1:1 gluten-free blend like Bob’s Red Mill. The texture stays soft but still crisp on the edges.
- Spiced Version: Add 1/2 teaspoon cinnamon and a pinch of ground cloves or nutmeg for a cozy fall or holiday cookie vibe.
- Vegan Adaptation: Swap butter with a plant-based butter that browns well and replace the egg with a flax egg (1 tablespoon flaxseed meal + 3 tablespoons water). The texture shifts slightly but remains delicious.
One variation I tried recently was mixing in a spoonful of tahini to deepen the nuttiness, inspired by the rich flavors in my creamy tahini dressing. It gave the cookies a subtle savory edge that was surprisingly addictive.
Serving & Storage Suggestions
These salted brown butter cookies are best served at room temperature, allowing the flavors and textures to shine. I like to plate them with a simple glass of cold milk or a warm cup of tea or coffee. They’re also fantastic alongside a cozy mug of the creamy collagen hot chocolate I keep coming back to on chilly nights.
For storage, place cooled cookies in an airtight container at room temperature. They’ll stay fresh and delicious for up to 4 days, though honestly, they rarely last that long. For longer storage, freeze the baked cookies in a single layer on a baking sheet, then transfer to a freezer-safe container or bag for up to 3 months.
To reheat, pop frozen cookies in a 300°F (150°C) oven for 5–7 minutes to regain that fresh-baked crispiness. Avoid microwaving if you want to keep the edges crispy, as it can make them chewy or soggy.
Flavors deepen after a day or two, so if you can resist, letting the cookies rest in the container overnight actually improves the taste and texture. Also, sprinkling a little flaky salt just before serving revives that perfect salty crunch.
Nutritional Information & Benefits
Per cookie (based on 24 cookies per batch): approximately 120 calories, 6g fat, 16g carbohydrates, 1g protein.
Key ingredients like butter provide fat-soluble vitamins (A, D, E) and, when browned, a small amount of antioxidants. Using high-quality, real butter enhances both taste and nutrition compared to processed alternatives.
The sprinkle of sea salt provides trace minerals, and the simple ingredient list means no artificial additives or preservatives. This recipe is naturally gluten-containing unless you swap the flour, but it’s free from nuts unless you add them yourself.
From a wellness standpoint, these cookies satisfy sweet cravings without going overboard on sugar, especially if you control portions. They pair well with protein-rich snacks like my easy collagen protein balls for a balanced treat lineup.
Conclusion
These salted brown butter cookies with crispy edges have quietly become my favorite homemade treat — simple yet sophisticated, with a perfect balance of sweet, salty, and nutty depths. Whether you’re baking for a crowd or sneaking a few for yourself, this recipe adapts beautifully to your kitchen mood and pantry.
Feel free to tweak the add-ins or spices to make it your own, but don’t skip the browned butter and flaky salt—that’s the magic combo that makes these cookies truly irresistible.
Once you’ve tried this recipe, I’d love to hear how you made it yours or what moments these cookies have sweetened for you. Baking’s more fun when we share the stories and the crumbs!
Frequently Asked Questions
How do I know when the butter is properly browned?
The butter should melt, foam, and then turn golden brown with small brown flecks on the bottom of the pan. It will smell nutty and toasty. Watch closely—it can go from browned to burnt quickly.
Can I skip chilling the dough?
Yes, but chilling helps control spread and improves flavor. If you skip it, expect thinner cookies with less developed taste.
What type of salt is best for topping?
Use flaky sea salt like Maldon or fleur de sel. Table salt is too fine and won’t provide the same burst of salty crunch.
Can I make these cookies vegan?
Yes, swap butter for a plant-based butter that browns well and replace the egg with a flax egg or commercial egg replacer. Texture may vary slightly.
How do I store leftover cookies?
Store in an airtight container at room temperature for up to 4 days or freeze for up to 3 months. Reheat frozen cookies in the oven for best texture.
Pin This Recipe!
Salted Brown Butter Cookies
These salted brown butter cookies feature crispy edges and a tender, buttery center with a perfect balance of sweet and salty flavors. Quick and easy to make, they are a homemade delight perfect for any occasion.
- Prep Time: 15 minutes
- Cook Time: 12 minutes
- Total Time: 37-52 minutes
- Yield: 24 cookies 1x
- Category: Dessert
- Cuisine: American
Ingredients
- 1 cup (227g) unsalted butter, browned
- 3/4 cup (150g) granulated sugar
- 1/2 cup (100g) light brown sugar
- 1 large egg, room temperature
- 1 tsp vanilla extract
- 1 3/4 cups (220g) all-purpose flour
- 1/2 tsp baking soda
- 1/2 tsp fine sea salt
- Flaky sea salt, for sprinkling
- Optional: dash of ground cinnamon or pinch of nutmeg
Instructions
- Brown the butter: Melt unsalted butter over medium heat in a saucepan, stirring constantly until it foams and turns golden brown with brown specks. Remove from heat and pour into a heatproof bowl. Let cool for 10 minutes until just warm.
- Mix sugars and browned butter: Add granulated sugar and light brown sugar to the browned butter. Beat with an electric mixer or whisk vigorously until well combined and slightly fluffy.
- Add egg and vanilla: Crack in the room-temperature egg and add vanilla extract. Mix until fully incorporated.
- Combine dry ingredients: In a separate bowl, whisk together all-purpose flour, baking soda, fine sea salt, and optional spices if using.
- Fold dry into wet: Gradually add dry ingredients to wet mixture. Fold gently with a spatula until just combined; do not overmix.
- Chill the dough (optional): Cover and chill dough in the fridge for 30-45 minutes to firm up and enhance flavor.
- Preheat oven and prepare baking sheet: Preheat oven to 350°F (175°C). Line baking sheets with parchment paper or silicone mats.
- Scoop and shape cookies: Portion dough onto baking sheets about 2 inches apart using a cookie scoop or tablespoon. Lightly press each mound to flatten slightly.
- Bake: Bake for 10-12 minutes until edges are golden brown and centers look set but soft.
- Add flaky salt and cool: Immediately sprinkle flaky sea salt on cookies after removing from oven. Transfer to a cooling rack after 5 minutes and let cool completely.
Notes
Watch the butter closely when browning to avoid burning. Chilling the dough is recommended for better texture and flavor but can be skipped if short on time. Use flaky sea salt for topping to enhance flavor and texture. Avoid overbaking to keep centers soft and edges crispy.
Nutrition
- Serving Size: 1 cookie
- Calories: 120
- Fat: 6
- Carbohydrates: 16
- Protein: 1
Keywords: brown butter cookies, salted cookies, crispy edge cookies, homemade cookies, easy cookie recipe, buttery cookies