I figured a no-bake dessert for a crowd meant hours of layering, precise chilling, and praying it didn’t slide apart when I cut the first slice. It took about one summer afternoon of my sister-in-law asking me to “just throw something together” for a backyard barbecue for that assumption to fall apart completely.
I grabbed graham crackers, a box of instant pudding, a bag of marshmallows, and some chocolate bars—things I honestly had no grand plan for. I was just trying to avoid turning on the oven in that sweltering July heat. I layered everything in a disposable pan, crossed my fingers, and stuck it in the fridge.
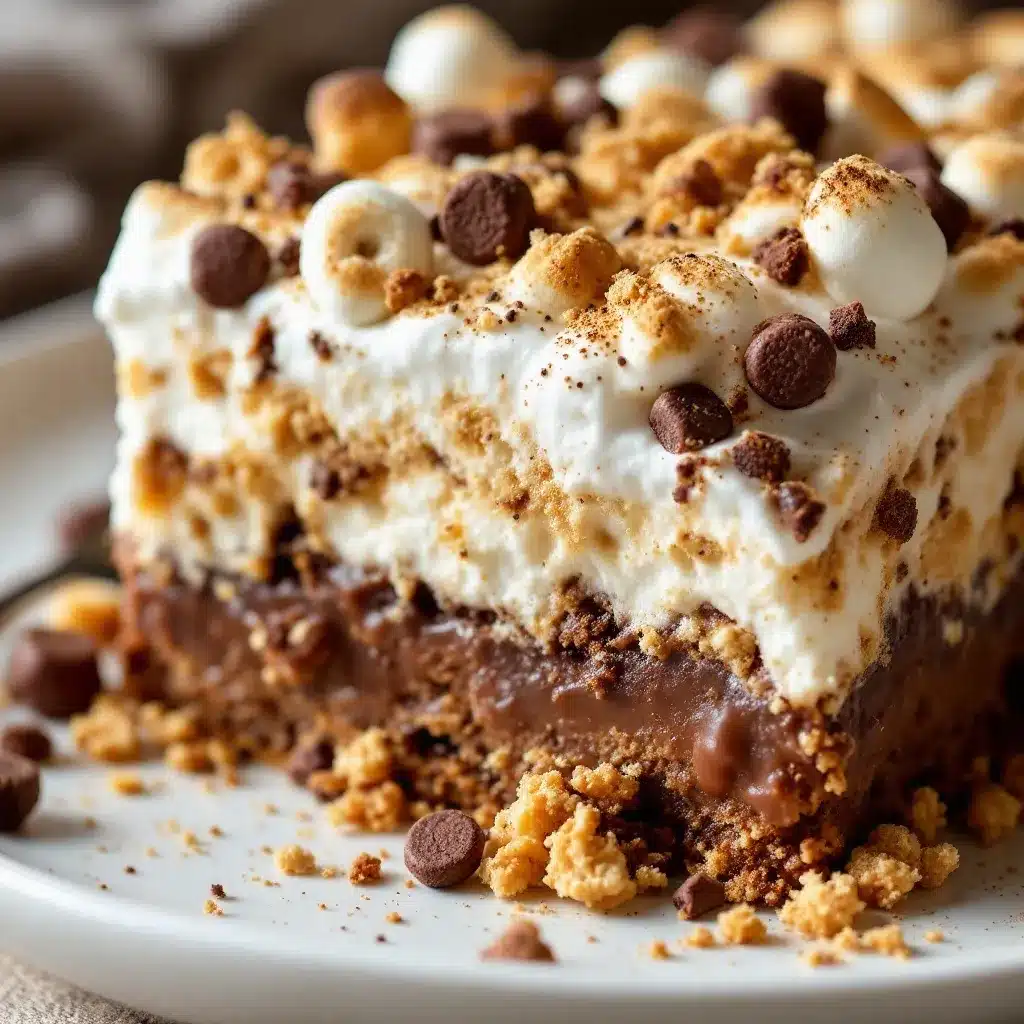
Four hours later, I pulled out this ridiculously tall, creamy, chocolate-studded slab of a dessert. It cut cleanly into perfect squares. People went back for seconds. Then thirds. Someone asked for the recipe before they even finished their first piece. I remember standing there with a plastic fork, thinking, wait, that actually worked?
That was the moment I realized you don’t need a complicated technique or a pastry degree to make a showstopper dessert. You just need a little patience and a few good ingredients. This Easy No-Bake S’mores Icebox Cake for a Crowd is that recipe—the one that makes you look like you planned it all along, even when you absolutely didn’t.
Why You’ll Love This Recipe
Let’s be honest—summer entertaining can be stressful. The last thing you want is to be stuck in a hot kitchen while your guests are outside having fun. This icebox cake solves that problem completely.
- Totally No-Bake: No oven, no stove, no sweat. If you can stir and layer, you can make this dessert. It’s perfect for those days when turning on the oven feels like a personal offense.
- Made for a Crowd: This recipe fills a 9×13-inch pan and serves 12 to 15 people easily. It’s my go-to for potlucks, barbecues, birthday parties, and holiday gatherings. One pan, zero fuss.
- Simple Ingredients: You probably have most of these in your pantry right now. Graham crackers, chocolate pudding, marshmallows, and chocolate bars. No fancy grocery store runs required.
- Make-Ahead Magic: This cake actually needs to sit in the fridge for at least 4 hours, but overnight is even better. That means you can prep it the day before your event and just pull it out when you’re ready to serve. Stress-free hosting at its finest.
- Crowd-Pleaser for All Ages: Kids love the marshmallow and chocolate layers. Adults appreciate the nostalgic s’mores flavor without the campfire mess. It’s the dessert that disappears fastest at every gathering I bring it to.
- Unbelievably Delicious: The graham crackers soften into a cake-like texture, the pudding becomes silky and rich, and the marshmallows and chocolate create pockets of gooey, melty goodness. It’s comfort food in dessert form.
This isn’t just another no-bake dessert. It’s the one that gets requested every single time I’m asked to bring something to a gathering. It’s the recipe that makes people say, “Wait, you didn’t bake this?” with genuine disbelief. And honestly, that never gets old.
What Ingredients You Will Need
This recipe uses simple, pantry-friendly ingredients to create something that tastes surprisingly complex. The magic is in the layering and the chilling time, not in hard-to-find items. Here’s what you’ll need:
For the Pudding Layer
- 2 (3.4-ounce) boxes instant chocolate pudding mix – I prefer Jell-O brand for its consistent texture, but any brand works. Do not use cook-and-serve pudding; it won’t set properly in this recipe.
- 3 cups cold whole milk – Whole milk gives the richest, creamiest pudding. You can use 2%, but avoid skim milk—the pudding needs the fat to set up nicely. For a dairy-free version, use full-fat oat milk or canned coconut milk (not light).
- 1 teaspoon vanilla extract – Pure vanilla adds depth to the chocolate flavor. Imitation vanilla works in a pinch, but pure is noticeably better here.
For the Layers
- 1 (14.4-ounce) box graham crackers – You’ll need about 3 full sleeves. Honey grahams are classic, but cinnamon or chocolate graham crackers work beautifully too. Avoid low-fat or “thin” versions; they get too soggy.
- 2 cups heavy whipping cream – This gets whipped into a stable, fluffy topping. Make sure it’s very cold before whipping. If you’re short on time, you can substitute a 16-ounce tub of Cool Whip, thawed.
- 1/4 cup powdered sugar – Just enough to sweeten the whipped cream without making it overly sugary.
- 2 cups mini marshmallows – Mini marshmallows distribute more evenly than full-sized ones. They soften slightly during chilling, creating little pockets of marshmallow cream throughout the cake.
- 4 (1.55-ounce) milk chocolate bars, chopped – Hershey’s is the classic choice here, but feel free to use your favorite. Dark chocolate bars work wonderfully if you prefer a less sweet dessert. Chop them into small chunks so every bite gets some chocolate.
For the Topping
- 1 cup mini marshmallows – Reserved for the top layer. They’ll soften but stay intact, giving the cake that classic s’mores look.
- 2 milk chocolate bars, chopped – For sprinkling on top. You can also use chocolate shavings or a drizzle of melted chocolate.
- Optional: 1/4 cup graham cracker crumbs – For garnish. Just crush a few graham crackers and sprinkle them over the top for a finished look.
Equipment Needed
You don’t need a professional kitchen to pull this off. Here’s what you’ll need:
- 9×13-inch baking dish – Glass or ceramic works best. A metal pan can work, but glass helps the cake chill more evenly. A disposable aluminum pan is perfectly fine for potlucks.
- Electric hand mixer or stand mixer – For whipping the cream. You can whisk by hand if you have strong arms and patience, but a mixer makes it much easier.
- Large mixing bowl – For the pudding and the whipped cream. A glass or stainless steel bowl works best.
- Medium mixing bowl – For whipping the cream separately.
- Rubber spatula – For folding the marshmallows and chocolate into the pudding mixture. A silicone spatula is ideal for scraping every last bit.
- Sharp knife and cutting board – For chopping the chocolate bars. A serrated knife works well for clean cuts.
- Plastic wrap or aluminum foil – For covering the dish while it chills.
That’s it. No special pans, no complicated gadgets. If you’ve made lasagna, you can make this cake. The technique is almost identical—just layers instead of pasta and sauce.
Preparation Method
This is where the magic happens. Follow these steps, and you’ll have a dessert that looks like you spent hours on it. I promise it’s easier than it sounds.
- Make the chocolate pudding. In a large mixing bowl, whisk together the two boxes of instant chocolate pudding mix and 3 cups of cold whole milk. Whisk vigorously for about 2 minutes until the pudding thickens. It will be quite thin at first, then suddenly it’ll start to set. Let it sit for 5 minutes to fully thicken. Stir in the vanilla extract.
- Whip the cream. In a separate medium mixing bowl, pour in the 2 cups of cold heavy whipping cream. Add the 1/4 cup of powdered sugar. Using an electric hand mixer or stand mixer fitted with the whisk attachment, beat the cream on medium-high speed until soft peaks form. This takes about 3 to 4 minutes. You’re looking for peaks that hold their shape but are still soft and billowy—not stiff and butter-like. Be careful not to overwhip, or you’ll end up with butter.
- Fold it all together. Take about a third of the whipped cream and gently fold it into the thickened pudding. This lightens the pudding and makes it easier to fold in the rest. Add the remaining whipped cream and fold until just combined. You want streaks of white and chocolate—don’t overmix. Now gently fold in the 2 cups of mini marshmallows and the chopped chocolate from the 4 chocolate bars. Reserve the remaining marshmallows and chocolate for the top.
- Start layering. Spread a thin layer (about 1/2 cup) of the pudding mixture on the bottom of your 9×13-inch dish. This helps the graham crackers stick and prevents them from sliding around. Place a single layer of graham crackers on top, breaking them as needed to fill any gaps. You want a solid, even layer—no big empty spaces.
- Repeat the layers. Spread about one-third of the remaining pudding mixture evenly over the graham crackers. Use a spatula to spread it all the way to the edges. Top with another layer of graham crackers. Repeat this process two more times: pudding, graham crackers, pudding, graham crackers. You should end with a final layer of pudding on top. Make sure the top layer is smooth and even.
- Add the topping. Sprinkle the reserved 1 cup of mini marshmallows evenly over the top. Scatter the chopped chocolate from the remaining 2 chocolate bars over the marshmallows. If you’re using graham cracker crumbs, sprinkle those on top too. Press the marshmallows and chocolate gently into the top pudding layer so they stick.
- Chill, chill, chill. Cover the dish tightly with plastic wrap or aluminum foil. Refrigerate for at least 4 hours, but overnight is truly best. The graham crackers need time to absorb the moisture from the pudding and soften into a cake-like texture. If you cut into it too early, the layers will slide apart and the crackers will still be crunchy. Patience is your friend here.
- Serve cold. When you’re ready to serve, remove the cake from the fridge. Use a sharp knife to cut clean squares. Wipe the knife clean between cuts for the neatest slices. Serve directly from the dish. The cake will be firm but creamy, with soft marshmallows and pockets of melted chocolate throughout.
Cooking Tips & Techniques
I’ve made this cake more times than I can count, and I’ve learned a few things the hard way. Here are my best tips for guaranteed success:
- Don’t rush the chilling time. I know it’s tempting to sneak a slice after a few hours, but trust me—wait the full 4 hours minimum. Overnight is ideal. The graham crackers need that time to fully soften. If you cut too early, you’ll get crunchy crackers and a messy slice. I learned this the hard way at a party where I was impatient. The cake tasted good, but it looked like a disaster.
- Use cold milk for the pudding. Instant pudding relies on cold liquid to activate the thickening agents. If your milk is warm, the pudding won’t set properly. Pour the milk straight from the fridge.
- Whip the cream to soft peaks, not stiff peaks. Soft peaks are billowy and hold their shape but still look a little loose. Stiff peaks are firm and stand straight up. If you overwhip the cream, it can turn grainy and eventually separate into butter. Stop when the cream looks like soft, pillowy clouds.
- Press the graham crackers gently. When you place each layer of graham crackers, press them down lightly so they make contact with the pudding. This helps them absorb moisture evenly. Don’t press too hard, or you’ll push the pudding through the cracks.
- Cut clean slices with a warm knife. Run your knife under hot water, dry it off, then cut. The warmth helps the knife glide through the marshmallows and chocolate without dragging. Wipe the knife clean between cuts for the neatest presentation.
- Make it ahead for better flavor. This cake actually tastes better the next day. The flavors meld together, the textures become perfectly uniform, and the marshmallows soften into little pockets of marshmallow cream. It’s a dessert that rewards patience.
Variations & Adaptations
This recipe is incredibly forgiving and adaptable. Here are some of my favorite variations:
- Peanut Butter S’mores Cake: Add 1/2 cup of creamy peanut butter to the pudding mixture before folding in the whipped cream. Swirl in an additional 1/4 cup of peanut butter on top before adding the marshmallows. The combination of chocolate, marshmallow, and peanut butter is absolutely irresistible.
- Dark Chocolate & Sea Salt Version: Use dark chocolate bars (70% cocoa or higher) instead of milk chocolate. Sprinkle flaky sea salt over the top before chilling. The salt cuts through the sweetness and makes the chocolate flavor really pop. This is my personal favorite for adult gatherings.
- Berry S’mores Cake: Add a layer of fresh raspberries or sliced strawberries between the graham cracker layers. The tartness of the berries balances the sweetness of the marshmallows and chocolate beautifully. I’ve also used a thin layer of raspberry jam for a similar effect.
- Gluten-Free Option: Use gluten-free graham crackers or gluten-free vanilla wafers. Most brands work well, though they may be slightly thinner. Adjust the layering as needed to fit the pan. The rest of the ingredients are naturally gluten-free.
- Vegan Version: Use a vegan instant pudding mix (most are accidentally vegan), full-fat oat milk or canned coconut milk for the pudding, and a vegan whipped topping like CocoWhip. Use vegan marshmallows (Dandies are my go-to) and dairy-free chocolate bars. The texture will be slightly different, but the flavor is still fantastic.
- S’mores Icebox Cake Trifle: Instead of layering in a 9×13 dish, break the graham crackers into chunks and layer everything in a trifle bowl. Alternate graham cracker pieces, pudding mixture, marshmallows, and chocolate. This is a fun, visually stunning presentation for parties.
Serving & Storage Suggestions
This cake is best served cold, straight from the fridge. The texture is perfectly creamy and firm, with the marshmallows and chocolate providing little bursts of sweetness in every bite.
How to Serve: Cut the cake into 12 to 15 squares. For the cleanest slices, use a sharp knife and wipe it clean between cuts. Serve on individual plates or directly from the dish. A dollop of extra whipped cream on top is never a bad idea. If you’re feeling fancy, drizzle some warm chocolate sauce or caramel sauce over each slice.
What to Serve With It: This dessert is rich and satisfying on its own, but it pairs beautifully with a scoop of vanilla ice cream or a glass of cold milk. For a summer gathering, I love serving it alongside my Fresh Cowboy Caviar Black Bean and Corn Salsa Dip for a sweet-and-savory combo that always wins. A cup of strong coffee or iced coffee also balances the sweetness nicely.
Storage Instructions: Cover the dish tightly with plastic wrap or aluminum foil and store in the refrigerator for up to 5 days. The cake will continue to soften as it sits, but it stays delicious. I actually think it’s even better on day two or three. Do not freeze this cake—the texture of the pudding and whipped cream will become watery and grainy upon thawing.
Make-Ahead Notes: This cake is perfect for making a day ahead. Prepare it completely, cover it, and refrigerate overnight. The flavors meld together beautifully, and the texture becomes perfectly uniform. Just pull it out of the fridge, cut, and serve. It’s the ultimate stress-free dessert for entertaining.
Nutritional Information & Benefits
Let’s be real—this is a dessert, not a health food. But knowing what’s in it helps you enjoy it mindfully. Here’s the approximate nutritional breakdown per serving (based on 12 servings):
- Calories: Approximately 420-480 per serving
- Fat: 22-26g (mostly from cream and chocolate)
- Carbohydrates: 52-58g (from graham crackers, pudding, and marshmallows)
- Protein: 6-8g (from milk and cream)
- Sugar: 35-40g (natural and added)
Health Benefits to Note: While this is an indulgent treat, the dark chocolate variation offers some antioxidants from the cocoa. The milk and cream provide calcium and vitamin D. And honestly, the biggest benefit is the joy it brings to a gathering. Food is about connection, and this cake creates plenty of that.
Dietary Considerations: This recipe contains dairy, gluten (from graham crackers), and soy (in some chocolate bars). For a gluten-free version, use gluten-free graham crackers. For a dairy-free version, follow the vegan adaptations listed above. Always check labels on pudding mix and chocolate to ensure they meet your dietary needs.
Conclusion
This Easy No-Bake S’mores Icebox Cake for a Crowd is the dessert I turn to again and again. It’s simple enough for a Tuesday night, impressive enough for a holiday party, and forgiving enough for a beginner baker. It’s the recipe that makes people think you put in way more effort than you actually did—and honestly, that’s the best kind of recipe to have in your back pocket.
I love this cake because it brings people together. There’s something about the combination of chocolate, marshmallow, and graham cracker that feels nostalgic and comforting. It reminds me of summer campfires and backyard barbecues and the kind of easy, happy gatherings where everyone leaves with a full belly and a smile.
If you’re looking for other crowd-friendly desserts, you might also enjoy my Best Red White and Blue Berry Trifle for patriotic holidays or my Creamy No-Bake Banana Pudding Eclair Icebox Cake for another no-bake option that’s just as easy.
I’d love to hear how yours turns out! Leave a comment below and let me know if you tried any variations. Did you add peanut butter? Use dark chocolate? Make it for a party? Share your experience—I read every comment and I’m always looking for new ideas. And if you loved this recipe, please share it with a friend who needs an easy dessert win. Happy no-baking!
Frequently Asked Questions
Can I use cook-and-serve pudding instead of instant?
No, I don’t recommend it. Cook-and-serve pudding requires stovetop cooking and has a different thickening agent. It won’t set properly in this no-bake recipe, and the texture will be too thin. Stick with instant pudding for the best results.
How far in advance can I make this cake?
You can make this cake up to 2 days in advance. In fact, it tastes even better on day two because the flavors have more time to meld together. Just keep it covered in the refrigerator until you’re ready to serve.
Can I freeze this icebox cake?
I don’t recommend freezing it. The pudding and whipped cream have a high water content, which creates ice crystals during freezing. When thawed, the texture becomes watery and grainy. This cake is best enjoyed fresh from the refrigerator.
What if I don’t have a 9×13-inch pan?
You can use a 9×9-inch square pan for a taller cake, but you’ll need to adjust the layering and may have leftover pudding mixture. Alternatively, use two 8×8-inch pans or a large trifle bowl. For the trifle bowl, break the graham crackers into chunks and layer everything in the bowl. It’s a fun, rustic presentation.
Can I use Cool Whip instead of homemade whipped cream?
Absolutely! If you’re short on time or don’t have heavy cream on hand, a 16-ounce tub of Cool Whip (thawed) works perfectly. Fold it into the pudding just like you would with homemade whipped cream. The texture will be slightly different—lighter and fluffier—but still delicious.
Pin This Recipe!
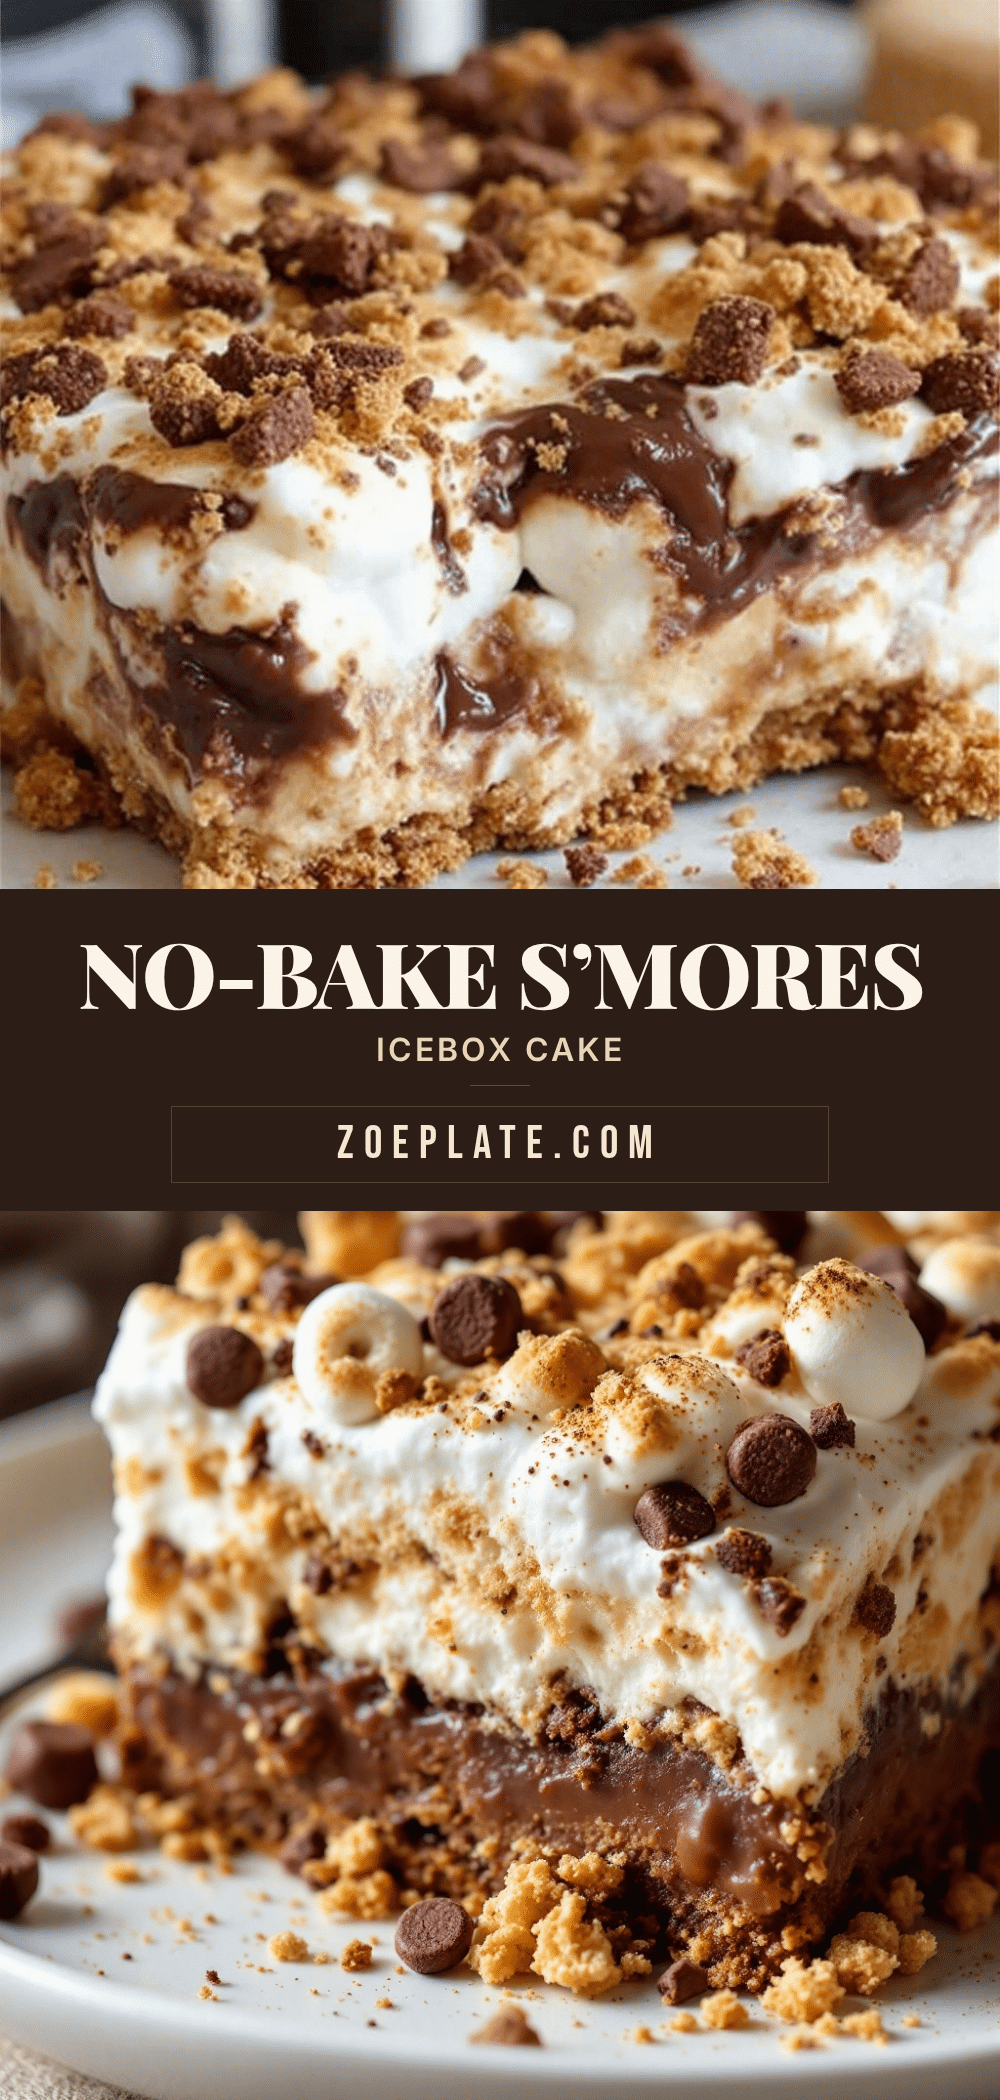
Easy No-Bake Smores Icebox Cake for a Crowd
This no-bake s’mores icebox cake is a crowd-pleasing dessert made with layers of graham crackers, chocolate pudding, marshmallows, and chocolate bars. Perfect for summer gatherings, it requires no oven and can be made ahead for stress-free entertaining.
- Prep Time: 20 minutes
- Cook Time: 0 minutes
- Total Time: 4 hours 20 minutes (includes chilling)
- Yield: 12-15 servings 1x
- Category: Dessert
- Cuisine: American
Ingredients
- 2 (3.4-ounce) boxes instant chocolate pudding mix
- 3 cups cold whole milk
- 1 teaspoon vanilla extract
- 1 (14.4-ounce) box graham crackers (about 3 sleeves)
- 2 cups heavy whipping cream
- 1/4 cup powdered sugar
- 2 cups mini marshmallows
- 4 (1.55-ounce) milk chocolate bars, chopped
- 1 cup mini marshmallows (for topping)
- 2 milk chocolate bars, chopped (for topping)
- 1/4 cup graham cracker crumbs (optional, for garnish)
Instructions
- Make the chocolate pudding: In a large mixing bowl, whisk together the two boxes of instant chocolate pudding mix and 3 cups of cold whole milk. Whisk vigorously for about 2 minutes until the pudding thickens. Let it sit for 5 minutes to fully thicken. Stir in the vanilla extract.
- Whip the cream: In a separate medium mixing bowl, pour in the 2 cups of cold heavy whipping cream. Add the 1/4 cup of powdered sugar. Using an electric hand mixer or stand mixer fitted with the whisk attachment, beat the cream on medium-high speed until soft peaks form, about 3 to 4 minutes.
- Fold it all together: Take about a third of the whipped cream and gently fold it into the thickened pudding. Add the remaining whipped cream and fold until just combined. Gently fold in the 2 cups of mini marshmallows and the chopped chocolate from the 4 chocolate bars. Reserve the remaining marshmallows and chocolate for the top.
- Start layering: Spread a thin layer (about 1/2 cup) of the pudding mixture on the bottom of a 9×13-inch dish. Place a single layer of graham crackers on top, breaking them as needed to fill any gaps.
- Repeat the layers: Spread about one-third of the remaining pudding mixture evenly over the graham crackers. Top with another layer of graham crackers. Repeat this process two more times: pudding, graham crackers, pudding, graham crackers. You should end with a final layer of pudding on top. Make sure the top layer is smooth and even.
- Add the topping: Sprinkle the reserved 1 cup of mini marshmallows evenly over the top. Scatter the chopped chocolate from the remaining 2 chocolate bars over the marshmallows. If using graham cracker crumbs, sprinkle those on top too. Press the marshmallows and chocolate gently into the top pudding layer.
- Chill: Cover the dish tightly with plastic wrap or aluminum foil. Refrigerate for at least 4 hours, but overnight is best.
- Serve cold: Remove the cake from the fridge. Use a sharp knife to cut clean squares. Wipe the knife clean between cuts for the neatest slices. Serve directly from the dish.
Notes
Don’t rush the chilling time—wait at least 4 hours, but overnight is ideal. Use cold milk for the pudding. Whip cream to soft peaks, not stiff peaks. Press graham crackers gently. For clean slices, use a warm knife and wipe it clean between cuts. This cake tastes even better the next day.
Nutrition
- Serving Size: 1 square (based on 1
- Calories: 420480
- Sugar: 3540
- Sodium: 350400
- Fat: 2226
- Saturated Fat: 1215
- Carbohydrates: 5258
- Fiber: 12
- Protein: 68
Keywords: no-bake dessert, icebox cake, s'mores, crowd dessert, summer dessert, potluck dessert, graham cracker cake, chocolate pudding cake


