I did not trust pumpkin crisp. For years, it felt like the dessert equivalent of a promise that never delivered—too much soft, mushy pumpkin, not enough crunch, and usually so sweet it made my teeth ache. Every fall, someone would bring a version to a gathering, and I’d take a polite spoonful, nod, and quietly push the rest around my plate. So when my neighbor, a woman who bakes like she’s got a direct line to some higher culinary power, dropped off a pan of what she called her “new thing” with salted caramel and pumpkin, I smiled and thanked her. Inside, I was already planning my escape from having to eat it.
But then I got home, and the smell hit me. It wasn’t just pumpkin spice. It was butter and brown sugar and something deep and almost toasted, like the caramel had been browned just enough to get serious. I cut a small square. Then another. By the time I texted her for the recipe, I had eaten three pieces and was licking caramel off my thumb like a raccoon who’d found a dropped ice cream cone. That was two years ago, and I have not stopped making these bars since. Honestly, I think I owe her an apology for all the times I dismissed her baking advice.
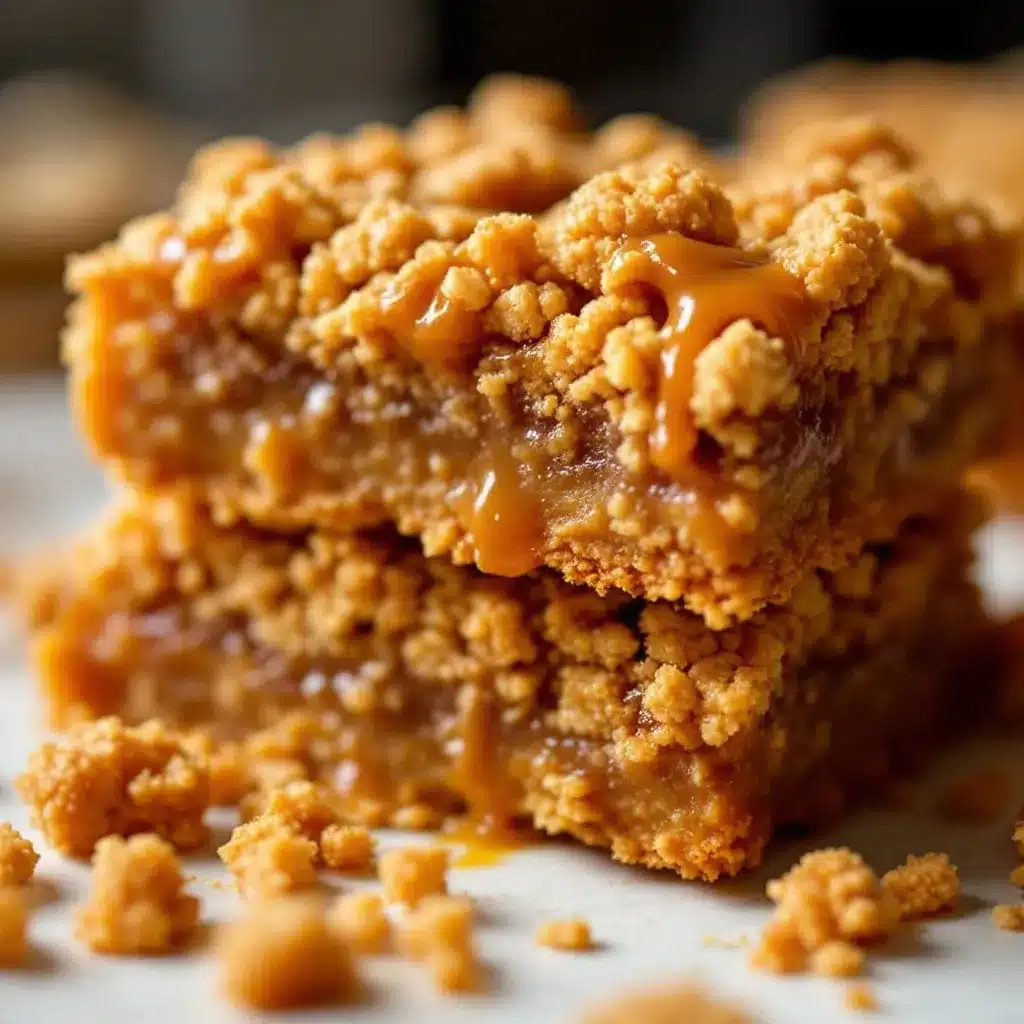
These Best Salted Caramel Pumpkin Crisp Bars are the fall dessert I actually trust. The pumpkin layer is creamy but not soupy, the crisp topping stays crunchy for days (if they last that long), and the salted caramel—homemade or store-bought, no judgment—ties it all together in a way that makes you close your eyes after the first bite. It’s the kind of recipe that turns a skeptic into a believer. And if you’re already a believer? Well, you’re about to find your new favorite way to eat pumpkin.
Why You’ll Love This Recipe
I have tested this recipe more times than I care to admit. The first batch was too wet. The second batch had a topping that sank into the pumpkin layer like a sad, crumbly shipwreck. But the third batch? That was the one. And I’ve been tweaking it ever since to make sure it works for you, too. Here is why these bars are worth every minute in the kitchen:
- Quick & Easy: The whole thing comes together in about 15 minutes of active prep time. The oven does the rest. Perfect for those evenings when you need a dessert but don’t want to spend hours measuring and mixing.
- Simple Ingredients: You probably already have most of these in your pantry. Canned pumpkin, butter, flour, oats, brown sugar—nothing fancy, nothing that requires a special trip to a gourmet store. The salted caramel is the only “special” ingredient, and you can use store-bought if you’re short on time.
- Perfect for Fall Gatherings: Whether it’s Thanksgiving, a potluck, or just a cozy Sunday afternoon, these bars show up and steal the show. They travel well, slice cleanly, and look gorgeous on a plate with a little extra caramel drizzle.
- Crowd-Pleaser: I have served these to kids, adults, and that one friend who “doesn’t really like pumpkin desserts.” Every single person has asked for the recipe. Every. Single. One.
- Unbelievably Delicious: The texture is what gets me. You get the soft, almost cheesecake-like pumpkin layer, the crunchy oat and pecan topping, and then that ribbon of salted caramel running through the middle. It’s like three desserts in one, and somehow they all work together perfectly.
What makes these bars different from the other pumpkin crisp recipes out there is the caramel. Most recipes just do pumpkin and crumble, and that’s fine, but it’s missing that little something. The salted caramel adds a depth that cuts through the sweetness of the pumpkin and the richness of the butter. It’s not just another version—it’s the version. And trust me, I’ve eaten a lot of pumpkin desserts in the name of research.
What Ingredients You Will Need
This recipe uses simple, wholesome ingredients to deliver big flavor without the fuss. Most of these are pantry staples, especially if you do a lot of fall baking. Here is what you need, broken down by layer:
For the Pumpkin Layer
- Canned pumpkin puree (15 oz can) – Not pumpkin pie filling. Make sure you get 100% pure pumpkin. I prefer Libby’s for its consistent texture, but any brand works.
- Large eggs (2, room temperature) – Room temperature eggs blend more smoothly into the pumpkin mixture. If you forget to pull them out early, place them in a bowl of warm water for 5 minutes.
- Granulated sugar (½ cup) – Adds sweetness without overpowering the pumpkin flavor.
- Brown sugar (¼ cup, packed) – For that deeper, molasses-like sweetness. Dark brown sugar gives even more depth, but light works fine.
- Heavy cream (¼ cup) – This is my secret for an ultra-creamy texture. It makes the pumpkin layer feel almost like a custard.
- Vanilla extract (1 teaspoon) – Pure vanilla, not imitation. It makes a difference.
- Pumpkin pie spice (1½ teaspoons) – You can use store-bought or make your own with cinnamon, nutmeg, ginger, and cloves.
- Cinnamon (½ teaspoon) – Because you can never have too much cinnamon in a pumpkin dessert.
- Salt (¼ teaspoon) – Just enough to balance the sweetness and bring out the pumpkin flavor.
For the Crisp Topping
- All-purpose flour (1 cup) – Spoon and level it for accuracy. Scooping directly from the bag can pack in too much flour.
- Old-fashioned rolled oats (¾ cup) – Not quick oats. The texture of rolled oats holds up better during baking and gives you that real crisp texture.
- Brown sugar (½ cup, packed) – For sweetness and that caramel-like flavor when it bakes.
- Granulated sugar (¼ cup) – Adds a little extra sweetness and helps the topping brown.
- Unsalted butter (½ cup, cold and cubed) – Cold butter is key. It creates those little pockets of fat that melt and steam, giving you a flaky, crunchy topping. I use Kerrygold for its rich flavor.
- Chopped pecans (½ cup) – Adds crunch and a nutty flavor that pairs beautifully with pumpkin and caramel. Walnuts work too, but pecans are my favorite here.
- Salt (¼ teaspoon) – Don’t skip this. It balances the sweetness and makes the topping taste more complex.
For the Salted Caramel
- Homemade or store-bought salted caramel sauce (about ½ cup) – I usually make my own because it’s surprisingly easy and tastes better. But if you’re short on time, a good quality jarred caramel works. I like the one from Trader Joe’s or Ghirardelli.
- Flaky sea salt (for finishing) – Maldon or any other flaky salt. It adds that final pop of saltiness that makes the caramel sing.
Substitution notes: For a gluten-free version, swap the all-purpose flour with a 1:1 gluten-free baking flour blend. The oats should be certified gluten-free if needed. For a dairy-free option, use a plant-based butter (like Miyoko’s) and substitute the heavy cream with full-fat coconut cream. The texture will be slightly different, but still delicious.
Equipment Needed
You don’t need a fancy kitchen to make these bars. Here is what you will need:
- 9×13-inch baking pan – Glass or metal both work. If using glass, you may need to add 5-10 minutes to the baking time. Grease it well or line with parchment paper for easy removal.
- Mixing bowls – One large bowl for the pumpkin mixture, one medium bowl for the crisp topping.
- Whisk – For the pumpkin layer. A fork works in a pinch, but a whisk gives you a smoother texture.
- Pastry cutter or fork – For cutting the cold butter into the flour mixture. You can also use your fingertips, but work quickly so the butter doesn’t warm up.
- Measuring cups and spoons – Accurate measurements matter in baking, so use the proper tools.
- Spatula – For spreading the pumpkin mixture evenly and scraping every last bit of caramel out of the jar.
- Small saucepan – If you’re making homemade salted caramel. Otherwise, you just need a spoon for drizzling.
- Cooling rack – Letting the bars cool completely before slicing is crucial. A cooling rack helps air circulate and prevents the bottom from getting soggy.
I’ve made these bars with a cheap baking pan from the dollar store and they still turned out great. The only thing I wouldn’t skimp on is the pastry cutter—it makes cutting in the butter so much easier and keeps your hands from warming up the dough. If you don’t have one, two forks crossed against each other work well too.
Preparation Method
Let’s get to it. This recipe is straightforward, but there are a few key moments where paying attention makes the difference between good and unforgettable. Here is how to make the Best Salted Caramel Pumpkin Crisp Bars:
- Preheat your oven to 350°F (175°C). Grease a 9×13-inch baking pan with butter or non-stick spray. If you want to make removal even easier, line the pan with parchment paper, leaving a little overhang on two sides. That way you can lift the whole slab out after baking.
- Make the pumpkin layer. In a large bowl, whisk together the canned pumpkin, eggs, granulated sugar, brown sugar, heavy cream, vanilla extract, pumpkin pie spice, cinnamon, and salt. Whisk until everything is smooth and well combined. The mixture should be thick but pourable. If it looks too stiff, add another tablespoon of cream. Set it aside while you make the topping.
- Make the crisp topping. In a medium bowl, combine the flour, oats, brown sugar, granulated sugar, and salt. Add the cold, cubed butter. Use a pastry cutter (or your fingertips) to cut the butter into the dry ingredients until the mixture looks like coarse crumbs with some pea-sized butter pieces still visible. This is important—you want some bigger chunks of butter for that flaky, crunchy texture. Stir in the chopped pecans.
- Assemble the bars. Pour the pumpkin mixture into the prepared pan and spread it evenly with a spatula. It should be about ½ inch thick. Drizzle about ¼ cup of the salted caramel sauce over the top in a zigzag pattern. You don’t need to swirl it in—just let it sit on top. Then sprinkle the crisp topping evenly over the entire surface. Use your hands to gently press the topping into the pumpkin layer just a little bit, so it sticks.
- Bake. Place the pan in the preheated oven and bake for 35-40 minutes. The edges should be golden brown and bubbly, and the center should be set but still slightly jiggly if you shake the pan gently. If the topping is browning too quickly (after about 25 minutes), tent the pan loosely with aluminum foil and continue baking.
- Cool. Remove the pan from the oven and place it on a cooling rack. Let the bars cool for at least 30 minutes at room temperature. Then drizzle the remaining ¼ cup of salted caramel over the top and sprinkle with flaky sea salt. For clean slices, refrigerate the bars for at least 2 hours (or overnight) before cutting. I know it’s hard to wait, but it makes a huge difference in how cleanly they slice.
- Slice and serve. Once fully cooled and set, lift the bars out of the pan using the parchment overhang. Place on a cutting board and slice into squares or rectangles. I usually get 12-16 bars, depending on how generous I’m feeling. Serve at room temperature or slightly warm. If you want to reheat individual bars, 10-15 seconds in the microwave does the trick.
Pro tip from my failed batches: If your pumpkin layer looks watery after mixing, don’t panic. It will set as it bakes. But if you’re using a brand of canned pumpkin that’s particularly thin (some store brands are runnier than others), add an extra tablespoon of flour to the pumpkin mixture to help it set.
Cooking Tips & Techniques
After making these bars more times than I can count, I’ve learned a few things the hard way. Here are my best tips for getting perfect results every time:
- Don’t overmix the topping. When you’re cutting the butter into the flour mixture, stop when it looks like coarse meal with some pea-sized chunks. If you overwork it, the topping will be dense and pasty instead of light and crunchy. I’ve made that mistake before, and it’s disappointing.
- Use a food scale for the flour. I know, I know, it sounds fussy. But flour is notoriously easy to overmeasure with cups. One cup of flour should weigh about 120 grams. If you don’t have a scale, spoon the flour into your measuring cup and level it off with a knife. Don’t scoop directly from the bag.
- Let the bars cool completely. This is the hardest part of the recipe, honestly. The bars are so tempting when they come out of the oven, all warm and smelling incredible. But if you cut them too soon, the pumpkin layer will be runny and the topping will crumble everywhere. I once cut into a batch after 20 minutes and ended up with a pan of pumpkin soup with croutons. Wait the full cooling time. Your patience will be rewarded.
- Make the caramel ahead of time. If you’re making homemade salted caramel, do it a day or two in advance. That way, when you’re assembling the bars, you just have to drizzle and go. Plus, the caramel thickens as it sits, which makes it easier to control the drizzle.
- Use a sharp knife for slicing. A dull knife will drag through the topping and mess up the layers. Run the knife under hot water, wipe it dry, and then slice. Clean the blade between cuts for the prettiest bars.
Variations & Adaptations
One of the best things about this recipe is how flexible it is. Here are some ways to make it your own:
- Gluten-Free Version: Substitute the all-purpose flour with a 1:1 gluten-free baking blend (I like Bob’s Red Mill). Make sure your oats are certified gluten-free. The texture will be slightly more crumbly, but still delicious.
- Vegan Version: Use a plant-based butter (like Miyoko’s or Earth Balance) in the topping. Replace the eggs with flax eggs (2 tablespoons ground flaxseed mixed with 6 tablespoons water, let sit for 5 minutes). Use full-fat coconut cream instead of heavy cream. The pumpkin layer will be a bit softer, but the flavor is still amazing.
- Nut-Free Version: Simply omit the pecans from the topping. Add an extra ¼ cup of oats to make up for the volume. The topping will still be crunchy, just without the nutty flavor.
- Add Chocolate Chips: Because why not? Sprinkle ½ cup of semi-sweet or dark chocolate chips over the pumpkin layer before adding the crisp topping. The chocolate melts into the pumpkin and creates these little pockets of fudgy goodness.
- Swap the Caramel: If you’re not a caramel person (are you okay?), try using a bourbon maple glaze instead. Mix ¼ cup maple syrup with 2 tablespoons bourbon and a pinch of salt, and drizzle it over the top before baking. It’s a completely different vibe, but it works.
- Individual Servings: Make these in ramekins or a muffin tin for individual desserts. Reduce the baking time to 20-25 minutes. Perfect for parties or when you want to control portion sizes.
I’ve tried the vegan version for a friend with dietary restrictions, and honestly, I was surprised by how good it was. The coconut cream adds a subtle richness that works well with the pumpkin. Just make sure to let the bars cool completely before slicing, because the vegan version is a bit more delicate.
Serving & Storage Suggestions
These bars are versatile enough to serve at a fancy dinner party or a casual weeknight treat. Here is how to get the most out of them:
- Serving Temperature: I prefer these bars at room temperature. The pumpkin layer is soft and creamy, and the topping stays crunchy. If you want them warm, pop an individual bar in the microwave for 10-15 seconds. But don’t overheat them, or the caramel will turn into a puddle.
- Presentation: For a pretty presentation, drizzle a little extra salted caramel on the plate, place a bar on top, and add a dollop of whipped cream or a scoop of vanilla ice cream. A sprinkle of flaky sea salt and a few extra pecans on top makes it look like it came from a bakery.
- What to Serve With It: A cup of hot coffee or a cozy pumpkin chai latte with oat milk is the perfect pairing. The warmth of the spices in the drink complements the caramel and pumpkin in the bars. For a boozy option, a glass of bourbon or a dark rum cocktail works beautifully.
- Storage: Store leftover bars in an airtight container in the refrigerator for up to 5 days. The topping will soften slightly over time, but they’re still delicious. If you want to keep the topping crunchy, store the bars uncovered at room temperature for up to 2 days (if your kitchen isn’t too humid).
- Freezing: These bars freeze beautifully. Wrap individual bars tightly in plastic wrap, then place them in a freezer-safe bag or container. They’ll keep for up to 3 months. To thaw, let them sit at room temperature for about 30 minutes, or pop them in the microwave for 15-20 seconds.
- Flavor Development: Here’s a secret—these bars actually taste better the next day. The flavors meld together overnight, and the pumpkin layer sets up perfectly. So if you can, make them a day ahead. Your future self will thank you.
Nutritional Information & Benefits
I’m not going to pretend these bars are health food. They’re a dessert, and they’re meant to be indulgent. But there are a few redeeming qualities worth mentioning:
- Estimated Nutritional Values (per bar, based on 16 servings): Calories: 320 | Fat: 18g | Carbohydrates: 38g | Fiber: 3g | Sugar: 22g | Protein: 5g | Sodium: 220mg
- Pumpkin is packed with vitamin A (over 200% of your daily needs per cup), which is great for eye health and immune function. It’s also a good source of fiber, which helps with digestion.
- Pecans are rich in healthy fats and antioxidants. They’re one of the best nuts for heart health, and they add a nice dose of magnesium and zinc.
- Oats provide soluble fiber (beta-glucan), which can help lower cholesterol and keep you feeling full longer.
- Dietary Considerations: This recipe can be made gluten-free, vegan, or nut-free with the substitutions listed above. It is not suitable for a low-carb or keto diet due to the sugar and oats.
- Potential Allergens: Contains dairy, eggs, gluten, and nuts (pecans). The vegan version eliminates dairy and eggs, but still contains gluten and nuts unless substitutions are made.
I like to think of these bars as a “sometimes food” that happens to have some nutritional perks. They’re not something you’d eat every day, but when you do, at least you’re getting some vitamin A and fiber along with all that buttery, caramel-y goodness.
Conclusion
These Best Salted Caramel Pumpkin Crisp Bars are the fall dessert I keep coming back to, batch after batch, year after year. They’re the recipe that made me stop rolling my eyes at pumpkin desserts and start actually looking forward to them. The combination of creamy pumpkin, crunchy oat topping, and that ribbon of salted caramel is just… right. It’s balanced. It’s satisfying. It’s the kind of dessert that makes you close your eyes after the first bite and forget about whatever else was on your mind.
I hope you give these bars a try, and I hope you make them your own. Maybe you add chocolate chips, or swap the pecans for walnuts, or double the caramel because you’re a rebel like that. Whatever you do, let me know how it turns out. Leave a comment below, tag me in your photos, or send me a message. I love hearing about your kitchen wins (and your kitchen fails too—we’ve all been there).
If you’re looking for more fall treats to fill your kitchen with that cozy, spicy smell, check out these perfect small batch pumpkin cinnamon rolls or this easy pumpkin dump cake with pecan crumble for another low-effort, high-reward dessert. And if you’re in the mood for something a little different, these easy mummy pumpkin cheesecake bars are a fun, spooky twist for Halloween gatherings.
Happy baking, friends. And remember—the salted caramel is non-negotiable. Trust me on that one.
Frequently Asked Questions
Can I use fresh pumpkin instead of canned?
Yes, you can. Roast a small sugar pumpkin until tender, scoop out the flesh, and puree it in a food processor. Just make sure to drain any excess liquid by pressing the puree through a fine-mesh sieve or cheesecloth. Fresh pumpkin has more water than canned, and too much liquid will make the bars soggy. I’ve done it before, and it works, but canned is more consistent and saves time.
Why did my crisp topping sink into the pumpkin layer?
This usually happens if the pumpkin mixture is too thin or if you pressed the topping in too hard. Make sure your pumpkin puree isn’t watery (drain it if needed). Also, don’t press the topping down—just sprinkle it evenly and gently pat it so it sticks. If the topping still sinks, try chilling the assembled bars for 15 minutes before baking. That helps the topping stay on top.
Can I make these bars without the salted caramel?
You can, but why would you want to? The caramel is what makes these bars special. If you’re really not a caramel fan, try a drizzle of maple syrup mixed with a pinch of salt, or a sprinkle of cinnamon sugar on top before baking. But honestly, the caramel is the star here. Even a cheap store-bought caramel sauce makes a big difference.
How do I get clean slices without the topping crumbling everywhere?
Patience, my friend. Let the bars cool completely, then refrigerate them for at least 2 hours before slicing. Use a sharp knife and wipe it clean between cuts. If you want extra clean edges, run the knife under hot water before each slice. And don’t saw back and forth—use one smooth, firm cut straight down.
Can I double this recipe for a crowd?
Absolutely. Double all the ingredients and bake in a half-sheet pan (about 13×18 inches). You’ll need to increase the baking time to 45-50 minutes. Keep an eye on the topping and tent with foil if it starts browning too quickly. The bars will be thinner, so they’ll set faster in the fridge. Perfect for potlucks, tailgates, or when you want to make sure there are leftovers for breakfast (no judgment).
Pin This Recipe!
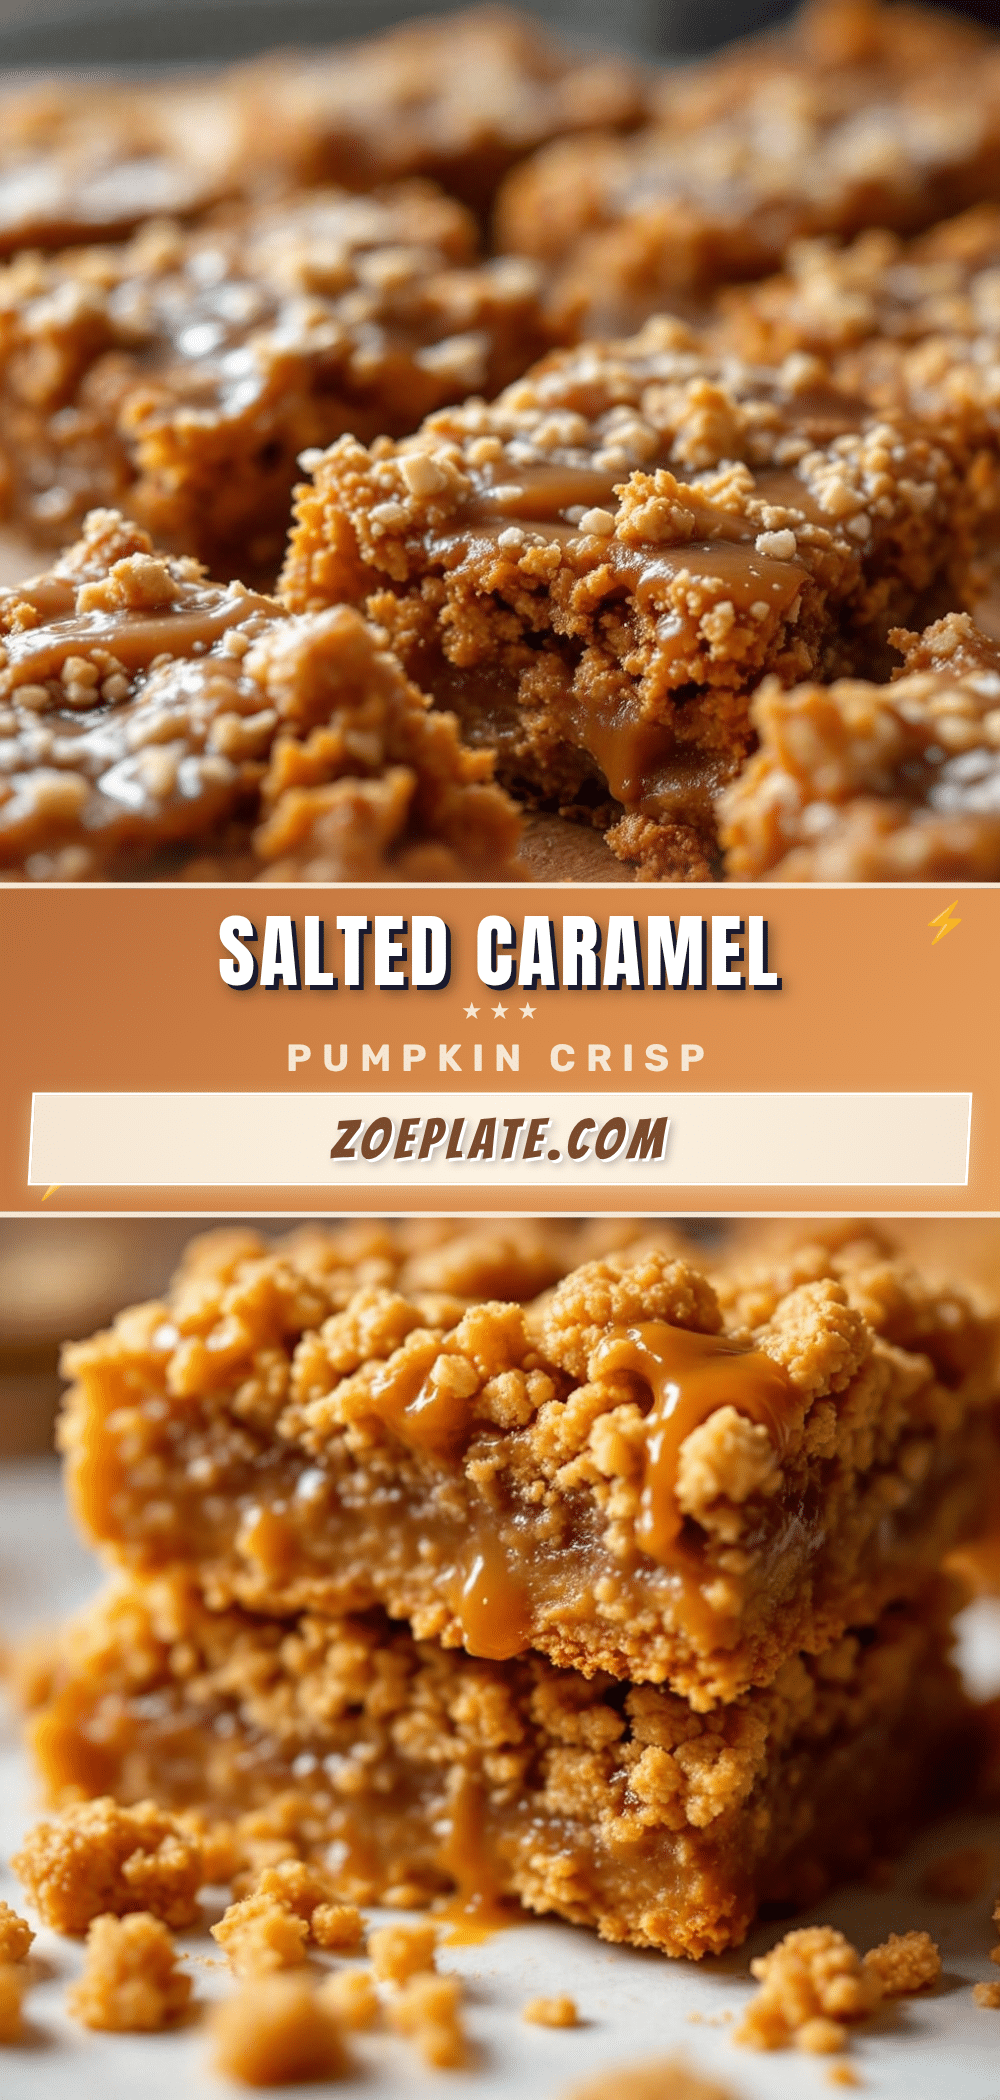
Best Salted Caramel Pumpkin Crisp Bars (Easy Fall Dessert)
These Best Salted Caramel Pumpkin Crisp Bars are the fall dessert you can actually trust. The pumpkin layer is creamy but not soupy, the crisp topping stays crunchy for days, and the salted caramel ties it all together in a way that makes you close your eyes after the first bite.
- Prep Time: 15 minutes
- Cook Time: 35-40 minutes
- Total Time: 50 minutes (plus cooling and chilling time)
- Yield: 12-16 bars
- Category: Dessert
- Cuisine: American
Ingredients
- Canned pumpkin puree (15 oz can) – 100% pure pumpkin
- Large eggs (2, room temperature)
- Granulated sugar (½ cup)
- Brown sugar (¼ cup, packed)
- Heavy cream (¼ cup)
- Vanilla extract (1 teaspoon)
- Pumpkin pie spice (1½ teaspoons)
- Cinnamon (½ teaspoon)
- Salt (¼ teaspoon)
- All-purpose flour (1 cup)
- Old-fashioned rolled oats (¾ cup)
- Brown sugar (½ cup, packed) – for topping
- Granulated sugar (¼ cup) – for topping
- Unsalted butter (½ cup, cold and cubed)
- Chopped pecans (½ cup)
- Salt (¼ teaspoon) – for topping
- Homemade or store-bought salted caramel sauce (about ½ cup)
- Flaky sea salt (for finishing)
Instructions
- Preheat your oven to 350°F (175°C). Grease a 9×13-inch baking pan with butter or non-stick spray. Optionally line with parchment paper for easy removal.
- Make the pumpkin layer: In a large bowl, whisk together the canned pumpkin, eggs, granulated sugar, brown sugar, heavy cream, vanilla extract, pumpkin pie spice, cinnamon, and salt until smooth and well combined. Set aside.
- Make the crisp topping: In a medium bowl, combine the flour, oats, brown sugar, granulated sugar, and salt. Add the cold, cubed butter. Use a pastry cutter or your fingertips to cut the butter into the dry ingredients until the mixture looks like coarse crumbs with some pea-sized butter pieces. Stir in the chopped pecans.
- Assemble the bars: Pour the pumpkin mixture into the prepared pan and spread evenly. Drizzle about ¼ cup of the salted caramel sauce over the top in a zigzag pattern. Sprinkle the crisp topping evenly over the entire surface. Gently press the topping into the pumpkin layer so it sticks.
- Bake for 35-40 minutes. The edges should be golden brown and bubbly, and the center should be set but still slightly jiggly. If the topping browns too quickly, tent with foil after about 25 minutes.
- Cool: Remove from oven and place on a cooling rack. Let cool for at least 30 minutes at room temperature. Drizzle the remaining ¼ cup of salted caramel over the top and sprinkle with flaky sea salt. For clean slices, refrigerate for at least 2 hours (or overnight) before cutting.
- Slice and serve: Lift the bars out using parchment overhang, place on a cutting board, and slice into squares or rectangles (12-16 bars). Serve at room temperature or slightly warm.
Notes
For gluten-free: use 1:1 gluten-free flour blend and certified gluten-free oats. For dairy-free: use plant-based butter and full-fat coconut cream. For nut-free: omit pecans and add extra ¼ cup oats. Let bars cool completely before slicing for best results. Bars taste even better the next day.
Nutrition
- Serving Size: 1 bar (based on 16 s
- Calories: 320
- Sugar: 22
- Sodium: 220
- Fat: 18
- Carbohydrates: 38
- Fiber: 3
- Protein: 5
Keywords: pumpkin crisp bars, salted caramel pumpkin bars, fall dessert, pumpkin dessert, easy pumpkin recipe, pumpkin crisp, caramel pumpkin bars


