My daughter took one bite, paused mid-chew, and then quietly asked if we could make these every single weekend until Halloween. That’s not something she does often—she’s usually the type to eat two bites and declare herself full. But these mummy-wrapped pumpkin cheesecake bars? She finished her whole square and then stared at the pan like she was trying to will another piece into existence.
I had been testing Halloween desserts for weeks, and honestly, I was getting tired of the same old sugar cookies and cupcakes. I wanted something that looked festive but actually tasted like a real dessert you’d crave in November, not just something cute that gets thrown away after the party. So I took my favorite pumpkin cheesecake recipe, wrapped it in a buttery pie crust blanket, and gave it those googly eyes that make everyone smile. The result was exactly what I was hoping for—spooky on the outside, creamy and cozy on the inside.
These easy mummy pumpkin cheesecake bars are the kind of treat that disappears fast at gatherings. They’ve got that perfect balance of pumpkin spice warmth and tangy cream cheese filling, all wrapped up in a crust that’s flaky and buttery. And the best part? They look like you spent hours making them, but the process is surprisingly straightforward. I’ve made these three times now, and each time I find myself loving them a little more.
Why You’ll Love This Recipe
Let me tell you why these bars have earned a permanent spot in my fall baking rotation. There’s something about combining pumpkin cheesecake with a cute Halloween presentation that just works.
- Quick & Easy: These come together in about 45 minutes of active prep time, with most of the work being chilling and baking. Perfect for busy October evenings when you still want to make something special.
- Simple Ingredients: You probably have most of these in your pantry right now. Canned pumpkin, cream cheese, butter, flour—nothing fancy required.
- Perfect for Halloween Parties: The mummy design is immediately recognizable and always gets compliments. Kids love the googly eyes, adults love the flavor.
- Crowd-Pleaser: I’ve yet to meet someone who doesn’t like these. The pumpkin and cheesecake combo is universally loved, and the crust adds that satisfying crunch.
- Unbelievably Delicious: The texture is what gets me every time. The creamy cheesecake layer, the smooth pumpkin filling, and the flaky crust all work together in perfect harmony.
What makes this different from other pumpkin cheesecake bars is the crust wrapping technique. Instead of just having a bottom crust, we’re creating those mummy bandages that make the dessert look like a little wrapped-up treat. It’s not just another cheesecake bar—it’s an experience. And honestly, the first time I pulled these out of the oven, I actually laughed out loud at how cute they were.
These bars are comfort food with a Halloween twist. They’re the kind of dessert that makes you feel like a kid again, but the flavor is sophisticated enough to serve at an adult gathering. Whether you’re hosting a spooky movie night or just want to surprise your family with something fun, these deliver every single time.
What Ingredients You Will Need
This recipe uses simple, wholesome ingredients to create that perfect pumpkin cheesecake experience. Most of these are pantry staples, especially if you do any fall baking.
For the Crust
- 1 ½ cups all-purpose flour (spooned and leveled for accuracy)
- ½ cup unsalted butter, cold and cut into small cubes (I use Kerrygold for the best flavor)
- ¼ cup granulated sugar
- ¼ teaspoon salt
- 3-4 tablespoons ice water (add one at a time until dough comes together)
For the Pumpkin Cheesecake Filling
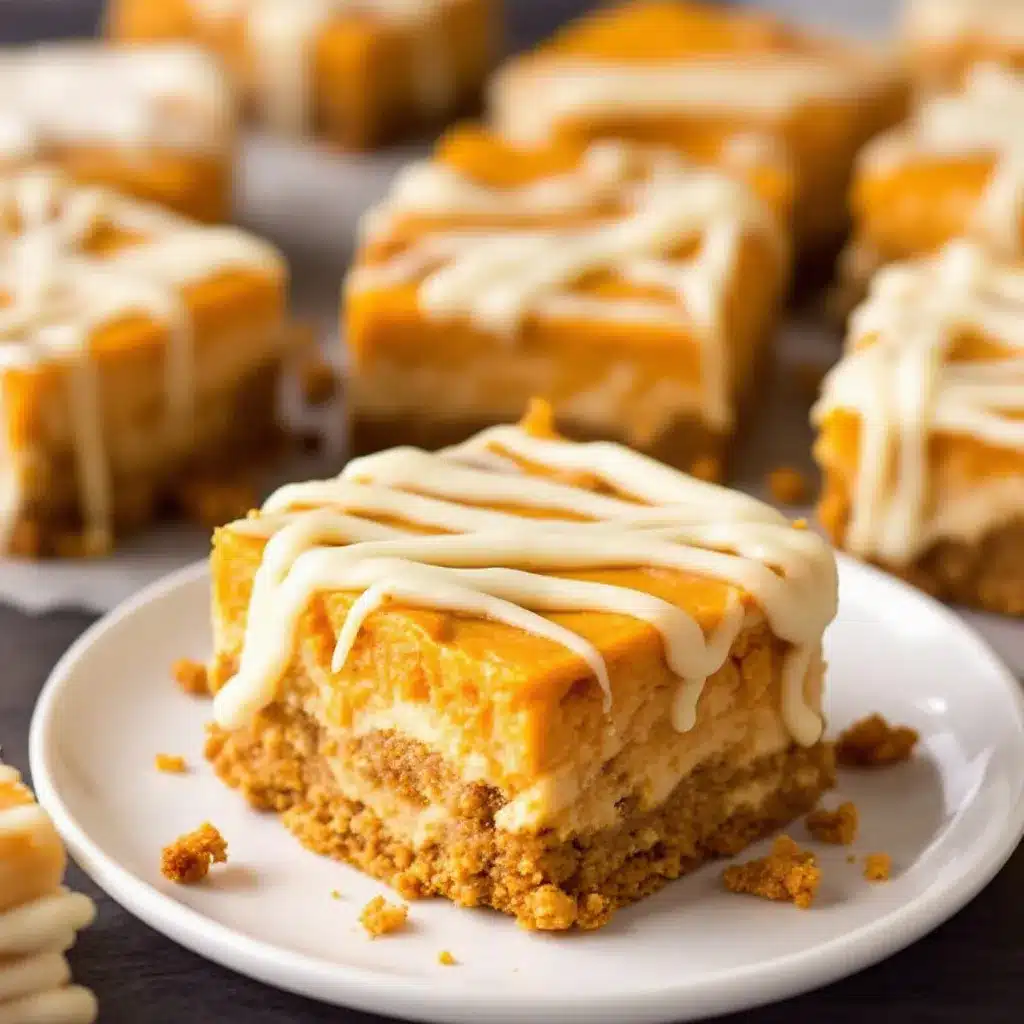
- 16 ounces cream cheese, softened to room temperature (full-fat works best for creaminess)
- ¾ cup granulated sugar
- 1 cup canned pumpkin puree (not pumpkin pie filling—make sure it’s 100% pumpkin)
- 2 large eggs, room temperature
- 1 teaspoon vanilla extract
- 1 teaspoon pumpkin pie spice (or ½ teaspoon cinnamon + ¼ teaspoon each nutmeg, ginger, and cloves)
- ¼ teaspoon salt
For the Mummy Wraps & Decoration
- 1 sheet frozen puff pastry, thawed but still cold (Pepperidge Farm is my go-to)
- 1 large egg, beaten with 1 tablespoon water (for egg wash)
- Candy eyes (the kind you find in the baking aisle—about 24-30 eyes)
- Optional: 2 tablespoons powdered sugar for dusting (makes them look extra spooky)
When selecting your pumpkin puree, look for one that’s smooth and not too watery. Libby’s is my preferred brand because it’s consistently thick and flavorful. If you’re using a different brand and the puree seems watery, you can drain it through a cheesecloth for about 30 minutes before using.
For the cream cheese, make sure it’s truly at room temperature—about 60-90 minutes on the counter. Cold cream cheese creates lumps that are nearly impossible to get rid of, and nobody wants lumpy cheesecake filling. Trust me, I learned this the hard way on my first attempt.
If you want to swap the puff pastry for something else, you can use refrigerated pie crust instead. It won’t puff up as much, but it’ll still look like mummy bandages. For a gluten-free version, use a gluten-free all-purpose flour blend in the crust and a gluten-free puff pastry if you can find one.
Equipment Needed
Nothing too fancy here—most of these tools are standard kitchen items. But having the right equipment makes the process so much smoother.
- 9×9 inch square baking pan (an 8×8 works too, but your bars will be slightly thicker)
- Parchment paper (for easy lifting—don’t skip this)
- Stand mixer or hand mixer (for beating the cheesecake filling until smooth)
- Rolling pin (for rolling out the puff pastry strips)
- Pizza cutter or sharp knife (for cutting the puff pastry into strips)
- Pastry brush (for applying the egg wash)
- Mixing bowls (one large, one medium)
- Plastic wrap (for chilling the crust)
- Cooling rack (to prevent soggy bottoms)
If you don’t have a pastry brush, you can use a paper towel dipped in the egg wash—just be gentle. And if you’re using a glass baking dish instead of metal, reduce the oven temperature by 25 degrees to prevent over-browning. I’ve used both, and honestly, the metal pan gives a crisper crust.
One tip I picked up from years of baking: invest in a good quality baking pan. Cheap pans can warp in the oven, leading to uneven baking. A nice heavy-duty one will last forever and give you better results every time.
Preparation Method
Let’s get into the actual process. I’ve broken this down step by step so you can follow along easily. Take your time with each stage—rushing is the number one mistake people make with cheesecake.
Step 1: Make the Crust
In a medium bowl, whisk together the flour, sugar, and salt. Add the cold butter cubes and use a pastry cutter or your fingertips to work the butter into the flour until the mixture resembles coarse crumbs with some pea-sized butter pieces remaining. Add the ice water one tablespoon at a time, mixing with a fork until the dough just comes together when pressed. Form the dough into a disk, wrap in plastic wrap, and refrigerate for at least 30 minutes. The dough should feel cold and firm but not rock hard.
Step 2: Blind Bake the Crust
Preheat your oven to 350°F (175°C). Line your baking pan with parchment paper, leaving some overhang on two sides for easy lifting. Roll the chilled dough out on a lightly floured surface to about ¼-inch thickness. Press it evenly into the bottom of the prepared pan. Prick the crust all over with a fork to prevent bubbles. Bake for 15-18 minutes until lightly golden. Let it cool completely on a wire rack while you make the filling. This step is crucial—a blind-baked crust stays crisp and doesn’t get soggy from the filling.
Step 3: Make the Pumpkin Cheesecake Filling
In a large bowl, beat the softened cream cheese with an electric mixer on medium speed until completely smooth, about 2 minutes. Scrape down the sides and bottom of the bowl. Add the sugar and beat for another minute until fluffy. Add the pumpkin puree, vanilla, pumpkin pie spice, and salt, and beat until well combined. Add the eggs one at a time, beating on low speed after each addition just until incorporated. Don’t overmix once the eggs are in—overbeating incorporates too much air, which can cause cracks. The filling should be smooth, thick, and a beautiful deep orange color.
Step 4: Assemble the Bars
Pour the pumpkin cheesecake filling over the cooled crust and spread it evenly with a spatula. Tap the pan gently on the counter to release any air bubbles. Now for the fun part—the mummy wraps! On a lightly floured surface, roll out the thawed puff pastry to about ⅛-inch thickness. Use a pizza cutter or sharp knife to cut it into strips about ½-inch wide and 6-8 inches long. Lay the strips across the filling in a crisscross pattern, leaving small gaps between them so you can see the pumpkin filling peeking through. Don’t cover the entire surface—you want those “bandages” to look wrapped but not completely covered. Leave about 1 inch of space on one end for the eyes.
Step 5: Bake the Bars
Brush the puff pastry strips lightly with the egg wash. This gives them that beautiful golden color. Bake at 350°F (175°C) for 30-35 minutes, or until the cheesecake filling is set around the edges but still slightly jiggly in the center. The puff pastry should be puffed and golden brown. If the pastry is browning too quickly, tent the pan loosely with aluminum foil for the last 10 minutes of baking. Let the bars cool completely in the pan on a wire rack—about 2 hours. Then refrigerate for at least 4 hours, preferably overnight. This chilling time is non-negotiable for clean slices.
Step 6: Add the Eyes and Serve
Once the bars are fully chilled and set, use the parchment paper overhang to lift them out of the pan. Place them on a cutting board. Press the candy eyes gently into the exposed cheesecake filling on one end of each bar—the “head” of your mummy. You can use two eyes per bar or one big eye for a more comical look. Slice into 9 or 12 bars using a sharp knife, wiping the blade clean between cuts for neat edges. Dust with powdered sugar right before serving if you want that extra spooky touch.
Cooking Tips & Techniques
After making these bars several times, I’ve collected a few tricks that make a real difference. Some I learned from mistakes, others from experimenting.
Don’t skip the blind baking. The first time I made these, I was impatient and poured the filling directly onto an unbaked crust. The bottom turned out soggy and sad. Blind baking creates a barrier that keeps the crust crisp even after the filling is added. It takes an extra 15 minutes, but it’s worth every second.
Room temperature ingredients matter. Cold cream cheese creates lumps that refuse to smooth out. Cold eggs can cause the filling to curdle. I set everything out on the counter about an hour before I start baking. If you forget, you can soften cream cheese in the microwave on 50% power for 15-second bursts, but it’s not quite the same.
Watch your puff pastry. It’s tempting to use the whole sheet, but you don’t want to completely cover the filling. The beauty of these bars is seeing that pumpkin cheesecake peeking through the bandages. I use about two-thirds of the pastry sheet for the strips and save the rest for another use (like mini turnovers or cheese straws).
Patience with chilling. I know it’s hard to wait, especially when your kitchen smells amazing. But cutting into warm cheesecake is a disaster waiting to happen. The filling needs time to set completely, or you’ll end up with a messy, goopy slice. I’ve made this mistake exactly once. Now I always make these the day before I plan to serve them.
Use a sharp knife for slicing. A dull blade will drag through the cheesecake and mess up your beautiful mummy design. I run my knife under hot water, dry it, then make each cut. Wipe the blade clean between slices for the neatest edges. If you’re serving these at a party, you can also cut them into smaller bite-sized pieces for a Halloween dessert platter.
Variations & Adaptations
One of the best things about this recipe is how easy it is to customize. Here are some variations I’ve tried and loved.
Gluten-Free Version: Use a gluten-free all-purpose flour blend for the crust—I’ve had good luck with Bob’s Red Mill 1-to-1 Baking Flour. For the mummy wraps, look for a gluten-free puff pastry (they exist, but you might need to check specialty stores). The texture will be slightly different, but the flavor is still fantastic.
Dairy-Free Adaptation: Substitute the cream cheese with a high-quality dairy-free alternative like Kite Hill or Miyoko’s. Use vegan butter in the crust and a plant-based puff pastry (many are accidentally vegan). The filling won’t be quite as creamy, but it’s still delicious. I made this version for a friend with dairy allergies, and she couldn’t tell the difference.
Chocolate Pumpkin Mummies: Add ½ cup of melted dark chocolate to the cheesecake filling along with the pumpkin for a chocolate-pumpkin swirl effect. Drizzle extra melted chocolate over the finished bars for an even more decadent treat. This is my personal favorite variation—the chocolate and pumpkin combo is unbeatable.
Mini Mummy Bites: Instead of a 9×9 pan, use a mini muffin tin lined with paper liners. Press a small amount of crust into each cup, fill with the cheesecake mixture, and top with tiny strips of puff pastry. Bake for 15-18 minutes. These are perfect for Halloween parties where people want to grab and go.
Spooky Spider Web Design: If mummies aren’t your thing, you can pipe a spider web pattern on top using melted white chocolate. Just drizzle the chocolate in concentric circles and drag a toothpick from the center outward to create the web effect. Add a small chocolate spider on top for extra creepiness.
Serving & Storage Suggestions
These bars are best served cold, straight from the refrigerator. The chilled cheesecake has the perfect texture—firm but creamy, with the crust staying crisp and the puff pastry staying flaky. I like to take them out about 10 minutes before serving to take the chill off slightly, but that’s personal preference.
For presentation, arrange the bars on a black or dark-colored platter to make the orange pumpkin filling pop. Add some fake spider webs or plastic spiders around the edges for a Halloween tablescape. A dusting of powdered sugar right before serving makes them look like they’ve been caught in a light snow—or a dusting of spiderwebs, if you prefer the spooky theme.
These pair beautifully with hot apple cider, pumpkin spice lattes, or even a scoop of vanilla ice cream on the side. If you’re serving them at a Halloween party, consider adding them to a seasonal grazing board alongside other fall treats for a stunning dessert spread.
Storage Instructions: Store the bars in an airtight container in the refrigerator for up to 5 days. They actually taste better on day two and three as the flavors meld together. To freeze, wrap individual bars tightly in plastic wrap, then place them in a freezer-safe bag. They’ll keep for up to 3 months. Thaw in the refrigerator overnight before serving. Don’t freeze them with the candy eyes attached—they can get sticky. Add the eyes after thawing.
Reheating: These are meant to be served cold, but if you prefer them slightly warm, microwave an individual bar for about 10-15 seconds. The puff pastry will soften a bit, but the cheesecake will get creamy and luscious. Just don’t overheat or the filling can become runny.
Nutritional Information & Benefits
Here’s the estimated nutritional breakdown for one bar (based on 9 servings):
| Nutrient | Amount Per Serving |
|---|---|
| Calories | 385 |
| Total Fat | 24g |
| Saturated Fat | 14g |
| Cholesterol | 95mg |
| Sodium | 310mg |
| Total Carbohydrates | 38g |
| Dietary Fiber | 2g |
| Sugars | 22g |
| Protein | 6g |
Pumpkin is packed with vitamin A, which supports eye health and immune function. It’s also a good source of fiber and antioxidants. The cream cheese provides calcium and protein, though it’s definitely a treat, not a health food. For a lighter version, you can use reduced-fat cream cheese and cut the sugar to ½ cup—the bars will still be delicious, just slightly less rich.
These bars contain gluten, dairy, and eggs, so they’re not suitable for those with allergies to those ingredients. But the variations section above offers alternatives for most dietary needs. If you’re watching your sugar intake, consider serving smaller portions—these are rich enough that a little square goes a long way.
Conclusion
These easy mummy pumpkin cheesecake bars have become my go-to Halloween dessert for good reason. They’re fun to make, adorable to look at, and genuinely delicious to eat. The combination of buttery crust, creamy pumpkin cheesecake, and flaky puff pastry bandages is something special—the kind of treat that makes people smile before they even take a bite.
I love that this recipe doesn’t require any special decorating skills. You don’t need to be a pastry artist to make these look good. The puff pastry strips do all the work for you, creating that mummy effect with minimal effort. And the candy eyes? They’re pure magic. Every time I serve these, someone asks how I got the eyes to stay on, and I get to share the simple trick.
Whether you’re making these for a Halloween party, a fall gathering, or just because you want something spooky and sweet, I think you’ll love them as much as I do. Feel free to customize the filling, try different variations, or even use a different shaped pan. If you’re looking for more fall-inspired desserts, you might also enjoy this creamy one-pot marry me chicken for a savory option that pairs beautifully with seasonal flavors.
I’d love to hear how yours turn out! Drop a comment below and let me know if you tried any variations, or share a photo of your mummy bars. Don’t forget to pin this recipe for later and share it with your fellow Halloween enthusiasts. Happy baking, and may your mummies be perfectly wrapped and delicious!
Frequently Asked Questions
Can I make these mummy pumpkin cheesecake bars ahead of time?
Absolutely! In fact, I recommend it. These bars need at least 4 hours of chilling time anyway, so making them a day ahead is perfect. They’ll keep in the refrigerator for up to 5 days. Just wait to add the candy eyes until right before serving so they stay fresh and don’t get sticky.
Can I use homemade pie crust instead of puff pastry for the mummy wraps?
Yes, you can! A refrigerated pie crust works great as an alternative. It won’t puff up as much as puff pastry, but it’ll still look like mummy bandages. Roll it out thin, cut into strips, and proceed with the recipe as written. The texture will be slightly different, but the flavor is still delicious.
Why did my cheesecake filling crack?
Cracks usually happen from overmixing the eggs or overbaking. Beat the eggs in on low speed and stop as soon as they’re incorporated. Also, take the bars out when the center is still slightly jiggly—it will continue to set as it cools. If cracks do appear, don’t worry! The puff pastry bandages will cover most of them, and nobody will notice.
Can I freeze these bars?
Yes, they freeze beautifully! Wrap individual bars tightly in plastic wrap, then place them in a freezer-safe bag or container. They’ll keep for up to 3 months. Thaw in the refrigerator overnight before serving. Add the candy eyes after thawing to keep them looking their best.
How do I get clean slices without the cheesecake sticking to the knife?
Use a sharp knife and run it under hot water before each cut. Dry the knife with a clean towel, then make your cut. Wipe the blade clean between slices. This method gives you those beautiful, Instagram-worthy edges. Chilling the bars thoroughly before slicing also helps tremendously.
Pin This Recipe!
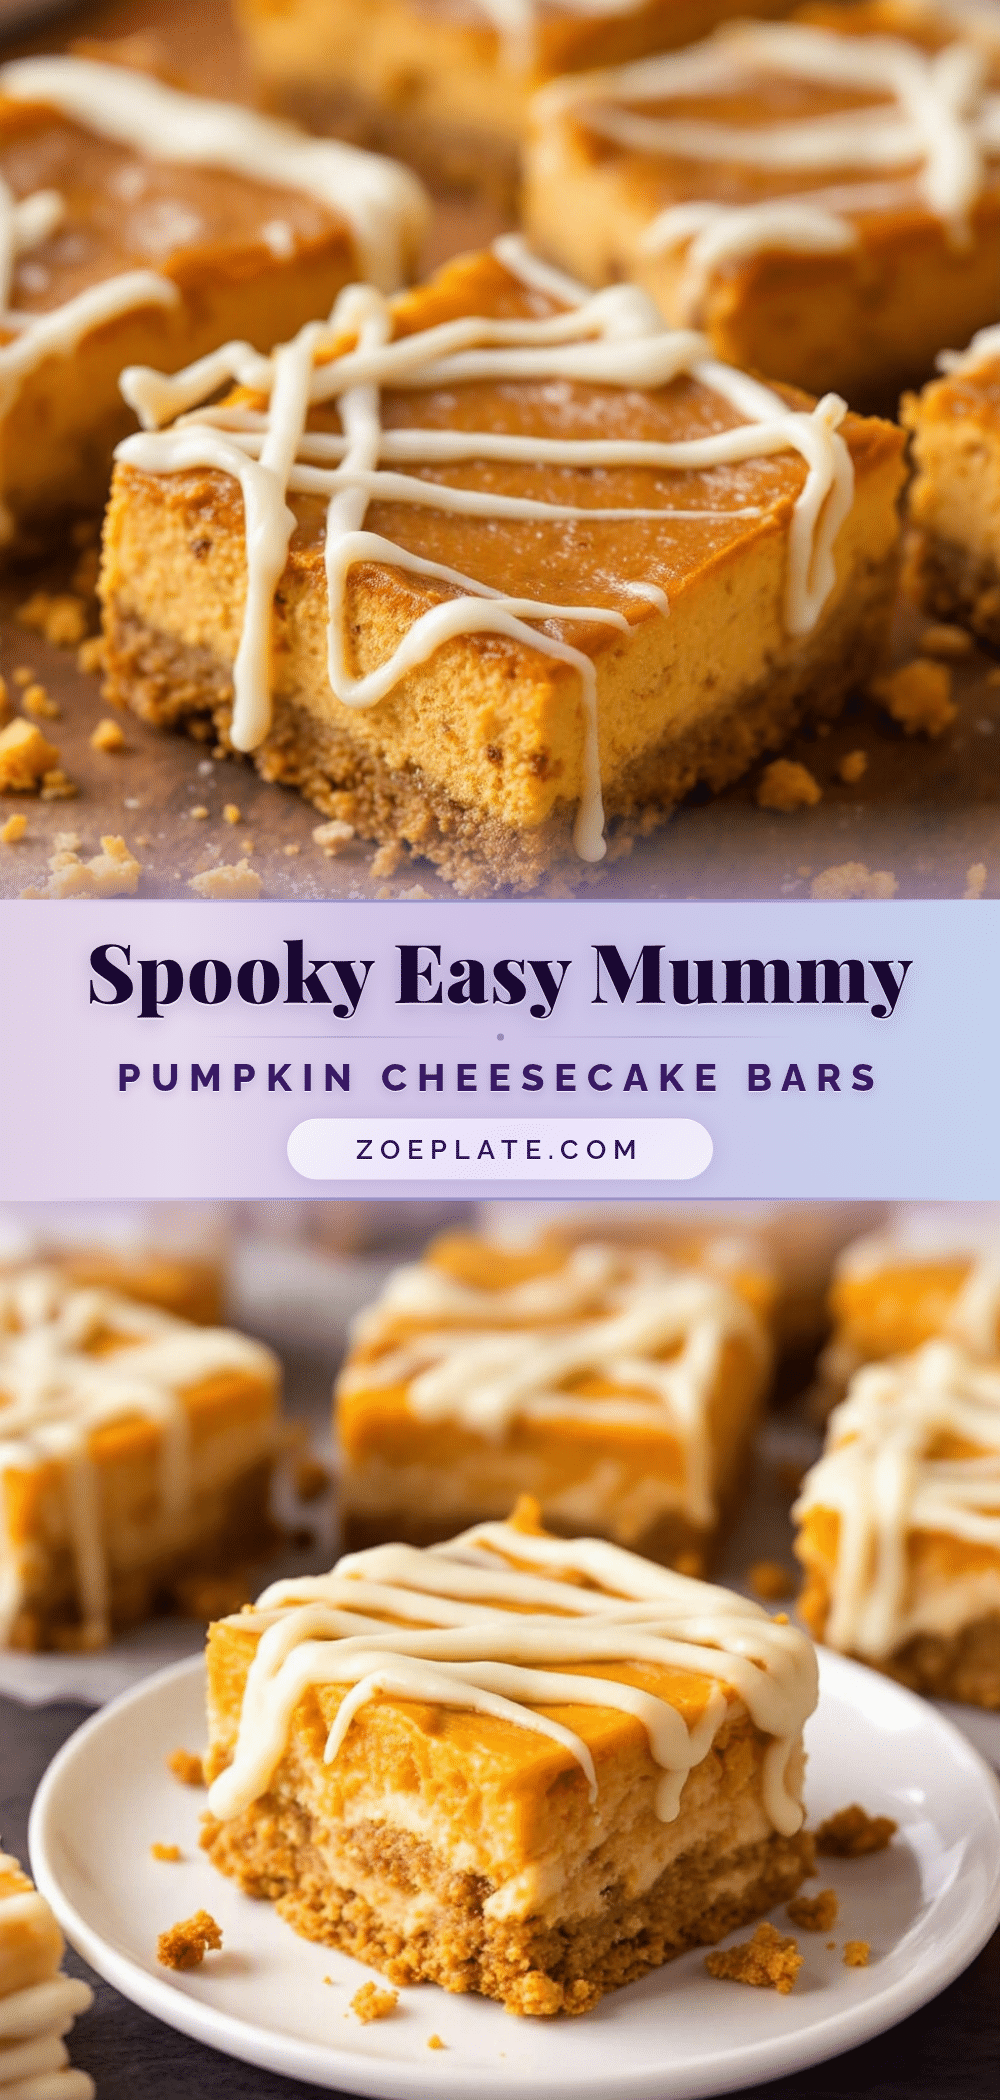
Easy Mummy Pumpkin Cheesecake Bars: A Spooky Treat
These easy mummy pumpkin cheesecake bars are a spooky and delicious Halloween dessert. They feature a buttery crust, creamy pumpkin cheesecake filling, and puff pastry bandages with candy eyes, perfect for parties and gatherings.
- Prep Time: 45 minutes
- Cook Time: 30 minutes
- Total Time: 1 hour 15 minutes (plus chilling time)
- Yield: 9 servings 1x
- Category: Dessert
- Cuisine: American
Ingredients
- 1 ½ cups all-purpose flour
- ½ cup unsalted butter, cold and cut into small cubes
- ¼ cup granulated sugar
- ¼ teaspoon salt
- 3–4 tablespoons ice water
- 16 ounces cream cheese, softened to room temperature
- ¾ cup granulated sugar
- 1 cup canned pumpkin puree (not pumpkin pie filling)
- 2 large eggs, room temperature
- 1 teaspoon vanilla extract
- 1 teaspoon pumpkin pie spice (or ½ teaspoon cinnamon + ¼ teaspoon each nutmeg, ginger, and cloves)
- ¼ teaspoon salt
- 1 sheet frozen puff pastry, thawed but still cold
- 1 large egg, beaten with 1 tablespoon water (for egg wash)
- Candy eyes (about 24-30 eyes)
- Optional: 2 tablespoons powdered sugar for dusting
Instructions
- Make the crust: In a medium bowl, whisk together flour, sugar, and salt. Add cold butter cubes and use a pastry cutter or fingertips to work butter into flour until mixture resembles coarse crumbs with some pea-sized butter pieces. Add ice water one tablespoon at a time, mixing with a fork until dough just comes together. Form into a disk, wrap in plastic wrap, and refrigerate for at least 30 minutes.
- Blind bake the crust: Preheat oven to 350°F (175°C). Line a 9×9 inch baking pan with parchment paper, leaving overhang. Roll chilled dough on a lightly floured surface to ¼-inch thickness. Press into bottom of prepared pan. Prick crust all over with a fork. Bake for 15-18 minutes until lightly golden. Cool completely on a wire rack.
- Make the pumpkin cheesecake filling: In a large bowl, beat softened cream cheese with an electric mixer on medium speed until smooth, about 2 minutes. Scrape down sides. Add sugar and beat for another minute until fluffy. Add pumpkin puree, vanilla, pumpkin pie spice, and salt; beat until well combined. Add eggs one at a time, beating on low speed after each addition just until incorporated. Do not overmix.
- Assemble the bars: Pour filling over cooled crust and spread evenly. Tap pan gently on counter to release air bubbles. On a lightly floured surface, roll out thawed puff pastry to about ⅛-inch thickness. Cut into strips about ½-inch wide and 6-8 inches long. Lay strips across filling in a crisscross pattern, leaving small gaps. Leave about 1 inch of space on one end for the eyes.
- Bake the bars: Brush puff pastry strips lightly with egg wash. Bake at 350°F (175°C) for 30-35 minutes, until cheesecake filling is set around edges but still slightly jiggly in center and pastry is puffed and golden. If pastry browns too quickly, tent loosely with foil for last 10 minutes. Cool completely in pan on wire rack (about 2 hours), then refrigerate for at least 4 hours, preferably overnight.
- Add eyes and serve: Once bars are fully chilled and set, use parchment overhang to lift out of pan. Place on cutting board. Press candy eyes gently into exposed cheesecake filling on one end of each bar. Slice into 9 or 12 bars using a sharp knife, wiping blade clean between cuts. Dust with powdered sugar right before serving if desired.
Notes
Don’t skip blind baking the crust to prevent sogginess. Use room temperature ingredients for a smooth filling. Chill bars thoroughly before slicing for clean edges. For gluten-free, use gluten-free flour blend and gluten-free puff pastry. For dairy-free, use dairy-free cream cheese and vegan butter. Bars can be stored in refrigerator for up to 5 days or frozen for up to 3 months (add candy eyes after thawing).
Nutrition
- Serving Size: 1 bar
- Calories: 385
- Sugar: 22
- Sodium: 310
- Fat: 24
- Saturated Fat: 14
- Carbohydrates: 38
- Fiber: 2
- Protein: 6
Keywords: pumpkin cheesecake bars, mummy dessert, Halloween dessert, pumpkin bars, cheesecake bars, easy Halloween treat


