I burned my first batch of pumpkin seeds into ash before I finally figured out why they kept sticking to the pan. It was October, and I was staring at a hollowed-out pumpkin that cost me four dollars at the grocery store. I didn’t have a pie to make, and I certainly didn’t have the energy to carve anything intricate. So, I just scooped out the guts and decided to salvage the seeds. I tossed them in oil, sprinkled on some cinnamon sugar, and popped them into the oven at 400 degrees because that’s what I usually do for roasted vegetables.
They were gone in ten minutes. Not eaten, but burned. I pulled out a black, smoking mess that smelled like regret and charred sugar. I scraped them into the trash and told myself I’d never bother with pumpkin seeds again. They’re too much work, I thought. Just buy the pre-packaged kind at the store. But then, three days later, I saw those same seeds in my head. I remembered the faint crunch I *might* have achieved if I hadn’t rushed them.
I tried again the next day. This time, I washed them thoroughly. I spent twenty minutes picking out the stringy bits because I hate when they get stuck in my teeth. I dried them with paper towels until they were almost dusty. I lowered the heat to 300 degrees and set a timer. I sat there and watched them, stirring every five minutes. It felt like babysitting, but I stayed. When they finally came out, they were golden, crunchy, and coated in a delicate layer of cinnamon sugar. They weren’t burnt. They were actually good.
That moment changed how I look at leftovers. It’s not about the pumpkin itself anymore. It’s about not wasting anything. These crispy baked cinnamon sugar pumpkin seeds are the kind of snack that makes you feel clever for using what you already have. They are sweet, salty, and totally addictive. I keep a bag in my pantry now, even when I don’t have pumpkins. You can use store-bought seeds if you want, but there is something special about making them from scratch. It’s a small thing, but it tastes like a win.
Why You’ll Love This Recipe
Let’s face it, most snack recipes promise the world and deliver a soggy disappointment. This recipe is different because it actually works. I’ve tested this method more times than I care to admit, and the difference between a chewy, sad seed and a truly crispy one is all about prep. You know that feeling when you’re trying to eat healthy, but you just want something crunchy? This hits that spot perfectly. It’s not just a snack; it’s a texture triumph.
Here is why this recipe stays in my regular rotation:
* **Quick & Easy**: Once you get the seeds prepped, they are hands-off in the oven. You get about 15 minutes of your life back while they roast. It is perfect for busy weeknights or when you need a distraction while cooking dinner.
* **Simple Ingredients**: You likely already have everything in your kitchen. Pumpkin seeds, butter, brown sugar, cinnamon, and a pinch of salt. No fancy grocery trips needed. It uses pantry staples that you probably have sitting around.
* **Perfect for Movie Nights**: These are the ultimate finger food. They are portable, not messy, and they don’t leave orange dust on your hands like some chips do. Great for cozy dinners or watching a fall film.
* **Crowd-Pleaser**: Kids usually hate eating seeds because they spit them out. But these? They are so flavorful that kids eat them without realizing they are getting a tiny bit of nutrition. Adults love them too, especially with a glass of milk or tea.
* **Unbelievably Delicious**: The texture and flavor combo is next-level comfort food. The sugar caramelizes slightly in the butter, creating little crispy shards that stick to the seed. It’s sweet, but the salt keeps it from being cloying.
* **Zero Waste Cooking**: This isn’t just another snack recipe. It’s your best version of zero-waste cooking. Instead of throwing away the “waste” from a pumpkin, you turn it into the best part of the meal. It feels sustainable and smart.
This recipe isn’t just good—it is the kind that makes you close your eyes after the first bite. It’s comfort food reimagined—healthier, faster, but with the same soul-soothing satisfaction. It’s perfect for impressing guests without stress, or turning a simple meal into something memorable. If you like my easy pumpkin dump cake, you will definitely love these seeds. They share that same warm, spiced vibe but in a crunchy, savory-sweet package.
What Ingredients You Will Need
This recipe uses simple, wholesome ingredients to deliver bold flavor and satisfying texture without the fuss. The key here is quality. Since there are only a few components, each one has to pull its weight. You don’t need exotic spices or expensive oils. Just good basics.
Here is what you need to get started:
* **Fresh Pumpkin Seeds**: About 1 cup of raw seeds, cleaned and dried. If you are using seeds from a store-bought pumpkin, they might be smaller. That is fine. You can also use dry roasted pumpkin seeds (pepitas) from the store to save time, but fresh ones have a better nutty flavor.
* **Unsalted Butter**: 2 tablespoons. I use butter because it adds a rich, creamy mouthfeel that oil just can’t match. It helps the sugar stick and brown nicely. Melt it before you add it so it coats everything evenly.
* **Brown Sugar**: 2 tablespoons. Light or dark brown sugar both work. Brown sugar has molasses in it, which gives it a deeper flavor and helps with that caramelized crunch. Granulated white sugar works too, but it won’t get as chewy or crisp in the same way.
* **Ground Cinnamon**: 1 teaspoon. Don’t skimp on this. If your cinnamon is old and dusty, it won’t taste like much. Use a fresh jar. It provides the warm, spicy backbone of the snack.
* **Kosher Salt**: 1/2 teaspoon. Salt is crucial. It balances the sweetness and brings out the natural nuttiness of the seeds. If you use table salt, reduce the amount slightly because it is denser.
* **Water**: For washing. Just enough to rinse the seeds thoroughly.
I recommend using a high-quality butter if you can find it, like Kerrygold or a local dairy brand. The flavor difference is noticeable in simple recipes like this. Also, look for seeds that are plump and green. If they are shriveled or yellowish, they might not roast up as crunchy. In the summer, you might find fresh zucchini seeds, but pumpkin seeds are denser and hold up better to roasting. If you are allergic to nuts, these are a great alternative to almonds or cashews for snacking. They are naturally nut-free and gluten-free.
Equipment Needed
You don’t need a lot of fancy gear for this. Most of what you need is already in your kitchen drawer.
* **Large Bowl**: You need a bowl big enough to toss the seeds in the butter and sugar mixture. A ceramic or glass bowl works best because it is wide and shallow.
* **Paper Towels**: This is the most important tool. You need plenty of paper towels to dry the seeds. Wet seeds will steam instead of roast.
* **Baking Sheet**: A standard rimmed baking sheet is fine. I prefer one with a light-colored interior because dark pans can burn the sugar too quickly.
* **Parchment Paper**: Lining your baking sheet saves so much cleanup. The sugar melts and hardens, and it will stick to the pan if you don’t use parchment.
* **Spatula**: A silicone spatula is good for stirring the seeds in the bowl and scraping them off the parchment paper when they are done.
If you don’t have parchment paper, you can use a silicone baking mat, but it’s not necessary. Avoid non-stick baking sheets if you can, as the sugar might still stick a bit. A standard metal sheet gives the best heat distribution. I’ve tried using a glass dish, but the edges get too hot and burn the seeds. Stick to a flat sheet. Also, make sure your butter is fully melted but not hot. You don’t want to cook the seeds before they even hit the oven.
Preparation Method
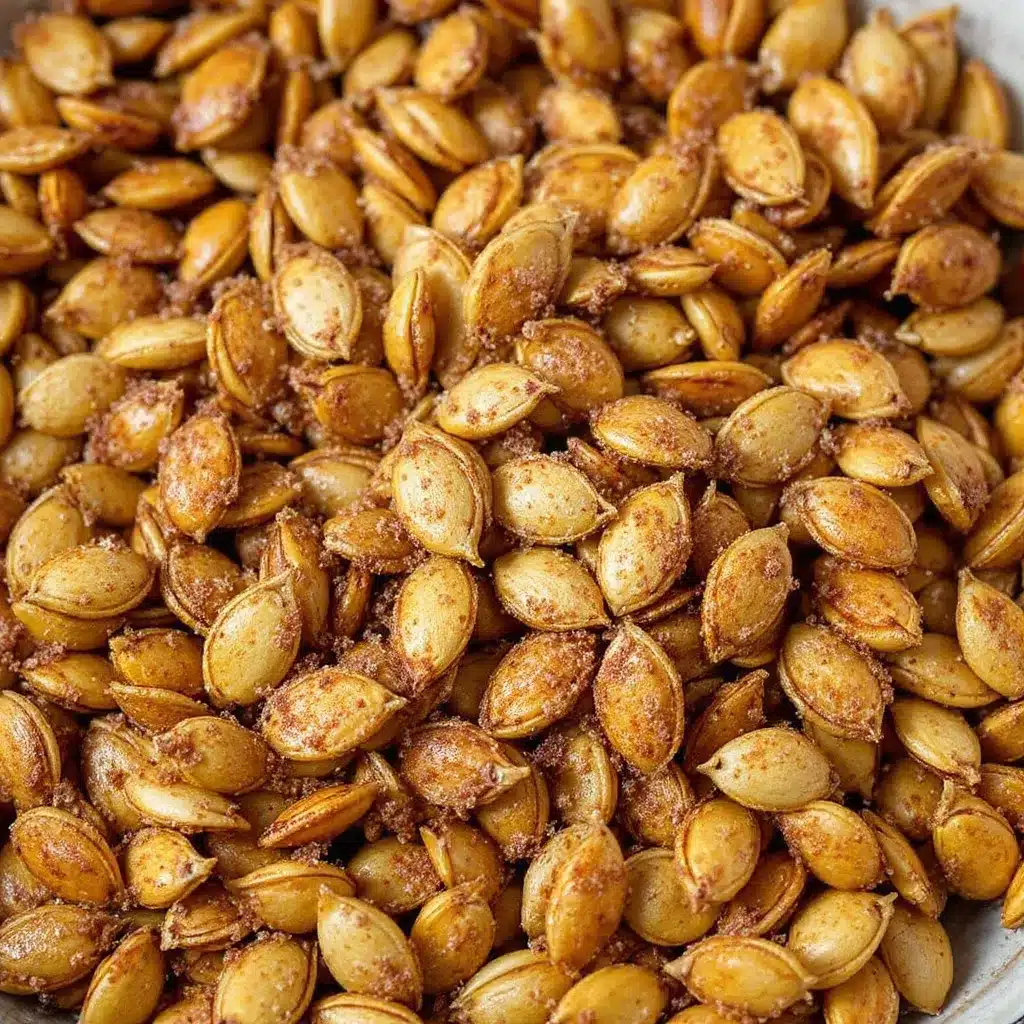
Let’s break this down into clear steps. It’s easier than you think, but the drying part is where people rush. Don’t rush it.
1. **Clean the Seeds**: Scoop the seeds out of the pumpkin into a large bowl. Add cold water and swirl them around. The seeds will sink, and the stringy pulp will float. Skim off the pulp with your hands or a slotted spoon. Repeat this until the water is mostly clear. This takes about 3-4 minutes.
2. **Dry Thoroughly**: Spread the wet seeds out on a layer of paper towels. Pat them dry with another layer of paper towels. You want them to look matte, not shiny. If they are still wet, they won’t crisp up. Let them sit for 10-15 minutes to air dry a bit more. This step is non-negotiable if you want crunch.
3. **Preheat the Oven**: Set your oven to 300 degrees Fahrenheit (150 degrees Celsius). This low temperature is key. High heat burns the sugar before the seeds are cooked through.
4. **Melt the Butter**: Melt the 2 tablespoons of butter in the microwave or a small saucepan. It should be liquid but not boiling.
5. **Coat the Seeds**: Put the dried seeds in your large bowl. Pour the melted butter over them. Toss well with a spoon or your hands until every seed is coated. You want a thin, even layer of butter.
6. **Add Sugar and Spice**: Sprinkle the brown sugar, cinnamon, and salt over the buttered seeds. Toss again. You want the sugar to adhere to the butter. If there are clumps of sugar, break them up with your fingers.
7. **Spread on Pan**: Line your baking sheet with parchment paper. Spread the seeds out in a single layer. Do not overcrowd the pan. If they are piled on top of each other, they will steam and get chewy.
8. **Roast**: Place the pan in the oven. Roast for 20-25 minutes.
9. **Stir Halfway**: After 10 minutes, pull the pan out and stir the seeds. This ensures even browning. The sugar will start to melt and bubble.
10. **Check for Doneness**: At 20 minutes, check the seeds. They should be golden brown. The sugar will look slightly crystallized but hard. If they look pale, give them 2-3 more minutes. Watch them closely because they go from done to burnt very fast.
11. **Cool**: Remove from the oven. Let them cool completely on the pan. They will continue to crisp up as they cool. Do not eat them hot, or they will be soft.
Cooking Tips & Techniques
I learned this the hard way: wet seeds are the enemy of crunch. When I first started, I thought I could skip the drying step. I was wrong. The water turns to steam, and the seeds become tough. If you are in a hurry, you can spread them on a baking sheet and put them in the oven on the “warm” setting for 10 minutes to dry them out before adding the butter. It’s a hack that works.
Another tip is about the sugar. Brown sugar has moisture. If your kitchen is humid, the sugar might not crisp up as much. In that case, add a tiny bit more cinnamon or salt to balance the chewiness. Also, stir the seeds often. I know I said stir once, but if you have time, stir them every 5 minutes. It prevents hot spots.
Don’t be afraid of the smell. It will smell like a bakery in your kitchen. That is a good sign. If you smell burning, take them out immediately. You can always put them back in for a minute, but you can’t unburn them.
Timing is everything. Every oven is different. Mine runs hot, so I watch them like a hawk. If your oven runs cool, you might need an extra 5 minutes. The seeds are done when they are a light golden brown, not dark brown. The sugar will harden as it cools, so they might look a bit soft when they come out of the oven. That is normal.
Variations & Adaptations
This recipe is a canvas. You can change it up based on what you have or what you like.
* **Spicy Kick**: Add a pinch of cayenne pepper or chili powder along with the cinnamon. It creates a sweet-heat combo that is amazing. It pairs well with cold beer.
* **Savory Option**: Skip the sugar and cinnamon entirely. Use olive oil, garlic powder, onion powder, and parmesan cheese. Roast them the same way. They become a savory crouton-like snack.
* **Maple Glaze**: Swap the brown sugar for pure maple syrup. It gives a more authentic fall flavor. Be careful, as maple syrup burns faster than sugar. Lower the heat to 275 degrees if you use maple syrup.
* **Vanilla Bean**: Add a few drops of vanilla extract to the melted butter. It adds a subtle floral note that complements the cinnamon.
* **Nut-Free**: This recipe is naturally nut-free, making it safe for school snacks or nut-free environments.
I once tried adding chopped walnuts to the mix. It was okay, but the nuts got bitter before the seeds were done. Stick to the seeds for best results. If you want nuts, roast them separately.
Serving & Storage Suggestions
These seeds are best served at room temperature. They are crunchy and don’t lose their texture if you leave them out.
* **Presentation**: Serve them in a small bowl on a coffee table. They look rustic and inviting.
* **Pairings**: They go great with a cup of hot tea or black coffee. The sweetness cuts through the bitterness of the coffee. They also pair well with the cozy crockpot butternut squash soup if you want a full pumpkin-themed meal.
* **Storage**: Let them cool completely before storing. Put them in an airtight container. They will stay crisp for up to one week at room temperature. If your kitchen is humid, they might get soft after a few days.
* **Reheating**: If they get soft, spread them on a baking sheet and put them in the oven at 300 degrees for 5 minutes. They will crisp right back up.
* **Freezing**: You can freeze them for up to three months. Thaw them at room temperature. They might lose a tiny bit of crunch, but they are still good.
The flavors develop over time. The cinnamon mellows out, and the sugar hardens. They taste better on day two than day one, in my opinion.
Nutritional Information & Benefits
These seeds are a nutritional powerhouse. Pumpkin seeds are rich in magnesium, zinc, and protein. They are a great source of healthy fats.
* **Calories**: Approximately 150 calories per 1/4 cup serving.
* **Protein**: About 7 grams per serving. This helps keep you full.
* **Healthy Fats**: They contain omega-3 and omega-6 fatty acids, which are good for heart health.
* **Dietary Notes**: This recipe is gluten-free and dairy-free if you use oil instead of butter. It is also nut-free.
* **Allergens**: None, unless you are allergic to pumpkin seeds, which is rare.
I eat these as a snack because they don’t spike my blood sugar like chips do. The fiber and protein keep me satisfied. It’s a guilt-free treat that actually fuels your body.
Conclusion
Making crispy baked cinnamon sugar pumpkin seeds is a small project with a big reward. It turns waste into treasure. It teaches you to slow down and pay attention. You don’t need to be a chef to make these. You just need patience and a baking sheet.
I love this recipe because it connects me to the season. It smells like autumn. It feels like home. I hope you try it and find your own way to make it. Add your own spices. Change the sugar. Make it yours.
If you make this, let me know in the comments. I love hearing how your snacks turn out. Share your variations with me. And if you need more easy fall recipes, check out my creamy cinnamon apple crisp overnight oats. They are perfect for breakfast. Enjoy your crunch!
FAQs
Can I use store-bought pumpkin seeds?
Yes. You can use dry roasted pumpkin seeds (pepitas) from the store. You will still need to melt the butter and mix in the sugar and spices. Just toss them gently so they don’t break. The cooking time will be shorter, about 10-15 minutes.
Why are my seeds chewy?
They are probably still wet. Make sure you dry them thoroughly with paper towels before adding the butter. Also, check your oven temperature. If it’s too high, the outside burns before the inside dries out. 300 degrees is the sweet spot.
Can I make these ahead of time?
Yes. They keep well in an airtight container for up to a week. If they lose their crunch, pop them in the oven for a few minutes to refresh them.
Do I have to use brown sugar?
No. You can use granulated white sugar or even coconut sugar. Brown sugar adds a deeper flavor and helps with caramelization, but white sugar works fine if you want a lighter taste.
Are these seeds healthy?
Yes, in moderation. Pumpkin seeds are high in protein, healthy fats, and minerals. The added sugar and butter make them a treat, but they are far better for you than chips or candy. They provide sustained energy.
Pin This Recipe!
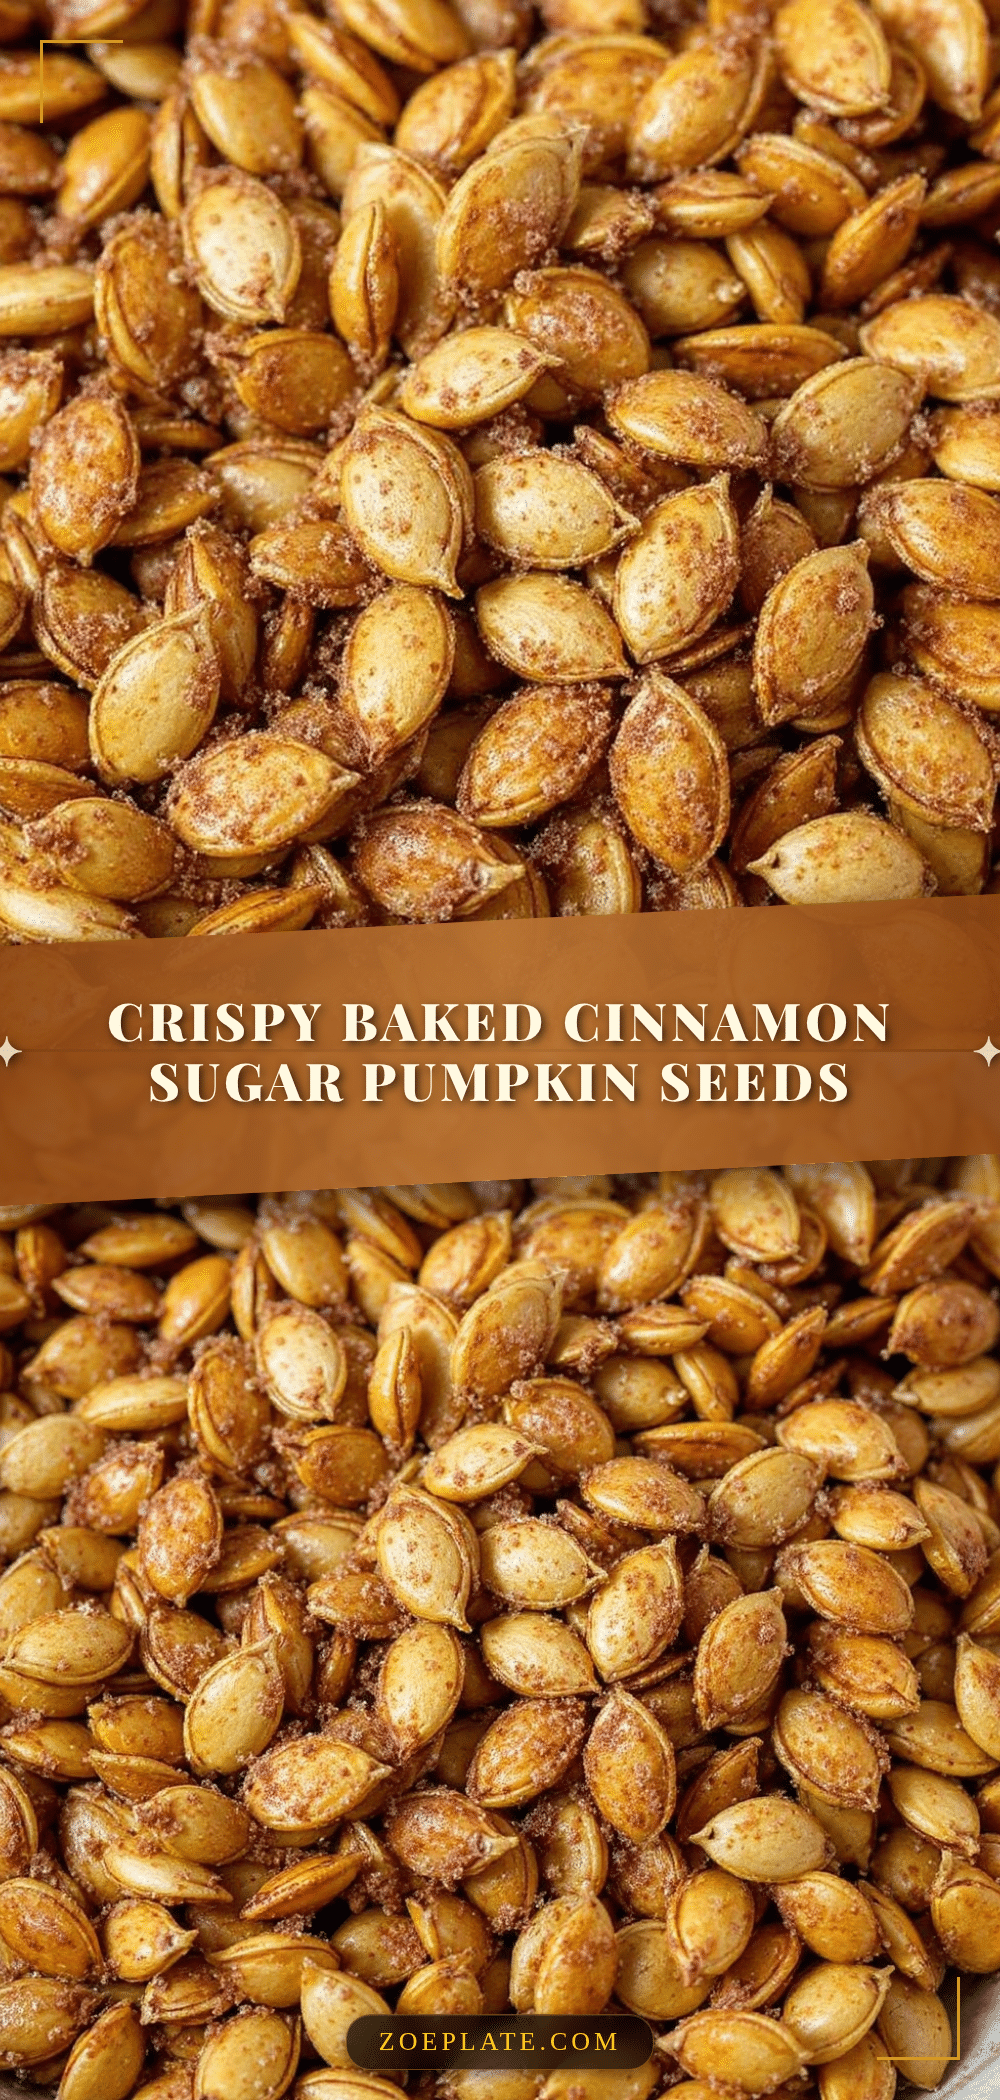
Crispy Baked Cinnamon Sugar Pumpkin Seeds: Best Snack
These crispy baked cinnamon sugar pumpkin seeds are a sweet, salty, and addictive snack made from scratch. By thoroughly drying the seeds and roasting them at a low temperature, you achieve a perfect crunch without burning the sugar.
- Prep Time: 20 minutes
- Cook Time: 25 minutes
- Total Time: 45 minutes
- Yield: 4 servings 1x
- Category: Snack
- Cuisine: American
Ingredients
- 1 cup raw pumpkin seeds, cleaned and dried
- 2 tablespoons unsalted butter, melted
- 2 tablespoons brown sugar
- 1 teaspoon ground cinnamon
- 1/2 teaspoon kosher salt
- Water for washing
Instructions
- Clean the seeds: Scoop seeds from the pumpkin into a large bowl. Add cold water and swirl to separate seeds from pulp. Skim off floating pulp and repeat until water is clear.
- Dry thoroughly: Spread wet seeds on paper towels and pat dry with more towels until they look matte, not shiny. Let them air dry for 10-15 minutes to ensure maximum crunch.
- Preheat oven: Set oven to 300°F (150°C).
- Melt butter: Melt the butter in the microwave or saucepan until liquid but not boiling.
- Coat seeds: Place dried seeds in a large bowl and pour melted butter over them. Toss until every seed is evenly coated.
- Add seasoning: Sprinkle brown sugar, cinnamon, and salt over the buttered seeds. Toss again to adhere the sugar, breaking up any clumps.
- Spread on pan: Line a baking sheet with parchment paper. Spread seeds in a single layer, ensuring they are not overcrowded.
- Roast: Bake for 20-25 minutes.
- Stir halfway: After 10 minutes, remove pan and stir seeds to ensure even browning.
- Check doneness: At 20 minutes, check for golden brown color. If pale, bake for 2-3 more minutes. Watch closely to prevent burning.
- Cool: Remove from oven and let cool completely on the pan. Seeds will crisp up as they cool.
Notes
Ensure seeds are completely dry before roasting to achieve crispiness. Stirring every 5 minutes helps prevent hot spots. Seeds continue to crisp as they cool, so do not eat them hot. Store in an airtight container for up to one week.
Nutrition
- Serving Size: 1/4 cup
- Calories: 150
- Sugar: 14
- Sodium: 180
- Fat: 8
- Saturated Fat: 4
- Carbohydrates: 18
- Fiber: 2
- Protein: 7
Keywords: pumpkin seeds, cinnamon sugar, baked snacks, healthy snacks, zero waste, gluten-free, nut-free, fall recipes, pepitas


