I assumed making meringue would be a delicate, high-stakes balancing act involving expensive thermometers and trembling hands. It took about twenty minutes of watching my first batch turn into sad, soupy puddles for that confidence to completely evaporate. Honestly, I just wanted cute ghosts for the Halloween party without spending hours at the oven, so I grabbed three ingredients and prayed to the baking gods. The result was a cloud-like crispiness that shattered into tiny, sweet pieces when you bit into them. You know how some treats are too airy to really taste? These actually have a flavor, which is surprising for something made mostly of air.
The secret wasn’t in fancy techniques, but in patience. Let’s face it, we all want quick wins in the kitchen, especially when holiday decorations are half-finished and the pumpkin spice latte is calling your name. I learned that if you can wait out the cooling process, the texture transforms from fragile to delightfully crunchy. It’s one of those recipes that feels like magic until you try it yourself. Then you realize it’s just chemistry, properly executed.
I still remember the look on my nephew’s face when he picked one up, thinking it was a marshmallow. The crunch made him jump, and then the chocolate chip eyes melted slightly in his mouth. That’s the moment I knew this was going to become a staple. It’s not just a cookie; it’s a tiny, edible sculpture that requires zero artistic talent to make.
There’s something deeply satisfying about turning simple pantry staples into something that looks like it came from a fancy French patisserie. But let’s be real, this is way easier than folding egg whites. And unlike pumpkin dump cake, which is great but messy, these sit neatly on a plate without demanding attention. They are the quiet, spooky guests at your dessert table that everyone ends up fighting over.
Why You’ll Love This Recipe
Quick & Easy
This recipe comes together in under 30 minutes of active time, making it perfect for busy weeknights or last-minute Halloween preparations. You don’t need to thaw anything or chop vegetables. Just whisk, pipe, and bake. It is the ultimate low-effort, high-reward dessert for anyone who wants to celebrate the season without spending the entire day in the kitchen.
Simple Ingredients
No fancy grocery trips are needed here. You likely already have egg whites, sugar, and chocolate chips in your fridge or pantry. This simplicity is what makes it so approachable for beginner bakers. If you can boil water, you can make these. There are no obscure flours or hard-to-find extracts that will leave you staring at an empty aisle.
Perfect for Halloween Parties
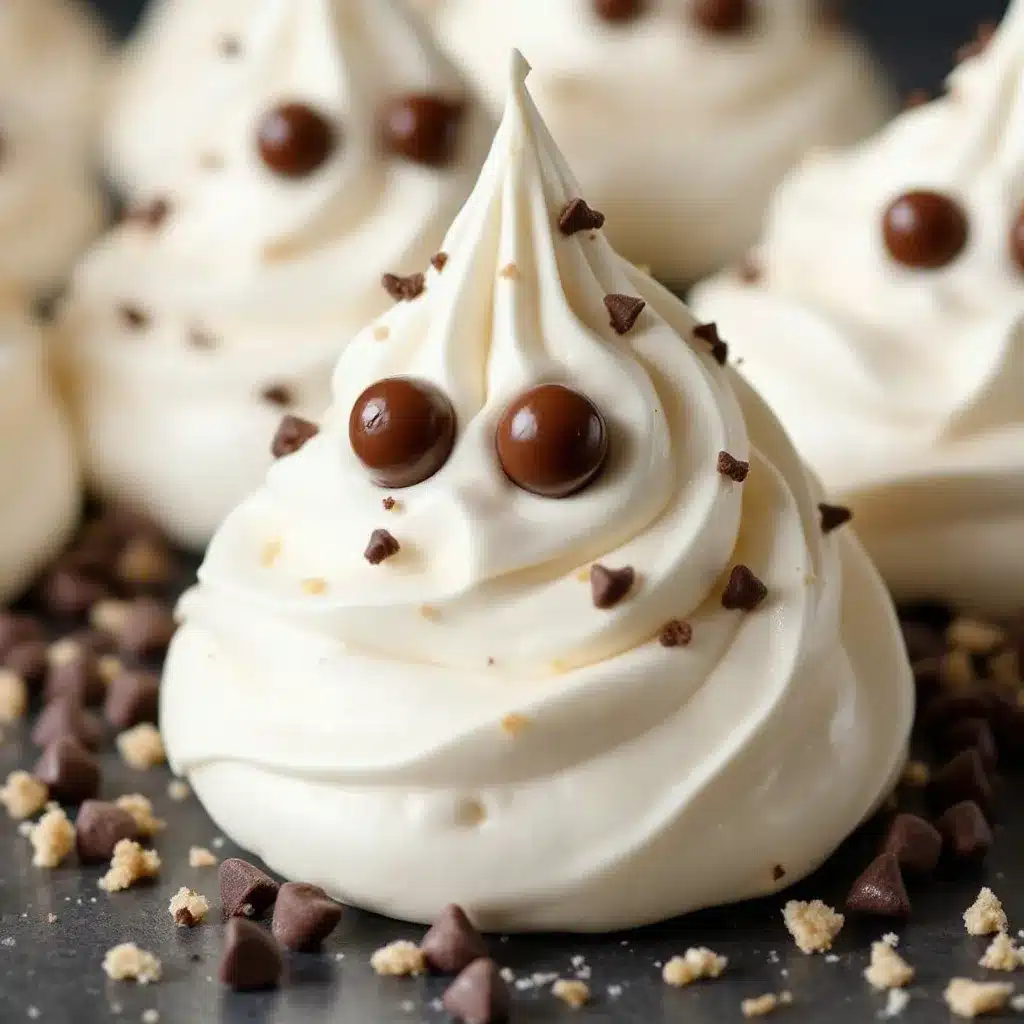
These ghostly meringues are great for potlucks, classroom treats, or cozy dinner parties. They have a festive shape that fits the spooky theme perfectly without being overly childish. Adults appreciate the sophisticated crunch, while kids are drawn to the cute faces. It’s a crowd-pleaser that bridges the generation gap at holiday gatherings.
Crowd-Pleaser
They always get rave reviews from kids and adults alike. The visual appeal is immediate, and the taste is universally liked because it is essentially just sweet, airy vanilla. It’s the kind of treat that disappears before you can take a photo of it. People will ask for the recipe within minutes of tasting one.
Unbelievably Delicious
The texture and flavor combo is next-level comfort food. Unlike heavy cookies, these are light and dissolve on your tongue. It’s not just good—it is the kind of treat that makes you close your eyes after the first bite because the contrast between the crisp shell and the soft interior is so pleasant. It’s comfort food reimagined—healthier, faster, but with the same soul-soothing satisfaction.
What Makes It Different
Whether it is the specific technique of letting them cool in the turned-off oven, or the creative twist of using chocolate chips for eyes, this isn’t just another version—it’s your best version. Many meringue recipes call for gel food coloring, which can taste bitter or metallic. By sticking to natural white and using chocolate for decoration, you keep the flavor pure. It connects emotionally by tapping into the why: it’s perfect for impressing guests without stress, or turning a simple meal into something memorable.
What Ingredients You Will Need
This recipe uses simple, wholesome ingredients to deliver bold flavor and satisfying texture without the fuss. The beauty of these crispy ghost meringue cookies lies in their minimalism. You don’t need a dozen different spices or complex flavorings. The quality of your eggs and sugar will dictate the final texture, so picking the right items matters more than you might think.
For the Meringue Base
- Egg whites – Large eggs, separated, room temperature (about 3 large eggs). Room temperature whites whip up faster and create a more stable foam. I usually separate them cold and let them sit out while I prep other things.
- Granulated sugar – 3/4 cup (150g). Fine granules dissolve better into the egg whites. Coarse sugars can leave gritty spots in your meringue.
- Cream of tartar – 1/4 teaspoon. This acidic powder stabilizes the egg whites, preventing them from collapsing. It’s a cheap pantry staple that makes a huge difference.
- Vanilla extract – 1/2 teaspoon. Pure vanilla adds depth. Avoid imitation vanilla if you can help it, as the alcohol taste can be sharp in such a simple recipe.
- Pinch of salt – Just a tiny pinch to balance the sweetness. It’s easy to forget, but it makes the vanilla flavor pop.
For the Ghost Eyes
- Mini chocolate chips – Dark or milk chocolate, mini size. Mini chips are perfect because they are the right size for eyes and don’t require chopping. I recommend Guittard or Toll House for consistent melting behavior.
- White chocolate chips (optional) – For a different look, you can use white chocolate for the eyes, but dark or milk chocolate provides better contrast against the white meringue.
Substitution Notes
If you are allergic to eggs, this recipe is not suitable for you as meringue is entirely egg-based. However, if you need a dairy-free option, simply ensure your chocolate chips are dairy-free certified. You can also swap granulated sugar for caster sugar (superfine sugar) if you have it, as it dissolves even quicker. For a nut-free environment, which these naturally are, just double-check your chocolate chip packaging for cross-contamination warnings if allergies are severe.
Equipment Needed
You don’t need a lot of fancy gear to make these. A large mixing bowl is essential. Glass or stainless steel works best because they are easy to clean and don’t retain grease. Plastic bowls can sometimes hold onto residual oils that might prevent the egg whites from whipping properly, so I always give mine a good wipe with vinegar just to be safe.
A hand mixer or stand mixer is highly recommended. Whipping egg whites by hand takes a lot of elbow grease and time. A hand mixer will get you to stiff peaks in about 5 minutes, while a stand mixer might take 7-10 minutes. Both work fine, but the machine saves your arms.
You will also need a baking sheet lined with parchment paper or a silicone baking mat. Parchment paper is cheaper and easier to replace if it gets messy. Silicone mats are great for reuse but can sometimes cause meringues to spread slightly more, so keep an eye on your piping size.
A piping bag with a round tip (like a Wilton 1M or a simple star tip) makes shaping the ghosts much easier. If you don’t have one, you can use a zip-top bag with the corner snipped off. It’s less precise but works in a pinch.
Finally, a small paring knife or toothpick is useful for adjusting the chocolate eyes if they slide out of place while melting. Nothing is more frustrating than a lopsided ghost!
Preparation Method
Step 1: Prepare the Oven and Pan
Preheat your oven to 225°F (107°C). This low temperature is crucial. It dries out the meringues slowly without browning them too quickly. If your oven runs hot, you might need to go down to 200°F (93°C). Line a baking sheet with parchment paper. Ensure the paper is flat and smooth to prevent the meringues from sticking.
Step 2: Whip the Egg Whites
In your clean, dry bowl, beat the room temperature egg whites on medium speed until they are foamy. This takes about 1-2 minutes. You want them to look like frothy soap bubbles. Add the cream of tartar and the salt. Continue beating on medium-high speed. The whites should start to hold soft peaks. This means when you lift the beaters, the peaks curl over slightly.
Step 3: Add the Sugar Gradually
While the mixer is still running, slowly pour in the granulated sugar. I add it about one tablespoon at a time. If you dump it all in at once, the sugar might not dissolve fully, leading to a gritty texture. This process takes about 3-5 minutes. Keep beating until you reach stiff, glossy peaks. When you lift the beaters, the peaks should stand straight up without curling. The mixture should feel smooth between your fingers, not gritty. This is the most important step for texture.
Step 4: Flavor and Pipe
Add the vanilla extract and beat for another 30 seconds to incorporate. Transfer the mixture to your piping bag. If using a zip-top bag, fill it about halfway and twist the top to seal. Pipe the meringue onto the baking sheet in ghost shapes. To make a ghost, pipe a round base, then pipe a taller, rounded top. You can use your finger or a wet spatula to smooth the top into a point if you want a classic ghost shape, but rustic is fine too. Leave space between them as they don’t spread much.
Step 5: The Long Bake
Place the tray in the oven and bake for 1 hour and 15 minutes to 1 hour and 30 minutes. The meringues are done when they are dry to the touch and release easily from the parchment paper. They should not stick at all. Turn off the oven and crack the door open slightly with a wooden spoon. Let the meringues cool completely inside the oven. This gradual cooling prevents cracking. This step can take another hour.
Step 6: Add the Eyes
Once completely cool, melt the mini chocolate chips in the microwave in 15-second intervals, stirring in between. Be careful not to overheat them or they will seize. Use a toothpick to dip into the melted chocolate and place two dots on each ghost for eyes. If the chocolate hardens too fast, just warm it briefly again. Let the eyes set for 5 minutes before handling.
Cooking Tips & Techniques
One common mistake is under-whipping the egg whites. If your peaks are soft, your ghosts will collapse in the oven. They need to be stiff and glossy. If you are unsure, whip them a little longer. It’s better to over-whip slightly than under-whip, as over-whipped whites can sometimes become grainy, but you can often rescue them by folding in a tiny bit more egg white.
Another tip is to ensure your bowl is completely free of grease. Even a tiny drop of yolk or oil can ruin the whipping process. I wash my bowls with hot soapy water and then wipe them with a paper towel dipped in vinegar or lemon juice. It sounds extreme, but it guarantees success.
Timing is everything with meringues. If your kitchen is humid, the meringues might not dry out properly. On rainy days, I sometimes add an extra 15 minutes to the baking time. Humidity is the enemy of crispness. If your ghosts feel soft or sticky after cooling, they need more time in the oven.
Don’t rush the cooling process. Removing them while they are still warm can cause them to crack or become chewy instead of crisp. Patience pays off here. The longer they sit in the cooling oven, the crunchier they become.
For consistent shapes, try to pipe all your ghosts to the same size. This ensures they bake evenly. If you have some huge ghosts and some tiny ones, the small ones might burn while the large ones are still soft. Uniformity leads to uniform results.
Variations & Adaptations
Flavor Variations
You can add different extracts to change the flavor profile. Try almond extract for a marzipan-like taste, or lemon extract for a citrusy zing. Use only 1/2 teaspoon of strong extracts as they are potent. You can also add a teaspoon of cocoa powder to the sugar for chocolate meringues, though this changes the texture slightly.
Color Variations
For Halloween, you can add a drop of black or purple gel food coloring to the meringue before piping. Gel coloring is best because it doesn’t add extra liquid like liquid food coloring does. This creates spooky purple or black ghosts. Just be aware that colored meringues might brown slightly more in the oven.
Allergen Adaptations
As mentioned, these are naturally gluten-free and nut-free. For a dairy-free version, just check your chocolate chips. There are many vegan chocolate chips available now. However, there is no direct vegan substitute for egg whites that works exactly the same for meringue. Aquafaba (chickpea water) can be whipped, but the texture and taste will be different. For this specific recipe, stick to traditional eggs for the best result.
Seasonal Twists
For Christmas, use red and green food coloring and add peppermint extract. For Easter, use pastel colors and add a lemon zest twist. The base recipe is incredibly versatile. You can also dip the bottom of the ghosts in melted chocolate for a “dipped cookie” look, which adds extra crunch and flavor.
Serving & Storage Suggestions
Serve these crispy ghost meringue cookies at room temperature. They are best enjoyed within the first few days of making them. If you leave them out too long, they can absorb moisture from the air and become chewy. Store them in an airtight container at room temperature for up to one week. Place a piece of parchment paper between layers to prevent sticking.
For longer storage, you can freeze them. Place them in a freezer-safe bag with parchment between layers. They will keep for up to two months. Thaw them at room temperature before serving. Note that freezing might slightly alter the texture, making them a bit more fragile.
These cookies pair well with a cup of hot coffee or tea. The crisp texture contrasts nicely with the warmth of the beverage. They also go well with a glass of cold milk or a sweet dessert wine like Moscato.
Avoid storing them in the refrigerator, as the humidity will ruin the crispness. If you live in a humid climate, consider adding a packet of silica gel or a few pieces of dry rice to the storage container to absorb excess moisture. This is a great trick for keeping baked goods crisp.
Presentation matters for Halloween. Arrange the ghosts on a platter with some candy corn or fake spiderwebs for a festive touch. They look especially cute when stacked in a glass jar or placed on individual napkins for party favors.
Nutritional Information & Benefits
These meringues are surprisingly light in calories compared to traditional cookies. Since they are mostly air and sugar, they have a lower fat content. One ghost cookie typically contains around 20-30 calories, depending on the size. This makes them a relatively guilt-free treat for parties where portion control is a concern.
They are naturally gluten-free, making them safe for those with celiac disease or gluten sensitivity, provided your chocolate chips are certified gluten-free. They are also nut-free, which is great for schools or workplaces with strict nut policies.
However, they are high in sugar. While they don’t have the fat of butter cookies, the sugar content is significant. Enjoy them in moderation. The lack of protein and fiber means they won’t keep you full for long, so they are best as a small indulgence rather than a filling snack.
From a wellness perspective, the simplicity of the ingredients means there are no artificial preservatives or additives. It’s just egg, sugar, and vanilla. For those who prefer clean eating, this is a nice change from highly processed store-bought candies.
Conclusion
Making crispy ghost meringue cookies with chocolate chip eyes is a fun, easy, and rewarding baking project. It requires minimal effort but delivers a high-impact visual result that is perfect for Halloween. The recipe is forgiving, delicious, and adaptable to your taste preferences.
I love this recipe because it brings a sense of whimsy to the holiday season. It’s not just about eating; it’s about the joy of creating something cute and sharing it with others. Whether you are a seasoned baker or a beginner, these cookies will boost your confidence in the kitchen.
I encourage you to try this recipe and customize it with your own flavors or colors. Share your creations on social media and tag me! I love seeing how everyone interprets these spooky treats. If you make any variations, let me know in the comments below. Your feedback helps me create better content for you.
Happy baking, and have a spooky and sweet Halloween!
FAQs
Why are my meringues sticky?
Sticky meringues usually mean they weren’t baked long enough or cooled properly. Make sure to bake them until they are dry to the touch and let them cool completely in the turned-off oven. Humidity can also cause stickiness, so store them in a dry, airtight container.
Can I use egg whites from a carton?
Yes, you can use pasteurized liquid egg whites from a carton. They work well, but you may need to whip them slightly longer to reach stiff peaks. Follow the same recipe ratios, adjusting for the volume of liquid you are using.
How do I make the ghosts look more like ghosts?
To make a classic ghost shape, pipe a round base, then pipe a taller, rounded top. You can use a wet finger or spatula to smooth the top into a point. Alternatively, pipe a teardrop shape and flatten the bottom slightly. The key is to keep the top rounded and the bottom flat.
Can I fill the meringues with cream?
Yes, you can sandwich two meringues together with whipped cream or buttercream. However, this will make them soft quickly, so eat them within a day. For a crispier treat, keep them plain.
Why did my meringues crack?
Cracking can happen if the oven temperature is too high or if the meringues are removed from the oven too quickly while still warm. Ensure you are using a low temperature and letting them cool gradually in the turned-off oven with the door cracked open.
Pin This Recipe!
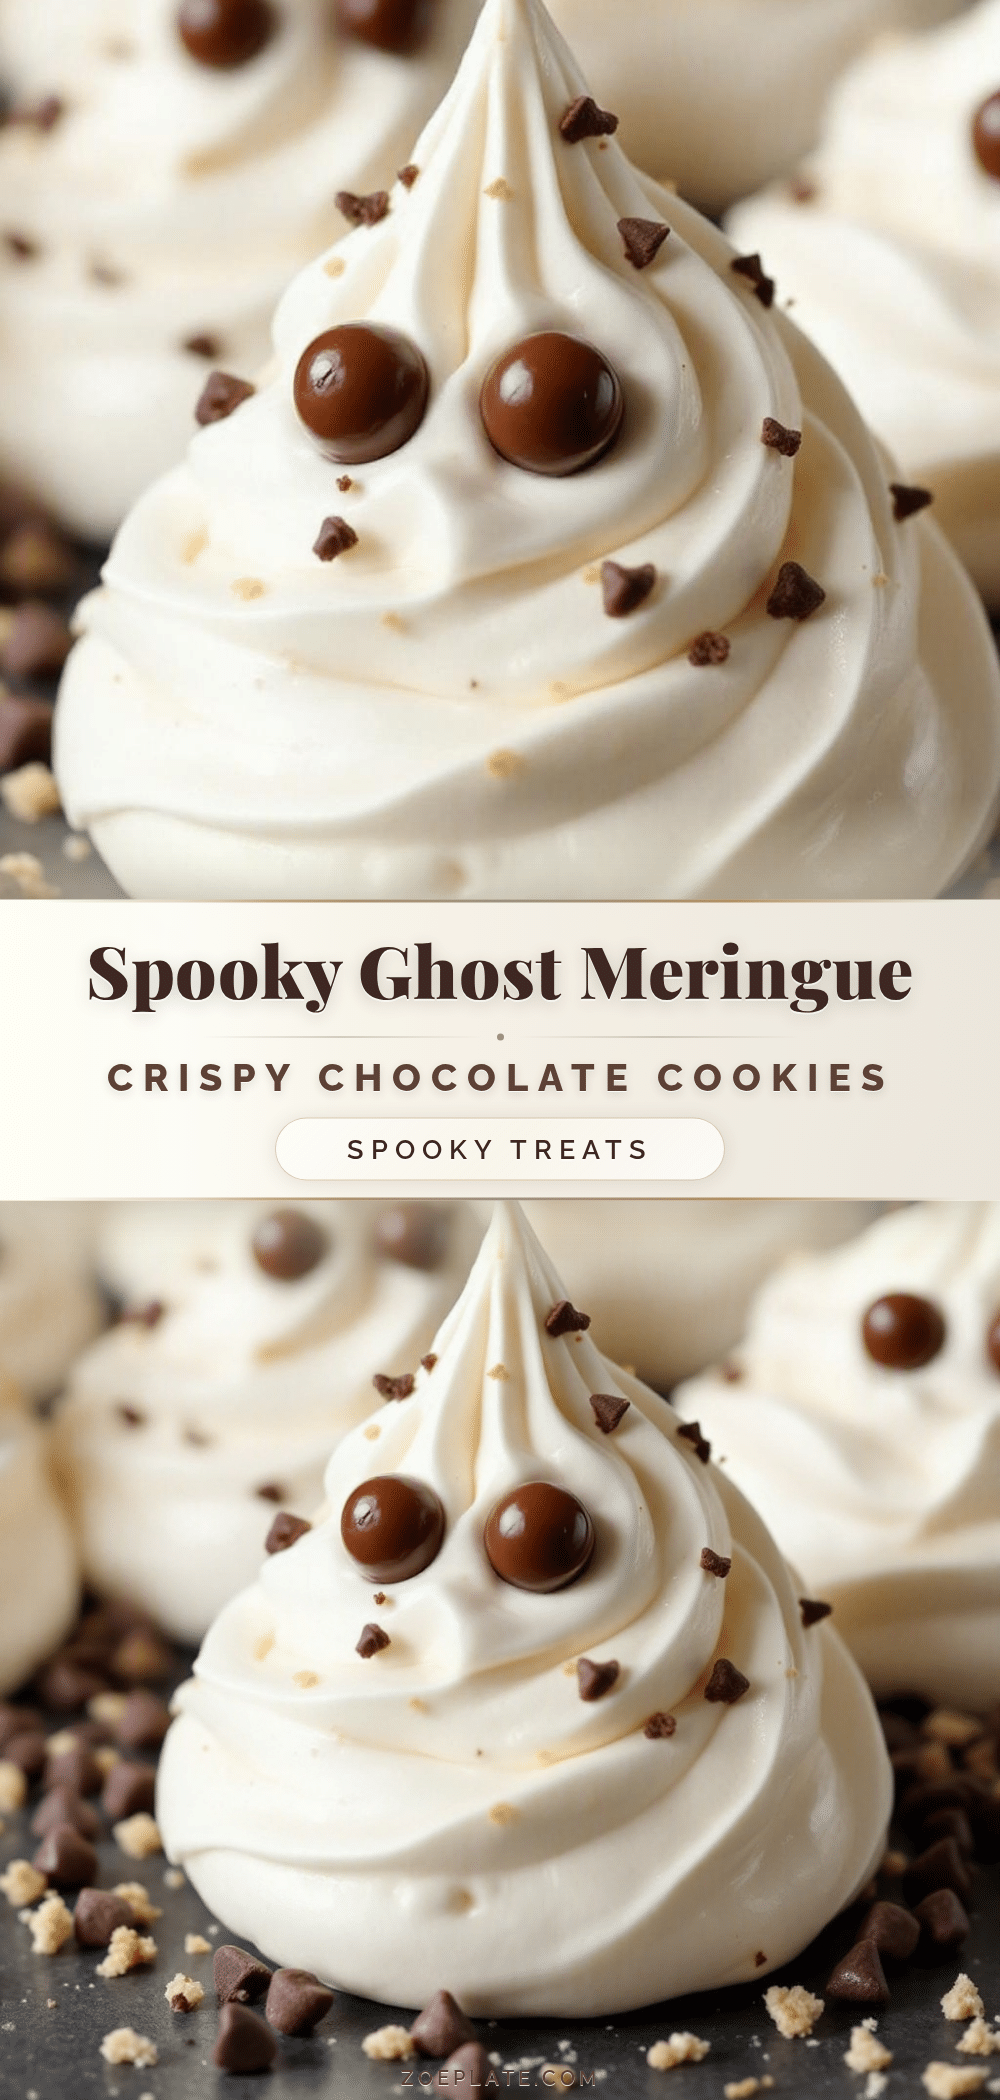
Crispy Ghost Meringue Cookies: 3-Ingredient Halloween Treat
These crispy ghost meringue cookies are a simple, 3-ingredient Halloween treat that requires minimal effort but delivers a high-impact visual result. Made with egg whites, sugar, and chocolate chips, they are light, crunchy, and perfect for parties.
- Prep Time: 15 minutes
- Cook Time: 1 hour 15 minutes
- Total Time: 2 hours 30 minutes
- Yield: Approximately 12-15 cookies 1x
- Category: Dessert
- Cuisine: American
Ingredients
- 3 large egg whites, separated and room temperature
- 3/4 cup (150g) granulated sugar
- 1/4 teaspoon cream of tartar
- 1/2 teaspoon vanilla extract
- Pinch of salt
- Mini chocolate chips (dark or milk) for eyes
Instructions
- Preheat oven to 225°F (107°C) and line a baking sheet with parchment paper.
- In a clean, dry bowl, beat egg whites on medium speed until foamy (1-2 minutes).
- Add cream of tartar and salt; continue beating on medium-high speed until soft peaks form.
- While mixing, slowly add granulated sugar one tablespoon at a time. Beat until stiff, glossy peaks form and mixture feels smooth (3-5 minutes).
- Beat in vanilla extract for 30 seconds.
- Transfer mixture to a piping bag and pipe ghost shapes onto the baking sheet.
- Bake for 1 hour 15 minutes to 1 hour 30 minutes until dry to the touch.
- Turn off the oven, crack the door open slightly, and let meringues cool completely inside the oven (about 1 hour).
- Melt mini chocolate chips in microwave intervals. Use a toothpick to place two dots on each ghost for eyes.
- Let chocolate eyes set for 5 minutes before handling.
Notes
Ensure all equipment is completely free of grease or yolk to ensure egg whites whip properly. If your kitchen is humid, you may need to bake them longer. Do not remove from oven until completely cool to prevent cracking. Store in an airtight container at room temperature.
Nutrition
- Serving Size: 1 cookie
- Calories: 25
- Sugar: 6
- Sodium: 10
- Carbohydrates: 6
Keywords: Halloween, meringue, cookies, ghost, easy dessert, 3-ingredient, gluten-free, kid-friendly


