I figured making a full-sized pumpkin pie for two people was just a waste of good gingersnap crust and perfectly good canned pumpkin. It took about twenty minutes for that assumption to fall apart completely when I realized I was staring at a whole pie tin, feeling like a glutton for nothing, while my partner politely declined a third slice of last night’s leftovers. Let’s face it, the math doesn’t work out when you have a sweet tooth and a limited appetite for dense, spiced custard. The first slice is always the best, but the second slice starts to feel like a commitment, and the third? That’s just guilt disguised as dessert. I spent years buying those tiny, pre-made crusts that tasted like cardboard and stale butter, trying to hack my way into a single-serving treat. Honestly, those little tins are the enemy of true flavor. You need the real thing, the buttery, flaky, homemade crust that shatters when you press your fork into it. This small-batch version changed everything for me. It’s not about restricting yourself; it’s about savoring every single bite without the looming shadow of leftovers taking over your fridge for a week. I remember the first time I made this, I was skeptical that a mini tin could hold up to the oven’s heat without curdling or cracking. I was wrong. It came out with a wobble that was just right, set firm enough to slice but soft enough to melt on your tongue. Now, it’s my go-to when I want something seasonal without the holiday-sized production. It fits into a Tuesday night just as well as a Thanksgiving dinner, which is exactly why I keep coming back to it. There is a quiet satisfaction in finishing the whole pie in one sitting, knowing you didn’t waste a drop of the spiced filling. It’s simple, it’s honest, and it tastes like autumn in a mug-sized format.
Why You’ll Love This Recipe
This isn’t just another scaled-down dessert; it’s a lesson in efficiency and flavor concentration. I’ve tested this recipe enough times to know that scaling down a custard pie can be tricky. Too much egg relative to the filling, and it turns rubbery. Too little, and it won’t set. This version strikes that perfect balance, giving you a texture that is creamy and rich, almost like a baked pumpkin pudding with a crust. It’s the kind of dessert that makes you close your eyes after the first bite, really letting the spices hit your senses. It’s comfort food reimagined for the modern kitchen—where time is short and ingredients matter.
- Quick & Easy: This comes together in under 45 minutes from start to finish, including bake time. It’s perfect for busy weeknights when you want a sweet treat but don’t have hours to spend in the kitchen. Unlike our easy no-bake apple cheesecake bars, this one requires a bit of oven time, but the payoff is worth every second.
- Simple Ingredients: No fancy grocery trips needed. You likely already have pumpkin puree, spices, and basic pantry staples. This is about using what you have to create something extraordinary.
- Perfect for Cozy Nights: Great for a quiet dinner for two, a last-minute guest appearance, or just treating yourself after a long day. It pairs beautifully with a hot cup of tea or coffee.
- Crowd-Pleaser: Even if it’s just for two, it always gets rave reviews. The flavor profile is classic and universally loved, reminding everyone of the holidays without the stress.
- Unbelievably Delicious: The texture and flavor combo is next-level comfort food. The crust is buttery and crisp, while the filling is smooth and spiced to perfection.
What makes this recipe different is the attention to the crust-to-filling ratio. In a large pie, the crust can sometimes get lost or soggy. Here, every bite has that ideal crunch followed by the soft custard. It’s your best version because it eliminates the waste and focuses on quality over quantity. It’s the kind of dessert that feels indulgent without feeling heavy.
What Ingredients You Will Need
This recipe uses simple, wholesome ingredients to deliver bold flavor and satisfying texture without the fuss. The magic lies in the balance of spices and the quality of the pumpkin. Since we are making a small batch, every ingredient counts, so choosing the right ones matters more than ever. You don’t need exotic items, just good basics.
- For the Crust:
- 1 1/2 cups all-purpose flour (about 190g) – The foundation of your pie. I recommend using a high-quality brand like King Arthur for consistent results.
- 1/2 cup unsalted butter, cold and cubed – Cold butter is non-negotiable for a flaky crust. If your butter is too warm, the crust will be tough.
- 1/4 teaspoon salt – Enhances the flavor of the dough.
- 3-4 tablespoons ice water – Add gradually. You want the dough to just come together, not be wet.
- For the Filling:
- 1/2 cup canned pure pumpkin puree (not pumpkin pie filling) – Make sure it’s 100% pure pumpkin. Look for firm, small-curd puree for best texture.
- 1/2 cup heavy cream – Adds richness and helps set the custard. You can use half-and-half for a lighter version, but the texture will be less dense.
- 2 large egg yolks – Using only yolks makes the filling richer and more custard-like. Egg whites can make it too firm.
- 1/3 cup granulated sugar – Adjust slightly if you prefer less sweet. Brown sugar can be used for a deeper, molasses flavor.
- 1/2 teaspoon ground cinnamon – The star spice. Use fresh ground if possible for brighter flavor.
- 1/4 teaspoon ground ginger – Adds a warm, spicy kick.
- 1/4 teaspoon ground nutmeg – Essential for that classic pumpkin pie taste. Freshly grated is best.
- 1/4 teaspoon ground cloves – Use sparingly. It’s strong and can overpower if you add too much.
- 1/4 teaspoon salt – Balances the sweetness.
- 1/2 teaspoon vanilla extract – Adds depth and rounds out the spices.
If you want to substitute, you can use a gluten-free flour blend for the crust, though the texture might be slightly crumblier. For the dairy-free option, coconut cream works well in place of heavy cream, adding a subtle tropical note that actually pairs nicely with the pumpkin.
Equipment Needed
You don’t need a lot of fancy tools for this. A 9-inch pie plate is standard, but for a small batch, a 6-inch or 7-inch pie dish is ideal. If you don’t have one, a standard 9-inch dish will work, but you’ll have leftover filling (which makes for great extra custard). A food processor makes the crust quickly, but you can do it by hand with a pastry cutter or two forks. A whisk is essential for blending the filling smooth. A pie crust shield or some aluminum foil is helpful to prevent the edges from burning, especially since the small crust-to-filling ratio can lead to over-browning.
Preparation Method
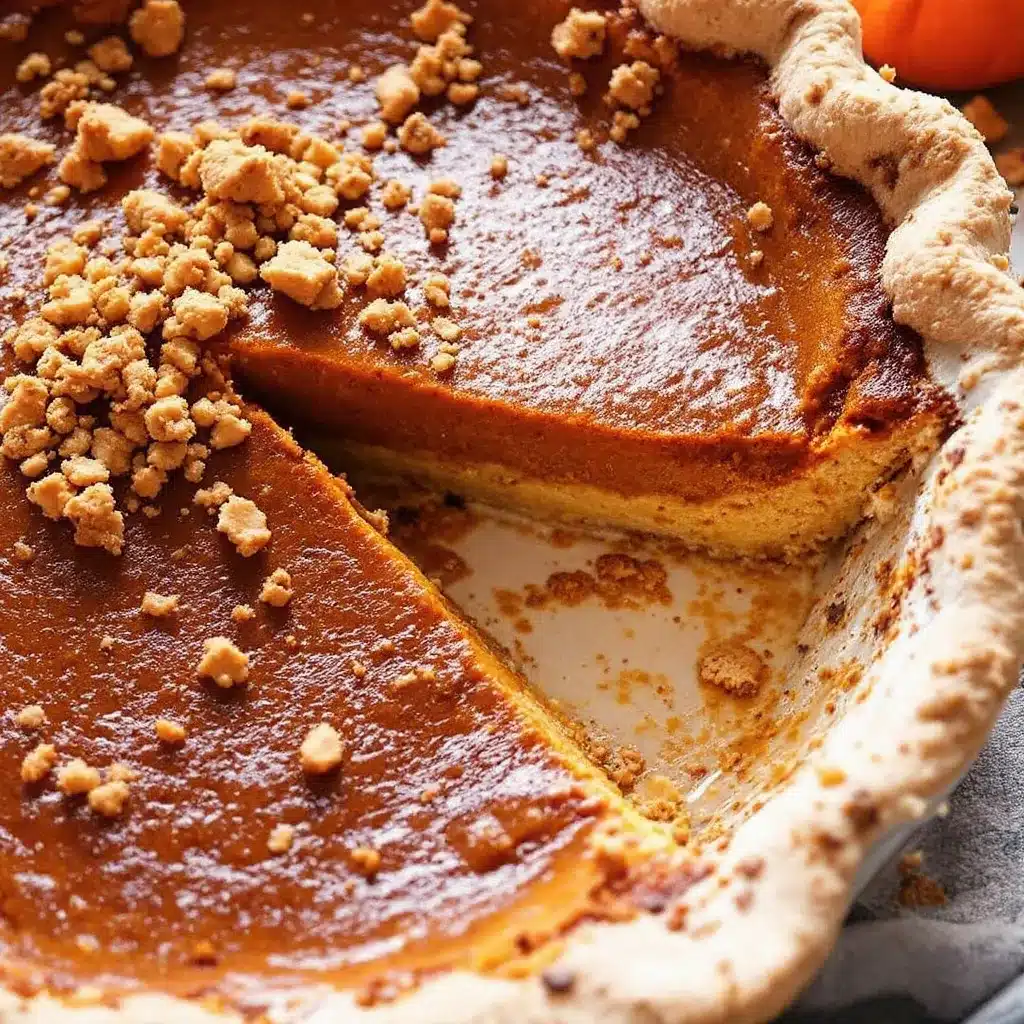
- Make the Crust (10 minutes): In a food processor, pulse the flour and salt. Add the cold, cubed butter and pulse until the mixture resembles coarse crumbs with some pea-sized pieces of butter remaining. This texture is key for flakiness. Drizzle in ice water, one tablespoon at a time, pulsing just until the dough starts to clump together. Do not overmix. Turn the dough out onto a piece of plastic wrap and form it into a disk. Wrap it tightly and refrigerate for at least 30 minutes. This step relaxes the gluten and re-chills the butter, which prevents shrinkage in the oven.
- Preheat and Prep (5 minutes): Preheat your oven to 375°F (190°C). Place a baking sheet on the lower rack to catch any potential drips. This is a good habit for any pie baking.
- Roll and Fit the Crust (10 minutes): On a lightly floured surface, roll out the dough into a circle about 1/8-inch thick. Carefully transfer it to your 6-inch or 7-inch pie dish. Gently press the dough into the bottom and sides without stretching it. Trim the excess dough, leaving a slight overhang. Crimp the edges as desired. Prick the bottom of the crust with a fork (dock it) to prevent bubbling. You can blind bake this for 10 minutes if you prefer a crispier bottom, but for this small batch, it’s not strictly necessary if you watch it closely.
- Make the Filling (5 minutes): In a medium bowl, whisk together the heavy cream, egg yolks, sugar, cinnamon, ginger, nutmeg, cloves, salt, and vanilla extract until smooth and well combined. The mixture should be a vibrant orange color. Whisk in the pumpkin puree until completely smooth. There should be no lumps. If the mixture looks too thin, that’s okay; it will thicken as it bakes.
- Assemble and Bake (35-40 minutes): Pour the filling into the prepared crust. It should fill the dish about 3/4 full. Place the pie on the center rack of the oven. Bake for 35-40 minutes. The pie is done when the edges are set but the center still has a slight jiggle, like Jell-O. It will continue to set as it cools. If the edges start to brown too quickly, cover them with a pie shield or foil.
- Cool Completely (2 hours): This is the hardest part. Let the pie cool on a wire rack for at least two hours. Cutting into it while warm will result in a messy, runny slice. The custard needs time to set properly. Once cooled, refrigerate if serving later.
Cooking Tips & Techniques
The biggest mistake people make with pumpkin pie is overbaking. Because this is a small batch, it cooks faster than a large pie. Check it at 30 minutes. If the center is still very liquid, give it 5 more minutes. The goal is a set edge and a soft center. Another tip is to ensure your butter is cold when making the crust. If it melts before it hits the oven, you lose those steam pockets that create flakiness. Also, don’t skip the resting time for the dough. Rushing this step can lead to a tough, shrinkage-prone crust. If you find your pie is browning too fast, tent it with foil. Finally, let the pie cool completely. I know it’s tempting, but warm pumpkin pie is a textural disaster. Cold pumpkin pie is a slice of heaven.
Variations & Adaptations
While the classic spice profile is unbeatable, you can tweak this recipe to suit your tastes. For a maple twist, substitute half the sugar with pure maple syrup. This adds a wonderful depth of flavor that pairs well with the pumpkin. If you like a spicier kick, add a pinch of cayenne pepper or increase the ginger. For a coconut version, use coconut cream instead of heavy cream and add shredded coconut to the crust. You can also add white chocolate chips to the filling for a sweeter, richer treat. If you want to use fresh pumpkin, you can roast a sugar pumpkin, scoop out the flesh, and puree it, but be aware that fresh pumpkin has more water, so you may need to cook it down first to concentrate the flavor. This recipe also works well with pumpkin dump cake flavors if you want a cobbler-style topping instead of a crust.
Serving & Storage Suggestions
Serve this pie at room temperature or slightly chilled. It pairs beautifully with a dollop of whipped cream or a scoop of vanilla bean ice cream. A drizzle of salted caramel sauce adds a nice contrast. For storage, cover the pie with plastic wrap or store it in an airtight container in the refrigerator for up to 3 days. It can also be frozen for up to 2 months. To freeze, wrap the whole pie tightly in plastic and then foil. Thaw it in the refrigerator overnight before serving. The flavors actually develop and meld together over the first day, making it even better the next day. If you have leftover filling, you can bake it in a small ramekin as a custard.
Nutritional Information & Benefits
This small-batch pie is a moderate indulgence. Pumpkin is rich in vitamin A, fiber, and antioxidants. The spices like cinnamon and ginger have anti-inflammatory properties. Each slice (assuming 6 slices) contains approximately 250-300 calories, depending on the crust thickness and cream amount. It is not gluten-free unless you use a gluten-free crust, and it contains dairy and eggs. For a lower-carb option, you can use a almond flour crust and sugar substitute. Overall, it’s a balanced treat that satisfies a sweet craving without being overly heavy.
Conclusion
Making a Cozy Small-Batch Pumpkin Pie for Two is a game-changer for anyone who loves pumpkin but hates waste. It’s easy, delicious, and perfect for any occasion. I hope you try this recipe and enjoy every bite. Feel free to customize the spices or add your own toppings to make it your own. If you do, please leave a comment below and let me know how it turned out! I love hearing from you. Share your photos on social media and tag me. Happy baking!
FAQs
Can I use a pre-made crust?
Yes, you can use a store-bought pie crust to save time. Just adjust the baking time slightly, as pre-made crusts often bake faster than homemade dough.
How do I know when the pie is done?
The edges should be set, and the center should have a slight jiggle. It will continue to set as it cools. If the center is liquid, bake for another 5 minutes.
Can I freeze this pie?
Yes, this pie freezes well. Wrap it tightly in plastic and foil. Thaw it in the refrigerator overnight before serving.
What if I don’t have a 6-inch pie dish?
You can use a 9-inch pie dish, but you will have leftover filling. You can bake the extra filling in a small ramekin or save it for another use.
Can I use fresh pumpkin instead of canned?
Yes, but you need to roast the pumpkin and puree it. Fresh pumpkin has more water, so you may need to cook it down to concentrate the flavor before using it in the recipe.
Pin This Recipe!
Cozy Small-Batch Pumpkin Pie for Two
A perfect 2-person pumpkin pie featuring a buttery, flaky homemade crust and a rich, spiced custard filling. This small-batch dessert eliminates waste while delivering maximum flavor and comfort.
- Prep Time: 35 minutes
- Cook Time: 40 minutes
- Total Time: 2 hours 15 minutes
- Yield: 2 servings 1x
- Category: Dessert
- Cuisine: American
Ingredients
- 1 1/2 cups all-purpose flour
- 1/2 cup unsalted butter, cold and cubed
- 1/4 teaspoon salt
- 3–4 tablespoons ice water
- 1/2 cup canned pure pumpkin puree
- 1/2 cup heavy cream
- 2 large egg yolks
- 1/3 cup granulated sugar
- 1/2 teaspoon ground cinnamon
- 1/4 teaspoon ground ginger
- 1/4 teaspoon ground nutmeg
- 1/4 teaspoon ground cloves
- 1/4 teaspoon salt
- 1/2 teaspoon vanilla extract
Instructions
- In a food processor, pulse flour and salt. Add cold cubed butter and pulse until mixture resembles coarse crumbs with pea-sized butter pieces.
- Drizzle in ice water one tablespoon at a time, pulsing just until dough starts to clump. Do not overmix.
- Turn dough onto plastic wrap, form into a disk, wrap tightly, and refrigerate for at least 30 minutes.
- Preheat oven to 375°F (190°C) and place a baking sheet on the lower rack.
- Roll dough into a 1/8-inch circle on a floured surface and transfer to a 6-inch or 7-inch pie dish.
- Press dough into bottom and sides, trim excess, crimp edges, and prick bottom with a fork.
- In a medium bowl, whisk heavy cream, egg yolks, sugar, spices, salt, and vanilla until smooth.
- Whisk in pumpkin puree until completely smooth with no lumps.
- Pour filling into prepared crust (filling should be 3/4 full).
- Bake for 35-40 minutes until edges are set but center has a slight jiggle.
- If edges brown too quickly, cover with a pie shield or foil.
- Cool completely on a wire rack for at least 2 hours before slicing.
Notes
Ensure butter is cold for a flaky crust. Do not skip the resting time for the dough to prevent shrinkage. The pie must cool completely to set properly; cutting while warm results in a runny texture. If using a 9-inch dish, you will have leftover filling which can be baked in a ramekin.
Nutrition
- Serving Size: 1 slice (approx. 1/6
- Calories: 275
- Sugar: 18
- Sodium: 150
- Fat: 18
- Saturated Fat: 11
- Carbohydrates: 28
- Fiber: 2
- Protein: 4
Keywords: pumpkin pie, small batch, dessert for two, fall baking, homemade pie, easy dessert, autumn recipes


