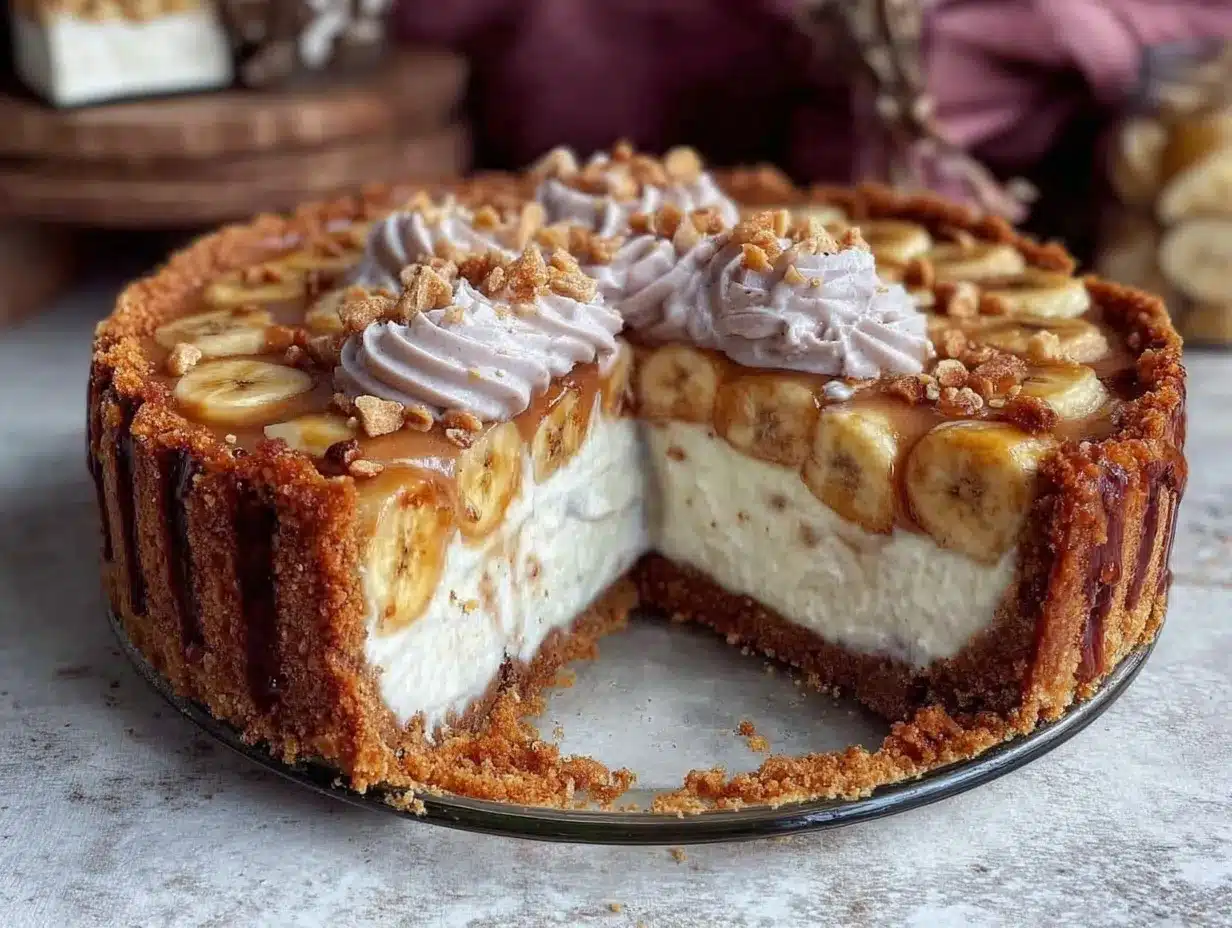
“You seriously made banana pudding into a cheesecake?” my friend asked, raising an eyebrow while eyeing the dessert I’d just pulled from the oven. Honestly, I wasn’t sure it was going to work either. It all started on a hectic Sunday afternoon when I had a few overripe bananas and a craving for something creamy but not too complicated. I tossed together some pantry staples—cream cheese, those classic Nilla wafers, and a sprinkle of vanilla—and just hoped for the best.
The smell of baked cheesecake mingled with the sweet banana aroma was oddly comforting after a day full of chaos. I invited a couple of friends over to test it out, fully expecting polite smiles and quick bites. But nope. It disappeared faster than I could refill plates. That creamy banana pudding cheesecake with Nilla wafer crust became an instant favorite, not just for its taste but for how it turned a frazzled afternoon into a moment worth savoring.
What stuck with me was how this recipe somehow blends the nostalgia of old-school banana pudding with the luxurious texture of cheesecake without any fancy ingredients or fuss. It’s that kind of dessert that makes you pause, close your eyes, and just enjoy the simple pleasure of something done right. And honestly? I find myself making it more often than I care to admit.
This recipe isn’t just a sweet treat; it’s a reminder that sometimes the best dishes come from the most unplanned, imperfect moments.
Why You’ll Love This Creamy Banana Pudding Cheesecake Recipe with Nilla Wafer Crust
After testing this recipe multiple times (yeah, I might have baked it three times in one week), I’ve nailed down why it’s such a crowd favorite. Here’s why you’re going to want this creamy banana pudding cheesecake in your dessert rotation:
- Quick & Easy: You can have this creamy banana pudding cheesecake ready in under 90 minutes (including baking), perfect when you want something impressive but don’t want to spend all day in the kitchen.
- Simple Ingredients: No wild ingredient hunts here—just cream cheese, ripe bananas, Nilla wafers, sugar, and a few pantry staples you probably already have.
- Perfect for Gatherings: Whether it’s a casual weekend get-together or a holiday dinner, this cheesecake fits right in with its nostalgic flavors and creamy texture.
- Crowd-Pleaser: Kids and adults alike keep asking for seconds — the texture is smooth, yet it has that subtly crunchy crust that everyone loves.
- Unbelievably Delicious: The combination of the buttery Nilla wafer crust with the silky banana pudding-infused cheesecake filling is honestly next-level comfort food.
What sets this cheesecake apart is the way the bananas are incorporated—not just mashed but blended with cream cheese and a hint of vanilla to make the filling irresistibly smooth. It’s not your average banana pudding or cheesecake; it’s a hybrid that brings the best of both worlds in one slice.
Every time I bring this dessert out, it feels like a little celebration—simple, satisfying, and totally crave-worthy.
What Ingredients You Will Need for Creamy Banana Pudding Cheesecake with Nilla Wafer Crust
This recipe uses straightforward, wholesome ingredients that come together to create bold flavor and a velvety texture without any fuss. Most are pantry staples, and a few are fresh additions that bring the whole thing to life.
- Nilla Wafers (about 2 cups crushed) – these form the buttery, crisp crust. I usually pick Keebler for that classic taste.
- Unsalted Butter (6 tablespoons, melted) – binds the crust and adds richness.
- Cream Cheese (16 ounces, softened) – the base of the creamy cheesecake filling. Full fat gives the best texture.
- Granulated Sugar (¾ cup) – sweetens the filling just right.
- Large Eggs (3, room temperature) – helps set the cheesecake without drying it out.
- Ripe Bananas (2 medium, mashed) – adds that unmistakable banana flavor and natural sweetness.
- Vanilla Extract (1 teaspoon) – enhances the banana notes and adds warmth.
- Heavy Cream (½ cup) – makes the filling ultra-smooth and silky.
- Salt (a pinch) – balances the sweetness and rounds out the flavors.
Feel free to swap the heavy cream for full-fat coconut cream if you want a dairy-free twist, or use almond flour in place of crushed Nilla wafers for a gluten-free crust (though it won’t be quite the same nostalgic crunch!). For the bananas, I recommend ones that are ripe with a few brown spots—this adds natural sweetness and depth of flavor without extra sugar.
Equipment Needed
- 9-inch Springform Pan: Essential for easy removal of the cheesecake without damaging the crust or edges.
- Mixing Bowls: One for the crust, one for the filling. Glass or metal works best to avoid sticking.
- Hand Mixer or Stand Mixer: For smooth, lump-free cream cheese blending—trust me, it makes a difference.
- Food Processor or Plastic Bag & Rolling Pin: To crush the Nilla wafers finely. I usually use a food processor for speed, but a rolling pin works fine if you don’t have one.
- Measuring Cups and Spoons: Precision matters, especially with baking.
- Spatula: For folding ingredients and scraping the bowl clean.
If you don’t own a springform pan, a regular 9-inch cake pan lined with parchment paper can work, but be extra careful when removing the cheesecake. I’ve tried both, and springform definitely saves the day.
Preparation Method
- Preheat your oven to 325°F (163°C) and prepare the springform pan by lightly greasing it.
- Make the crust: Crush about 2 cups of Nilla wafers until fine crumbs. Mix with 6 tablespoons melted unsalted butter until the mixture resembles wet sand.
- Press the crust evenly into the bottom of your springform pan, about 1/2 inch thick. Use the bottom of a glass to compact it firmly. Bake for 8 minutes, then set aside to cool slightly.
- Prepare the filling: In a large bowl, beat 16 ounces softened cream cheese with ¾ cup granulated sugar on medium speed until smooth and creamy—about 3-4 minutes. Scrape down sides as needed.
- Add eggs one at a time, beating well after each addition. Make sure each egg is fully incorporated before adding the next to prevent curdling.
- Mix in mashed ripe bananas (about 2 medium bananas), 1 teaspoon vanilla extract, and a pinch of salt until combined.
- Slowly pour in ½ cup heavy cream, mixing on low speed to keep the batter silky and smooth.
- Pour the filling over the baked crust, smoothing the top with a spatula. Tap the pan gently on the counter a couple of times to release any air bubbles.
- Bake the cheesecake in the preheated oven for 50-60 minutes. The edges should be set, but the center will still have a slight jiggle.
- Turn off the oven, crack the oven door, and let the cheesecake cool inside for 1 hour to prevent cracking.
- Remove from oven, then chill the cheesecake in the refrigerator for at least 4 hours or overnight for best texture and flavor.
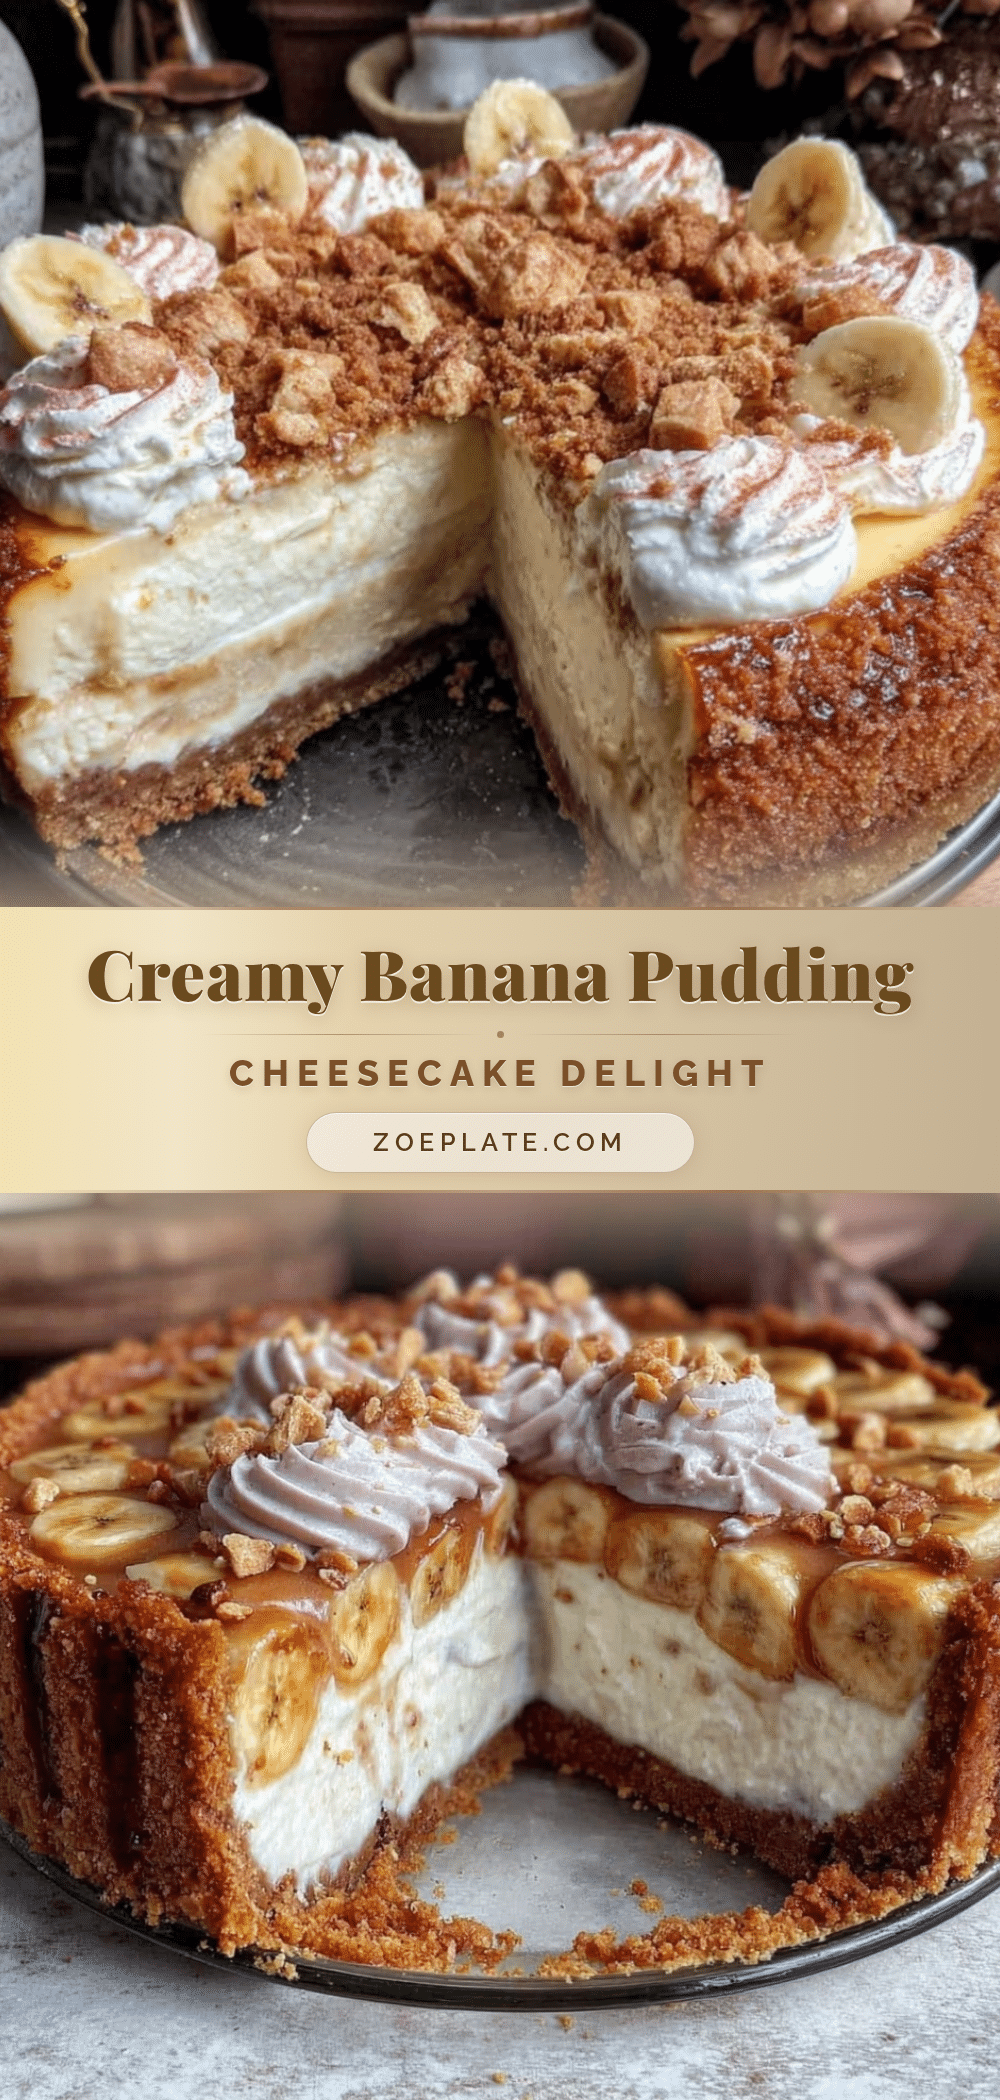
- Serve chilled (room temperature works too), optionally topped with sliced bananas or extra crushed Nilla wafers for crunch.
If cracks form on the surface, don’t panic! A little whipped cream or banana slices on top hide them perfectly. Also, be careful not to overmix the batter once eggs are added, or you might end up with a dense cheesecake.
Cooking Tips & Techniques
Getting a smooth, creamy cheesecake can feel tricky, but a few tricks make all the difference:
- Room temperature ingredients: Make sure your cream cheese, eggs, and bananas are all at room temp before mixing. Cold ingredients lead to lumps and uneven baking.
- Don’t overmix: Once you add eggs, mix just until combined. Overmixing introduces air, which can cause cracks or a cakey texture.
- Water bath option: If you’re nervous about cracking, bake your cheesecake in a water bath. Wrap the pan with foil and place it in a larger pan filled halfway with hot water.
- Let it cool gradually: Cooling the cheesecake slowly in the oven prevents sudden temperature changes that crack the surface.
- Use fresh bananas: Overripe bananas add sweetness and flavor, but if they’re too mushy or brown, flavor can get overpowering.
- Crust pressing: Firmly packing the Nilla wafer crust helps it hold together better after baking and prevents crumbling when serving.
I learned the hard way that skipping the slow cooling step results in cracked tops and sad slices. Patience here really pays off!
Variations & Adaptations
This creamy banana pudding cheesecake is pretty versatile and can be tweaked to fit different tastes and dietary needs:
- Chocolate Banana Cheesecake: Add ½ cup melted semi-sweet chocolate to the filling for a rich twist. Chocolate and banana are a classic combo!
- Gluten-Free Crust: Swap crushed Nilla wafers for almond flour mixed with melted butter to keep that buttery crust without gluten.
- Dairy-Free Version: Use dairy-free cream cheese and coconut cream instead of heavy cream. The texture is slightly different but still delicious.
- Tropical Twist: Mix in ½ cup crushed pineapple or shredded coconut into the filling for a summery vibe.
- Mini Cheesecakes: Divide the batter into muffin tins lined with cupcake liners and bake for 20-25 minutes for perfectly portioned treats.
Once, I tried adding a bit of browned butter to the crust, which gave a nutty depth that was unexpected but delightful. Experimenting with this recipe really keeps it exciting!
Serving & Storage Suggestions
This cheesecake is best served chilled for that creamy, melt-in-your-mouth texture. Letting it sit at room temperature for 10-15 minutes before slicing makes cutting easier and enhances flavor release.
Pair it with a dollop of freshly whipped cream or a sprinkle of crushed Nilla wafers for extra texture. A side of fresh berries or a light coffee balances the dessert’s sweetness beautifully.
Store leftovers tightly covered in the refrigerator for up to 4 days. The flavors actually deepen after a day, so it’s perfect for making ahead. To freeze, wrap the whole cheesecake or individual slices in plastic wrap and foil; freeze for up to 2 months. Thaw overnight in the fridge before serving.
Reheat gently at room temperature or in a low oven (about 275°F/135°C) for 10 minutes if you prefer it less chilled. Just don’t overdo it or you’ll lose that signature creamy texture.
Nutritional Information & Benefits
Each slice of this creamy banana pudding cheesecake with Nilla wafer crust is roughly:
| Calories | 350-400 |
|---|---|
| Fat | 24g (mostly from cream cheese and butter) |
| Carbohydrates | 30g (includes natural sugar from bananas) |
| Protein | 6g |
| Sugar | 18g |
Key ingredients like bananas add potassium and fiber, while cream cheese provides calcium and protein. This dessert is not low-calorie, but treating yourself to a slice now and then fits perfectly into a balanced lifestyle.
For those watching gluten, swapping the crust as mentioned can keep it safe. And if you prefer less sugar, using ripe bananas helps naturally sweeten the filling, allowing you to reduce added sugar slightly.
Conclusion
This creamy banana pudding cheesecake with Nilla wafer crust isn’t just a dessert—it’s a little slice of comfort and nostalgia wrapped up in a creamy, dreamy package. It’s easy enough to whip up on a busy evening but special enough to bring out for company.
Feel free to make it your own—whether you toss in a handful of chocolate chips or switch up the crust, it’s a recipe that welcomes your personal touch. I love it because it reminds me that simple ingredients and a bit of patience can create something truly memorable.
If you try it, I’d love to hear what you think or how you’ve mixed it up to suit your tastes. Sharing recipes and stories is what makes cooking so rewarding, after all.
Here’s to many creamy, comforting slices ahead!
Frequently Asked Questions About Creamy Banana Pudding Cheesecake
Can I make this cheesecake ahead of time?
Absolutely! It actually tastes better after chilling overnight, which helps the flavors meld and the texture set perfectly.
What if I don’t have a springform pan?
You can use a regular 9-inch cake pan lined with parchment paper, but be careful when removing the cheesecake. A springform pan just makes it easier to serve without damage.
Can I use frozen bananas?
Yes, but thaw and drain any excess liquid first. Freshly mashed ripe bananas give the best texture and flavor.
How do I prevent cracks on the cheesecake surface?
Don’t overmix the batter, bake at a moderate temperature, and let the cheesecake cool gradually in the oven with the door cracked for an hour after baking.
Is it possible to make mini cheesecakes with this recipe?
Definitely! Divide the filling into muffin tins lined with cupcake liners and bake for 20-25 minutes for bite-sized treats.
For more comforting and easy dessert ideas, you might enjoy the ultimate one bowl chocolate cake or these brown butter rice krispie treats. Both are simple, crowd-pleasers that pair well with this creamy banana pudding cheesecake for a full dessert spread.
Pin This Recipe!
Creamy Banana Pudding Cheesecake Recipe with Nilla Wafer Crust

A nostalgic and creamy banana pudding cheesecake with a buttery Nilla wafer crust, blending the best of banana pudding and cheesecake in one delicious dessert.
- Prep Time: 20 minutes
- Cook Time: 1 hour 8 minutes
- Total Time: 1 hour 28 minutes
- Yield: 12 servings 1x
- Category: Dessert
- Cuisine: American
Ingredients
- 2 cups crushed Nilla Wafers
- 6 tablespoons unsalted butter, melted
- 16 ounces cream cheese, softened
- 3/4 cup granulated sugar
- 3 large eggs, room temperature
- 2 medium ripe bananas, mashed
- 1 teaspoon vanilla extract
- 1/2 cup heavy cream
- Pinch of salt
Instructions
- Preheat your oven to 325°F (163°C) and lightly grease a 9-inch springform pan.
- Crush about 2 cups of Nilla wafers until fine crumbs. Mix with 6 tablespoons melted unsalted butter until the mixture resembles wet sand.
- Press the crust evenly into the bottom of the springform pan, about 1/2 inch thick. Compact firmly using the bottom of a glass. Bake for 8 minutes, then set aside to cool slightly.
- In a large bowl, beat 16 ounces softened cream cheese with 3/4 cup granulated sugar on medium speed until smooth and creamy, about 3-4 minutes. Scrape down sides as needed.
- Add eggs one at a time, beating well after each addition until fully incorporated.
- Mix in mashed ripe bananas, 1 teaspoon vanilla extract, and a pinch of salt until combined.
- Slowly pour in 1/2 cup heavy cream, mixing on low speed to keep the batter silky and smooth.
- Pour the filling over the baked crust, smoothing the top with a spatula. Tap the pan gently on the counter to release air bubbles.
- Bake the cheesecake for 50-60 minutes. The edges should be set but the center will still have a slight jiggle.
- Turn off the oven, crack the oven door, and let the cheesecake cool inside for 1 hour to prevent cracking.
- Remove from oven and chill the cheesecake in the refrigerator for at least 4 hours or overnight for best texture and flavor.
- Serve chilled or at room temperature, optionally topped with sliced bananas or extra crushed Nilla wafers.
Notes
Use room temperature ingredients for smooth mixing. Avoid overmixing after adding eggs to prevent cracks. Cooling the cheesecake gradually in the oven with the door cracked helps prevent cracking. For a water bath, wrap the pan with foil and place in a larger pan with hot water. Ripe bananas with brown spots add natural sweetness. Press crust firmly to avoid crumbling. Can substitute heavy cream with coconut cream for dairy-free, and almond flour for gluten-free crust.
Nutrition
- Serving Size: 1 slice (1/12th of c
- Calories: 375
- Sugar: 18
- Sodium: 250
- Fat: 24
- Saturated Fat: 15
- Carbohydrates: 30
- Fiber: 2
- Protein: 6
Keywords: banana pudding cheesecake, Nilla wafer crust, creamy cheesecake, easy dessert, banana dessert, crowd-pleaser, nostalgic dessert