My husband did not trust a no-churn ice cream. He said it sounded like a gimmick, something that would turn into a icy block or a weirdly soft mess. I couldn’t really argue with him, not at first anyway. I had tried a few no-churn recipes in the past and they were, honestly, a little disappointing. They were either too sweet, too icy, or they just didn’t have that creamy, luxurious mouthfeel that real ice cream has. So I get it, the skepticism was warranted.
But then I found myself staring at a can of sweetened condensed milk and a pint of heavy cream in my fridge, and a bag of good sea salt on the counter. I had a serious salted caramel craving that would not quit, and no ice cream maker. So I decided to give it one more shot. I was determined to crack the code on a no-churn recipe that actually tasted like it came from a fancy ice cream parlor, not a science experiment gone wrong. I wanted that deep, complex caramel flavor, the perfect salty-sweet balance, and a texture so smooth it felt like a cheat code.
This recipe is the result of that stubborn determination. It’s the one that finally made my husband take back every single doubt he had. The texture is so rich and creamy, you will honestly never guess it didn’t spin in a machine. The caramel is made from scratch on the stove, getting dark and toasty before you even think about the cream. It’s a little bit of work upfront, but the payoff is a dessert that feels like a genuine indulgence. This is the kind of ice cream that makes you close your eyes after the first bite.
Why You’ll Love This Recipe
Honestly, this is the kind of recipe that changes your mind about what’s possible in a home kitchen. It’s proof you don’t need a lot of fancy gear to make something truly spectacular. I’ve tested this more times than I care to count, tweaking the caramel temperature and the amount of salt until it was just right. This version is the one I’d serve to anyone, including that friend who claims they don’t like “homemade” ice cream.
- No Ice Cream Maker Required: You read that right. No churning, no freezing bowls, no special equipment. Just a whisk or a mixer and some patience for the freezer.
- Seriously Rich & Creamy: The secret is in the ratio of heavy cream to sweetened condensed milk. It creates a texture that is dense, scoopable, and absolutely luscious, without a single ice crystal in sight.
- Real, Deep Caramel Flavor: We are not using a jar of store-bought sauce here. This recipe starts with a dry caramel on the stove, which gives it a deep, slightly bitter, and incredibly complex flavor that you just can’t get from a bottle.
- Perfectly Balanced Salt: The flaky sea salt isn’t just a garnish. It cuts through the sweetness of the caramel and cream, creating that addictive salty-sweet contrast that makes every bite interesting.
- Customizable to Your Cravings: Once you master this base, you can add chocolate chunks, toasted nuts, a swirl of peanut butter, or even a ribbon of raspberry jam. The possibilities are endless.
This isn’t just another no-churn ice cream recipe. It’s the one that will make you feel like a pro. It’s the dessert you bring to a dinner party that gets you asked for the recipe before you’ve even left the driveway. It’s comfort in a bowl, reimagined as something you can make on a Tuesday afternoon.
What Ingredients You Will Need
This recipe uses simple ingredients, but the quality of each one really matters. Since there aren’t a ton of components, each one needs to shine. You won’t find any weird stabilizers or artificial flavors here, just the good stuff that makes real homemade ice cream taste so amazing.
- Granulated Sugar: This is for the dry caramel. Use a good quality white sugar. Don’t use brown sugar here, as the molasses content can affect the caramelization process and you won’t get that clean, clear amber color.
- Water: Just a tablespoon to help the sugar dissolve evenly before it starts to caramelize. Tap water is fine.
- Heavy Cream: This is the backbone of your ice cream. You need heavy cream or heavy whipping cream with at least 36% milk fat. Do not use half-and-half or light cream, as it won’t whip properly and your ice cream will be icy. I usually buy the store brand, but for the best results, look for a cream that is not ultra-pasteurized, as it whips up a little stiffer.
- Sweetened Condensed Milk: This is your secret weapon for no-churn ice cream. It provides sweetness, body, and a smooth texture. One 14-ounce can is the perfect amount. Don’t confuse it with evaporated milk, which is unsweetened and will not work here.
- Unsalted Butter: A small amount of butter stirred into the hot caramel adds a beautiful richness and a silky mouthfeel. It also helps prevent the caramel from seizing up later.
- Vanilla Extract: Use pure vanilla extract, not imitation. It enhances the flavor of the caramel and adds a warm, familiar note. A good vanilla is worth the splurge here.
- Flaky Sea Salt: This is non-negotiable. You want a soft, flaky salt like Maldon or fleur de sel. It’s not just for the top; we add a little to the caramel itself to balance the sweetness. The large flakes provide little pops of salt that are just incredible. A fine table salt will dissolve too quickly and you won’t get the same effect.
Equipment Needed
The beauty of this recipe is how little you actually need. You probably have 90% of this stuff in your kitchen right now.
- Medium Heavy-Bottomed Saucepan: This is crucial for making the caramel. A light-colored pan (like stainless steel) is best because it lets you see the color of the sugar as it caramelizes. A heavy bottom prevents hot spots that can burn the sugar.
- Large Mixing Bowl: For whipping the cream. A metal or glass bowl works best, especially if you chill it beforehand.
- Hand Mixer or Stand Mixer: You can whip the cream by hand with a whisk, but it will take a while and your arm will get a serious workout. A hand mixer or stand mixer with the whisk attachment makes it quick and easy.
- Rubber Spatula: For folding everything together gently. You want to keep as much air in the whipped cream as possible.
- 9×5-Inch Loaf Pan: This is the perfect size for a batch of no-churn ice cream. It gives you nice, thick slices. You can also use a square baking dish.
- Parchment Paper or Plastic Wrap: To line your pan for easy removal. This is a game-changer when it comes time to scoop.
- Instant-Read Thermometer (Optional but Helpful): While you can make caramel by color, a thermometer gives you peace of mind. You want the sugar to hit about 350°F (177°C) for a deep amber caramel.
Preparation Method
This process is straightforward, but a few steps need your full attention. The caramel can go from perfect to burnt in seconds, so don’t walk away from the stove. Trust me, I learned this the hard way.
- Make the Salted Caramel: In your medium saucepan, combine 1 cup (200g) of granulated sugar and 1 tablespoon of water. Stir them together with a fork until the sugar looks like wet sand. Turn the heat to medium-high and let it cook, without stirring, until the sugar starts to melt around the edges. Swirl the pan gently (don’t use a spoon) to help the sugar melt evenly. Cook until the mixture turns a deep amber color, like the color of a copper penny. This should take about 6-8 minutes. It will smell nutty and rich.
- Finish the Caramel: As soon as it reaches that deep amber color, remove the pan from the heat. Immediately add 4 tablespoons (56g) of unsalted butter, cut into pieces. Be careful, the mixture will bubble up violently. Whisk until the butter is completely melted and smooth. Then, slowly drizzle in 1 cup (240ml) of heavy cream while whisking constantly. The caramel will bubble up again, so go slow. Whisk until the sauce is smooth and glossy. Stir in 1 teaspoon of vanilla extract and 1/2 teaspoon of flaky sea salt. Set the caramel aside to cool completely to room temperature. It will thicken as it cools.
- Whip the Cream: In your large mixing bowl, pour in the remaining 1 cup (240ml) of heavy cream. Using your hand mixer or stand mixer, whip the cream on medium-high speed until stiff peaks form. You want it to be thick and hold its shape, but not so much that it starts to look grainy or like butter. This usually takes about 3-4 minutes.
- Combine the Base: In a separate large bowl, pour the entire can (14 ounces) of sweetened condensed milk. Take about 1 cup of the cooled salted caramel sauce and whisk it into the sweetened condensed milk until it’s well combined. This creates your flavored base.
- Fold Everything Together: Take about a third of the whipped cream and fold it into the caramel-condensed milk mixture. This lightens it up. Then, gently fold in the remaining whipped cream until just combined. You don’t want to overmix or deflate all that air you worked so hard to create. A few streaks are fine.
- Layer and Swirl: Pour half of the ice cream base into your prepared loaf pan. Drizzle over a few tablespoons of the remaining salted caramel sauce. Use a knife or a skewer to gently swirl it into the base. Pour the rest of the ice cream base on top, and then drizzle and swirl in the rest of the caramel sauce. You can leave a little bit of sauce on the side for serving.
- Freeze: Sprinkle the top with a little more flaky sea salt. Cover the pan tightly with plastic wrap or foil and place it in the freezer. Freeze for at least 6 hours, but preferably overnight. The longer it freezes, the better the texture will be.
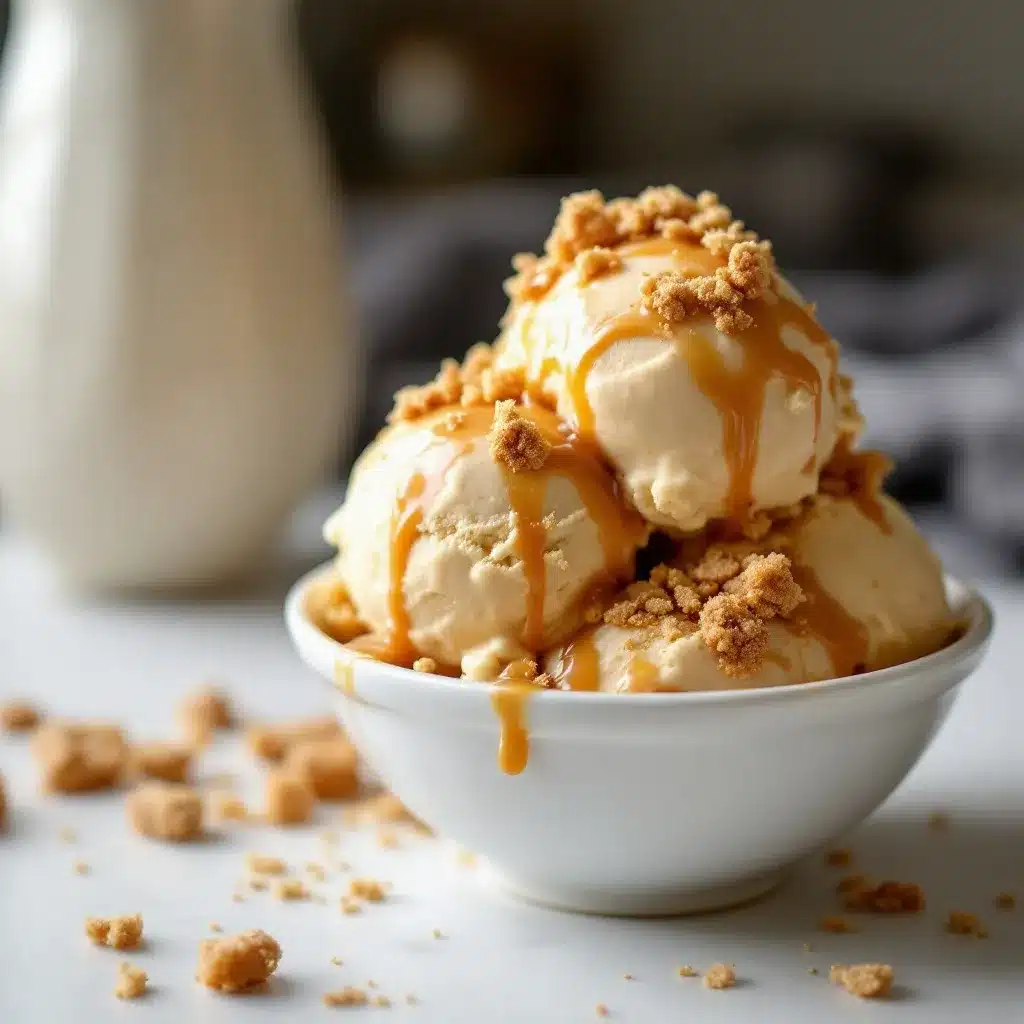
- Serve: When you’re ready to serve, let the ice cream sit at room temperature for about 5-10 minutes to soften slightly. This makes scooping so much easier. Scoop into bowls and drizzle with any leftover caramel sauce and an extra pinch of salt.
Cooking Tips & Techniques
Making caramel can feel a little intimidating at first, but it’s really just about patience and paying attention. Here are a few things I’ve learned from my own burnt batches and sticky messes.
- Don’t Walk Away from the Caramel: Seriously. The moment you turn your back to grab your phone, the sugar will go from a perfect amber to a black, burnt mess. Stay by the stove, watch the color, and trust your nose. It should smell sweet and toasty, not acrid.
- Use a Light-Colored Pan: A dark non-stick pan makes it impossible to see the true color of the caramel. A stainless steel or enameled pan is your best friend here. You need to see that beautiful amber color develop.
- Warm Your Cream: Adding cold cream to hot caramel can cause it to seize up and harden into a lumpy mess. It will still melt back down, but it’s a lot more work. If you remember, let your cream sit out for 15 minutes or warm it gently in the microwave for 15-20 seconds before adding it to the caramel.
- Chill Your Bowl and Cream: For the fluffiest whipped cream, pop your mixing bowl and the beaters in the freezer for 10-15 minutes before you start. A cold bowl makes a huge difference in how quickly and stiffly the cream whips.
- Don’t Over-Whip the Cream: You want stiff peaks, but stop the second you get there. If you keep going, you’ll end up with butter and buttermilk, which is not what we want for ice cream. It should look smooth, thick, and glossy.
- Patience is Key for Freezing: I know it’s hard to wait, but don’t rush the freezing process. A full overnight freeze is what gives this ice cream its perfect, scoopable texture. If you try to eat it after 4 hours, it will still be a bit soft and icy.
Variations & Adaptations
Once you have this base down, you can really make it your own. Here are a few of my favorite ways to change it up.
- Chocolate Salted Caramel: After you make the caramel and before you add the cream, whisk in 2 ounces of finely chopped dark chocolate (70% cocoa or higher). The heat from the caramel will melt it perfectly. Proceed with the rest of the recipe. It creates a deep, fudgy, and even more decadent ice cream.
- Salted Caramel & Toasted Pecan: While the ice cream base is chilling, toast 1 cup of pecan halves in a dry skillet over medium heat until fragrant, about 3-4 minutes. Let them cool, then roughly chop them. Fold the pecans into the finished ice cream base before you layer it into the pan. The crunch is amazing against the smooth, creamy texture.
- Dairy-Free Version: You can absolutely make this work without dairy. Use a full-fat can of coconut cream (chilled overnight) instead of the heavy cream. Whip the solid part of the coconut cream until fluffy. For the sweetened condensed milk, you can find dairy-free versions at most grocery stores, or you can make your own by simmering a can of full-fat coconut milk with 1/2 cup of sugar until it reduces and thickens. Use a good vegan butter in the caramel.
- Boozy Salted Caramel: For an adult version, add 2-3 tablespoons of bourbon, dark rum, or a good quality Irish cream liqueur to the caramel sauce after you take it off the heat. The alcohol will help keep the ice cream a little softer and adds a wonderful layer of flavor.
Serving & Storage Suggestions
This ice cream is best enjoyed after it has had a few minutes to soften up. It comes out of the freezer quite firm, so don’t fight it. Let it sit on the counter for about 10 minutes before you try to scoop it. This makes a world of difference in the texture.
It is absolutely perfect on its own, but it’s also incredible served warm. You can use it to top a warm brownie or a slice of warm apple pie. The contrast of hot and cold is pure magic. I also love serving it with a simple overnight crème brûlée French toast for a truly over-the-top brunch. The creamy, caramel notes pair beautifully with the rich, custardy bread.
For storage, keep the ice cream tightly covered in the freezer. Press a piece of plastic wrap directly onto the surface of the ice cream before you put the lid on to prevent ice crystals from forming. It will keep well for up to 2 weeks, but honestly, it never lasts that long in my house. The flavor actually deepens and gets even better after a day or two in the freezer.
If the ice cream gets too hard after a few days, just let it sit at room temperature for a little longer before scooping. You can also microwave your scoop for about 10 seconds to make it easier to dig into.
Nutritional Information & Benefits
Let’s be real, this is a dessert. It’s not a health food, and it’s meant to be enjoyed as a treat. But understanding what’s in it can help you enjoy it mindfully. The key ingredients do offer a few surprising benefits.
- Estimated per serving (1/2 cup): Calories: 380, Fat: 24g, Saturated Fat: 15g, Carbohydrates: 38g, Sugar: 35g, Protein: 4g, Sodium: 220mg. (These are estimates and will vary based on your specific ingredients).
- Calcium from Dairy: The heavy cream and sweetened condensed milk are good sources of calcium, which is important for bone health.
- Energy Boost: This is a high-calorie, high-fat dessert that provides a quick source of energy. It’s perfect for a special occasion or a day when you need a little indulgence.
- Mood Booster: Let’s be honest, a bowl of homemade salted caramel ice cream is a fantastic mood booster. The combination of sugar and fat triggers the release of feel-good chemicals in the brain. Sometimes, that’s the most important benefit of all.
- Dietary Considerations: This recipe is naturally gluten-free and can be made dairy-free and egg-free with the substitutions mentioned above. It is not suitable for a low-fat or low-sugar diet.
I always look at this as a “sometimes food.” It’s the kind of thing you make for a special dinner, a birthday, or a Friday night when you just want something incredible. It’s about quality over quantity.
Conclusion
This creamy no-churn salted caramel ice cream is proof that you don’t need a fancy machine or a culinary degree to make something truly spectacular. It’s a recipe that feels like a secret weapon in your dessert arsenal. The deep, complex caramel, the velvety texture, and those perfect pops of flaky sea salt create a dessert that is both simple and elegant. It’s the kind of thing that makes you feel like a rockstar in your own kitchen.
I love this recipe because it’s a reminder that the best things in life are often the ones you make yourself. It’s a little bit of patience and a whole lot of love, and the result is something that brings a smile to everyone’s face. It’s perfect for a hot summer day, a cozy winter evening by the fire, or any time you need a little bit of sweet, salty comfort. I honestly can’t wait for you to try it.
I really hope you give this a try. If you do, I would love to hear about it! Leave a comment below and let me know how your ice cream turned out. Did you add any fun mix-ins? Share your photos with me on social media—I love seeing your creations. And if you have any questions, don’t be shy. Happy scooping!
Frequently Asked Questions
Can I use store-bought caramel sauce instead of making it from scratch?
You can, but I really do not recommend it. The flavor you get from a homemade dry caramel is so much deeper, richer, and less cloyingly sweet than anything from a jar. It has a slight bitterness that perfectly balances the sweetness of the ice cream base. It’s a different world of flavor.
Why is my caramel turning into a hard, crystallized block?
This is usually caused by sugar crystals forming on the side of the pan. To prevent this, make sure your pan and utensils are completely clean. When you first add the water and sugar, you can stir it, but once it starts to boil, do not stir it again. Just swirl the pan gently. A little bit of lemon juice or corn syrup in the sugar can also help prevent crystallization.
My ice cream is too hard to scoop. What did I do wrong?
This is actually normal for homemade no-churn ice cream because it has a lower fat and sugar content than commercial ice cream, which uses stabilizers. The best trick is to let it sit at room temperature for 10-15 minutes before scooping. You can also store it in a slightly warmer part of the freezer, like the door, or add a tablespoon of vodka or bourbon to the base next time to keep it softer.
Can I use this recipe to make other flavors of ice cream?
Absolutely! This is a perfect base recipe. You can leave out the caramel and vanilla and add in 1/2 cup of cocoa powder for a chocolate base, or fold in 1 cup of crushed cookies, fresh fruit, or toasted nuts. The possibilities are endless. It’s a great way to experiment.
How long will this ice cream last in the freezer?
It will be at its best for about 1-2 weeks. After that, it can start to develop ice crystals and lose some of its creamy texture, especially if it’s not stored airtight. Pressing a piece of plastic wrap directly onto the surface before sealing the container helps a lot. But honestly, it rarely lasts that long.
Pin This Recipe!
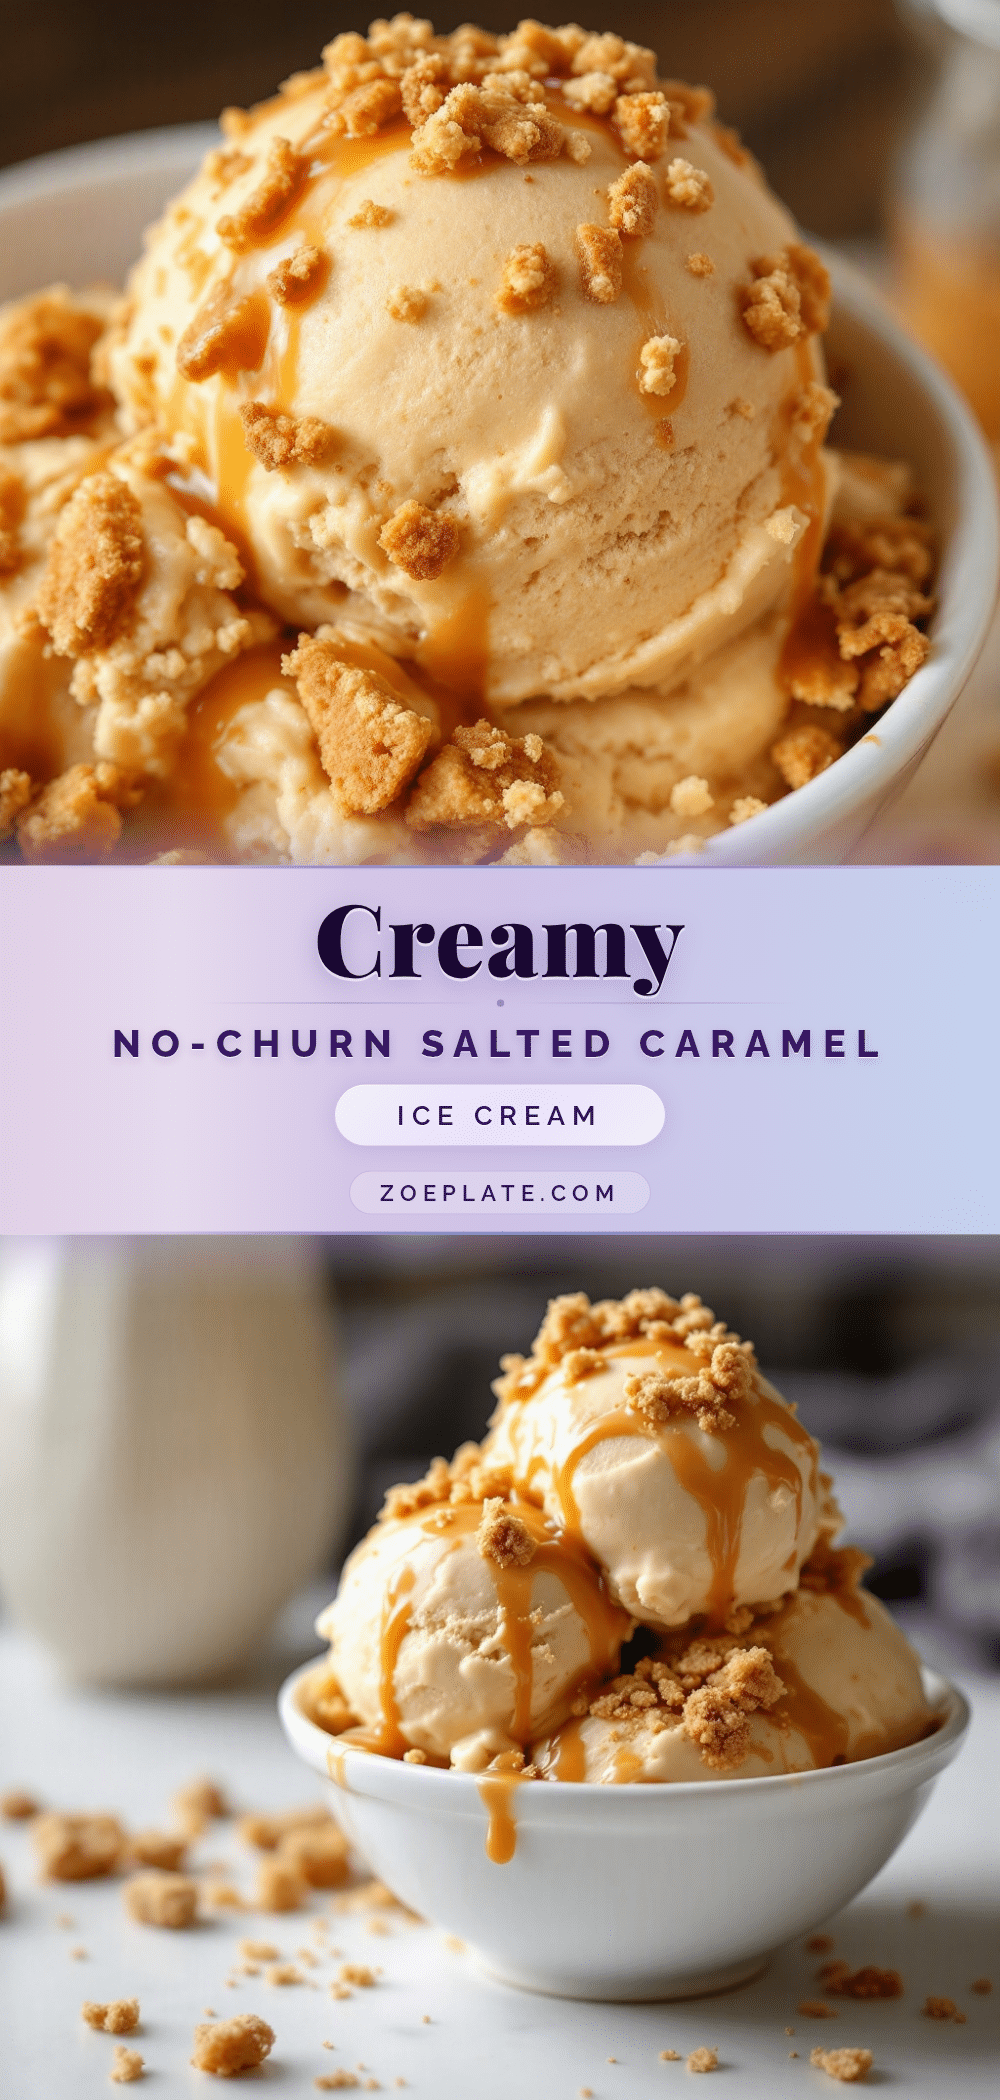
Creamy No-Churn Salted Caramel Ice Cream: Easy Homemade Recipe

This creamy no-churn salted caramel ice cream is proof that you don’t need a fancy machine or a culinary degree to make something truly spectacular. The deep, complex caramel, the velvety texture, and those perfect pops of flaky sea salt create a dessert that is both simple and elegant.
- Prep Time: 20 minutes
- Cook Time: 10 minutes
- Total Time: 6 hours 30 minutes (including freezing time)
- Yield: 8 servings 1x
- Category: Dessert
- Cuisine: American
Ingredients
- 1 cup (200g) granulated sugar
- 1 tablespoon water
- 2 cups (480ml) heavy cream, divided
- 1 (14-ounce) can sweetened condensed milk
- 4 tablespoons (56g) unsalted butter
- 1 teaspoon pure vanilla extract
- 1/2 teaspoon flaky sea salt, plus more for topping
Instructions
- Make the Salted Caramel: In a medium saucepan, combine 1 cup (200g) of granulated sugar and 1 tablespoon of water. Stir together with a fork until the sugar looks like wet sand. Turn the heat to medium-high and let it cook, without stirring, until the sugar starts to melt around the edges. Swirl the pan gently to help the sugar melt evenly. Cook until the mixture turns a deep amber color, like the color of a copper penny, about 6-8 minutes.
- Finish the Caramel: As soon as it reaches that deep amber color, remove the pan from the heat. Immediately add 4 tablespoons (56g) of unsalted butter, cut into pieces. Be careful, the mixture will bubble up violently. Whisk until the butter is completely melted and smooth. Then, slowly drizzle in 1 cup (240ml) of heavy cream while whisking constantly. Whisk until the sauce is smooth and glossy. Stir in 1 teaspoon of vanilla extract and 1/2 teaspoon of flaky sea salt. Set the caramel aside to coo…
- Whip the Cream: In a large mixing bowl, pour in the remaining 1 cup (240ml) of heavy cream. Using a hand mixer or stand mixer, whip the cream on medium-high speed until stiff peaks form, about 3-4 minutes.
- Combine the Base: In a separate large bowl, pour the entire can (14 ounces) of sweetened condensed milk. Take about 1 cup of the cooled salted caramel sauce and whisk it into the sweetened condensed milk until well combined.
- Fold Everything Together: Take about a third of the whipped cream and fold it into the caramel-condensed milk mixture. Then, gently fold in the remaining whipped cream until just combined.
- Layer and Swirl: Pour half of the ice cream base into a prepared 9×5-inch loaf pan. Drizzle over a few tablespoons of the remaining salted caramel sauce. Use a knife or skewer to gently swirl it into the base. Pour the rest of the ice cream base on top, then drizzle and swirl in the rest of the caramel sauce.
- Freeze: Sprinkle the top with a little more flaky sea salt. Cover the pan tightly with plastic wrap or foil and place it in the freezer. Freeze for at least 6 hours, but preferably overnight.
- Serve: When ready to serve, let the ice cream sit at room temperature for about 5-10 minutes to soften slightly. Scoop into bowls and drizzle with any leftover caramel sauce and an extra pinch of salt.
Notes
Don’t walk away from the caramel; it can burn quickly. Use a light-colored pan to see the caramel color. Warm your cream before adding to hot caramel to prevent seizing. Chill your bowl and cream for fluffier whipped cream. Don’t over-whip the cream. Patience is key for freezing; a full overnight freeze gives the best texture.
Nutrition
- Serving Size: 1/2 cup
- Calories: 380
- Sugar: 35
- Sodium: 220
- Fat: 24
- Saturated Fat: 15
- Carbohydrates: 38
- Protein: 4
Keywords: no-churn ice cream, salted caramel ice cream, homemade ice cream, easy ice cream, no ice cream maker, creamy ice cream, caramel dessert