I did not trust baked oatmeal. For years, it felt like a compromise—something you ate because you should, not because you wanted to. The texture always landed somewhere between soggy porridge and dense bread, and honestly, I couldn’t figure out who it was for. Then came the pumpkin chocolate chip version, and I had to eat my words (and about six of these cups in one sitting).
It happened on a Tuesday morning in late September. My kitchen counter was covered in half-used cans of pumpkin puree from a weekend baking spree—I’d made a batch of pumpkin cinnamon rolls that disappeared in under an hour, and I had leftovers staring at me. I needed something that wasn’t another loaf of bread or pan of bars. Something portable. Something my kids could grab on their way out the door without me having to chase them with a fork.
So I threw together oats, pumpkin, chocolate chips, and a few pantry staples, crossed my fingers, and baked them in a muffin tin. What came out of the oven was nothing like the sad, gluey oatmeal cups I’d tried from the store. These had edges that were slightly crisp, centers that were tender but not mushy, and pockets of melted chocolate in every bite. The pumpkin flavor was there—warm and subtle—but it didn’t scream “fall-themed health food.” It just tasted good.
These Easy Pumpkin Chocolate Chip Baked Oatmeal Cups have become my secret weapon for busy mornings, after-school snacks, and those moments when I need something that feels like a treat but doesn’t leave me crashing an hour later. They’re the recipe that finally made me a believer.
Why You’ll Love This Recipe
These aren’t your average oatmeal cups. I’ve tested this recipe about seven times to get the texture just right—not too dry, not too wet, with enough structure to hold together but enough softness to feel comforting. Here’s what makes them stand out:
- Quick & Easy: From bowl to oven in under 10 minutes. The batter comes together in one bowl with a spoon—no mixer required. Total time is about 30 minutes, and most of that is hands-off baking.
- Simple Ingredients: You probably have everything in your pantry right now. Oats, pumpkin puree, eggs, chocolate chips, a few spices. No weird flours or specialty items.
- Perfect for Meal Prep: Make a batch on Sunday, and you’ve got breakfast or snacks ready for the whole week. They refrigerate beautifully and freeze like a dream.
- Kid-Approved: My kids call them “pumpkin chocolate chip muffins” and have no idea they’re eating oatmeal. The chocolate chips are strategically placed throughout to win over even the pickiest eaters.
- Customizable: Gluten-free? Use certified gluten-free oats. Dairy-free? Swap the chocolate chips. Want more protein? Add a scoop of your favorite protein powder.
- Portable: No bowl, no spoon, no mess. These cups are sturdy enough to toss in a lunchbox or grab on your way out the door.
What makes this recipe different from other baked oatmeal cups I’ve tried is the ratio. I use just enough pumpkin to keep things moist without making the cups soggy, and I add a touch of brown sugar for depth without going overboard. The result is a cup that tastes like a cross between a soft-baked cookie and a muffin—but with way more staying power.
Honestly, these are the kind of breakfast treats that make you forget you’re eating something relatively healthy. They’re cozy, satisfying, and just sweet enough to feel like a reward.
What Ingredients You Will Need
This recipe relies on simple, everyday ingredients that work together to create something surprisingly good. No fancy health food store runs required.
- Rolled oats (old-fashioned oats): 2 cups (180g). These provide the best texture—chewy but not mushy. Quick oats will work in a pinch, but the cups will be softer and less structured. Steel-cut oats are not a substitute here; they won’t soften enough during the short bake time.
- Pumpkin puree: 1 cup (245g). Make sure you’re using 100% pure pumpkin puree, not pumpkin pie filling. The pie filling has added sugar and spices that will throw off the balance. I prefer Libby’s brand for consistent texture, but store brands work fine too.
- Eggs: 2 large, room temperature. Eggs bind everything together and help the cups rise slightly. If you’re in a hurry, place the eggs in a bowl of warm water for 5 minutes to bring them to room temperature quickly.
- Milk: ½ cup (120ml). Any milk works here—dairy, almond, oat, or soy. I’ve used unsweetened almond milk and it turned out perfectly. The milk adds moisture without making the batter too thin.
- Brown sugar: ⅓ cup (67g), packed. Light or dark brown sugar both work. Dark brown sugar will give a deeper, more molasses-like flavor that pairs beautifully with pumpkin. You can reduce this to ¼ cup if you prefer less sweetness.
- Maple syrup or honey: 2 tablespoons (30ml). This adds a subtle sweetness and helps with browning. I prefer maple syrup for the flavor, but honey works great too.
- Coconut oil or butter: 2 tablespoons (28g), melted. This keeps the cups moist and adds a hint of richness. You can use melted butter, coconut oil, or even avocado oil.
- Vanilla extract: 1 teaspoon. Pure vanilla extract is best, but imitation works in a pinch. It rounds out the flavors and makes everything taste more “bakery-style.”
- Pumpkin pie spice: 1½ teaspoons. If you don’t have pumpkin pie spice, make your own: ½ teaspoon cinnamon, ¼ teaspoon nutmeg, ¼ teaspoon ginger, and ⅛ teaspoon cloves. I actually prefer making my own blend because I can adjust the ratios.
- Cinnamon: 1 teaspoon. This extra hit of cinnamon makes the pumpkin flavor pop. Trust me on this one.
- Baking powder: 1 teaspoon. This gives the cups a little lift so they’re not dense hockey pucks.
- Salt: ¼ teaspoon. Don’t skip this—salt balances the sweetness and makes the chocolate taste more chocolaty.
- Chocolate chips: ½ cup (90g). Semi-sweet or dark chocolate chips are my go-to, but milk chocolate works if you want a sweeter cup. I like using mini chocolate chips because they distribute more evenly, but regular-sized chips are perfectly fine. For a dairy-free version, use Enjoy Life brand chocolate chips.
- Optional mix-ins: ¼ cup chopped pecans or walnuts, 2 tablespoons flaxseed meal, or ¼ cup dried cranberries. These are all optional but add nice texture and flavor variations.
Equipment Needed
You don’t need a fancy kitchen to make these, which is one of the reasons I love this recipe.
- Muffin tin: A standard 12-cup muffin tin. I use a non-stick one, but any type will work if you grease it well or use paper liners. If you only have a 6-cup tin, just bake in batches.
- Mixing bowls: One large bowl for the wet ingredients and one medium bowl for the dry ingredients. Or just use one large bowl if you’re lazy like me—just add the dry ingredients to the wet and stir.
- Measuring cups and spoons: Standard set for dry and liquid ingredients. A kitchen scale is helpful if you want to be precise, but not necessary.
- Whisk or fork: For mixing the wet ingredients. A fork works fine if you don’t have a whisk handy.
- Spatula or wooden spoon: For folding everything together. A silicone spatula is ideal for scraping the bowl clean.
- Ice cream scoop or spoon: For portioning the batter into the muffin cups. An ice cream scoop makes the job mess-free and ensures even portions.
- Paper liners or cooking spray: I prefer paper liners for easy cleanup, but you can also spray the muffin tin generously with non-stick cooking spray. Silicone muffin cups work great too and are reusable.
- Cooling rack: Not strictly necessary, but it helps the cups cool evenly and prevents soggy bottoms. A wire rack is ideal, but you can just let them cool in the pan for 5 minutes then transfer to a plate.
I’ve made these with a cheap muffin tin from the dollar store and they turned out just fine. Don’t overthink the equipment.
Preparation Method
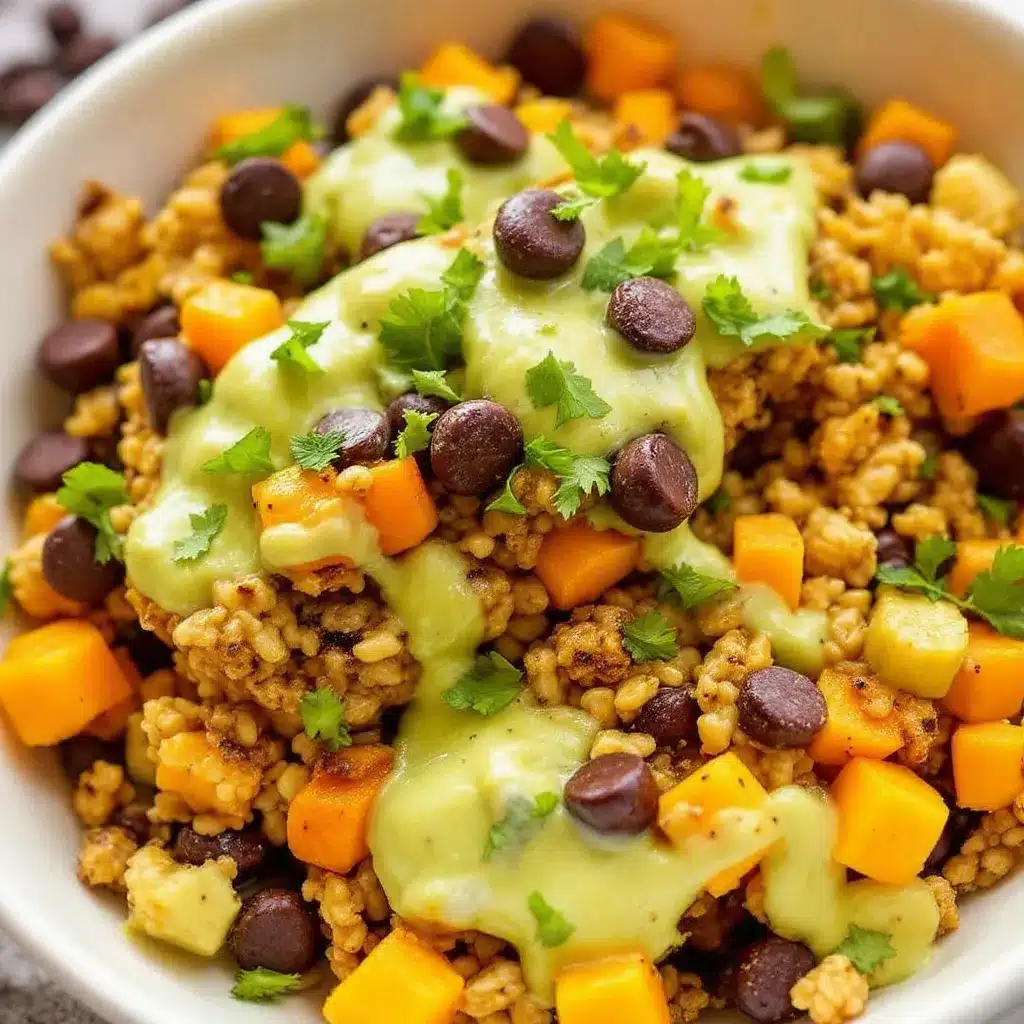
Preheat your oven to 375°F (190°C). While it’s heating up, grease a 12-cup muffin tin with cooking spray or line with paper liners. I’ve done both, and honestly, paper liners make cleanup so much easier—but if you’re out, spray works perfectly.
Step 1: Mix the wet ingredients.
In a large bowl, whisk together the pumpkin puree, eggs, milk, brown sugar, maple syrup, melted coconut oil, and vanilla extract. Whisk until everything is smooth and well combined. The mixture should be a uniform orange color with no streaks of egg white. Don’t worry if the coconut oil solidifies slightly when it hits the cold eggs—just keep whisking and it will incorporate.
Step 2: Combine the dry ingredients.
In a separate bowl (or just dump them into the wet bowl if you’re feeling brave), stir together the rolled oats, pumpkin pie spice, cinnamon, baking powder, and salt. Make sure the baking powder is evenly distributed—nobody wants a pocket of baking powder in their oatmeal cup.
Step 3: Fold everything together.
Pour the dry ingredients into the wet ingredients and stir with a spatula until just combined. Do not overmix—you want to see a few streaks of dry oats still. Overmixing can make the cups tough. Fold in the chocolate chips, reserving a handful to sprinkle on top if you want them to look pretty.
Step 4: Portion the batter.
Spoon the batter into the prepared muffin cups, filling each about ¾ full. The batter will be thick and slightly chunky—that’s normal. An ice cream scoop makes this step super easy and ensures all the cups are the same size. If you’re using paper liners, give the pan a gentle tap on the counter to settle the batter.
Step 5: Add the finishing touch.
Sprinkle the reserved chocolate chips on top of each cup. This is purely cosmetic, but it makes them look bakery-style and ensures every cup has visible chocolate on top. Press the chips in gently so they stick.
Step 6: Bake.
Bake for 18-22 minutes, or until the tops are set and golden brown around the edges. A toothpick inserted into the center should come out mostly clean—a few moist crumbs are fine, but you don’t want raw batter. The cups will look slightly puffed and the kitchen will smell like fall heaven.
Step 7: Cool properly.
Let the cups cool in the pan for 5 minutes. This is crucial—they need this time to set up. Then transfer them to a wire rack to cool completely. If you try to remove them too early, they might fall apart. Patience, my friend.
Step 8: Enjoy.
Serve warm or at room temperature. They’re amazing straight out of the oven with a pat of butter, but they’re equally delicious cold from the fridge.
Cooking Tips & Techniques
After making these cups more times than I care to admit, I’ve learned a few things the hard way. Here are my best tips:
Don’t skip the salt. I know it seems like a small amount, but salt is what makes the chocolate taste like chocolate and the pumpkin taste like pumpkin. Without it, the cups will taste flat and one-dimensional.
Measure your oats correctly. Scooping oats directly from the container with a measuring cup can pack them down and give you too much. Instead, spoon the oats into the measuring cup and level it off with a knife. This is the single biggest mistake people make with baked oatmeal recipes.
Let the batter rest for 5 minutes. If you have time, let the batter sit for 5 minutes before portioning it into the muffin tin. This gives the oats a chance to absorb some of the liquid, which results in a more tender, cohesive cup. I learned this trick from my first failed batch, which was too dry because I baked it immediately.
Use room temperature ingredients. Cold eggs and cold milk can cause the melted coconut oil to seize up and form little clumps. If you forget to take them out ahead of time, place the eggs in a bowl of warm water for 5 minutes and microwave the milk for 15 seconds.
Watch the bake time. Every oven is different. My oven runs hot, so I start checking at 16 minutes. Yours might need the full 22 minutes. Look for golden edges and a set center—that’s your cue.
Don’t overbake. These cups continue to cook slightly as they cool in the pan. If you bake them until they look completely dry, they’ll be tough when they cool. Pull them out when they’re still slightly soft in the center.
Grease your pan well. Even with non-stick pans, these cups can stick. I use a generous amount of cooking spray or butter, making sure to get into the crevices. Paper liners are the foolproof option.
Variations & Adaptations
This recipe is incredibly flexible. Here are some variations I’ve tried and loved:
Gluten-Free Version: Use certified gluten-free rolled oats. That’s it—the recipe is naturally gluten-free as long as your oats are certified. I’ve tested this with gluten-free oats and couldn’t tell the difference.
Dairy-Free Version: Use dairy-free chocolate chips (Enjoy Life brand is my favorite) and swap the butter for coconut oil or a plant-based butter. Use almond or oat milk instead of dairy milk. Everything else is already dairy-free.
Protein-Packed Version: Add 2 scoops (about 30g) of vanilla or unflavored protein powder. You’ll need to add an extra 2-3 tablespoons of milk to compensate for the dry powder. I’ve done this with collagen peptides and it worked beautifully—the cups were slightly denser but still delicious.
Lower Sugar Version: Reduce the brown sugar to 2 tablespoons and use unsweetened applesauce instead of maple syrup. The cups will be less sweet, but the chocolate chips provide enough sweetness to satisfy a craving.
Pumpkin-Free Version: Swap the pumpkin puree for mashed banana (about 2 medium bananas) or unsweetened applesauce. The texture will be slightly different, but it works in a pinch. I’ve made banana chocolate chip baked oatmeal cups this way and they were a hit with my kids.
Spice It Up: Add ¼ teaspoon of cardamom or a pinch of cayenne pepper for a warm, unexpected kick. The cayenne pairs surprisingly well with the chocolate and pumpkin.
Nutty Crunch: Fold in ¼ cup of chopped pecans or walnuts along with the chocolate chips. Toast them first in a dry pan for 3-4 minutes for extra flavor. This is my personal favorite variation—the crunch against the soft oatmeal is perfect.
Chocolate Lover’s Version: Use dark chocolate chips and add 1 tablespoon of cocoa powder to the dry ingredients. You might need to add an extra tablespoon of milk to balance the dryness. These are dangerously good.
Serving & Storage Suggestions
These oatmeal cups are incredibly versatile when it comes to serving and storing. Here’s what works best:
Serving Temperature: They’re delicious warm, at room temperature, or even cold. Warm them up for 15-20 seconds in the microwave if you want that fresh-from-the-oven experience. A little pat of butter or a drizzle of maple syrup takes them over the top.
Perfect Pairings: Serve alongside a hot cup of coffee, a pumpkin chai latte, or a glass of cold milk. They’re also great crumbled over yogurt or ice cream for a quick dessert.
Breakfast on the Go: Grab one (or two) on your way out the door. They’re sturdy enough to survive a commute in a lunchbox or bag. My husband takes them to work with a piece of fruit and calls it a perfect breakfast.
After-School Snack: These are a hit with kids. They’re sweet enough to feel like a treat but filling enough to hold them over until dinner. I often pack them in lunchboxes too.
Refrigerator Storage: Store in an airtight container in the refrigerator for up to 5 days. Place a paper towel in the container to absorb excess moisture and prevent sogginess. I like to layer them with parchment paper between each cup so they don’t stick together.
Freezer Storage: These freeze beautifully. Place the cooled cups in a single layer on a baking sheet and freeze for 1-2 hours until solid. Then transfer to a freezer-safe bag or container. They’ll keep for up to 3 months. To thaw, leave them in the refrigerator overnight or microwave for 30-40 seconds.
Reheating: Microwave for 20-30 seconds for a warm, soft cup. If you prefer a crisper exterior, pop them in a toaster oven at 350°F for 5-7 minutes. The toaster oven method is my favorite—the edges get slightly crispy while the center stays tender.
Flavor Development: Honestly, these cups taste even better on day two. The flavors meld together overnight, and the texture becomes more uniform. If you can resist eating them all on day one, you’re in for a treat.
Nutritional Information & Benefits
Here’s the approximate nutritional breakdown for one oatmeal cup (based on 12 servings with semi-sweet chocolate chips):
- Calories: 185
- Protein: 5g
- Carbohydrates: 28g
- Fiber: 3g
- Sugar: 12g
- Fat: 7g
- Saturated Fat: 3.5g
- Sodium: 95mg
These numbers are estimates and will vary based on the specific ingredients you use.
Health Highlights:
- Pumpkin is packed with vitamin A (over 200% of your daily needs in one cup), which supports eye health and immune function. It’s also rich in fiber, which helps keep you full and satisfied.
- Oats are a great source of soluble fiber, specifically beta-glucan, which has been shown to help lower cholesterol levels. They also provide steady energy without the blood sugar spike.
- Dark chocolate (if you use it) contains antioxidants called flavonoids, which may support heart health. Plus, it makes breakfast feel like dessert.
- Eggs provide high-quality protein and important nutrients like choline, which supports brain health.
Dietary Considerations: This recipe is naturally vegetarian and can be made gluten-free, dairy-free, and nut-free with simple substitutions. It’s not suitable for a vegan diet unless you use flax eggs and plant-based milk, which I haven’t tested but would likely work.
Allergen Note: Contains eggs and wheat (if using non-certified gluten-free oats). The chocolate chips may contain dairy. Always check labels if you’re cooking for someone with allergies.
I’m not a nutritionist, but I feel good about feeding these to my family. They’re balanced enough for breakfast but indulgent enough to feel like a treat—which is exactly what I want in a recipe.
Conclusion
These Easy Pumpkin Chocolate Chip Baked Oatmeal Cups have become a staple in my kitchen for good reason. They’re quick, forgiving, and endlessly adaptable. Whether you’re a seasoned baker or someone who’s never made anything from scratch, this recipe will work for you.
What I love most about them is how they make mornings feel a little less chaotic. Having a batch in the fridge means breakfast is solved for the week, and I can focus on getting everyone out the door without the usual scramble. Plus, they make the whole house smell like fall, which is never a bad thing.
I’d love to hear how these turn out for you. Did you add any mix-ins? Did your kids love them as much as mine do? Drop a comment below and let me know—I read every single one and I’m always looking for new variations to try. And if you’re feeling generous, share this recipe with a friend who needs a little more pumpkin in their life.
Happy baking, friends. I hope these cups bring you as much comfort as they’ve brought me.
Frequently Asked Questions
Can I use quick oats instead of rolled oats?
Yes, but the texture will be softer and less chewy. Quick oats absorb liquid faster, so the cups might be slightly denser. I recommend reducing the bake time by 2-3 minutes and checking for doneness earlier. If you only have quick oats, go ahead and use them—they’ll still taste great.
How do I keep the oatmeal cups from sticking to the pan?
Grease the muffin tin generously with cooking spray or butter, making sure to get into all the crevices. Paper liners are the most reliable option—they peel off easily and make cleanup a breeze. If you’re using silicone muffin cups, place them on a baking sheet for stability and spray them lightly with oil.
Can I make these ahead of time for meal prep?
Absolutely. In fact, they taste even better on day two. Make a batch on Sunday, let them cool completely, and store them in an airtight container in the refrigerator for up to 5 days. You can also freeze them for up to 3 months. Just reheat in the microwave for 20-30 seconds when you’re ready to eat.
Why did my oatmeal cups turn out dry?
This usually happens from overbaking or using too many oats. Make sure you’re measuring your oats correctly (spoon them into the measuring cup and level off, don’t scoop directly). Also, check your oven temperature—an oven that runs hot can dry out the cups quickly. Pull them out when they’re still slightly soft in the center.
Can I use pumpkin pie filling instead of pumpkin puree?
I wouldn’t recommend it. Pumpkin pie filling has added sugar, spices, and sometimes thickeners that will throw off the balance of the recipe. You’d end up with overly sweet, overly spiced cups that might not set properly. Stick with 100% pure pumpkin puree for the best results.
How do I make these vegan?
I haven’t tested a vegan version myself, but you can try using flax eggs (2 tablespoons ground flaxseed mixed with 6 tablespoons water, let sit for 5 minutes), plant-based milk, and maple syrup instead of honey. The texture might be slightly different, but it should work. Let me know if you try it!
Pin This Recipe!
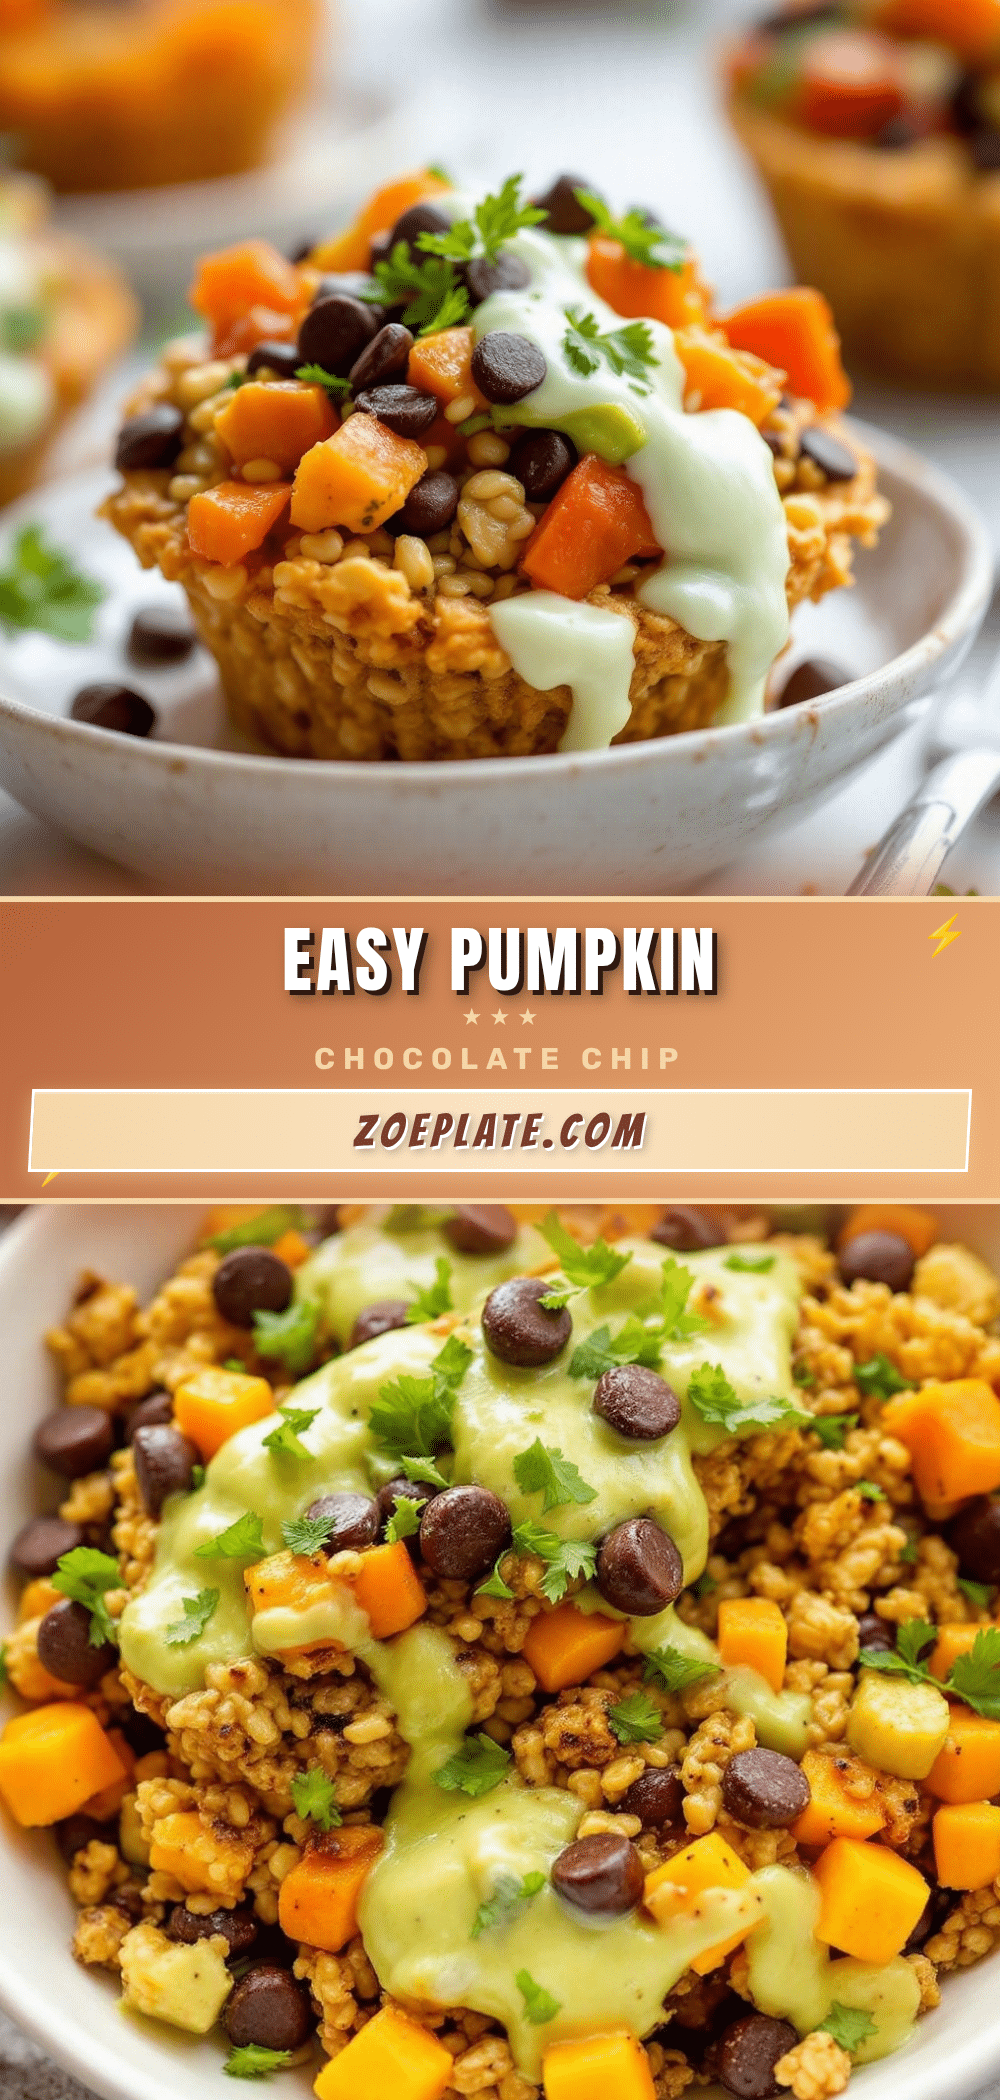
Easy Pumpkin Chocolate Chip Baked Oatmeal Cups
These Easy Pumpkin Chocolate Chip Baked Oatmeal Cups are a quick, portable breakfast or snack made with simple pantry ingredients. They have slightly crisp edges, tender centers, and pockets of melted chocolate in every bite.
- Prep Time: 10 minutes
- Cook Time: 20 minutes
- Total Time: 30 minutes
- Yield: 12 servings 1x
- Category: Breakfast
- Cuisine: American
Ingredients
- 2 cups (180g) rolled oats (old-fashioned oats)
- 1 cup (245g) pumpkin puree (100% pure, not pumpkin pie filling)
- 2 large eggs, room temperature
- ½ cup (120ml) milk (dairy, almond, oat, or soy)
- ⅓ cup (67g) brown sugar, packed (light or dark)
- 2 tablespoons (30ml) maple syrup or honey
- 2 tablespoons (28g) coconut oil or butter, melted
- 1 teaspoon vanilla extract
- 1½ teaspoons pumpkin pie spice
- 1 teaspoon cinnamon
- 1 teaspoon baking powder
- ¼ teaspoon salt
- ½ cup (90g) chocolate chips (semi-sweet or dark)
- Optional mix-ins: ¼ cup chopped pecans or walnuts, 2 tablespoons flaxseed meal, or ¼ cup dried cranberries
Instructions
- Preheat your oven to 375°F (190°C). Grease a 12-cup muffin tin with cooking spray or line with paper liners.
- In a large bowl, whisk together the pumpkin puree, eggs, milk, brown sugar, maple syrup, melted coconut oil, and vanilla extract until smooth and well combined.
- In a separate bowl, stir together the rolled oats, pumpkin pie spice, cinnamon, baking powder, and salt until evenly distributed.
- Pour the dry ingredients into the wet ingredients and stir with a spatula until just combined. Do not overmix. Fold in the chocolate chips, reserving a handful to sprinkle on top.
- Spoon the batter into the prepared muffin cups, filling each about ¾ full. An ice cream scoop makes this easy and ensures even portions.
- Sprinkle the reserved chocolate chips on top of each cup and press them in gently.
- Bake for 18-22 minutes, or until the tops are set and golden brown around the edges. A toothpick inserted into the center should come out mostly clean.
- Let the cups cool in the pan for 5 minutes, then transfer to a wire rack to cool completely. Serve warm or at room temperature.
Notes
Let the batter rest for 5 minutes before portioning for more tender cups. Use room temperature ingredients to prevent coconut oil from seizing. Don’t overbake; cups continue to cook as they cool. These taste even better on day two.
Nutrition
- Serving Size: 1 oatmeal cup
- Calories: 185
- Sugar: 12
- Sodium: 95
- Fat: 7
- Saturated Fat: 3.5
- Carbohydrates: 28
- Fiber: 3
- Protein: 5
Keywords: pumpkin oatmeal cups, baked oatmeal, pumpkin chocolate chip, breakfast cups, meal prep breakfast, healthy breakfast, fall breakfast


