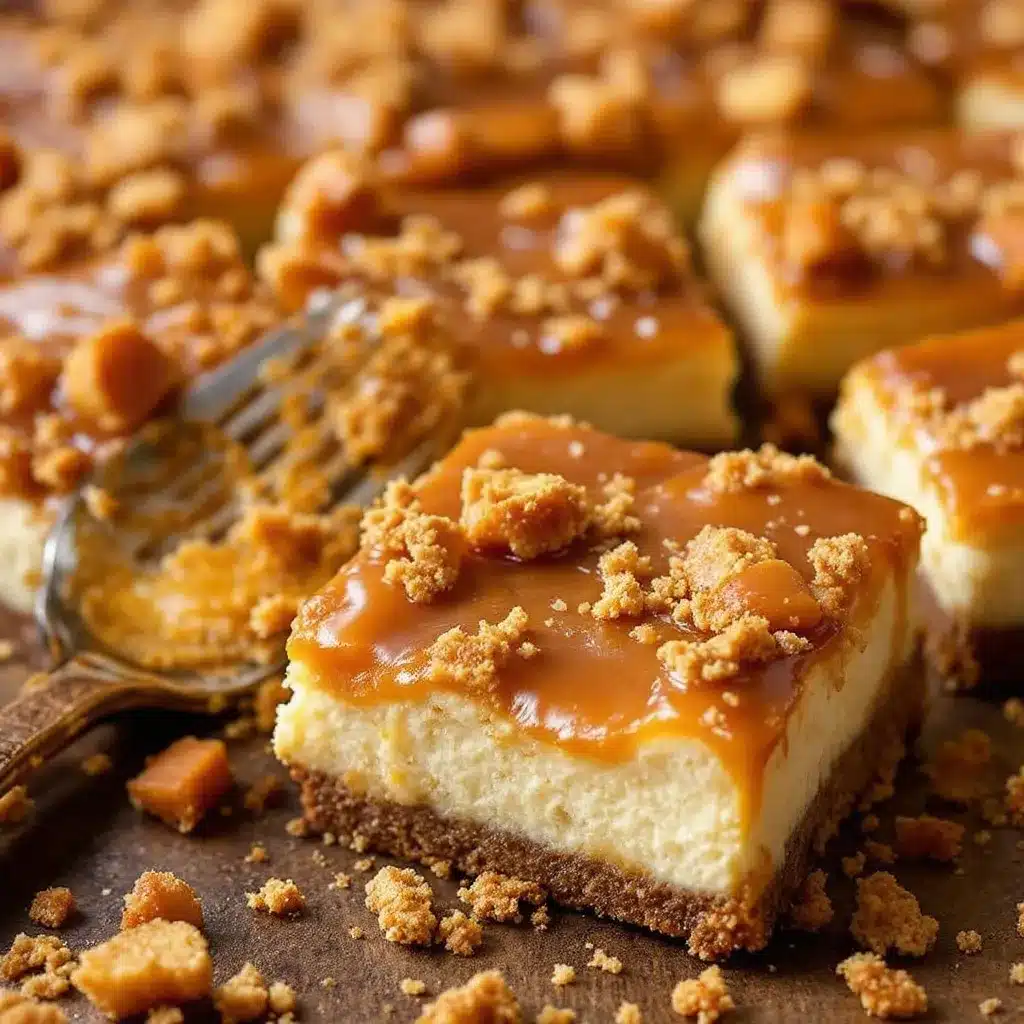
It wasn’t the smell of cinnamon and apples filling the kitchen—though that was good. It wasn’t the buttery shortbread crust, or the creamy swirl of cheesecake. It was that split-second moment when the fork hit the top layer and the salted caramel gave way with a glassy shatter before sinking into the soft apple filling underneath. That texture—firm on top, yielding beneath—is the whole point of these Ultimate Salted Caramel Apple Cheesecake Bars. Everything else is just supporting the structure.
I developed this recipe on a Tuesday afternoon in late September, when the air had that crisp edge that makes you crave layers—in your sweaters and in your desserts. I wanted something that felt like a full-on autumn project but didn’t actually require the patience of a full cheesecake bake. Something you could throw together while the kids were doing homework, or while you half-watched a movie, and still have people ask, “Wait, you made this?”
The first batch? A disaster. The caramel slid right off the cheesecake layer like it had personal beef with the apples. The crust was too thick. The apples released so much liquid I had to rename it “Apple Soup with Cheesecake Islands.” But that second batch—the one where I stopped overthinking and started trusting the process—that one worked. The caramel clung. The apples softened just enough. The cheesecake stayed creamy without getting weepy.
These bars are the kind of dessert you make for a friend who’s had a rough week, or for a dinner party where you want to look like you spent hours (you didn’t). They’re the fall dessert that actually delivers on the promise of “all the flavors in one bite.” And honestly? That first crack of caramel through the fork? Still the best part.
Why You’ll Love These Ultimate Salted Caramel Apple Cheesecake Bars
Let me tell you why this recipe earned the word “Ultimate” in its title. I don’t throw that around lightly. I’ve tested this thing six ways from Sunday, and here’s what makes it stand out.
- Three Layers, One Pan: You get a buttery shortbread crust, a creamy cheesecake middle, and a spiced apple topping all in one bar. No separate components to assemble. No fancy piping. Just layers that work together.
- No Water Bath Needed: I hate water baths. They leak, they steam up your oven, and they’re a hassle. This recipe skips the water bath entirely. The cheesecake stays creamy because of the technique, not the steam.
- Make-Ahead Friendly: These bars actually get better after a day in the fridge. The flavors meld, the caramel sinks in, and the texture firms up for cleaner slices. Perfect for holiday prep.
- Real Apple Texture: I’m not a fan of apple filling that turns into mush. This recipe uses a quick stovetop cook that softens the apples while keeping some bite. You’ll actually taste apple, not just apple-flavored goo.
- That Salted Caramel Finish: The flaky sea salt on top cuts through the sweetness and makes every bite a little different. It’s not just decoration—it’s a flavor anchor.
I’ve made these for Thanksgiving, for book club, and for “it’s Tuesday and I need something sweet.” Every time, someone asks for the recipe. Every time, I tell them the same thing: the caramel is the star, but the crust is the foundation. Don’t skip either.
What Ingredients You Will Need
This recipe uses simple, mostly pantry-friendly ingredients to build something that tastes way more complicated than it is. Here’s what you’ll need, broken down by layer.
For the Shortbread Crust
- 1 ½ cups all-purpose flour (190g) — spoon and level for accuracy
- ½ cup powdered sugar (60g) — not granulated; powdered gives that melt-in-your-mouth texture
- ¾ cup unsalted butter (170g), cold and cut into small cubes — I use Kerrygold for the richness
- ¼ teaspoon salt — fine sea salt, not table salt
- ½ teaspoon vanilla extract — pure, not imitation
For the Cheesecake Layer
- 16 oz cream cheese (two 8-ounce blocks), softened to room temperature — Philadelphia is my go-to
- ½ cup granulated sugar (100g)
- 2 large eggs, room temperature — cold eggs will make the filling lumpy
- 1 teaspoon vanilla extract
- 2 tablespoons all-purpose flour (15g) — this helps stabilize the cheesecake so it doesn’t crack
- ¼ cup sour cream (60g), room temperature — adds tang and creaminess
For the Apple Layer
- 3 medium apples (about 450g), peeled, cored, and diced into ½-inch cubes — I prefer Honeycrisp or Granny Smith for the balance of sweetness and tartness
- 3 tablespoons unsalted butter (42g)
- ¼ cup brown sugar (50g), packed — light or dark works
- 1 teaspoon cinnamon
- ¼ teaspoon nutmeg — freshly grated if you have it
- 1 tablespoon lemon juice (15ml) — keeps the apples from browning and brightens the flavor
- 1 tablespoon cornstarch (8g) mixed with 1 tablespoon water — for thickening
For the Salted Caramel Topping
- ½ cup granulated sugar (100g)
- 3 tablespoons unsalted butter (42g), cut into pieces
- ¼ cup heavy cream (60ml), room temperature — warm it slightly if you can
- ½ teaspoon flaky sea salt — Maldon is my favorite; plus extra for finishing
- ½ teaspoon vanilla extract
Equipment Needed
You don’t need a lot of fancy gear for these bars, but a few things make the process smoother.
- 9×13-inch baking pan — metal or glass works; I prefer metal for even browning on the crust
- Parchment paper — line the pan with two overlapping sheets, leaving overhang on all sides for easy lifting
- Stand mixer or hand mixer — for the cheesecake filling; you can do it by hand but your arm will hate you
- Medium saucepan — for the apple filling and the caramel
- Food processor — for the crust, or you can use a pastry cutter and a bowl
- Rubber spatula — for scraping every last bit of cheesecake filling
- Sharp knife — for clean slices; wipe it clean between cuts
If you don’t have a food processor, you can make the crust by hand. Just cut the butter into the flour-sugar mixture using a pastry blender or two forks until it looks like coarse sand. It takes a little longer but works just fine. I’ve done it both ways, and honestly, the hand-mixed crust has a slightly more rustic texture that I kind of love.
Preparation Method
Let’s build these bars layer by layer. Take your time with each step—rushing is the enemy of good cheesecake.
Step 1: Make the Shortbread Crust
Preheat your oven to 350°F (175°C). Line your 9×13 pan with parchment paper, leaving overhang on two opposite sides. In a food processor, pulse the flour, powdered sugar, and salt together. Add the cold butter cubes and vanilla, then pulse until the mixture looks like coarse meal with some pea-sized butter pieces still visible. Don’t overprocess—you want texture, not paste. Press the mixture evenly into the bottom of the prepared pan. Use the bottom of a measuring cup to get it flat and compact. Bake for 18-20 minutes, until lightly golden around the edges. Set aside to cool slightly while you make the filling.
Step 2: Make the Cheesecake Filling
In a large bowl, beat the softened cream cheese with an electric mixer on medium speed until smooth and creamy—about 2 minutes. Scrape down the sides and the bottom of the bowl. Add the sugar and beat for another minute. Add the eggs one at a time, beating on low after each addition just until combined. Overbeating at this stage incorporates too much air, which can cause cracks. Add the vanilla, sour cream, and flour, and mix on low until just smooth. Pour the filling over the warm crust and spread it evenly. Set aside while you make the apple layer.
Step 3: Cook the Apple Layer
In a medium saucepan over medium heat, melt the butter. Add the diced apples, brown sugar, cinnamon, nutmeg, and lemon juice. Cook, stirring occasionally, for about 5-6 minutes until the apples soften slightly but still hold their shape. Stir in the cornstarch slurry and cook for another minute until the mixture thickens. Remove from heat and let it cool for 5 minutes. Spoon the apples evenly over the cheesecake layer, spreading gently. Don’t press them in—let them sit on top.
Step 4: Bake the Bars
Bake at 350°F (175°C) for 35-40 minutes. The edges should be set and slightly puffed, but the center will still jiggle slightly when you shake the pan. That’s okay—it will set as it cools. Remove from the oven and let it cool completely on a wire rack (about 1 hour). Then refrigerate for at least 4 hours, preferably overnight. This is crucial—don’t skip the chilling time or your bars will fall apart when you cut them.
Step 5: Make the Salted Caramel
While the bars are chilling, make the caramel. In a medium saucepan over medium heat, melt the sugar, stirring occasionally with a dry whisk. It will clump first, then melt into a golden amber liquid. Watch it carefully—sugar burns fast. Once it’s a deep amber color (about 350°F if you’re using a thermometer), remove it from heat and immediately whisk in the butter pieces. It will bubble up violently; that’s normal. Keep whisking until the butter is fully incorporated. Slowly drizzle in the heavy cream while whisking constantly. The mixture will steam and bubble again. Whisk until smooth, then stir in the vanilla and flaky sea salt. Let it cool to room temperature. It will thicken as it cools.
Step 6: Assemble and Serve
Once the bars are fully chilled and set, use the parchment overhang to lift them out of the pan onto a cutting board. Drizzle the salted caramel over the top. Sprinkle with additional flaky sea salt. Use a sharp knife to cut into 12-16 bars, wiping the knife clean between cuts for neat edges. Serve cold or at room temperature.
Cooking Tips & Techniques
I’ve made these bars more times than I care to count, and I’ve learned a few things the hard way. Here’s what I wish someone had told me.
Room temperature ingredients matter. I know it’s annoying to wait, but cold cream cheese and cold eggs will give you a lumpy, grainy cheesecake layer. Set them out on the counter 30-45 minutes before you start. If you’re in a hurry, cut the cream cheese into small cubes and let it sit for 15 minutes—it’ll soften faster.
Don’t overbake. The center will look underdone when you pull it out. That’s the goal. Overbaked cheesecake cracks, gets rubbery, and loses that creamy texture. Trust the jiggle. If the edges are set and the center wobbles like Jell-O when you shake the pan, you’re golden.
Caramel is a diva. It will seize. It will burn. It will make you question your life choices. The trick is patience. Use a clean, dry pan. Don’t stir once the sugar starts melting—just swirl the pan gently. And for the love of all things sweet, warm your heavy cream before adding it. Cold cream into hot sugar = instant sugar rock. I learned that one the hard way and spent 20 minutes scrubbing a saucepan.
Chill overnight if you can. Four hours is the minimum, but overnight gives you cleaner cuts and better flavor development. The caramel sinks into the apple layer just a bit, and the whole thing becomes more cohesive. Trust me on this.
If you’re looking for another dessert that layers textures and flavors beautifully, you might love these creamy banana pudding cheesecake bars. Same easy approach, completely different flavor profile.
Variations & Adaptations
One of the best things about this recipe is how flexible it is. Here are some ways to make it your own.
Gluten-Free Version: Swap the all-purpose flour in the crust with a 1:1 gluten-free baking flour blend. I’ve used Bob’s Red Mill with good results. The texture will be slightly more crumbly, but still delicious. Just make sure your caramel ingredients are also gluten-free (most are, but check labels).
Dairy-Free Adaptation: Use dairy-free cream cheese (Kite Hill is my favorite), vegan butter, and coconut cream instead of heavy cream. The texture won’t be identical—it’ll be a bit softer—but the flavor is still fantastic. I’ve served this to dairy-free friends and they didn’t complain once.
Different Apple Varieties: Try Fuji for sweeter bars, Braeburn for a balanced tart-sweet, or even Pink Lady for a floral note. Avoid Red Delicious—they turn to mush. Mix two varieties for more complex flavor.
Spice It Up: Add ¼ teaspoon cardamom to the apple layer for a warm, slightly floral note. Or use apple pie spice instead of cinnamon and nutmeg. I’ve also added a pinch of cayenne to the caramel for a spicy-sweet kick that’s surprisingly addictive.
Nutty Crust: Replace ¼ cup of the flour in the crust with finely ground pecans or walnuts. Toast them first for extra depth. This works especially well if you’re serving these bars for Thanksgiving.
If you’re a fan of apple desserts, you’ll also enjoy these easy apple nachos with caramel drizzle—they’re a fun, shareable twist on apple flavor.
Serving & Storage Suggestions
These bars are versatile enough for almost any occasion. Here’s how to serve and store them.
Serving Temperature: I prefer them cold, straight from the fridge. The cheesecake layer is firmer and the caramel has a nice snap. But they’re also great at room temperature—the cheesecake gets creamier and the apples soften slightly. Try both and see which you prefer.
Presentation Ideas: Cut into 12 bars for generous portions or 16 for smaller servings. Arrange on a platter and drizzle extra caramel on top just before serving. Add a dollop of whipped cream and a sprinkle of cinnamon for a more dressed-up look. For holiday gatherings, I sometimes cut them into 24 smaller squares and serve them on a tiered tray with other treats.
What to Serve With: A scoop of vanilla ice cream is the classic pairing. The cold creaminess balances the caramel and apples perfectly. A cup of hot coffee or spiced chai also works beautifully. For a boozy option, serve with a glass of bourbon or a warm apple cider cocktail.
Storage: Keep leftovers in an airtight container in the refrigerator for up to 5 days. The caramel may soften and sink into the bars over time, but that’s honestly delicious. To freeze, wrap individual bars tightly in plastic wrap, then place them in a freezer bag. They’ll keep for up to 3 months. Thaw in the refrigerator overnight before serving.
Reheating: If you want that warm apple pie experience, microwave a single bar for 15-20 seconds. The cheesecake will soften, the apples will warm, and the caramel will get slightly gooey. Just don’t overdo it—30 seconds and you’ll have a puddle.
For another crowd-pleasing dessert that stores beautifully, try this homemade fresh peach cobbler. It’s a completely different vibe but equally satisfying.
Nutritional Information & Benefits
Let’s be real—these are a treat, not a health food. But knowing what’s in them helps with mindful indulgence.
Estimated per bar (based on 12 servings):
- Calories: 420-450
- Fat: 28g
- Saturated Fat: 17g
- Carbohydrates: 42g
- Sugar: 30g
- Fiber: 1g
- Protein: 6g
- Sodium: 280mg
Health Benefits (yes, there are some): Apples provide fiber and vitamin C. Cinnamon has anti-inflammatory properties. The calcium from cream cheese and sour cream supports bone health. The nuts in the optional crust variation add healthy fats and protein. And honestly? The mental health benefit of eating something this delicious is real. I’m a firm believer that dessert has a place in a balanced lifestyle.
Dietary Considerations: This recipe contains gluten, dairy, and eggs. For gluten-free and dairy-free options, see the variations section above. It’s not suitable for vegan diets without significant modifications.
Allergen Notes: Contains wheat, dairy, and eggs. May contain tree nuts if using the nut crust variation.
If you’re looking for a lighter option that still satisfies your sweet tooth, these no-bake peanut butter oat energy bites are a great alternative for everyday snacking.
Conclusion
These Ultimate Salted Caramel Apple Cheesecake Bars are the fall dessert I keep coming back to. They’re not the quickest recipe I have, and they’re not the simplest. But they are the most rewarding. Every layer has a purpose, every bite has a moment, and every time I make them, someone asks for the recipe.
What I love most is how they bring people together. I’ve made them for holiday dinners where the whole table went quiet after the first bite. I’ve made them for casual get-togethers where someone ate three bars before admitting they’d had dinner already. I’ve even made them for myself on a rainy Sunday, just because I wanted something that felt like a hug.
Don’t be afraid to make these your own. Use your favorite apples. Add extra cinnamon. Skip the nuts. Double the caramel. The recipe is a framework, not a prison. The best version is the one that makes you happy.
If you make these bars, I’d love to hear about it. Leave a comment below and tell me how they turned out, what variations you tried, or just share your favorite fall memory. And if you loved them, share this recipe with a friend who needs a little sweetness in their life. Happy baking!
Frequently Asked Questions
Can I use pre-made caramel sauce instead of making my own?
You can, but it won’t be the same. Homemade salted caramel has a deeper flavor and better texture. If you’re short on time, use a high-quality store-bought caramel and add a pinch of flaky sea salt. Just know that the final result will be sweeter and less complex.
Why did my cheesecake layer crack?
Overbaking is the most common cause. The center should still jiggle when you pull it out. Overmixing the batter (which incorporates too much air) and sudden temperature changes (like opening the oven door repeatedly) can also cause cracks. Let the bars cool gradually in the oven with the door cracked open for 10 minutes before removing them.
Can I make these bars ahead of time?
Absolutely. In fact, they’re better made a day ahead. Prepare the bars through Step 4, let them cool completely, and refrigerate overnight. Make the caramel the next day and drizzle it over the bars just before serving. This gives the flavors time to meld and makes for cleaner slices.
What apples work best for this recipe?
Honeycrisp and Granny Smith are my top picks. Honeycrisp holds its shape well and has a nice sweet-tart balance. Granny Smith is more tart, which pairs beautifully with the sweet caramel and creamy cheesecake. Fuji and Braeburn are also good options. Avoid Red Delicious and McIntosh—they turn mushy.
How do I get clean, neat slices?
Chill the bars for at least 4 hours, preferably overnight. Use a sharp knife and wipe it clean with a damp paper towel between each cut. For the cleanest slices, run the knife under hot water, dry it, then cut. The heat helps the knife glide through the caramel layer without dragging.
Pin This Recipe!
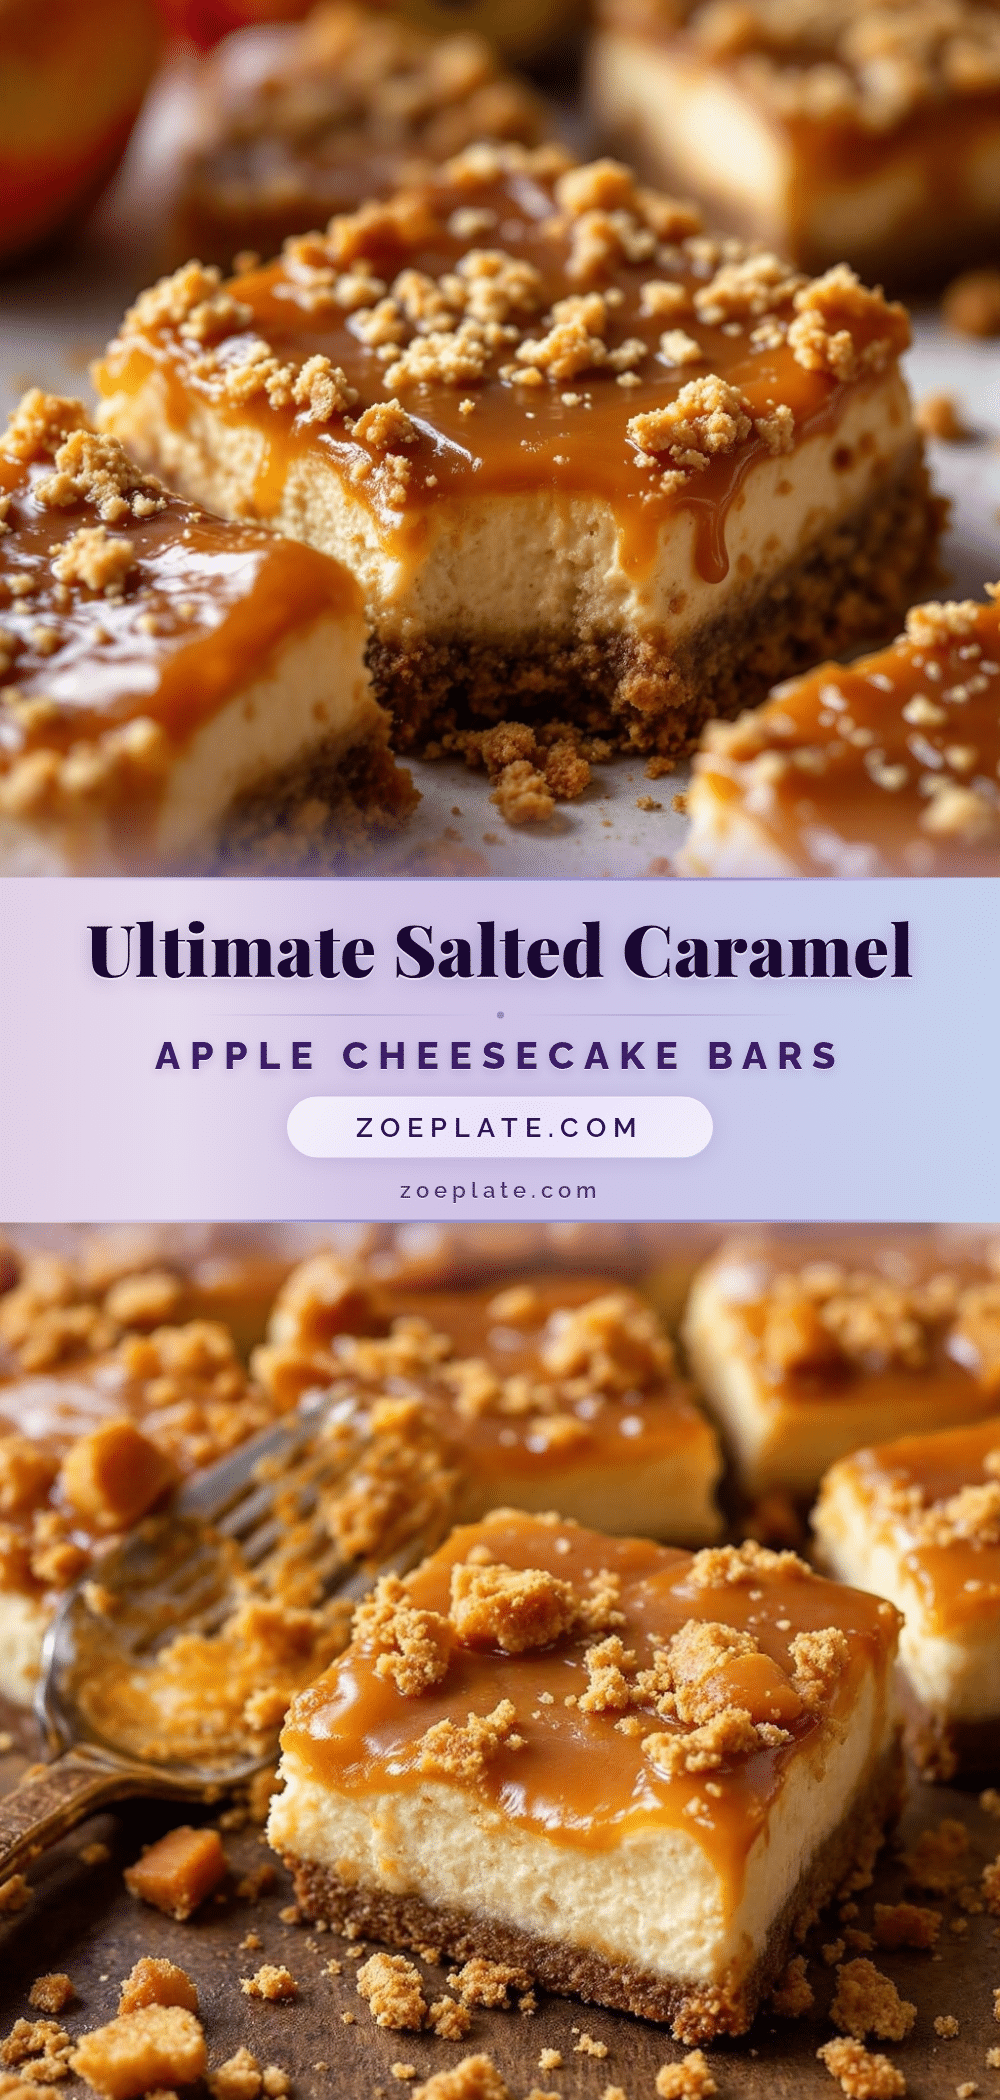
Ultimate Salted Caramel Apple Cheesecake Bars
These Ultimate Salted Caramel Apple Cheesecake Bars feature a buttery shortbread crust, creamy cheesecake layer, spiced apple topping, and a glassy salted caramel finish. No water bath needed, and they’re make-ahead friendly for easy fall entertaining.
- Prep Time: 30 minutes
- Cook Time: 55 minutes
- Total Time: 5 hours 25 minutes (includes chilling)
- Yield: 12-16 servings 1x
- Category: Dessert
- Cuisine: American
Ingredients
- 1 ½ cups all-purpose flour (190g)
- ½ cup powdered sugar (60g)
- ¾ cup unsalted butter (170g), cold and cut into small cubes
- ¼ teaspoon fine sea salt
- ½ teaspoon pure vanilla extract
- 16 oz cream cheese (two 8-ounce blocks), softened to room temperature
- ½ cup granulated sugar (100g)
- 2 large eggs, room temperature
- 1 teaspoon vanilla extract
- 2 tablespoons all-purpose flour (15g)
- ¼ cup sour cream (60g), room temperature
- 3 medium apples (about 450g), peeled, cored, and diced into ½-inch cubes
- 3 tablespoons unsalted butter (42g)
- ¼ cup brown sugar (50g), packed
- 1 teaspoon cinnamon
- ¼ teaspoon nutmeg
- 1 tablespoon lemon juice (15ml)
- 1 tablespoon cornstarch (8g) mixed with 1 tablespoon water
- ½ cup granulated sugar (100g)
- 3 tablespoons unsalted butter (42g), cut into pieces
- ¼ cup heavy cream (60ml), room temperature
- ½ teaspoon flaky sea salt, plus extra for finishing
- ½ teaspoon vanilla extract
Instructions
- Preheat oven to 350°F (175°C). Line a 9×13-inch baking pan with parchment paper, leaving overhang on two opposite sides.
- Make the shortbread crust: In a food processor, pulse flour, powdered sugar, and salt. Add cold butter cubes and vanilla; pulse until mixture looks like coarse meal with some pea-sized butter pieces. Press evenly into prepared pan. Bake 18-20 minutes until lightly golden. Set aside to cool slightly.
- Make the cheesecake filling: In a large bowl, beat softened cream cheese with an electric mixer on medium speed until smooth (about 2 minutes). Add sugar and beat 1 minute. Add eggs one at a time, beating on low just until combined. Add vanilla, sour cream, and flour; mix on low until smooth. Pour over warm crust and spread evenly.
- Cook the apple layer: In a medium saucepan over medium heat, melt butter. Add diced apples, brown sugar, cinnamon, nutmeg, and lemon juice. Cook 5-6 minutes until apples soften slightly. Stir in cornstarch slurry and cook 1 minute until thickened. Remove from heat and cool 5 minutes. Spoon apples evenly over cheesecake layer.
- Bake at 350°F (175°C) for 35-40 minutes. Edges should be set, center will jiggle slightly. Cool completely on a wire rack (about 1 hour), then refrigerate at least 4 hours, preferably overnight.
- Make the salted caramel: In a medium saucepan over medium heat, melt sugar, stirring occasionally with a dry whisk. Once deep amber (about 350°F), remove from heat and whisk in butter pieces. Slowly drizzle in heavy cream while whisking constantly. Whisk until smooth, then stir in vanilla and flaky sea salt. Cool to room temperature.
- Once bars are fully chilled, use parchment overhang to lift out of pan. Drizzle salted caramel over top and sprinkle with additional flaky sea salt. Cut into 12-16 bars using a sharp knife, wiping clean between cuts. Serve cold or at room temperature.
Notes
Room temperature ingredients are crucial for a smooth cheesecake. Don’t overbake; the center should jiggle. Chill overnight for cleanest slices. Caramel will thicken as it cools; warm cream before adding to prevent seizing.
Nutrition
- Serving Size: 1 bar (based on 12 s
- Calories: 420450
- Sugar: 30
- Sodium: 280
- Fat: 28
- Saturated Fat: 17
- Carbohydrates: 42
- Fiber: 1
- Protein: 6
Keywords: salted caramel apple cheesecake bars, fall dessert, apple cheesecake bars, easy cheesecake bars, no water bath cheesecake


