My sister showed up at my door on October 30th with three bags of candy corn and a look that said “fix this.” Her kid’s school party got canceled last minute, and she had already bought all the supplies for a class treat. Now she was staring at a mountain of those little orange triangles with no plan. I grabbed a cutting board, raided my pantry for pretzels, white chocolate chips, and a bag of dried cranberries I’d forgotten about. The candy corn charcuterie board was born in about twelve minutes flat, and honestly, it was the most fun I’d had in the kitchen all month. We arranged everything in stripes, like a giant candy corn, and the kids went absolutely wild for it. It’s one of those rare recipes that looks like you spent hours on it when you really just threw stuff on a board. That accidental moment turned into a Halloween tradition I actually look forward to every year.
There’s something about the way candy corn looks when you treat it like a design element instead of just a candy. It becomes almost architectural. This board isn’t just a snack — it’s a conversation piece. And the best part? You can make it with whatever you have lying around. I’ve made versions with chocolate-covered almonds, marshmallows, and even leftover melting witch Halloween sugar cookies crumbled on top. The recipe adapts to whatever chaos your pantry throws at you. That’s the beauty of it. It’s forgiving, it’s flexible, and it’s guaranteed to make people smile.
If you’re hosting a Halloween party, sending treats to school, or just want something fun for a movie night, this board delivers. It’s the kind of thing that makes people stop and take a picture before they even grab a bite. And once they start eating? The combination of salty, sweet, crunchy, and chewy keeps everyone coming back for more. I’ve made this for three Halloweens in a row now, and it never gets old. Trust me — once you try it, you’ll wonder why you ever stressed over Halloween snacks.
Why You’ll Love This Recipe
Let me tell you why this board has become my go-to Halloween trick. First off, it’s stupidly easy. We’re talking no baking, no complicated steps, just arranging stuff on a board. That’s it. You can put this together in under fifteen minutes, even if you’re distracted by kids or last-minute party prep. I’ve done it while answering emails and helping with homework. It’s that forgiving.
- Quick & Easy: From start to finish, this takes about 10-15 minutes. Perfect for when Halloween sneaks up on you (which it always does).
- Simple Ingredients: You probably already have most of these things in your pantry. Candy corn, pretzels, chocolate — nothing fancy required.
- Perfect for Halloween Parties: Whether it’s a school event, a neighborhood gathering, or a spooky movie night, this board fits right in.
- Crowd-Pleaser: Kids love the candy corn, adults love the salty-sweet combo, and everyone loves how cute it looks.
- Unbelievably Delicious: The texture mix is next-level. Crunchy pretzels, chewy candy corn, creamy chocolate — it’s a party in your mouth.
What makes this board different from every other Halloween snack out there is the visual impact. I’m not just throwing stuff on a platter. I’m layering it in candy corn stripes — white, orange, yellow — so it actually looks like the candy itself. It’s a little design trick that makes people do a double-take. And the flavor combination? I tested about six different versions before landing on this one. The salty pretzels balance the sweetness of the candy corn perfectly. The white chocolate adds creaminess. The dried cranberries give it a tart pop that cuts through all that sugar. It’s not just another snack board — it’s the best version I’ve ever made.
Honestly, this recipe makes me happy every time I make it. There’s something about seeing a board full of colorful treats that brings out the kid in everyone. It’s comfort food reimagined — festive, fun, and totally stress-free. Perfect for impressing guests without breaking a sweat, or turning a simple Halloween night into something memorable. You close your eyes after that first bite of pretzel dipped in chocolate with a piece of candy corn? Pure magic.
What Ingredients You Will Need
This recipe uses simple, mostly pantry-stable ingredients to create a visually stunning and deliciously balanced snack board. Nothing fancy, nothing hard to find — just good stuff that works together beautifully. Here’s what you’ll need to build your candy corn masterpiece.
- Candy Corn (about 2 cups): The star of the show. You can use classic candy corn or seasonal variations like harvest mix (which has those cute little pumpkins). I prefer Brach’s for the classic texture and flavor. Pro tip: buy an extra bag because someone will eat it before you assemble the board. Trust me on this.
- Mini Pretzel Twists (about 2 cups): These provide the salty crunch that balances the sweetness. I like the mini twists because they’re easy to arrange and look great in stripes. Snyder’s of Hanover are my go-to brand. If you only have regular pretzels, just break them into smaller pieces.
- White Chocolate Melting Wafers (about 1 cup): These add that creamy, sweet layer that ties everything together. I use Ghirardelli white chocolate melting wafers because they melt smoothly and set firmly. You can also use white chocolate chips, but they don’t melt as evenly. If you’re dairy-free, look for vegan white chocolate chips.
- Dried Cranberries (about 1 cup): The tartness cuts through all that sugar and adds a beautiful red pop of color. Craisins work perfectly. You can also use dried cherries or chopped dried apricots if you want to switch it up.
- Salted Roasted Almonds (about 1 cup): These add another layer of crunch and saltiness. The salt on the almonds really enhances the sweetness of the candy corn. If you’re nut-free, use roasted pumpkin seeds or sunflower seeds instead.
- Orange and Yellow M&M’s (about 1 cup each): These are optional but highly recommended for extra color and crunch. They reinforce the candy corn color scheme beautifully. You can also use Reese’s Pieces in orange and yellow if you prefer peanut butter flavor.
- Pumpkin-Shaped Marshmallows (about 1 cup): These are seasonal and add a soft, pillowy texture. If you can’t find them, regular mini marshmallows work fine. I’ve also used ghost-shaped marshmallows for a different vibe.
- Halloween Sprinkles (about ¼ cup): For garnish. These add that extra festive touch that makes the board look professionally done. Any fall-colored sprinkles work — orange, yellow, black, purple.
- Optional Add-Ins: Dark chocolate squares, caramel popcorn, gummy worms, or even candy corn layered Jello cups cut into small pieces. Get creative with what you have on hand.
When selecting ingredients, look for fresh candy corn — check the date on the bag because stale candy corn is tough and less flavorful. For the pretzels, make sure they’re not broken into tiny pieces. Whole mini twists look much better on the board. If you’re making this for a crowd with allergies, swap the almonds for seeds and use dairy-free chocolate. The board is super adaptable, so don’t stress about exact matches.
Equipment Needed
You don’t need much for this recipe, which is part of why I love it. Here’s what you’ll need to pull it off.
- Large Charcuterie Board or Serving Platter (at least 12×16 inches): A wooden board looks amazing, but a white ceramic platter works just as well. I use a large bamboo board I got from Target for about $15. It’s held up for years. If you don’t have a big board, use a baking sheet lined with parchment paper — seriously, it works perfectly and looks rustic.
- Small Bowls (3-4): For holding the candy corn, M&M’s, and marshmallows. I use little ceramic ramekins I picked up at a thrift store. They add height and visual interest to the board.
- Parchment Paper (optional): If you’re using a baking sheet, parchment paper makes cleanup a breeze. Also useful for drizzling melted white chocolate.
- Microwave-Safe Bowl (for melting chocolate): A small glass bowl works best. I’ve used the same Pyrex bowl for years. If you don’t have a microwave, you can melt the chocolate in a double boiler on the stovetop.
- Spoon or Offset Spatula: For drizzling the melted white chocolate. A regular spoon works fine, but an offset spatula gives you more control.
- Tongs (optional): For arranging ingredients without getting sticky fingers. I usually just use my hands, but tongs are nice if you’re serving a crowd and want to keep things tidy.
Budget-friendly tip: you don’t need a fancy charcuterie board. I’ve made this on a cutting board, a pizza pan, and even a clean cookie sheet. The presentation matters less than the fun of eating it. For the bowls, use whatever small dishes you have — ramekins, teacups, even small mason jars work beautifully.
Preparation Method
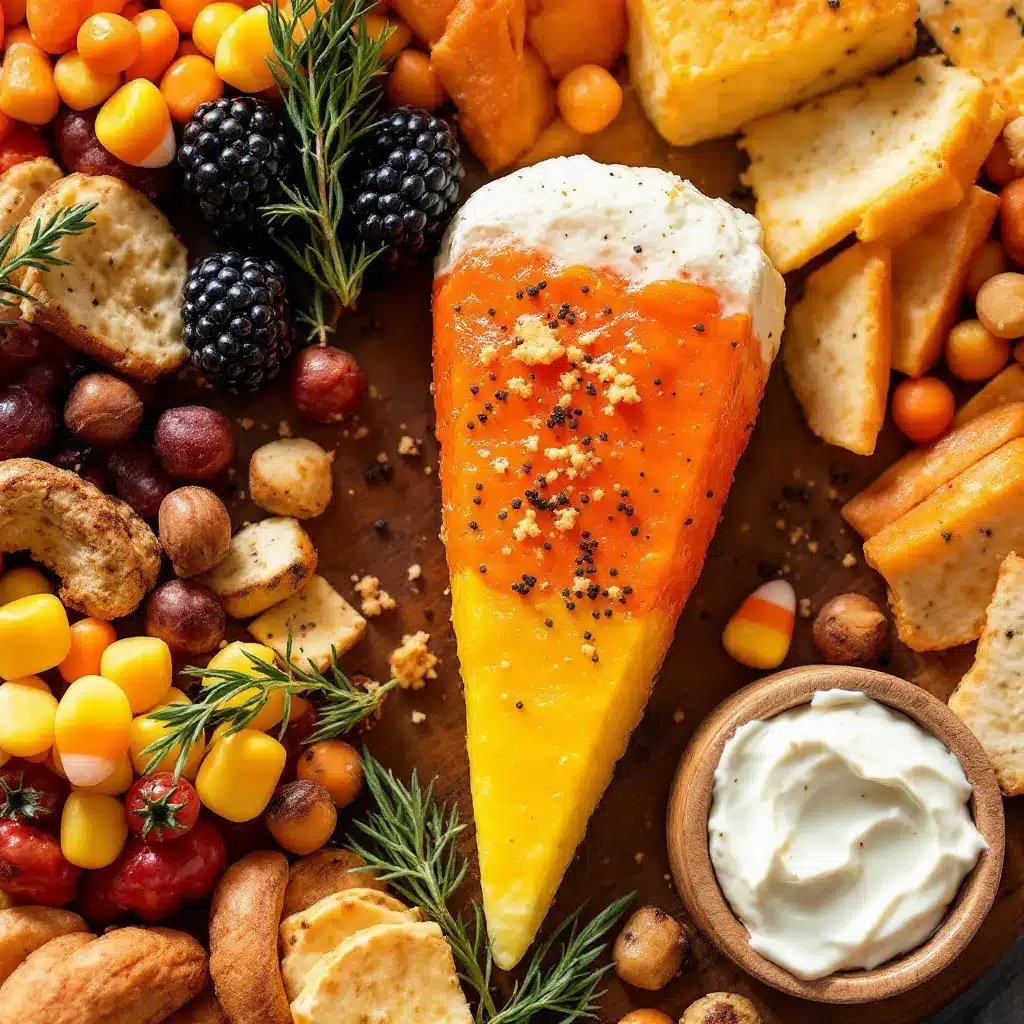
Let’s build this board. Take your time with the arrangement — it’s the most fun part. Here’s how I do it step by step.
- Melt the White Chocolate (5 minutes): Place the white chocolate melting wafers in a microwave-safe bowl. Microwave in 30-second intervals, stirring between each, until completely smooth. Be careful not to overheat — white chocolate burns easily. It should be silky and pourable. Set aside to cool slightly while you prep the board.
- Prepare the Board (2 minutes): Place your large board or platter on a flat surface. If using a baking sheet, line it with parchment paper for easy cleanup. Decide on your layout — I like to create three distinct stripes across the board, mimicking the candy corn colors: white, orange, and yellow.
- Create the White Stripe (3 minutes): In the bottom third of the board, arrange the white ingredients. Start with a line of mini pretzel twists. Then add the white chocolate drizzled over some of the pretzels. Sprinkle white M&M’s and pumpkin-shaped marshmallows in this section. The goal is to create a cohesive white band that visually anchors the board.
- Build the Orange Stripe (3 minutes): In the middle third of the board, layer the orange ingredients. This is where the candy corn shines. Arrange a generous pile of candy corn in a wide band. Add orange M&M’s, dried cranberries (they add a reddish-orange pop), and more white chocolate drizzle if you want. The orange section should be the most vibrant part of the board.
- Finish with the Yellow Stripe (3 minutes): In the top third of the board, create the yellow section. Use yellow M&M’s, salted almonds (they have a warm golden tone), and more pretzels. Drizzle with remaining white chocolate. If you have yellow sprinkles, scatter them over this section. The yellow stripe should feel bright and cheerful.
- Add the Final Touches (2 minutes): Fill in any gaps with extra candy corn, sprinkles, or whatever ingredients you have left. I like to place a few small bowls of candy corn and M&M’s on the board for easy grabbing. Sprinkle Halloween sprinkles over the entire board for a festive finish. Step back and admire your work — it should look like a giant candy corn!
- Serve Immediately (or Chill): This board is best served at room temperature. If you’re making it ahead, cover it loosely with plastic wrap and refrigerate for up to 4 hours. Let it sit at room temperature for 15 minutes before serving so the chocolate softens slightly. The board will look gorgeous for about 2-3 hours before the pretzels start getting soft from humidity.
Troubleshooting Tips: If your white chocolate seizes up (turns grainy), you overheated it. Start over with fresh wafers and microwave in shorter bursts. If the board looks messy, use a small offset spatula to nudge ingredients into cleaner lines. Don’t worry about perfect stripes — the overall effect is what matters. And if you run out of candy corn (it happens), just add more pretzels or almonds to fill the space.
Sensory Cues: The board should look vibrant and colorful, like a Halloween candy rainbow. The white chocolate should be glossy and smooth, not streaky. When you drizzle it, it should fall in ribbons. The candy corn should be bright and slightly glossy. The pretzels should be crisp, not stale. If you tap a pretzel against the board, it should make a sharp sound. The marshmallows should be soft and pillowy. Everything should feel fresh and inviting.
Personal Efficiency Tip: I always melt the white chocolate first and let it cool while I arrange the board. This way, it’s the perfect drizzling consistency when I’m ready. Also, sort your candies by color before you start — it makes the assembly much faster. I use small bowls for each color so I can grab and arrange quickly.
Cooking Tips & Techniques
After making this board about a dozen times (yes, I tested it that much), I’ve picked up some tricks that make a real difference. Let me share them so you don’t make the same mistakes I did.
The White Chocolate Drizzle Trick: Don’t just dump the melted white chocolate in one spot. Use a spoon and drizzle it back and forth in a zigzag pattern across the board. This creates a beautiful, professional-looking finish. I learned this the hard way after my first board looked like a chocolate splatter crime scene. Also, let the chocolate cool for about 2 minutes after melting — if it’s too hot, it will soak into the pretzels and make them soggy. You want it thick enough to hold its shape but thin enough to drizzle.
Common Mistake: Overloading the Board: I know it’s tempting to pile everything on, but less is more. Leave some empty space on the board so the colors pop. If the board looks cluttered, it loses that candy corn stripe effect. I aim for about 70% coverage — enough to look abundant but not chaotic. You can always refill sections as people eat.
Timing and Multitasking: This is a 15-minute recipe, but you can prep ingredients ahead of time. Sort your candies into color groups the night before. Melt the white chocolate just before assembling. If you’re making this for a party, assemble the board right before guests arrive — it looks best fresh. I’ve left it out for up to 3 hours at room temperature with no issues, but the pretzels will start to soften after that.
My Biggest Failure: The first time I made this, I used stale candy corn. It was tough and chewy in a bad way. Now I always check the freshness date on the bag. Fresh candy corn is soft and slightly chewy — it should bend without breaking. If it cracks, it’s too old. Also, I once used dark chocolate instead of white chocolate, and the colors got muddy. Stick with white chocolate for that clean candy corn look.
Consistency Tips: For the best results, keep all ingredients at room temperature before assembling. Cold chocolate will seize when drizzled. Cold pretzels can cause the chocolate to harden too quickly. If you’re in a humid environment, add the pretzels last so they stay crunchy. And always taste-test each ingredient before adding it to the board — stale or off-flavored ingredients will ruin the whole experience.
Variations & Adaptations
One of the best things about this board is how adaptable it is. I’ve tried several variations over the years, and they all turned out great. Here are some of my favorites.
- Nut-Free Version: Skip the almonds and add roasted pumpkin seeds or sunflower seeds instead. They provide the same salty crunch without the allergens. I’ve also used toasted coconut flakes for a sweet, nutty flavor. Just make sure everything is labeled nut-free if you’re serving a crowd with allergies.
- Chocolate Lover’s Twist: Swap half the white chocolate for dark or milk chocolate. Drizzle both over the board for a marbled effect. Add chocolate-covered pretzels and chocolate candies. My husband loves this version — he says it’s more “grown-up.” I call it the indulgent edition.
- Vegan-Friendly Board: Use vegan white chocolate chips (Enjoy Life makes a good one) and dairy-free marshmallows. Most candy corn is actually vegan, but check the label. Swap the pretzels for vegan-friendly ones (most are). This version works perfectly for plant-based guests.
- Spicy-Sweet Version: Add a sprinkle of chili powder or cayenne to the white chocolate before drizzling. The heat cuts through the sweetness beautifully. I tried this on a whim and it was surprisingly good. Start with a small amount — you can always add more.
- Breakfast Board: Yes, really. Swap the candy corn for yogurt-covered pretzels, granola, and fresh fruit. Arrange in the same candy corn stripes. It’s a fun Halloween morning surprise for kids. I’ve done this for Halloween brunch and it was a hit.
- Mini Individual Boards: Instead of one large board, make small individual boards using small plates or paper plates. This is perfect for parties where people are standing and mingling. Each person gets their own mini candy corn board. I did this for a Halloween potluck and everyone loved having their own.
No matter which variation you choose, the key is keeping that candy corn stripe pattern. It’s what makes the board visually distinctive. Feel free to experiment with different candies and textures — the board is forgiving and always looks festive.
Serving & Storage Suggestions
This board is best served at room temperature, right after assembly. The flavors and textures are at their peak when everything is fresh. Here’s how to serve and store it for the best experience.
Serving Temperature: Room temperature is ideal. If you refrigerate the board, let it sit out for 15-20 minutes before serving so the white chocolate softens and the pretzels don’t feel cold. I’ve served it straight from the fridge in a pinch, and it was still good — just not as visually appealing because the white chocolate gets hard and matte.
Presentation Tips: Place the board on a central table where everyone can see it. The candy corn stripes are the main attraction, so make sure the board is well-lit. I like to surround it with small napkins and plates. If you’re serving a crowd, put out small tongs or spoons for each section so people can serve themselves without messing up the design.
Complementary Dishes and Beverages: This board pairs beautifully with mummy pumpkin cheesecake bars for a full Halloween dessert spread. For drinks, serve it with apple cider, hot chocolate, or pumpkin spice lattes. If you’re feeling adventurous, try it with a cozy pumpkin chai latte with oat milk — the warm spices complement the sweet candy corn perfectly. For a non-alcoholic option, sparkling water with a splash of cranberry juice is refreshing.
Storage Instructions: This board is best enjoyed the day it’s made. If you have leftovers, store the ingredients separately. Candy corn and pretzels can be stored in airtight containers at room temperature for up to a week. White chocolate drizzled items should be refrigerated in an airtight container for up to 3 days. I don’t recommend freezing any of the components — they’ll lose their texture.
Reheating Methods: If you’re serving leftover white chocolate-drizzled pretzels, let them come to room temperature before serving. Don’t microwave them — the chocolate will melt and make a mess. If the candy corn has gotten hard, toss it and use fresh. Stale candy corn is not worth saving.
How Flavors Develop Over Time: The board is best fresh, but some flavors actually improve. The white chocolate soaks into the pretzels slightly, creating a softer, almost cookie-like texture. The candy corn stays chewy. The dried cranberries plump up a bit. If you’re making this a few hours ahead, the flavors meld together nicely. Just don’t make it more than 4 hours in advance or the pretzels will get too soft.
Nutritional Information & Benefits
Let’s be real — this is a treat board, not a health food. But that doesn’t mean it’s without some redeeming qualities. Here’s a rough estimate of what you’re getting per serving (about ¼ of the board).
- Calories: Approximately 350-400 per serving
- Total Fat: 15-18g (mostly from white chocolate and almonds)
- Carbohydrates: 55-60g (mostly sugar from candy corn and chocolate)
- Protein: 5-7g (from almonds and pretzels)
- Fiber: 2-3g (from almonds and pretzels)
- Sugar: 40-45g (this is a dessert board, so expect sweetness)
Health Benefits of Key Ingredients: Almonds provide healthy fats, vitamin E, and magnesium. Dried cranberries offer antioxidants and a small amount of fiber. Pretzels provide quick energy from carbohydrates. White chocolate contains calcium from milk solids. Candy corn? Well, it makes people happy — and that counts for something.
Dietary Considerations: This board is vegetarian. It can be made vegan with dairy-free white chocolate and marshmallows. It contains gluten (from pretzels) and dairy (from white chocolate). For a gluten-free version, use gluten-free pretzels or swap them for rice crackers. For a dairy-free version, use vegan white chocolate. Always check labels for allergens if serving a crowd.
Potential Allergens: This recipe contains dairy (white chocolate), gluten (pretzels), and tree nuts (almonds). Candy corn is typically gluten-free and dairy-free, but check the brand. If you’re serving people with allergies, clearly label the board or provide allergen-free alternatives in separate bowls.
My Wellness Perspective: I believe in balance. This board is for celebration, not everyday eating. It’s the kind of treat you make for a special occasion and enjoy without guilt. The joy it brings — the smiles, the photos, the shared moments — is part of a healthy relationship with food. So go ahead, grab a handful of candy corn, and enjoy the moment.
Conclusion
This easy Halloween candy corn charcuterie board is more than just a snack — it’s a statement. It says, “I put thought into this, but I didn’t stress about it.” It’s the kind of recipe that makes you look like a party planning genius without any of the actual work. And honestly, that’s my favorite kind of recipe.
I love this board because it brings people together. Every time I make it, someone takes a picture, someone asks for the recipe, and someone says, “I can’t believe how easy this is.” That’s the magic of it. It’s simple, it’s beautiful, and it’s delicious. What more could you want from a Halloween treat?
Now I want to hear from you. Did you try this board? Did you add your own twist? Did your kids go crazy for it? Drop a comment below and let me know how it turned out. Share your photos on social media and tag me — I love seeing your creations. And if you’re looking for more Halloween fun, check out the perfect black cat cupcakes or the easy homemade pumpkin spice syrup for your coffee. Happy Halloween, friends! Make it spooky, make it sweet, and make it yours.
Frequently Asked Questions
Can I make this board ahead of time?
Yes, you can assemble the board up to 4 hours in advance. Cover it loosely with plastic wrap and refrigerate. Let it sit at room temperature for 15 minutes before serving so the white chocolate softens. Just keep in mind that the pretzels will start to soften from humidity after a few hours, so it’s best enjoyed the day it’s made.
What if I can’t find candy corn?
No problem! You can use any orange and yellow candies you have. Reese’s Pieces, M&M’s, or even gummy worms work well. The key is keeping the color scheme — white, orange, yellow — to maintain that candy corn look. If you’re in a pinch, just use whatever fall-colored candies you can find.
How do I keep the white chocolate from seizing?
Melt it slowly in 30-second intervals in the microwave, stirring well between each. White chocolate burns easily, so don’t rush it. If it starts to seize (turns grainy and thick), you overheated it. Unfortunately, you can’t fix seized chocolate — you’ll need to start over with fresh wafers. Keep the heat low and slow for best results.
Can I make this gluten-free or vegan?
Absolutely! For gluten-free, use gluten-free pretzels or swap them for rice crackers. For vegan, use dairy-free white chocolate (Enjoy Life makes a good one) and vegan marshmallows. Most candy corn is naturally vegan, but double-check the label. The board is super adaptable, so don’t stress about substitutions.
How many people does this board serve?
This board serves about 8-10 people as a dessert or snack. If it’s the main dessert at a party, it might serve 6-8. I usually make it for gatherings of 10-12 people and there’s always some left over. If you’re feeding a larger crowd, double the ingredients and use a bigger board or two boards.
Pin This Recipe!
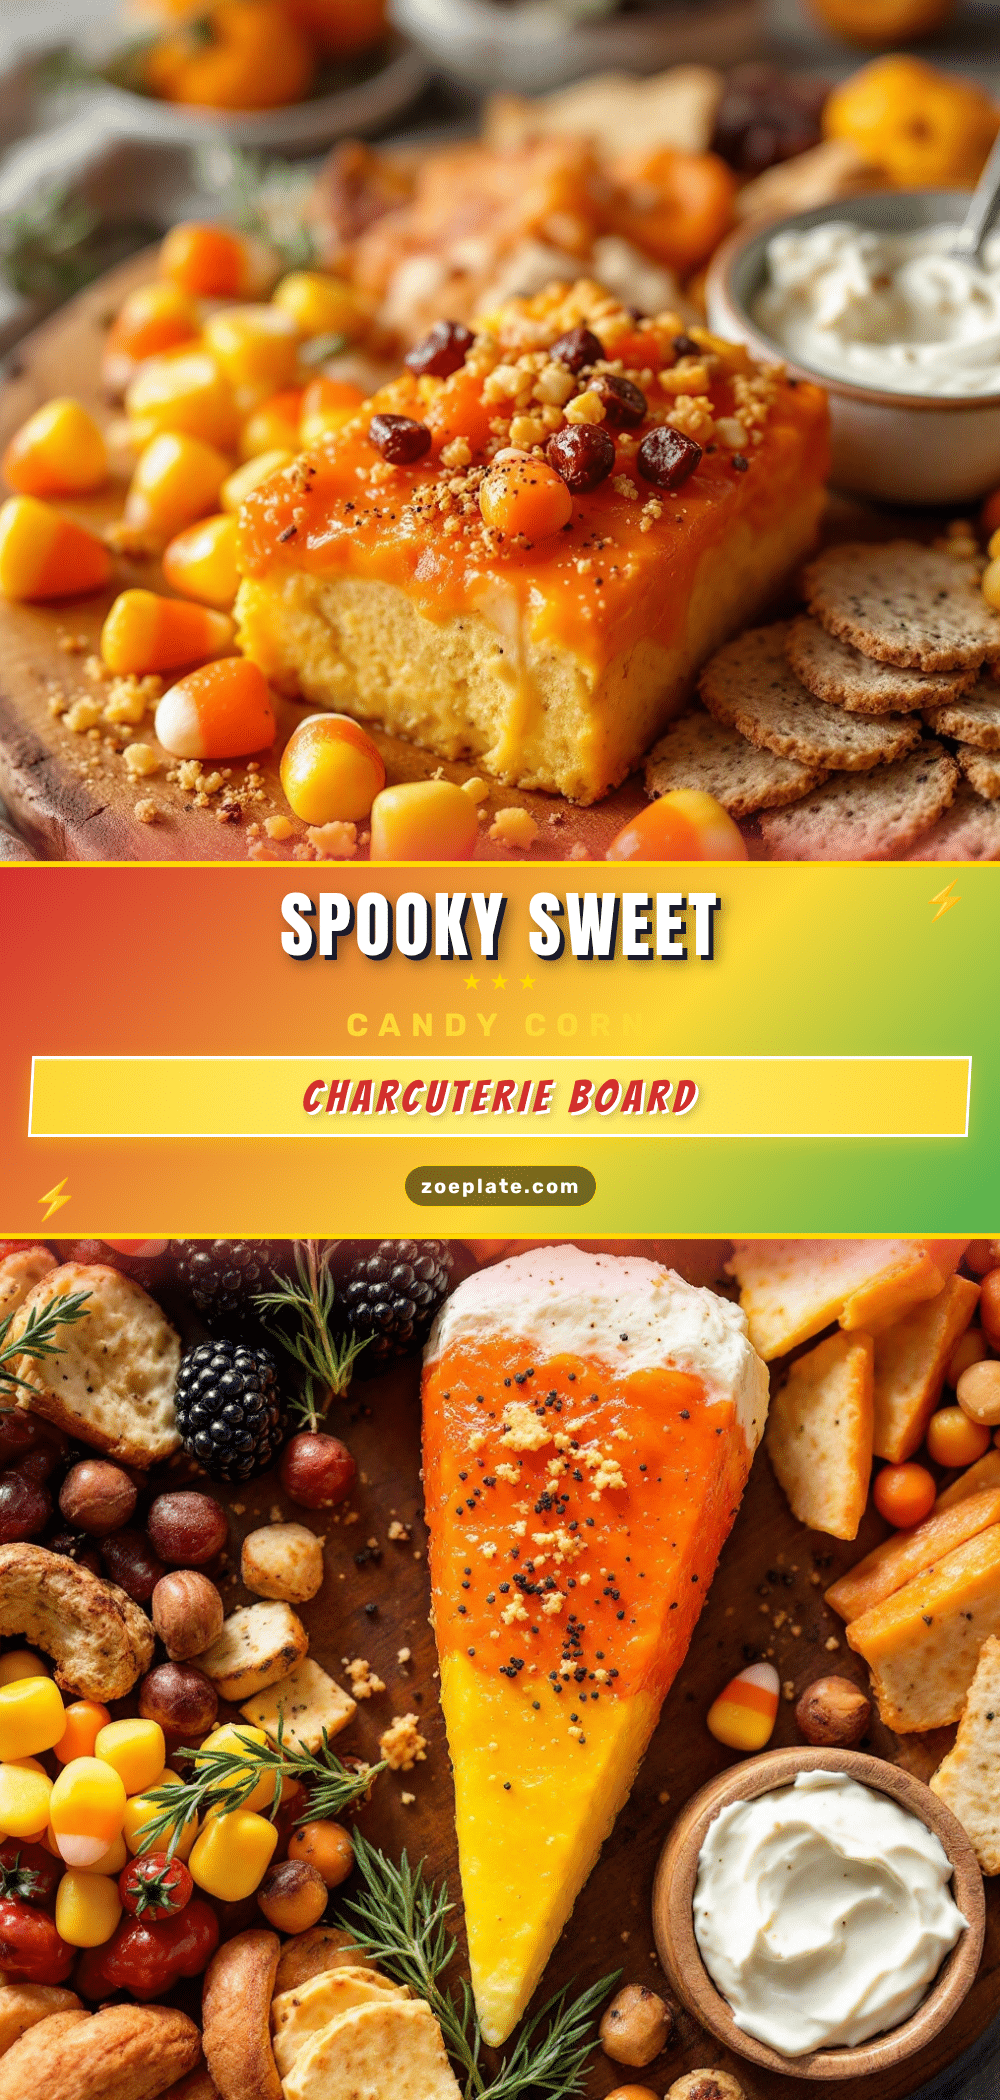
Easy Halloween Candy Corn Charcuterie Board
A quick and fun Halloween snack board arranged in candy corn stripes with white, orange, and yellow ingredients. Perfect for parties, school events, or movie nights, this no-bake treat combines salty pretzels, sweet candy corn, creamy white chocolate, and crunchy almonds for a crowd-pleasing presentation.
- Prep Time: 15 minutes
- Cook Time: 0 minutes
- Total Time: 15 minutes
- Yield: 8-10 servings
- Category: Dessert
- Cuisine: American
Ingredients
- Candy Corn (about 2 cups)
- Mini Pretzel Twists (about 2 cups)
- White Chocolate Melting Wafers (about 1 cup)
- Dried Cranberries (about 1 cup)
- Salted Roasted Almonds (about 1 cup)
- Orange M&M’s (about 1 cup)
- Yellow M&M’s (about 1 cup)
- Pumpkin-Shaped Marshmallows (about 1 cup)
- Halloween Sprinkles (about ¼ cup)
- Optional: Dark chocolate squares, caramel popcorn, gummy worms, or candy corn layered Jello cups
Instructions
- Melt the White Chocolate (5 minutes): Place the white chocolate melting wafers in a microwave-safe bowl. Microwave in 30-second intervals, stirring between each, until completely smooth. Be careful not to overheat — white chocolate burns easily. Set aside to cool slightly while you prep the board.
- Prepare the Board (2 minutes): Place your large board or platter on a flat surface. If using a baking sheet, line it with parchment paper for easy cleanup. Decide on your layout — create three distinct stripes across the board, mimicking the candy corn colors: white, orange, and yellow.
- Create the White Stripe (3 minutes): In the bottom third of the board, arrange the white ingredients. Start with a line of mini pretzel twists. Then add the white chocolate drizzled over some of the pretzels. Sprinkle white M&M’s and pumpkin-shaped marshmallows in this section.
- Build the Orange Stripe (3 minutes): In the middle third of the board, layer the orange ingredients. Arrange a generous pile of candy corn in a wide band. Add orange M&M’s, dried cranberries, and more white chocolate drizzle if desired.
- Finish with the Yellow Stripe (3 minutes): In the top third of the board, create the yellow section. Use yellow M&M’s, salted almonds, and more pretzels. Drizzle with remaining white chocolate. If you have yellow sprinkles, scatter them over this section.
- Add the Final Touches (2 minutes): Fill in any gaps with extra candy corn, sprinkles, or whatever ingredients you have left. Place a few small bowls of candy corn and M&M’s on the board for easy grabbing. Sprinkle Halloween sprinkles over the entire board for a festive finish.
- Serve Immediately (or Chill): This board is best served at room temperature. If making ahead, cover loosely with plastic wrap and refrigerate for up to 4 hours. Let sit at room temperature for 15 minutes before serving so the chocolate softens slightly.
Notes
This board is best enjoyed the day it’s made. For best results, keep all ingredients at room temperature before assembling. If white chocolate seizes, start over with fresh wafers. The board can be made gluten-free by using gluten-free pretzels, and vegan by using dairy-free white chocolate and vegan marshmallows. Most candy corn is naturally vegan, but check the label.
Nutrition
- Serving Size: 1/4 of the board
- Calories: 375
- Sugar: 42.5
- Sodium: 320
- Fat: 16.5
- Saturated Fat: 7
- Carbohydrates: 57.5
- Fiber: 2.5
- Protein: 6
Keywords: Halloween charcuterie board, candy corn board, easy Halloween snack, no-bake dessert, party snack, candy corn recipe, Halloween party food


