Fourth time in a week and I still hadn’t gotten the cream cheese-to-pumpkin ratio exactly right. Not that anyone complained—my kitchen counter had become a graveyard of tiny, half-eaten samples, and my husband had started eyeing the fridge with the kind of wary respect usually reserved for something alive. But I knew what I was after: that perfect little pop of fall flavor, dense but not heavy, sweet but not cloying, and firm enough to hold its shape without a single minute in the oven.
I’d made a batch for a friend’s gathering last October, a last-minute addition because I didn’t want to show up empty-handed. I threw together some cream cheese, canned pumpkin, and crushed graham crackers, crossed my fingers, and let the fridge do the work. They vanished before the appetizers. People kept coming back to the kitchen island, picking at the tray, asking if there were more. I muttered something about a recipe I was testing, which was true-ish. But honestly? I was just lazy that day and didn’t want to turn on the oven.
That accidental batch became the blueprint. I’ve been tweaking it ever since, chasing the version that feels less like a shortcut and more like a secret weapon. And I think—I finally think—I’ve got it.
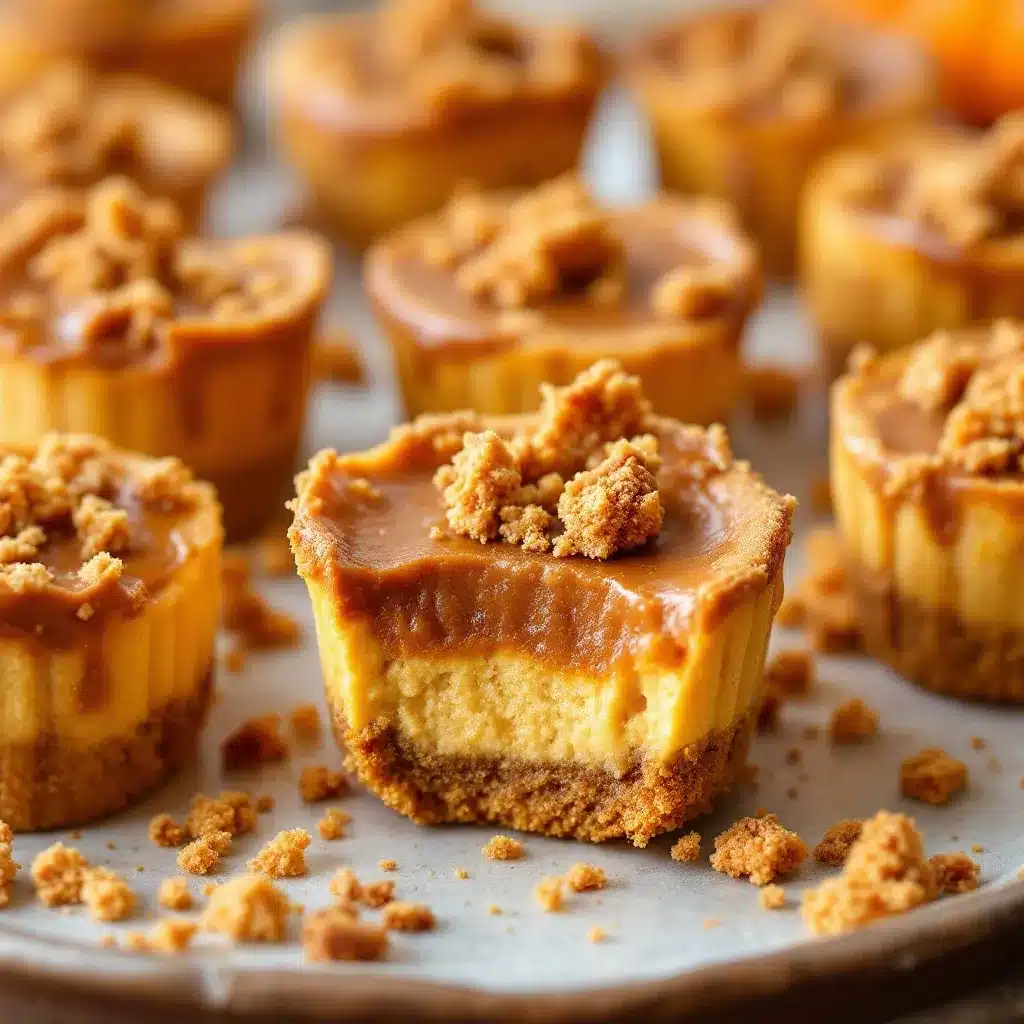
These Easy No-Bake Pumpkin Pie Cheesecake Bites are the kind of thing you make when you want to impress without the stress. No oven, no complicated steps, no specialty pan. Just three main ingredients, a little patience, and a fridge that does all the heavy lifting. They taste like the best parts of pumpkin pie and cheesecake had a tiny, perfect baby.
Why You’ll Love This Recipe
Let me tell you why these little bites have become my go-to for everything from fall grazing boards to after-dinner cravings. They check every box.
- Quick & Easy : You need about 15 minutes of active prep time. Seriously. The hardest part is waiting for them to chill.
- Simple Ingredients : Cream cheese, pumpkin puree, and a box of instant pudding mix. That’s the base. You probably have everything else in your pantry right now.
- Perfect for Fall Gatherings : Thanksgiving, Friendsgiving, Halloween parties, or just a Tuesday that feels like it deserves a seasonal treat. These fit right in.
- Crowd-Pleaser : I’ve served these to kids who “don’t like pumpkin” and adults who claim they’re “not dessert people.” Every single one reached for a second.
- Unbelievably Delicious : The texture is this incredible cross between a cheesecake filling and a mousse. It’s rich without being heavy, and the pumpkin pie spice hits you in the most comforting way.
What makes this recipe different from all the other no-bake pumpkin desserts out there? It’s the texture. Most no-bake cheesecake bites use gelatin or a ton of whipped cream to set, which can leave them tasting a little… hollow. My version uses instant pudding mix as a stabilizer, which gives you that dense, creamy, almost-sliceable consistency without any weird ingredients. Plus, the graham cracker crust is pressed right into the bottom of each bite, so you get that classic pumpkin pie experience in two perfect bites.
This isn’t just another pumpkin dessert. It’s the one that makes people close their eyes, smile, and ask for the recipe before they’ve even finished chewing. It’s comfort food reimagined—faster, easier, but with the same soul-soothing satisfaction as a slice of your grandmother’s pie.
What Ingredients You Will Need
This recipe uses simple, wholesome ingredients to deliver bold flavor and satisfying texture without the fuss. Most of these are pantry staples, especially once fall hits and you’ve stocked up on all things pumpkin.
- 8 ounces cream cheese, softened (full-fat works best for texture, but Neufchâtel or reduced-fat is fine in a pinch—just expect a slightly softer bite)
- 1 cup pumpkin puree (not pumpkin pie filling—you want 100% pure pumpkin. I prefer Libby’s for consistent texture, but any brand works)
- 1 box (3.4 ounces) instant vanilla pudding mix (this is the secret weapon. It sets the filling without any gelatin or extra steps. Jell-O brand is my go-to, but store brands work too)
- 1/4 cup milk (any kind works—dairy, oat, almond—just make sure it’s cold for best results)
- 1 teaspoon pumpkin pie spice (or make your own with 1/2 teaspoon cinnamon, 1/4 teaspoon ginger, 1/8 teaspoon nutmeg, and a pinch of cloves)
- 1/2 teaspoon vanilla extract (pure vanilla extract adds a warmth that imitation just can’t match)
- 1 cup graham cracker crumbs (about 8 full sheets, crushed. You can use store-bought crumbs, but I like crushing my own for a more rustic texture)
- 3 tablespoons unsalted butter, melted (salted butter works too—just skip any added salt in the crust)
- 1 tablespoon granulated sugar (optional, for the crust. I add it when I want a slightly sweeter base)
- Optional toppings : Whipped cream, a dusting of cinnamon, chopped pecans, or a drizzle of caramel sauce
A few notes on ingredient selection: Make sure your cream cheese is truly at room temperature. Cold cream cheese will leave you with lumpy filling, and nobody wants that. If you’re in a hurry, cut the cream cheese into small cubes and let it sit on the counter for 15-20 minutes. As for the pumpkin puree, I always recommend opening the can and blotting it with a paper towel to remove excess moisture. This step is optional, but it gives you a firmer, more stable filling.
For a gluten-free version, use certified gluten-free graham crackers or crushed gluten-free cookies. The filling itself is naturally gluten-free. And if you’re dairy-free, swap the cream cheese for a high-quality vegan version (I like Kite Hill or Miyoko’s) and use a non-dairy milk. The texture will be slightly softer, but the flavor is still spot-on.
Equipment Needed
You don’t need much for this recipe, which is part of the beauty. Here’s what you’ll need:
- Mixing bowls : One medium bowl for the crust, one large bowl for the filling. Glass or stainless steel work best.
- Electric hand mixer or stand mixer : You can do this by hand with a whisk, but a mixer makes the filling much smoother and faster. I’ve done both, and the mixer is worth the minimal cleanup.
- Mini muffin tin : This gives you the perfect bite-sized shape. If you don’t have one, you can use a regular muffin tin (just double the filling per cup) or even a small baking dish and cut the set mixture into squares.
- Mini muffin liners : Paper or silicone. Paper liners make for easy removal and cute presentation. Silicone liners are reusable and work beautifully.
- Measuring cups and spoons : For accuracy. Eyeballing works for some things, but not for the pudding-to-pumpkin ratio.
- Rubber spatula : For scraping every last bit of filling into the liners. Waste not, want not.
- Small cookie scoop or spoon : For portioning the filling evenly. A 1-tablespoon scoop is perfect for mini muffin cups.
If you don’t have a mini muffin tin, don’t worry. You can press the crust into the bottom of a small glass dish, pour the filling over it, chill until set, and cut into squares. The texture and flavor are exactly the same—the shape is just different. I’ve done this when traveling and it works like a charm.
Preparation Method
Alright, let’s get to it. This is the fun part.
- Make the crust : In a medium bowl, combine the graham cracker crumbs, melted butter, and sugar (if using). Stir with a fork until the mixture looks like wet sand and holds together when pressed. Set aside.
- Line your mini muffin tin : Place a mini muffin liner in each cup. If you’re using silicone liners, you can skip the tin entirely and place them on a small baking sheet for stability.
- Press the crust : Spoon about 1 teaspoon of the crust mixture into the bottom of each liner. Use the back of a spoon or your fingers to press it down firmly and evenly. You want a compact, solid base. Set the tin aside.
- Make the filling : In a large bowl, beat the softened cream cheese with an electric mixer on medium speed until smooth and creamy, about 1-2 minutes. Scrape down the sides of the bowl with a rubber spatula.
- Add the pumpkin : Add the pumpkin puree, pumpkin pie spice, and vanilla extract to the cream cheese. Beat on medium speed until fully combined and smooth. The mixture should be a uniform orange color with no streaks of white.
- Add the pudding mix : Sprinkle the instant vanilla pudding mix over the pumpkin mixture. Add the cold milk. Beat on low speed for about 30 seconds, then increase to medium speed and beat for another 1-2 minutes. The mixture will thicken noticeably as the pudding activates. Scrape the bowl once more to ensure everything is incorporated.
- Fill the liners : Using a small cookie scoop or a spoon, divide the filling evenly among the prepared muffin cups. Each cup should be filled almost to the top. The filling will be thick and scoopable, not runny.
- Smooth the tops : Gently tap the muffin tin on the counter to settle the filling. Use the back of a spoon or a small offset spatula to smooth the tops if needed. Don’t worry about perfection—these are rustic little bites.
- Chill : Place the muffin tin in the refrigerator, uncovered, for at least 4 hours, but overnight is best. The filling needs time to set completely. If you try to rush this step, the bites will be too soft to hold their shape.
- Serve : Once set, remove the bites from the tin. Peel away the paper liners if using. Top with a dollop of whipped cream, a sprinkle of cinnamon, or any other topping you like. Serve cold or at room temperature.
A few notes on timing: The active prep time is about 15 minutes. The total time, including chilling, is at least 4 hours. Plan accordingly. I usually make these the night before I need them, which makes for a stress-free morning.
One more thing—if your filling seems too thick after adding the pudding mix, don’t panic. It should be thick. That’s what gives these bites their structure. If it’s truly unworkable (like, you can’t scoop it), add a tablespoon of milk at a time until it loosens slightly.
Cooking Tips & Techniques
I’ve made these Easy No-Bake Pumpkin Pie Cheesecake Bites more times than I care to admit, and I’ve learned a few things along the way. Here are the tips that make the difference between good and great.
Room temperature cream cheese is non-negotiable. I know, I know—you’re in a hurry. But cold cream cheese will leave you with lumps that no amount of beating can fully fix. The lumps don’t affect the taste, but they affect the texture, and texture is everything in a no-bake dessert. Set your cream cheese out at least 30 minutes before you start. If you forget, cut it into small cubes and microwave it in 5-second bursts until it’s soft but not melted.
Blot your pumpkin puree. This is the tip that took my bites from good to perfect. Open the can of pumpkin puree, spoon it onto a plate lined with paper towels, and blot the top with another paper towel. Let it sit for a few minutes. This removes excess water that can make your filling too soft. You’ll be amazed at how much liquid comes out.
Don’t overmix the filling. Once you add the pudding mix, beat just until everything is combined. Overmixing can incorporate too much air, which makes the filling fluffy instead of dense. We want dense here. Dense is good.
Press the crust firmly. The crust is the foundation. If it’s too loose, it will crumble when you try to eat the bites. Use the back of a spoon or the bottom of a small glass to really pack it down. I’ve also used the end of a rolling pin for this—whatever works.
Patience with chilling. I know it’s hard. I’ve been there, checking the fridge after two hours, wondering if they’re ready. They’re not. Four hours is the minimum, and overnight is better. The filling needs time to set completely, and the flavors need time to meld. Trust the process.
Make-ahead magic. These bites actually taste better on day two. The flavors deepen and the texture firms up perfectly. So don’t stress about making them the day before—it’s actually the ideal timeline.
Variations & Adaptations
One of the best things about this recipe is how easy it is to adapt. Here are some of my favorite variations.
Vegan version : Use a high-quality vegan cream cheese (Kite Hill or Miyoko’s work beautifully) and a non-dairy milk like oat or almond. Make sure your graham crackers are vegan (most are, but check for honey). The texture will be slightly softer, but the flavor is still incredible. I’ve made this for vegan friends and they couldn’t tell the difference.
Low-carb / Keto version : Swap the graham cracker crust for a mixture of almond flour, melted butter, and a low-carb sweetener like erythritol or monk fruit. Use a sugar-free instant pudding mix (vanilla or cheesecake flavor) and a low-carb milk alternative. The filling will be a bit less sweet, but the pumpkin and spice flavors shine through beautifully.
Gluten-free version : Use certified gluten-free graham crackers or crushed gluten-free cookies. The filling is naturally gluten-free, so this is an easy swap. I like using gluten-free vanilla wafers for a slightly different flavor profile.
Chocolate-dipped version : After the bites are fully set, dip the tops in melted dark chocolate and let them set on a parchment-lined baking sheet. The combination of pumpkin, cream cheese, and dark chocolate is surprisingly perfect. I tried this on a whim for a holiday party and it was the first thing to disappear.
Spiced-up version : Add a pinch of cayenne pepper or a dash of chipotle powder to the filling for a sweet-heat twist. The warmth of the spice plays beautifully with the pumpkin and cinnamon. Start with a tiny amount and taste as you go.
No-bake pumpkin pie cheesecake bars : If you don’t want to deal with individual bites, press the crust into the bottom of an 8×8 inch baking dish lined with parchment paper. Pour the filling over the crust, spread it evenly, and chill for at least 6 hours or overnight. Cut into squares and serve. This is my go-to when I’m feeding a crowd.
Serving & Storage Suggestions
These bites are best served cold, straight from the fridge. The texture is firm and creamy, and the flavors are bright and fresh. If you let them sit at room temperature for more than 15-20 minutes, they’ll start to soften, so keep that in mind if you’re serving them at a party.
Presentation ideas : Arrange the bites on a platter or a fall-themed grazing board alongside apple slices, pears, candied pecans, and a bowl of whipped cream. The colors are gorgeous—deep orange filling against golden crust, with a swirl of white cream on top. It’s almost too pretty to eat. Almost.
What to serve with them : These bites pair beautifully with a hot cup of coffee, a chai latte, or a glass of cold milk. For a dessert spread, serve them alongside brown butter chocolate chip cookies or a slice of banana pudding cheesecake for a full dessert table.
Storage : Store the bites in an airtight container in the refrigerator for up to 5 days. Place them in a single layer or between sheets of parchment paper to prevent sticking. I don’t recommend freezing these—the texture of the cream cheese and pudding can become grainy when thawed. But honestly, they never last long enough in my house to worry about storage.
Leftover filling : If you have extra filling (which happens if you don’t fill the liners all the way), you can eat it as a dip with graham crackers or apple slices. No judgment here. I’ve definitely stood over the mixing bowl with a spoon more than once.
Nutritional Information & Benefits
Here’s the approximate nutritional breakdown for one bite (based on 24 bites, using full-fat cream cheese and crust with sugar):
| Nutrient | Amount per Bite |
|---|---|
| Calories | 95 |
| Total Fat | 6g |
| Saturated Fat | 3.5g |
| Cholesterol | 18mg |
| Sodium | 105mg |
| Total Carbohydrates | 9g |
| Dietary Fiber | 1g |
| Sugars | 5g |
| Protein | 2g |
| Vitamin A | 35% DV |
These bites are a good source of Vitamin A, thanks to the pumpkin puree. Vitamin A is essential for eye health, immune function, and skin health. Pumpkin is also rich in antioxidants like beta-carotene, which can help protect your cells from damage. The cream cheese adds a small amount of calcium and protein, making these a slightly more balanced treat than your average dessert.
If you’re watching your sugar intake, you can reduce the sugar in the crust or use a sugar-free pudding mix. The pumpkin and spice flavors are strong enough to carry the dessert even with less sweetness. And if you’re looking for a lower-sugar option, these can easily be adapted to fit your needs.
Potential allergens include dairy (cream cheese, butter, milk) and gluten (graham crackers). See the variations section for vegan and gluten-free alternatives.
Conclusion
These Easy No-Bake Pumpkin Pie Cheesecake Bites are proof that you don’t need a complicated recipe, a hot oven, or a culinary degree to make something truly special. They’re simple enough for a weeknight craving, elegant enough for a holiday table, and forgiving enough for a beginner cook. The first time I made them, I was just looking for a way to use up leftover pumpkin puree. Now, I buy pumpkin puree specifically to make these.
I love that this recipe lets the pumpkin and spice flavors take center stage. There’s no complicated technique to distract you, no long list of ingredients to stress over. Just three main ingredients, a little patience, and a fridge that does the work. It’s the kind of recipe that makes you feel like a genius even when you’re barely trying.
So go ahead—make a batch. Customize them to your heart’s content. Dip them in chocolate, sprinkle them with pecans, or eat them plain (which is how I prefer them). And when someone asks for the recipe, send them my way.
I’d love to hear how yours turn out. Leave a comment below and let me know what variations you tried, or tag me in your photos. Happy fall baking—or rather, happy fall no-baking!
Frequently Asked Questions
Can I use pumpkin pie filling instead of pumpkin puree?
No, I don’t recommend it. Pumpkin pie filling is already sweetened and spiced, so it will throw off the balance of the recipe. Stick with 100% pure pumpkin puree for the best results. The pudding mix and spices will take care of the sweetness and flavor.
How long do these bites need to chill?
At least 4 hours, but overnight is best. The filling needs time to set completely, and the flavors meld together beautifully over time. If you try to rush the chilling, the bites will be too soft to hold their shape.
Can I freeze these bites?
I don’t recommend freezing them. The texture of the cream cheese and pudding can become grainy or watery when thawed. These are best made fresh and stored in the refrigerator for up to 5 days. Trust me, they won’t last that long anyway.
Can I make these without a mini muffin tin?
Absolutely. You can press the crust into the bottom of an 8×8 inch baking dish, pour the filling over it, and chill until set. Cut into squares and serve. You can also use a regular muffin tin with paper liners—just double the filling per cup and adjust the chilling time slightly.
What can I use instead of graham crackers for the crust?
You can use crushed vanilla wafers, shortbread cookies, gingersnaps, or even crushed pretzels for a sweet-salty twist. For a gluten-free option, use certified gluten-free graham crackers or crushed gluten-free cookies. Each option gives the crust a slightly different flavor and texture, so feel free to experiment.
Pin This Recipe!
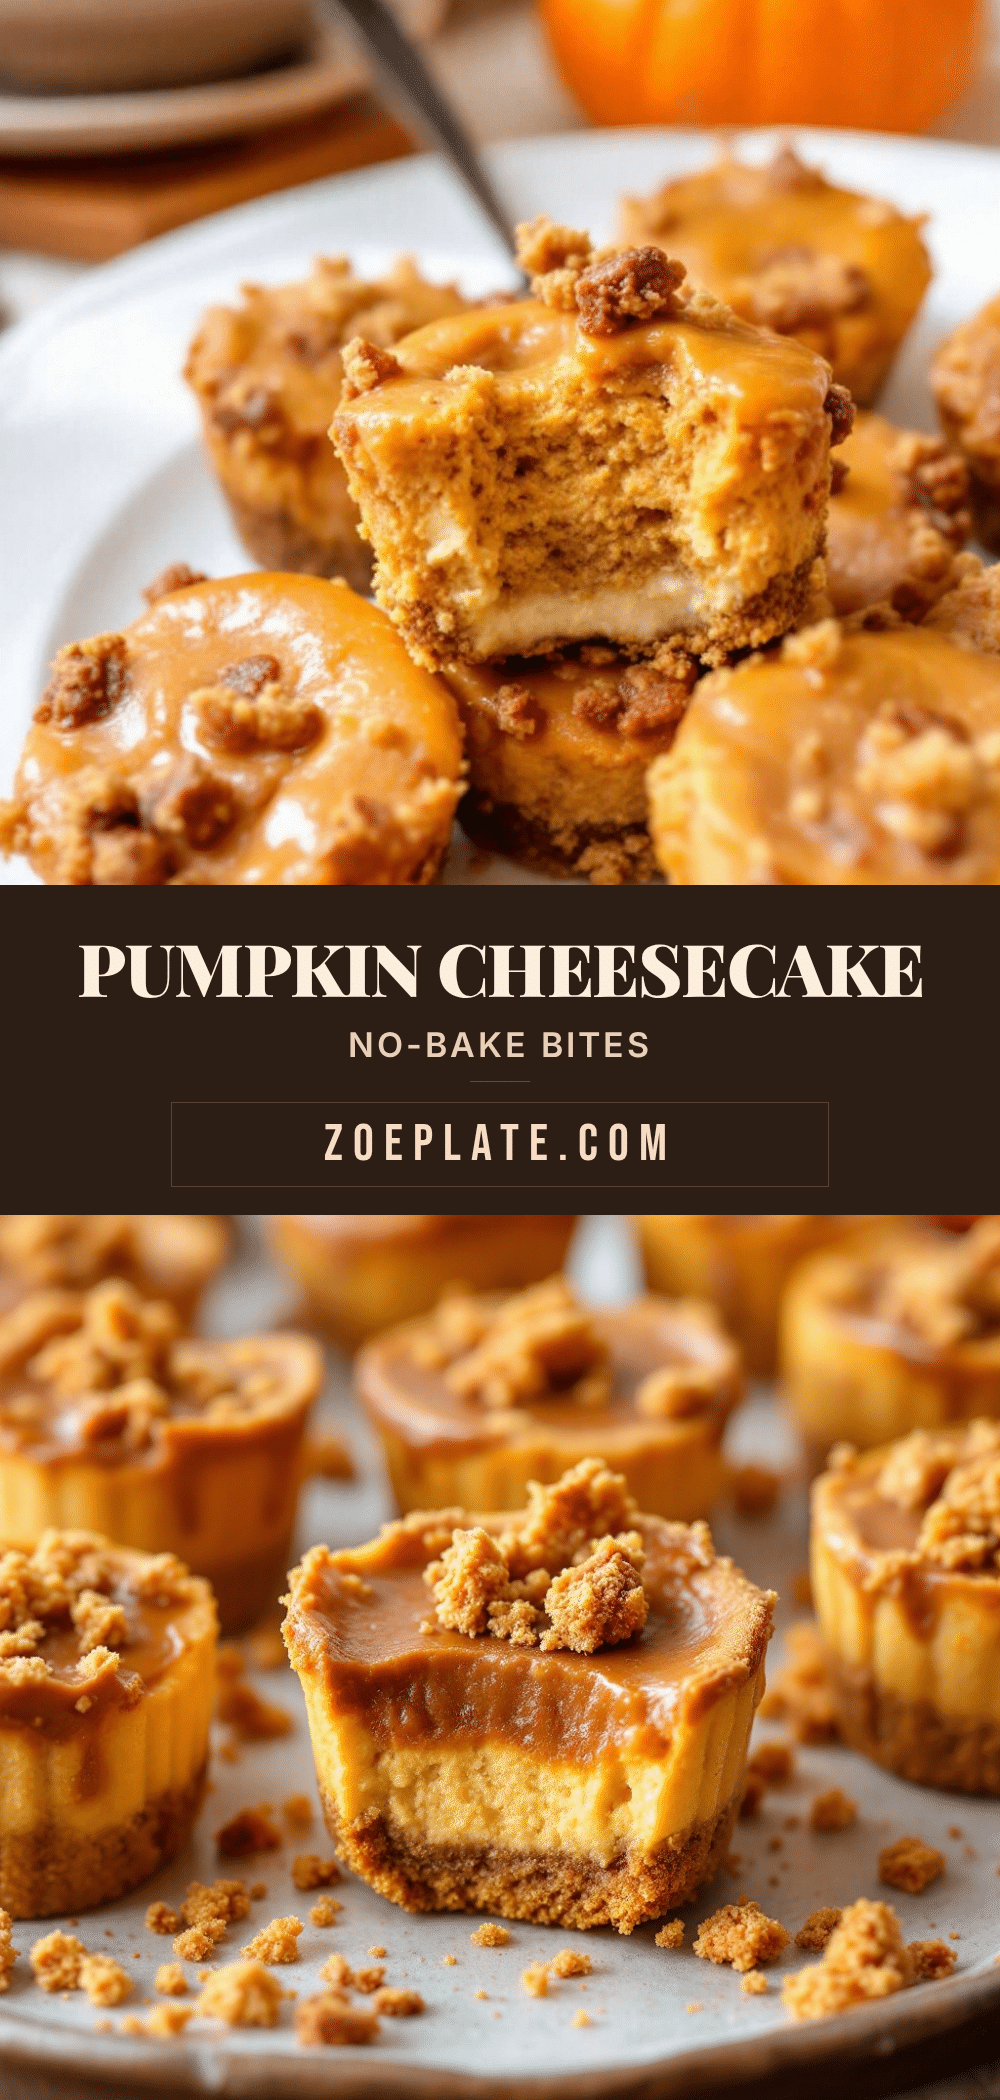
Easy No-Bake Pumpkin Pie Cheesecake Bites
These Easy No-Bake Pumpkin Pie Cheesecake Bites are the perfect fall treat with just three main ingredients. No oven required, they are quick to make and always a crowd-pleaser.
- Prep Time: 15 minutes
- Cook Time: 0 minutes
- Total Time: 4 hours 15 minutes
- Yield: 24 bites 1x
- Category: Dessert
- Cuisine: American
Ingredients
- 8 ounces cream cheese, softened
- 1 cup pumpkin puree
- 1 box (3.4 ounces) instant vanilla pudding mix
- 1/4 cup milk
- 1 teaspoon pumpkin pie spice
- 1/2 teaspoon vanilla extract
- 1 cup graham cracker crumbs
- 3 tablespoons unsalted butter, melted
- 1 tablespoon granulated sugar (optional)
- Optional toppings: whipped cream, cinnamon, chopped pecans, caramel sauce
Instructions
- Make the crust: In a medium bowl, combine graham cracker crumbs, melted butter, and sugar (if using). Stir until the mixture looks like wet sand and holds together when pressed. Set aside.
- Line your mini muffin tin: Place a mini muffin liner in each cup.
- Press the crust: Spoon about 1 teaspoon of the crust mixture into the bottom of each liner. Press down firmly and evenly.
- Make the filling: In a large bowl, beat the softened cream cheese with an electric mixer on medium speed until smooth and creamy, about 1-2 minutes. Scrape down the sides.
- Add the pumpkin: Add pumpkin puree, pumpkin pie spice, and vanilla extract. Beat on medium speed until fully combined and smooth.
- Add the pudding mix: Sprinkle instant vanilla pudding mix over the pumpkin mixture. Add cold milk. Beat on low speed for 30 seconds, then increase to medium speed and beat for another 1-2 minutes until thickened.
- Fill the liners: Using a small cookie scoop or spoon, divide the filling evenly among the prepared muffin cups, filling almost to the top.
- Smooth the tops: Gently tap the muffin tin on the counter to settle the filling. Smooth tops if needed.
- Chill: Place the muffin tin in the refrigerator, uncovered, for at least 4 hours, but overnight is best.
- Serve: Once set, remove the bites from the tin. Peel away paper liners if using. Top with whipped cream, cinnamon, or other toppings. Serve cold or at room temperature.
Notes
Make sure cream cheese is at room temperature to avoid lumps. Blot pumpkin puree with paper towels to remove excess moisture for a firmer filling. Do not overmix after adding pudding mix. Press crust firmly. Chill for at least 4 hours, preferably overnight. These taste even better on day two.
Nutrition
- Serving Size: 1 bite
- Calories: 95
- Sugar: 5
- Sodium: 105
- Fat: 6
- Saturated Fat: 3.5
- Carbohydrates: 9
- Fiber: 1
- Protein: 2
Keywords: no-bake pumpkin cheesecake bites, easy pumpkin dessert, 3-ingredient treat, fall dessert, mini cheesecake bites