I figured a no-bake dessert this simple couldn’t possibly taste as good as the real thing. It took about one bite of this Easy No-Bake S’mores Icebox Cake for that assumption to crumble completely. I was standing in my kitchen on a sticky July afternoon, the air conditioner struggling to keep up, and I needed something sweet that didn’t require turning on the oven. The thought of heating up the whole house for a batch of cookies felt like a personal betrayal of common sense.
So I grabbed a box of graham crackers, a jar of marshmallow fluff, and some chocolate pudding mix—ingredients I honestly bought on a whim during the last grocery run. I layered them together in a loaf pan, more out of desperation than confidence, and stuck the whole thing in the fridge. When I pulled it out a few hours later, I was not prepared for what happened next. The graham crackers had softened into something almost cake-like, the chocolate pudding had set into a rich, creamy layer, and the marshmallow fluff (which I had always been a little suspicious of) had turned into this dreamy, cloud-like filling.
The first slice came out clean and perfect, and I stood there eating it straight from the plate, not even bothering with a fork at one point. That is how this recipe became a permanent resident in my dessert rotation. It is the kind of thing you make when you want to impress people but also want to stay in your pajamas. No oven, no mixer, no stress—just a whole lot of s’mores flavor packed into a chilled, sliceable cake that tastes like summer camp but takes about ten minutes to throw together.
Why You’ll Love This Recipe
Let me tell you why this Easy No-Bake S’mores Icebox Cake is going to become your new favorite dessert. I have tested this recipe about seven times now—once with instant pudding, once with homemade, once with different brands of marshmallow fluff, and even one questionable attempt with low-fat cream cheese that I do not recommend. Every single time, it worked. That is the beauty of a no-bake icebox cake: it is practically foolproof.
- Quick & Easy: This comes together in about 10 minutes of active prep time. No baking, no complicated techniques, no waiting for butter to soften. You just layer and chill.
- Simple Ingredients: You probably have most of these in your pantry right now. Graham crackers, chocolate pudding mix, milk, marshmallow fluff, and some cream cheese. That is it.
- Perfect for Summer: When the temperature hits 90 degrees and the last thing you want to do is turn on the oven, this dessert saves the day. It is cool, creamy, and requires zero heat.
- Crowd-Pleaser: I brought this to a family barbecue last month, and three different people asked for the recipe before the plate was empty. Kids love it, adults love it, and it disappears fast.
- Unbelievably Delicious: The texture is what gets me every time. The graham crackers soften just enough to feel like cake layers, the chocolate pudding is rich and silky, and the marshmallow filling is light and fluffy. It tastes like you spent hours in the kitchen when you really did not.
What makes this recipe different from all the other no-bake desserts out there is the cream cheese in the marshmallow layer. It adds a slight tang that balances the sweetness of the marshmallow fluff and keeps the whole thing from being cloying. I learned that trick from a friend who used to work at a bakery, and honestly, it is a game-changer.
This is comfort food reimagined—cooler, faster, and with the same soul-soothing satisfaction as the original campfire s’mores. It is the kind of dessert that makes you close your eyes after the first bite and forget about the heat outside. Perfect for impressing guests without breaking a sweat, or turning a simple weeknight into something special.
What Ingredients You Will Need
This recipe uses simple, everyday ingredients to create something that tastes way more complicated than it is. Here is everything you need and a few notes on why each one matters.
For the Chocolate Pudding Layer
- 1 (3.9 oz) box instant chocolate pudding mix – I recommend Jell-O brand for consistent results, but any brand works. Do not use cook-and-serve pudding; it will not set properly in the fridge.
- 2 cups cold whole milk – Whole milk gives the pudding a richer, creamier texture. You can use 2% in a pinch, but avoid skim milk—the pudding needs the fat to set up nicely.
For the Marshmallow Cream Layer
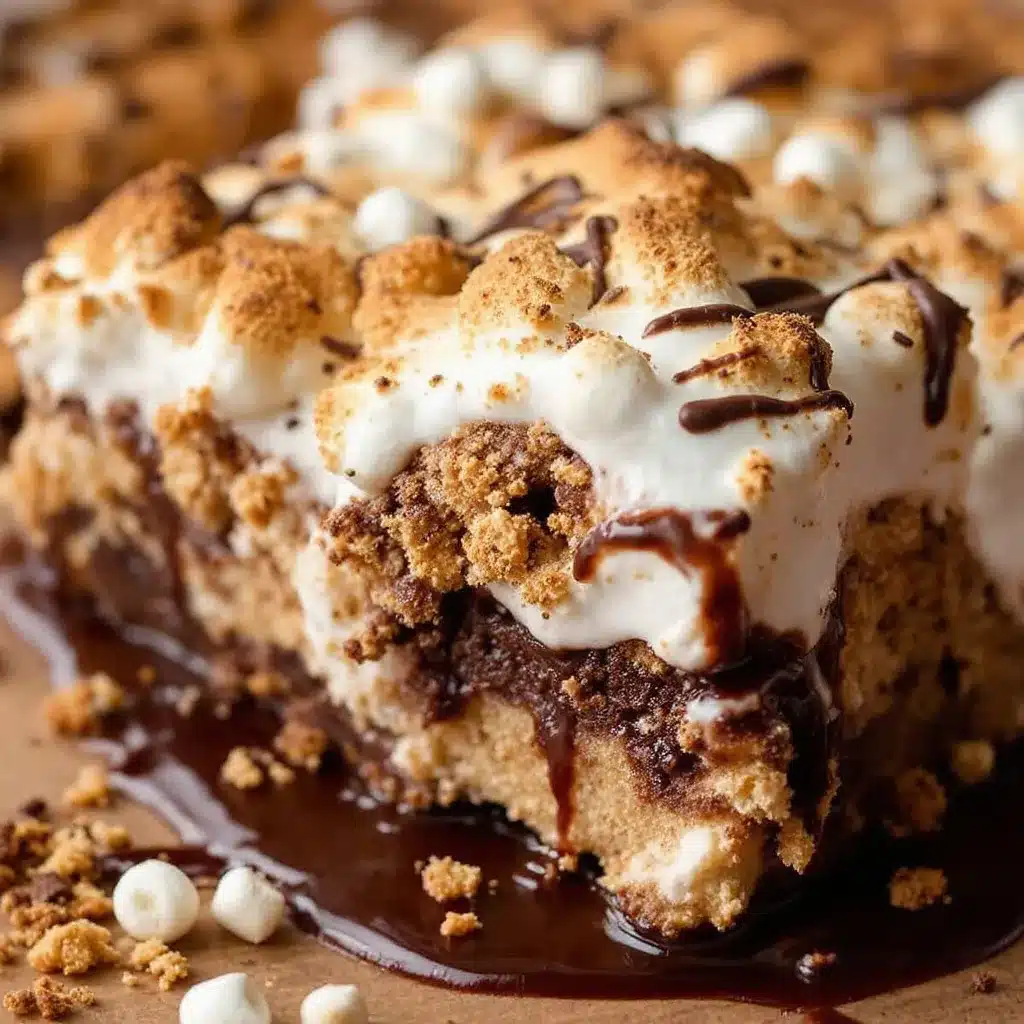
- 1 (7 oz) jar marshmallow fluff – This is the classic stuff. Jet-Puffed is my go-to because it is widely available and has the right texture. Do not substitute mini marshmallows melted down; the texture will be different.
- 4 oz cream cheese, softened – This is my secret ingredient. It adds a subtle tang and helps the marshmallow layer hold its shape when sliced. Let it sit out for 30 minutes to soften before mixing.
- 1/2 cup powdered sugar – Just enough to sweeten the cream cheese without making it grainy. Sift it if you are feeling fancy, but I rarely bother.
- 1 teaspoon vanilla extract – Pure vanilla extract makes a difference here. The imitation stuff has a chemical aftertaste that stands out in a simple recipe like this.
For the Layers
- 1 box (about 14 oz) graham crackers – You will need about 12 full sheets. Honey graham crackers are traditional, but cinnamon graham crackers add a nice twist if you want to experiment.
For the Topping (Optional but Recommended)
- 1 cup heavy cream – For making fresh whipped cream. Store-bought whipped topping works too, but homemade is so much better and takes two minutes with a hand mixer.
- 2 tablespoons powdered sugar – For sweetening the whipped cream.
- 1/2 cup mini marshmallows – For garnish. Toast them under the broiler for 30 seconds if you want that campfire flavor.
- 1/4 cup chocolate chips or shaved chocolate – For sprinkling on top. I like using dark chocolate chips to balance the sweetness.
I have made this recipe with dairy-free alternatives before, and it works surprisingly well. Use oat milk in the pudding (it has a similar consistency to whole milk) and a dairy-free cream cheese alternative. The texture will be slightly different, but the flavor is still fantastic.
Equipment Needed
You do not need much for this recipe, which is part of the appeal. Here is what you will need:
- 8×8-inch baking dish or 9×5-inch loaf pan – I prefer the 8×8 dish because it gives you more surface area for layering, but a loaf pan works if you want taller slices. Glass or ceramic works best because it chills evenly.
- Medium mixing bowls – You will need two: one for the pudding and one for the marshmallow cream layer. I use glass bowls because they are easy to clean and do not hold onto odors.
- Hand mixer or stand mixer – You can whisk the pudding by hand, but the marshmallow cream layer benefits from a few minutes of electric mixing to get it light and fluffy. A hand mixer is perfect for this.
- Rubber spatula – For spreading the layers evenly. A silicone spatula works best because it does not scratch your baking dish.
- Plastic wrap or aluminum foil – For covering the cake while it chills. Plastic wrap pressed directly onto the surface prevents a skin from forming on the pudding.
- Sharp knife – For cutting clean slices. Run it under hot water and wipe it dry between cuts for the neatest slices.
If you do not have a hand mixer, you can whisk the cream cheese mixture by hand, but it will take some elbow grease. Make sure the cream cheese is really soft before you start, or you will end up with lumps. I learned that the hard way on my first attempt and ended up with a lumpy marshmallow layer that still tasted good but was not as pretty.
Preparation Method
This is where the magic happens. Follow these steps, and you will have a beautiful, delicious icebox cake that looks like you spent hours on it.
Step 1: Make the Chocolate Pudding
In a medium mixing bowl, whisk together the instant chocolate pudding mix and 2 cups cold whole milk. Whisk for about 2 minutes until the mixture thickens. It will be quite thick right away—that is normal. Let it sit for 5 minutes to fully set while you work on the next layer. The pudding should be thick enough to hold its shape when you lift the whisk. If it looks runny, give it another minute of whisking.
Step 2: Make the Marshmallow Cream Layer
In another medium mixing bowl, beat the softened cream cheese with a hand mixer on medium speed until it is smooth and creamy, about 1 minute. Add the powdered sugar and vanilla extract and beat until combined, about 30 seconds. Scrape down the sides of the bowl with a rubber spatula. Add the entire jar of marshmallow fluff and beat on medium speed until the mixture is light, fluffy, and completely combined, about 2 minutes. The mixture should be spreadable but not runny. If it is too stiff, add a tablespoon of milk and beat again.
Step 3: Line Your Baking Dish
Line your 8×8-inch baking dish with plastic wrap or parchment paper, leaving some overhang on the sides. This makes it much easier to lift the cake out later for clean slices. Trust me on this one—I skipped this step once and ended up with a messy situation trying to get the first slice out.
Step 4: Start Layering
Spread a thin layer of the chocolate pudding on the bottom of the prepared dish. This helps the first layer of graham crackers stick and prevents them from sliding around. You only need about 2 tablespoons. Place a layer of graham crackers on top, breaking them as needed to fit. I usually use about 4 full sheets per layer, depending on the size of my dish. Do not overlap them too much, but try to cover the surface as completely as possible.
Step 5: Add the Marshmallow Layer
Spread about one-third of the marshmallow cream mixture evenly over the graham crackers. Use an offset spatula or the back of a spoon to spread it gently. The graham crackers might shift a little, but that is okay. Just nudge them back into place. Top with another layer of graham crackers.
Step 6: Add the Chocolate Pudding Layer
Spread about half of the remaining chocolate pudding over the second layer of graham crackers. Spread it evenly, making sure it reaches the edges. Top with another layer of graham crackers. Repeat with the remaining marshmallow cream, another layer of graham crackers, and the remaining chocolate pudding. You should end with a final layer of graham crackers on top.
Step 7: Cover and Chill
Cover the dish tightly with plastic wrap, pressing it directly onto the surface of the top layer to prevent a skin from forming. Refrigerate for at least 6 hours, but overnight is better. The longer it sits, the more the graham crackers soften and absorb the flavors. I have let it sit for up to 24 hours, and it only gets better.
Step 8: Make the Whipped Cream and Garnish
About 30 minutes before serving, make the whipped cream. In a medium bowl, beat the heavy cream and powdered sugar with a hand mixer on high speed until stiff peaks form, about 3 minutes. Spread the whipped cream over the top of the chilled cake. Sprinkle with mini marshmallows and chocolate shavings or chocolate chips. If you want toasted marshmallows, place the mini marshmallows on a baking sheet and broil for 30-45 seconds until golden brown, then sprinkle them on top.
Step 9: Slice and Serve
Use the plastic wrap overhang to lift the cake out of the dish. Place it on a cutting board and slice with a sharp knife. Run the knife under hot water and wipe it clean between cuts for the neatest slices. Serve cold straight from the fridge.
Cooking Tips & Techniques
I have made this Easy No-Bake S’mores Icebox Cake more times than I care to admit, and I have picked up a few tricks along the way. Here are the things I wish someone had told me before my first attempt.
Let the pudding set completely. I know it is tempting to start layering right away, but letting the pudding sit for the full 5 minutes makes a huge difference. If you layer it too soon, it will be too runny and the graham crackers will turn into a soggy mess instead of a tender cake-like texture. Patience is your friend here.
Soften the cream cheese properly. Cold cream cheese will leave you with lumps that no amount of mixing can fix. Take it out of the fridge 30 minutes before you start, or if you forget (which I do all the time), microwave it for 10-15 seconds on low power. Do not overdo it—you want it soft, not melted.
Do not skimp on the chilling time. Six hours is the minimum, but overnight is where the magic happens. The graham crackers need time to absorb moisture from the pudding and marshmallow cream, and the flavors need time to meld together. I once tried to rush it after 4 hours, and the layers slid apart when I tried to slice it. Learn from my mistake.
Use a sharp knife for clean slices. A dull knife will drag through the layers and make a mess. Run the knife under hot water, wipe it dry, and make one clean cut. Wipe the blade between each cut. It takes an extra 30 seconds and makes the cake look professional.
Toast the marshmallows if you want that campfire flavor. This is optional but highly recommended. Just spread the mini marshmallows on a baking sheet and broil for 30-45 seconds. Watch them closely—they go from golden to burnt in about 10 seconds. I learned this the hard way and ended up with a smoky kitchen and a batch of charcoal marshmallows.
Make it ahead of time. This cake actually improves with age, so do not be afraid to make it a day in advance. It is perfect for parties because you can make it the night before and just add the whipped cream and garnish right before serving.
Variations & Adaptations
One of the best things about this recipe is how easy it is to customize. Here are some variations I have tried and loved.
Peanut Butter S’mores Icebox Cake
Add 1/2 cup creamy peanut butter to the marshmallow cream layer and beat until combined. The peanut butter adds a salty, nutty flavor that pairs beautifully with the chocolate and marshmallow. I made this version for a party last fall, and it was gone in 20 minutes. If you love chocolate chip cookies with sea salt, you will understand the magic of that sweet-salty combo.
Mint Chocolate S’mores Icebox Cake
Use mint chocolate pudding mix instead of regular chocolate pudding. Add 1/2 teaspoon peppermint extract to the marshmallow cream layer. Top with crushed chocolate mints or Andes mints for garnish. This version is incredibly refreshing and perfect for the holidays.
Gluten-Free S’mores Icebox Cake
Use gluten-free graham crackers. Most brands work well, but I have found that Schär brand holds up the best. The texture will be slightly different, but the flavor is just as good. This is a great option for anyone with celiac disease or gluten sensitivity.
Vegan S’mores Icebox Cake
Use vegan graham crackers, dairy-free chocolate pudding (made with oat milk or almond milk), and vegan cream cheese. For the marshmallow layer, use a vegan marshmallow fluff like Dandies or make your own with aquafaba. The texture will be a bit softer, but it is still delicious.
S’mores Icebox Cake in a Loaf Pan
If you want taller, more dramatic slices, use a 9×5-inch loaf pan instead of an 8×8 dish. You will need to break the graham crackers into smaller pieces to fit, and you will get more layers. This is my preferred method when I am serving a crowd because the slices look so impressive.
I have also tried adding a layer of fresh strawberries or raspberries between the pudding and graham crackers, and it was fantastic. The tartness of the berries cuts through the sweetness of the marshmallow and chocolate. If you are a fan of no-bake banana pudding eclair icebox cake, you will love this fruity twist.
Serving & Storage Suggestions
This cake is best served cold, straight from the fridge. The texture is perfect when it is chilled—the graham crackers are tender but not mushy, the pudding is creamy, and the marshmallow layer is light and fluffy.
Serving Temperature: Serve directly from the refrigerator. If it sits out at room temperature for more than 30 minutes, the layers will start to soften and lose their structure. I usually take it out of the fridge, slice it, and serve it immediately.
Presentation: For a prettier presentation, lift the cake out of the dish using the plastic wrap overhang and place it on a serving platter. Add a generous layer of whipped cream on top and sprinkle with mini marshmallows and chocolate shavings. You can also drizzle chocolate syrup over the top for extra decadence.
Complementary Dishes: This cake pairs beautifully with a cup of hot coffee or a tall glass of cold milk. If you are serving it after a meal, it goes well with light, fresh dishes like Mediterranean chickpea salad with lemon herb feta dressing or a simple fruit salad. The richness of the cake balances nicely with something bright and tangy.
Storage: Store any leftovers in the refrigerator, tightly covered with plastic wrap or in an airtight container. The cake will keep for up to 4 days, though the graham crackers will continue to soften over time. I actually prefer the texture on day 2 or 3, when everything has fully melded together.
Freezing: You can freeze this cake for up to 2 months. Wrap it tightly in plastic wrap and then in aluminum foil. Thaw in the refrigerator overnight before serving. The texture will be slightly softer after freezing, but it is still delicious. I have done this multiple times when I wanted to get ahead on party prep.
Reheating: This is a cold dessert, so there is no reheating involved. If you want to bring back some of the campfire flavor, you can toast the marshmallow garnish under the broiler for 30 seconds right before serving.
Nutritional Information & Benefits
Let me be honest: this is a dessert, not a health food. But that does not mean it cannot fit into a balanced diet. Here is the estimated nutritional breakdown per serving (based on 12 servings):
| Nutrient | Amount per Serving |
|---|---|
| Calories | 320 |
| Total Fat | 16g |
| Saturated Fat | 9g |
| Cholesterol | 45mg |
| Sodium | 280mg |
| Total Carbohydrates | 42g |
| Dietary Fiber | 1g |
| Sugars | 28g |
| Protein | 4g |
The graham crackers provide a small amount of whole grains, and the cream cheese adds a bit of protein and calcium. The chocolate pudding contains antioxidants from cocoa, though it is not a significant source. If you want to lighten it up, you can use sugar-free pudding mix, low-fat cream cheese, and light whipped topping. I have tried this version, and while it is not as rich, it is still satisfying.
This recipe contains dairy (milk, cream cheese, heavy cream) and gluten (graham crackers). If you have allergies, check the labels on your ingredients carefully. Most marshmallow fluff is gluten-free, but always verify the brand you are using.
I like to serve this cake in small portions because it is rich and decadent. A little goes a long way, and it is the perfect ending to a summer meal. If you are looking for a lighter dessert option, try cowboy caviar black bean and corn salsa dip for a fresh, healthy alternative.
Conclusion
This Easy No-Bake S’mores Icebox Cake is the dessert I turn to when I want something impressive without the effort. It is cool, creamy, and packed with all the flavors of a classic campfire s’mores—chocolate, marshmallow, and graham cracker—but without the heat, the smoke, or the sticky fingers.
I love that this recipe is flexible enough to adapt to whatever you have in your pantry. You can make it gluten-free, vegan, or add your own twist with peanut butter, mint, or fresh fruit. It is the kind of recipe that invites experimentation and always delivers.
If you make this cake, I would love to hear about it. Leave a comment below and let me know how it turned out, or share your own variations. Did you add peanut butter? Use mint chocolate pudding? Toast the marshmallows until they were perfectly golden? I want to hear all about it.
And if you are looking for more no-bake desserts to get you through the summer, check out my no-bake banana pudding eclair icebox cake or this creamy banana pudding cheesecake with Nilla wafer crust. Both are just as easy and just as delicious.
Happy no-baking, friends. Your summer dessert game just got a whole lot cooler.
Frequently Asked Questions
Can I make this S’mores Icebox Cake ahead of time?
Yes, absolutely. In fact, it tastes better when made a day in advance. The graham crackers need time to soften and absorb the flavors from the pudding and marshmallow cream. Make it up to 24 hours ahead, and add the whipped cream and garnish just before serving.
Can I use homemade chocolate pudding instead of instant?
You can, but the texture will be different. Instant pudding sets quickly and holds its shape well between layers. Homemade pudding is softer and may cause the graham crackers to become too soggy. If you want to use homemade, make it extra thick by reducing the milk slightly.
How do I get clean slices without the layers sliding apart?
Chill the cake for at least 6 hours, preferably overnight. Use a sharp knife and run it under hot water, wiping it dry between cuts. Lift the cake out of the dish using the plastic wrap overhang before slicing for the cleanest results.
Can I freeze this S’mores Icebox Cake?
Yes, you can freeze it for up to 2 months. Wrap it tightly in plastic wrap and then aluminum foil. Thaw in the refrigerator overnight before serving. The texture will be slightly softer after freezing, but it is still delicious.
What can I use instead of marshmallow fluff?
You can make your own marshmallow cream by melting marshmallows with a little corn syrup, or use a vegan marshmallow fluff alternative. Do not substitute melted marshmallows directly, as they will be too sticky and will not blend well with the cream cheese.
Pin This Recipe!
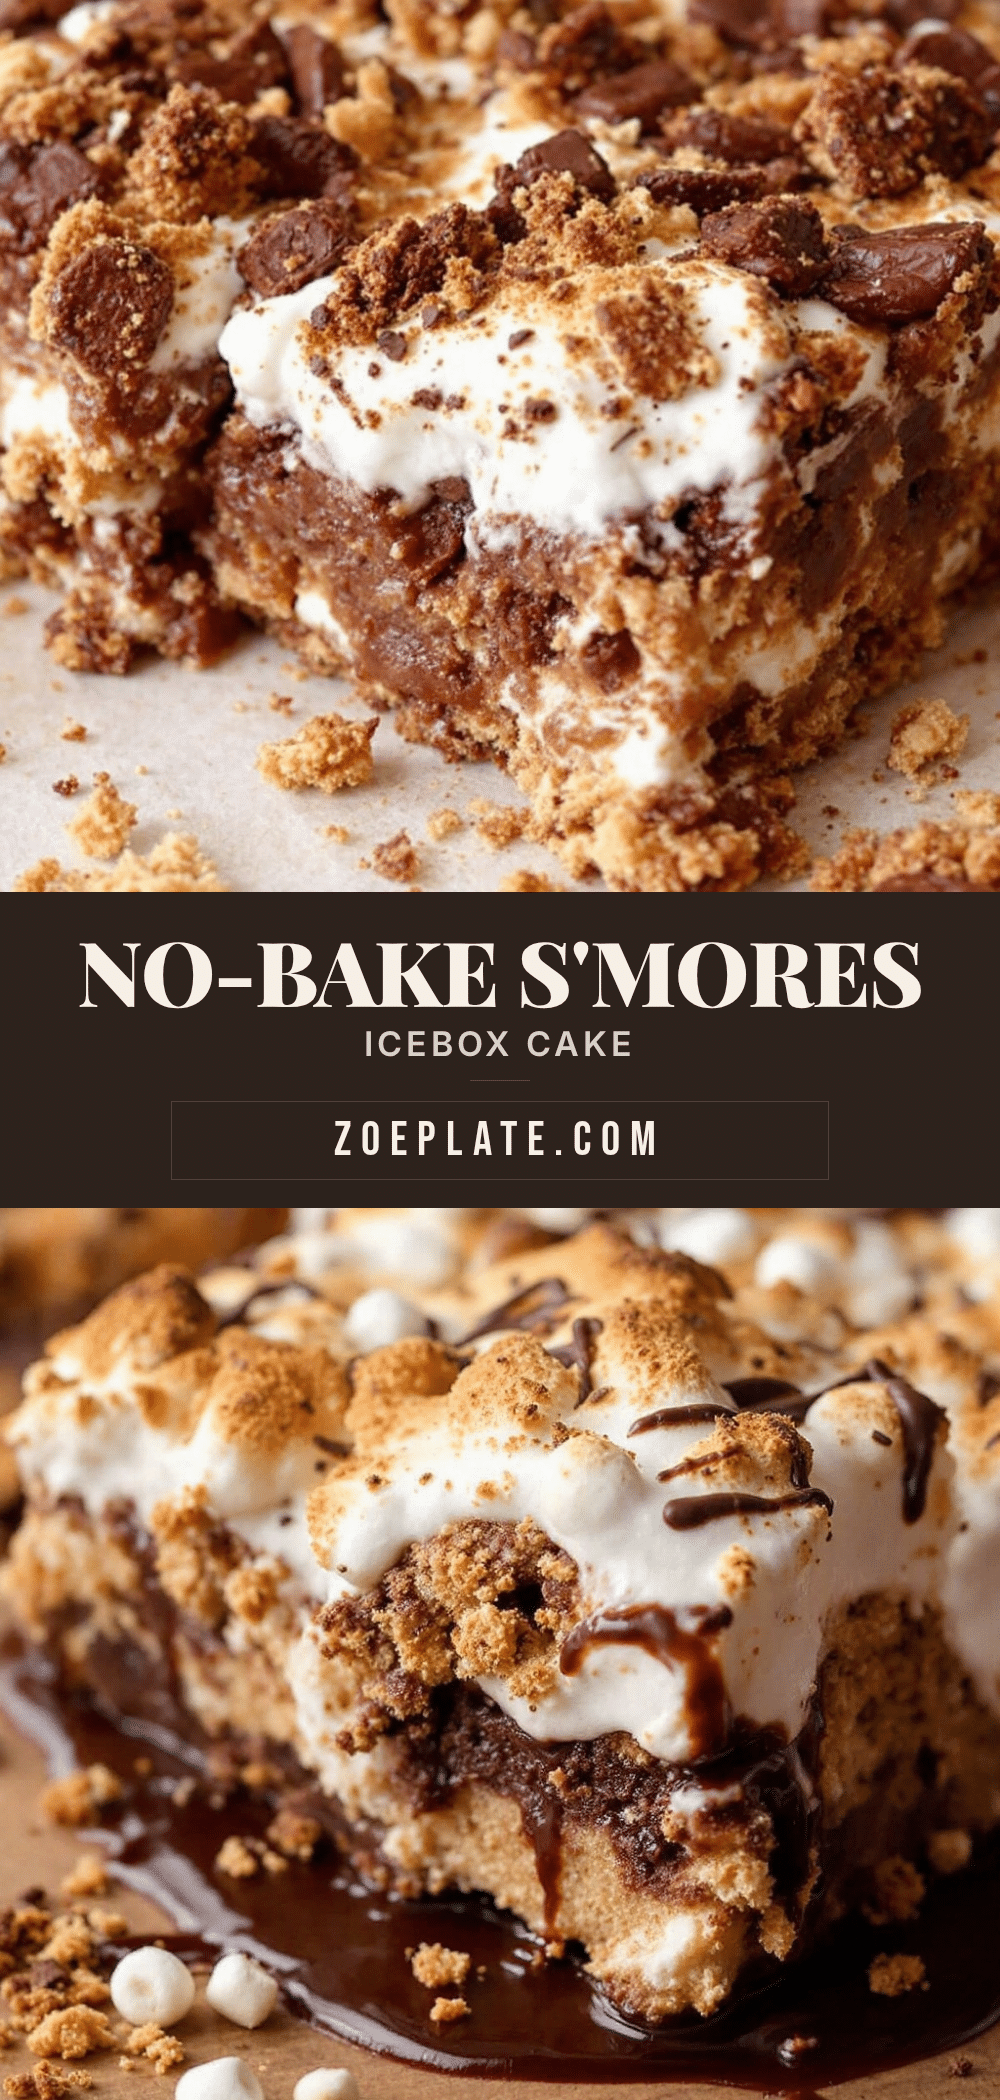
Easy No-Bake Smores Icebox Cake – Best 10-Minute Dessert
A cool, creamy, and incredibly easy no-bake dessert that tastes like summer camp. Layers of chocolate pudding, marshmallow cream, and graham crackers come together in minutes for a crowd-pleasing treat.
- Prep Time: 10 minutes
- Cook Time: 0 minutes
- Total Time: 6 hours 10 minutes (includes chilling)
- Yield: 12 servings 1x
- Category: Dessert
- Cuisine: American
Ingredients
- 1 (3.9 oz) box instant chocolate pudding mix
- 2 cups cold whole milk
- 1 (7 oz) jar marshmallow fluff
- 4 oz cream cheese, softened
- 1/2 cup powdered sugar
- 1 teaspoon vanilla extract
- 1 box (about 14 oz) graham crackers (about 12 full sheets)
- 1 cup heavy cream
- 2 tablespoons powdered sugar
- 1/2 cup mini marshmallows
- 1/4 cup chocolate chips or shaved chocolate
Instructions
- Make the chocolate pudding: In a medium bowl, whisk together the instant chocolate pudding mix and 2 cups cold whole milk for about 2 minutes until thickened. Let sit for 5 minutes to fully set.
- Make the marshmallow cream layer: In another medium bowl, beat the softened cream cheese with a hand mixer on medium speed until smooth, about 1 minute. Add the powdered sugar and vanilla extract and beat until combined, about 30 seconds. Add the marshmallow fluff and beat on medium speed until light, fluffy, and combined, about 2 minutes.
- Line an 8×8-inch baking dish with plastic wrap or parchment paper, leaving overhang on the sides.
- Spread a thin layer (about 2 tablespoons) of chocolate pudding on the bottom of the dish. Place a layer of graham crackers on top, breaking as needed to fit (about 4 full sheets).
- Spread about one-third of the marshmallow cream mixture evenly over the graham crackers. Top with another layer of graham crackers.
- Spread about half of the remaining chocolate pudding over the second layer of graham crackers. Top with another layer of graham crackers.
- Repeat with the remaining marshmallow cream, another layer of graham crackers, and the remaining chocolate pudding. End with a final layer of graham crackers on top.
- Cover the dish tightly with plastic wrap, pressing it directly onto the surface. Refrigerate for at least 6 hours, preferably overnight.
- About 30 minutes before serving, make the whipped cream: In a medium bowl, beat the heavy cream and 2 tablespoons powdered sugar with a hand mixer on high speed until stiff peaks form, about 3 minutes.
- Spread the whipped cream over the top of the chilled cake. Sprinkle with mini marshmallows and chocolate chips or shaved chocolate. Optionally, toast the mini marshmallows under the broiler for 30-45 seconds before sprinkling.
- Use the plastic wrap overhang to lift the cake out of the dish. Slice with a sharp knife (run under hot water and wipe clean between cuts) and serve cold.
Notes
For best results, chill overnight. The cream cheese adds a slight tang that balances sweetness. Use whole milk for richer pudding. Toast marshmallows under broiler for 30-45 seconds for campfire flavor.
Nutrition
- Serving Size: 1 slice (1/12 of cak
- Calories: 320
- Sugar: 28
- Sodium: 280
- Fat: 16
- Saturated Fat: 9
- Carbohydrates: 42
- Fiber: 1
- Protein: 4
Keywords: no-bake dessert, smores, icebox cake, summer dessert, easy dessert, chocolate, marshmallow, graham cracker


