My nephew took one bite, stopped mid-chew, and looked at me with the kind of serious expression only a seven-year-old can pull off. “Auntie,” he said, holding up the green rice krispie treat with its little candy eyes, “this is the best monster I’ve ever eaten.” And honestly? That was it. That was the moment I knew these Easy Frankenstein Rice Krispie Treats were going to be a regular thing around here.
I’d spent the afternoon testing different ways to make a Halloween treat that didn’t require baking (because let’s face it, October is busy enough) and that kids could actually help with. The regular rice krispie treats were fine, but they needed a personality. So I added some green food coloring, pressed them into rectangles, and stuck on some candy eyes and a little black frosting mouth. The result was this goofy, lovable Frankenstein face that made my nephew laugh out loud.
These aren’t just another Halloween dessert. They’re the kind of thing that makes kids forget about their candy stash for a minute. They’re simple enough to whip up after school, and they don’t require any fancy decorating skills. If you’re looking for a fun Halloween activity that doubles as a treat, this is it.
Why You’ll Love This Recipe
I’ve made these Easy Frankenstein Rice Krispie Treats for Halloween parties, classroom events, and just for fun on a rainy October afternoon. Every single time, they disappear faster than I can make them. Here’s why this recipe works so well:
- No Baking Required: This is a stovetop recipe that comes together in about 15 minutes. No oven needed, which means you can make these even when the kitchen is already full of other holiday prep.
- Simple Ingredients: You probably already have marshmallows, butter, and rice cereal in your pantry. The green food coloring and candy decorations are easy to find at any grocery store or online.
- Perfect for Halloween Parties: Whether it’s a school celebration, a neighborhood get-together, or just a spooky movie night at home, these Frankenstein faces fit right in.
- Kid-Friendly Activity: Kids can help stir, press the treats into the pan, and decorate the faces. It’s a great way to spend some time together without the stress of complicated baking.
- Unbelievably Cute: Let’s be honest, the little candy eyes and stitched-up mouth make these irresistible. They’re the kind of treat that makes people smile before they even take a bite.
What makes these different from other Halloween rice krispie treats is the texture. I’ve tested this recipe more times than I can count, and I’ve figured out the exact ratio of butter to marshmallows that gives you a treat that’s soft and chewy, not hard and crunchy. The marshmallows get perfectly melted and gooey, and the cereal stays light and airy. It’s comfort food with a spooky twist, and honestly, it’s the kind of treat that makes you feel like a kid again.
What Ingredients You Will Need
This recipe uses simple, everyday ingredients that come together to create something truly fun. No fancy baking supplies required, just good old-fashioned pantry staples and some Halloween-themed decorations.
- Unsalted Butter (3 tablespoons): This is the base that helps the marshmallows melt smoothly. I always use unsalted butter so I can control the salt level. If you only have salted butter, just skip adding any extra salt later.
- Mini Marshmallows (10 ounces, about 6 cups): Mini marshmallows melt faster and more evenly than the big ones. I’ve tried both, and the minis really do make a difference in the texture. If you’re in a pinch, you can use the large ones, just give them a little extra time to melt.
- Crispy Rice Cereal (6 cups): The classic choice. I’ve tested this with generic brands and name brands, and honestly, the name brand gives a slightly better texture. It stays crispier longer. If you need a gluten-free option, make sure you pick up a certified gluten-free rice cereal.
- Green Gel Food Coloring (1 teaspoon): This is the secret to getting that perfect Frankenstein green. Liquid food coloring can make the treats too wet and watery. Gel coloring gives you a vibrant color without changing the consistency. I like the Wilton brand, but any gel food coloring works great.
- Candy Eyes (about 24): You can find these at craft stores or online. They come in different sizes, and I like the medium-sized ones for these treats. They’re just the right proportion for the Frankenstein face.
- Black Decorating Frosting (1 tube): This is for drawing the mouth and the stitches on the forehead. The tube with a small tip works best. I’ve used regular black frosting in a piping bag before, but the tube is so much easier for this project.
- Vegetable Oil or Non-Stick Spray: You’ll need this to grease your hands and the spatula when pressing the treats into the pan. The mixture is sticky, and this makes the whole process much easier.
For the decorations, you can also get creative. I’ve used black licorice strings for the mouth before, and it looked amazing. Some people like to add a little pretzel stick as a bolt on the side of the head. The base recipe is so simple that you can really make it your own.
Equipment Needed
You don’t need any fancy equipment for these Easy Frankenstein Rice Krispie Treats. Here’s what you’ll need to have on hand:
- Large Pot or Dutch Oven: You need a pot big enough to stir the marshmallows and cereal together without spilling. A 5-quart pot works perfectly. I’ve used a smaller pot before, and it was a mess. Trust me on this one.
- Rubber Spatula or Wooden Spoon: A silicone spatula is my go-to because it doesn’t scratch the pot and it’s great for scraping every last bit of the mixture out.
- 9×13-inch Baking Pan: This is the perfect size for making rectangular Frankenstein faces. If you only have an 8×8 pan, you’ll get thicker treats, just adjust your pressing technique.
- Parchment Paper: Line your pan with parchment paper, leaving some overhang on the sides. This makes lifting the treats out of the pan so much easier. I learned this the hard way after spending 20 minutes trying to pry treats out of a greased pan.
- Small Bowl of Water: Keep this nearby. Wetting your fingers or the spatula prevents the sticky mixture from clinging to everything.
- Sharp Knife: For cutting the treats into rectangles. A bench scraper also works great for this.
If you don’t have a 9×13 pan, you can use a cookie sheet with sides. The treats will be thinner, so you might need to adjust the cutting size. I’ve also made these in a muffin tin for individual Frankenstein faces, and that turned out adorable.
Preparation Method
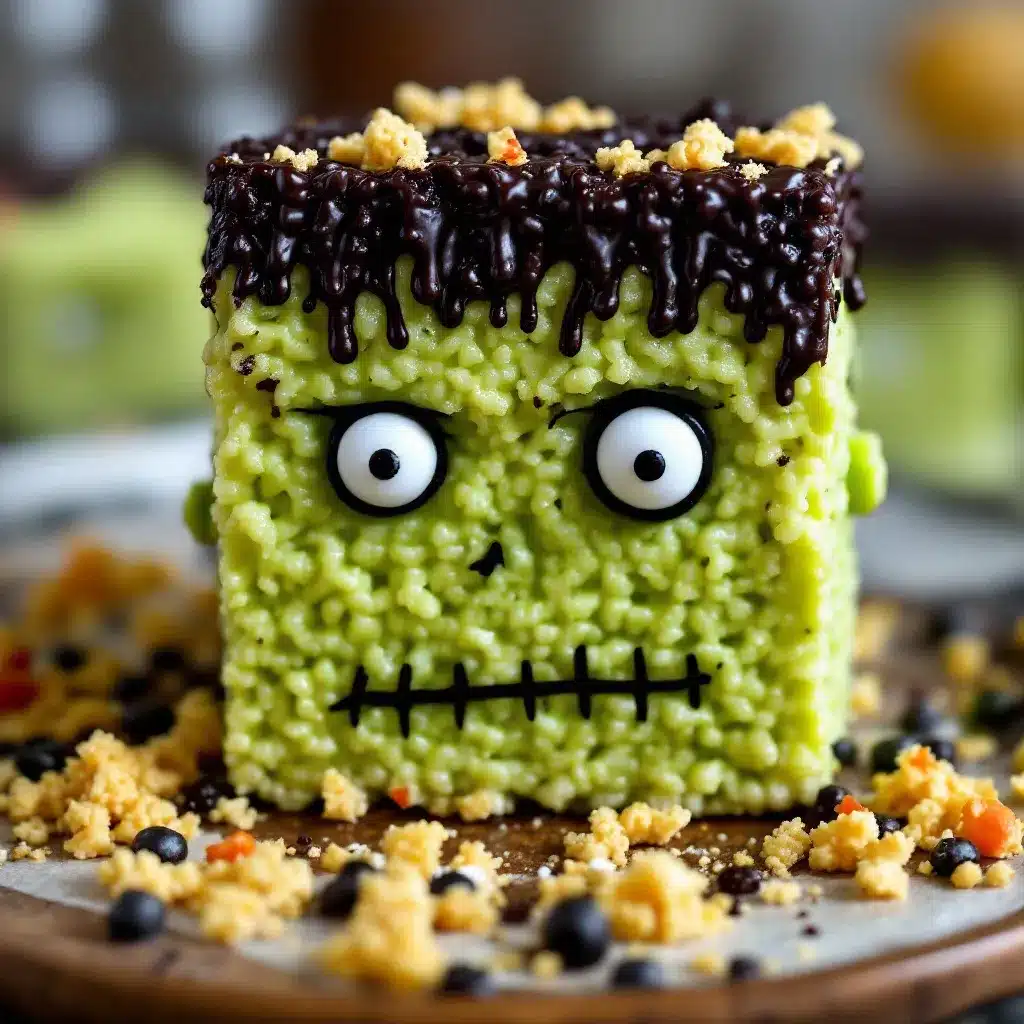
Making these Easy Frankenstein Rice Krispie Treats is simple, but there are a few tricks to getting them just right. Follow these steps, and you’ll have a batch of spooky treats in no time.
- Prep Your Pan: Line your 9×13-inch baking pan with parchment paper, leaving about 2 inches of overhang on the long sides. Lightly spray the parchment with non-stick spray. This will make lifting the treats out later a breeze.
- Melt the Butter: Place your large pot over medium-low heat. Add the 3 tablespoons of unsalted butter and let it melt completely. Don’t rush this step. If the heat is too high, the butter can brown, which will change the flavor of your treats. You want the butter just melted, not sizzling.
- Add the Marshmallows: Pour in the 10 ounces of mini marshmallows. Stir constantly with your rubber spatula until the marshmallows are completely melted and smooth. This usually takes about 3-4 minutes. The mixture should be glossy and stretchy when you lift the spatula.
- Add the Green Color: Remove the pot from the heat. Add 1 teaspoon of green gel food coloring and stir until the color is evenly distributed. The mixture will turn a bright, vibrant green. If you want a darker green, add a tiny bit more coloring, but go slowly. You can always add more, but you can’t take it away.
- Add the Cereal: Pour in the 6 cups of crispy rice cereal. Fold it into the marshmallow mixture gently. Use a folding motion, not a stirring motion. You want to coat every piece of cereal with the green marshmallow mixture without crushing the cereal. This takes about 2 minutes of gentle folding.
- Transfer to the Pan: Scrape the mixture into your prepared pan. Don’t dump it all in one spot. Try to spread it out as evenly as possible before you start pressing.
- Press It Down: Here’s the trick. Lightly wet your hands or a spatula with water (or spray with non-stick spray). Gently press the mixture into an even layer in the pan. Don’t press too hard. If you compact the mixture too much, the treats will be hard and dense instead of soft and chewy. You just want to get it level and flat.
- Let It Set: Allow the treats to cool and set at room temperature for about 30 minutes. Don’t put them in the refrigerator. The rapid cooling can make them hard.
- Cut Into Rectangles: Use the parchment paper to lift the block of treats out of the pan. Place it on a cutting board. Use a sharp knife to cut the block into rectangles. I usually cut the block into 12 rectangles, about 3 inches by 4 inches each. A bench scraper gives you cleaner cuts than a knife.
- Decorate the Faces: This is the fun part. For each rectangle, press two candy eyes into the top half. Use the black decorating frosting to draw a small mouth below the eyes. I like to add a little zigzag stitch pattern on the forehead with the frosting. It gives them that classic Frankenstein look. You can also draw a little bolt on the side of the head if you’re feeling creative.
One thing I’ve learned from making these a dozen times: work quickly when the mixture is warm. It sets fast, and once it’s cool, it’s hard to press into the pan. If the mixture starts to get too stiff before you’ve pressed it, you can microwave it for 10 seconds to soften it up.
For the decorations, I like to give each Frankenstein a slightly different expression. Some get a big smile. Some get a little frown. Some get a surprised look with their eyes placed higher. It makes the batch feel more fun and less factory-made.
Cooking Tips & Techniques
I’ve made these Easy Frankenstein Rice Krispie Treats more times than I can count, and I’ve definitely learned a few things along the way. Here are my best tips for getting them perfect every time.
Don’t Overheat the Marshmallows. This is the biggest mistake people make. If you cook the marshmallows too long or on too high heat, the sugar can crystallize, and your treats will turn out hard and crunchy instead of soft and chewy. Keep the heat on medium-low and stir constantly. The moment the marshmallows are melted and smooth, take the pot off the heat.
Use Fresh Marshmallows. Old marshmallows can be hard and dry, and they won’t melt as smoothly. If your marshmallows are a little stale, they’ll leave lumps in your mixture. I always check the date on the bag before I start.
Wet Your Hands Regularly. The mixture is incredibly sticky. I keep a small bowl of water next to my work station, and I dip my fingers in it before I touch the mixture. It makes pressing the treats into the pan so much easier. Just make sure your hands are wet, not dripping, or you’ll water down the mixture.
Cut With a Warm Knife. If you’re having trouble cutting clean rectangles, try running your knife under hot water and drying it off before each cut. The warmth helps the knife glide through the treats without sticking or tearing them.
One time I forgot to add the green food coloring until after I’d already poured the cereal in. I had to stir it in really fast, and the color was streaky and uneven. Now I always add the coloring to the melted marshmallows before I add the cereal. The color distributes much more evenly that way.
For the Decorations, Work in Batches. Don’t try to decorate all 12 treats at once if you’re doing it with kids. The frosting can dry out, and the candy eyes can slide off if the surface isn’t slightly tacky. I like to decorate 3 or 4 at a time, then take a break, then do the next batch.
Timing is Everything. These treats are best enjoyed within 24 hours of making them. They’ll stay good for a few days, but the texture is really at its peak on the first day. If you’re making them for a party, I recommend making them the day before and decorating them the morning of the event.
Variations & Adaptations
One of the best things about this recipe is how easy it is to adapt. Here are some of my favorite variations:
Gluten-Free Version: Use a certified gluten-free crispy rice cereal. Most major brands offer a gluten-free option now. The rest of the ingredients are naturally gluten-free, so this is a simple swap. I’ve made these for friends with celiac disease, and they loved them.
Vegan Frankenstein Treats: Substitute the butter with a vegan butter alternative (I like the Miyoko’s brand) and use vegan marshmallows. Dandies is a good brand that melts well. The texture will be slightly different, but they’re still delicious and just as fun to decorate.
Chocolate Frankenstein: Add 1/2 cup of chocolate chips to the marshmallow mixture right after you take it off the heat. Stir until the chips are melted and incorporated. The green color will turn into a dark, swampy green, and the chocolate flavor adds a whole new dimension. This is my personal favorite variation.
Peanut Butter Frankenstein: Stir in 1/4 cup of creamy peanut butter along with the marshmallows. The peanut butter adds a savory note that balances the sweetness perfectly. If you’re making these for a school event, just double-check that there aren’t any peanut allergies in the class.
Spooky Shapes: Instead of cutting the treats into rectangles, you can press the mixture into a 9×13 pan and use Halloween-themed cookie cutters to cut out shapes. Ghosts, pumpkins, and bats all work great. Just make sure to press the cookie cutter straight down and lift it straight up for clean edges.
Different Decorations: Swap out the candy eyes for other Halloween candies. I’ve used candy corn for teeth, black licorice strings for hair, and red hots for little monster spots. The possibilities are endless, and it’s a great way to use up leftover Halloween candy.
If you’re looking for other fun Halloween treats, you might also enjoy my Easy Pumpkin Dump Cake with Pecan Crumble. It’s another no-fuss dessert that’s perfect for fall gatherings.
Serving & Storage Suggestions
These Easy Frankenstein Rice Krispie Treats are best served at room temperature. The texture is soft and chewy, and the decorations stay put. If you serve them straight from the refrigerator, they’ll be a little hard, so let them sit out for about 10 minutes first.
For presentation, I like to arrange them on a platter lined with black or orange tissue paper. The green faces really pop against a dark background. You can also stand them up on their edges for a more dramatic display, just make sure they’re stable enough not to tip over.
These treats pair perfectly with other Halloween snacks. I’ve served them alongside Fresh Cowboy Caviar for a fun sweet and savory combo at Halloween parties. The contrast between the sweet, gooey treats and the fresh, tangy dip is surprisingly good.
Storage Instructions: Store the treats in an airtight container at room temperature for up to 3 days. Layer them between sheets of parchment paper so the decorations don’t stick together. Do not refrigerate them. The cold air will dry them out and make them hard.
Freezer Instructions: You can freeze these treats for up to 2 months. Wrap each treat individually in plastic wrap, then place them in a freezer-safe bag. To thaw, let them sit at room temperature for about 30 minutes. The texture will be slightly softer than fresh, but they’re still delicious. I’ve frozen batches for Halloween parties and just decorated them after thawing.
Reheating: If your treats have gotten a little hard, you can microwave them for 5-10 seconds to soften them up. Just be careful not to overheat them, or the marshmallow can become too soft and the decorations might slide off.
The flavors actually develop a little bit over time. On the second day, the marshmallow flavor mellows out, and the treats become a little more chewy. Some people actually prefer them this way. I say make a double batch and see which texture you like best.
Nutritional Information & Benefits
These Easy Frankenstein Rice Krispie Treats are a treat, so they’re not exactly health food. But here’s what you should know:
Estimated Nutritional Values (per treat, based on 12 servings):
- Calories: 180
- Total Fat: 6g
- Saturated Fat: 4g
- Carbohydrates: 32g
- Sugar: 18g
- Protein: 2g
- Sodium: 150mg
Dietary Considerations: This recipe can be made gluten-free and vegan with simple substitutions. It’s naturally nut-free if you skip the peanut butter variation, but always check your ingredient labels to be sure.
Potential Allergens: This recipe contains dairy (butter) and may contain traces of nuts depending on the brand of candy decorations you use. The rice cereal is typically made in facilities that process wheat, so check the label if you have celiac disease.
Health Perspective: Look, these are a special occasion treat. They’re meant to be fun and festive, not a daily snack. But I do appreciate that they’re made with simple, recognizable ingredients. There’s nothing artificial or processed in the base recipe except the food coloring, which you can swap for a natural green coloring if you prefer.
For a healthier Halloween option, you might also love my No-Bake Peanut Butter Oat Energy Bites. They’re naturally sweetened and packed with protein, perfect for balancing out all the candy.
Conclusion
These Easy Frankenstein Rice Krispie Treats have become a Halloween tradition in my house, and I hope they become one in yours too. They’re simple enough to make on a busy weeknight, fun enough to get the kids involved, and cute enough to impress at any Halloween party.
The best part? You don’t need to be a professional baker or a cake decorator to make them look good. The little candy eyes and the stitched-up mouth do all the work for you. Even if your frosting lines are a little wobbly, the treats still come out looking adorable. Honestly, the imperfect ones are my favorite. They’ve got more personality.
I’d love to see how your Frankenstein faces turn out. Leave a comment below and let me know if you tried any of the variations or came up with your own decorations. And if you’re looking for more Halloween inspiration, check out my Perfect Pumpkin Cream Cheese Muffins for another seasonal favorite.
Happy Halloween, and happy snacking!
Frequently Asked Questions
Can I make these Frankenstein Rice Krispie Treats ahead of time?
Yes, you can make them up to 2 days ahead of time. Store them in an airtight container at room temperature, and decorate them the day you plan to serve them. The decorations stay fresher that way.
Why are my Rice Krispie Treats hard?
This usually happens when the marshmallows are overcooked or when the mixture is pressed too firmly into the pan. Keep the heat on medium-low, stir constantly, and press the mixture gently into the pan. You want it level, not compacted.
Can I use liquid food coloring instead of gel?
You can, but liquid food coloring will make the mixture wetter and can affect the texture. You’ll need more liquid coloring to achieve the same vibrant green, which can make the treats sticky. Gel coloring is definitely the better choice for this recipe.
How do I keep the candy eyes from falling off?
Press the candy eyes into the treats while they’re still slightly warm and tacky. If the treats have fully cooled, you can dab a tiny bit of frosting on the back of each eye to help it stick. The black decorating frosting works great for this.
Can I double this recipe?
Absolutely. Just double all the ingredients and use a larger pan, like a 12×17-inch sheet pan. You might need to work in batches when melting the marshmallows, as a single pot might not hold everything. I’ve made a double batch for classroom parties, and it worked perfectly.
Pin This Recipe!
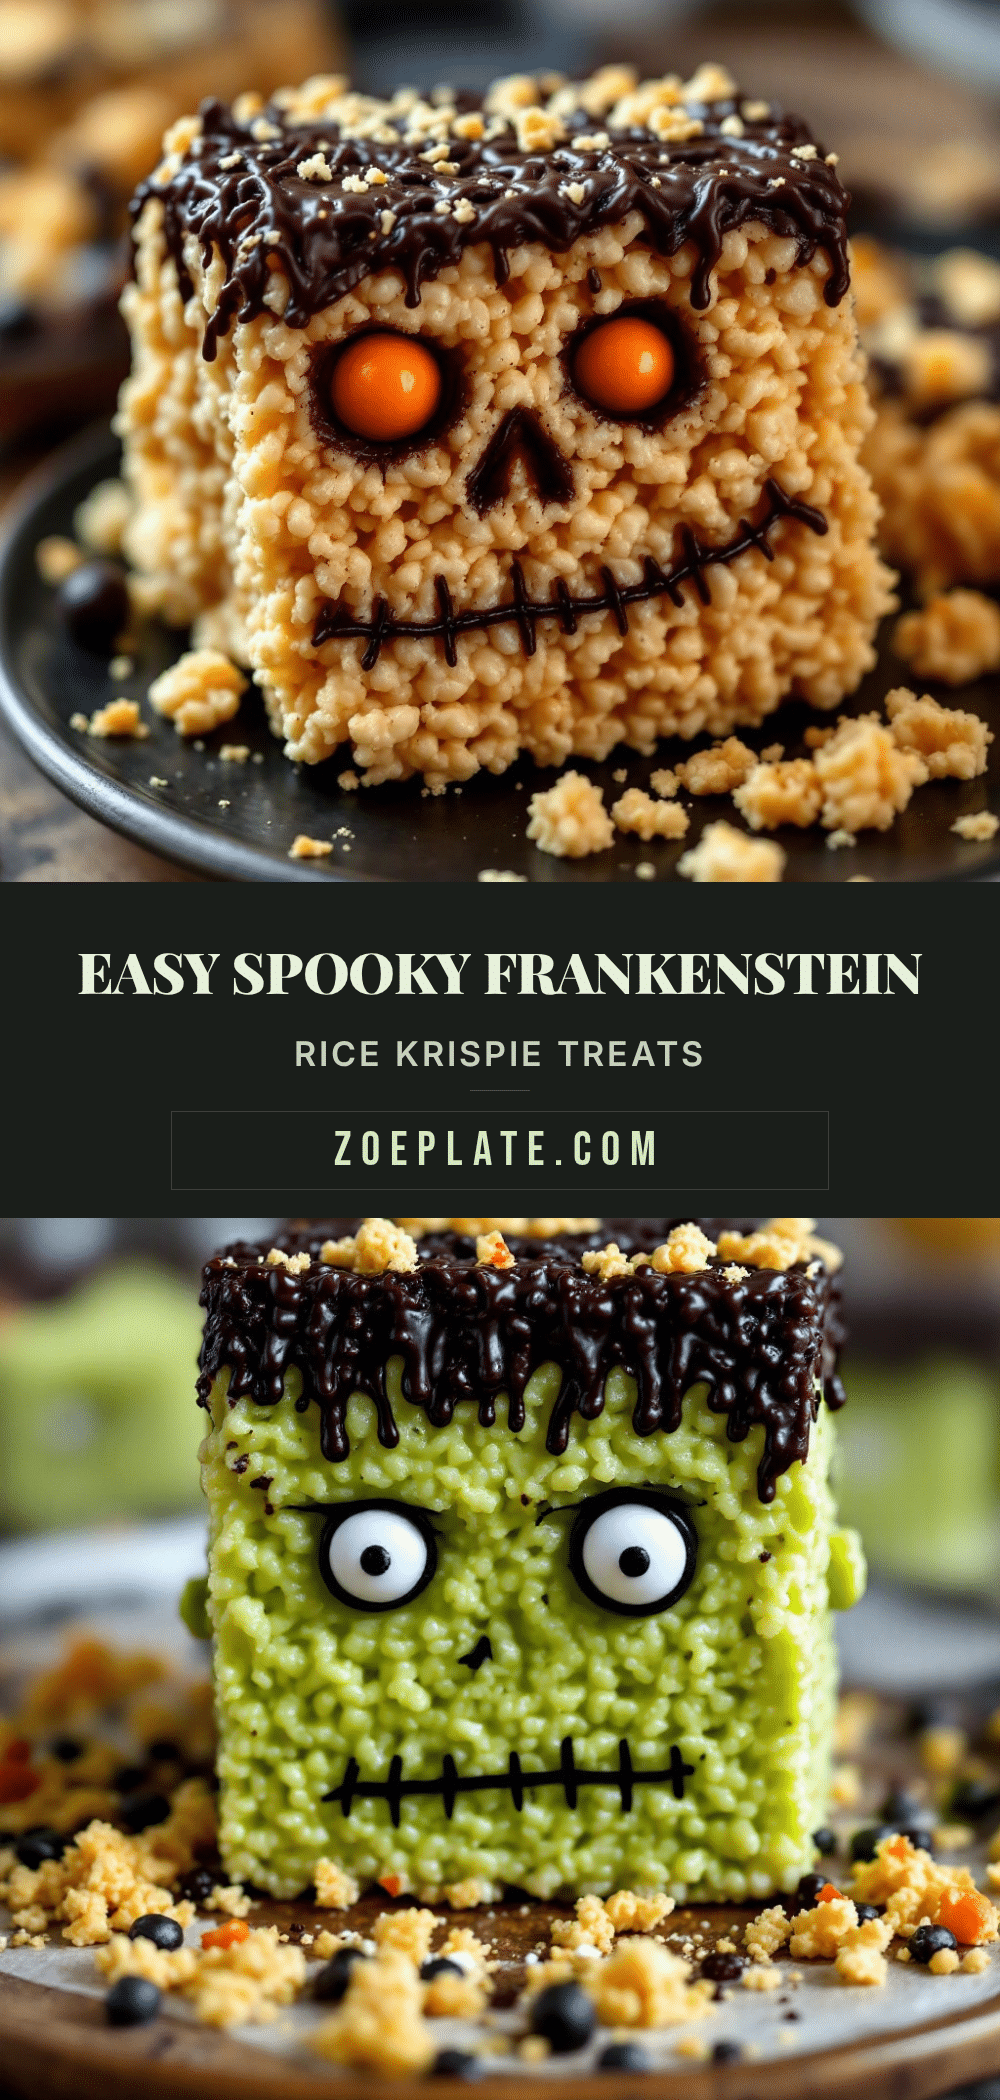
Easy Frankenstein Rice Krispie Treats Recipe: Fun & Spooky

These no-bake Frankenstein Rice Krispie Treats are a fun and spooky Halloween dessert that kids can help make. With green food coloring, candy eyes, and a stitched-up mouth, they’re as adorable as they are delicious.
- Prep Time: 15 minutes
- Cook Time: 5 minutes
- Total Time: 50 minutes
- Yield: 12 servings 1x
- Category: Dessert
- Cuisine: American
Ingredients
- 3 tablespoons unsalted butter
- 10 ounces mini marshmallows (about 6 cups)
- 6 cups crispy rice cereal
- 1 teaspoon green gel food coloring
- 24 candy eyes
- 1 tube black decorating frosting
- Vegetable oil or non-stick spray (for greasing)
Instructions
- Line a 9×13-inch baking pan with parchment paper, leaving about 2 inches of overhang on the long sides. Lightly spray the parchment with non-stick spray.
- Place a large pot over medium-low heat. Add the unsalted butter and melt completely.
- Add the mini marshmallows and stir constantly until completely melted and smooth, about 3-4 minutes.
- Remove the pot from the heat. Add the green gel food coloring and stir until evenly distributed.
- Pour in the crispy rice cereal and fold gently until every piece is coated, about 2 minutes.
- Scrape the mixture into the prepared pan. Lightly wet your hands or a spatula with water (or spray with non-stick spray) and gently press the mixture into an even layer. Do not press too hard.
- Let the treats cool and set at room temperature for about 30 minutes.
- Use the parchment paper to lift the block of treats out of the pan. Place on a cutting board and cut into 12 rectangles (about 3×4 inches each).
- For each rectangle, press two candy eyes into the top half. Use the black decorating frosting to draw a small mouth below the eyes and a zigzag stitch pattern on the forehead.
Notes
Work quickly when the mixture is warm as it sets fast. If it gets too stiff before pressing, microwave for 10 seconds to soften. For best texture, enjoy within 24 hours. Store in an airtight container at room temperature for up to 3 days. Do not refrigerate.
Nutrition
- Serving Size: 1 treat
- Calories: 180
- Sugar: 18
- Sodium: 150
- Fat: 6
- Saturated Fat: 4
- Carbohydrates: 32
- Protein: 2
Keywords: Frankenstein Rice Krispie Treats, Halloween treats, no-bake dessert, kid-friendly Halloween, spooky snacks


