The bag of candy eyes I bought last October was still sitting in my baking drawer. I found them while looking for vanilla extract, and that discovery turned into the whole reason these black cat Halloween brownies exist. My niece was coming over after school, and I had a box of brownie mix, a package of Oreos, and a sudden, stubborn vision of a cat face staring up at me from a baking dish. I wasn’t planning on making anything elaborate—honestly, I was just trying to use up ingredients before they went stale.
So I dumped the brownie batter into a pan, and then I started messing around with the Oreos. I twisted one apart, scraped off some filling, and pressed it into the batter. It looked ridiculous at first. But then I added the candy eyes and a little peanut butter chip for the nose, and something clicked. It was a messy, impulsive kind of creativity, the kind that usually ends in a sink full of dirty bowls. But this time, it ended with my niece walking into the kitchen, stopping mid-sentence, and saying, “Did you make a cat?”
These perfect black cat Halloween brownies with Oreo ears are not fancy. They are not complicated. They are the result of digging through your pantry and deciding to have a little fun. And honestly, that is the best kind of baking. It feels good to make something that looks like it took way more effort than it actually did, especially when the payoff is a pan of fudgy brownies with little cat faces peeking out.
Why You’ll Love This Recipe
I have tested this recipe about four times now, and each time, I tweaked something small. The first batch had the ears sliding off. The second batch had the eyes sinking into the batter. The third batch? That was the one. Here is why I think you will love it as much as my niece does.
- Super Simple to Make: You start with a boxed brownie mix. No shame in that. It keeps things fast and foolproof, which is exactly what you want when you are baking with kids or short on time.
- Minimal Ingredients: Brownie mix, eggs, oil, water, Oreos, candy eyes, and a few peanut butter chips. That is it. You probably already have most of it.
- Perfect for Halloween Parties: These brownies are a total crowd-pleaser. They look like you spent hours piping black frosting, but you just pressed a few cookies into the batter. Kids love them, adults smile at them, and they disappear fast.
- No Special Equipment Needed: You do not need a piping bag, a cookie cutter, or any weird tools. Just a 9×13 pan and your hands.
- Unbelievably Cute: Let’s face it—food that looks like an animal is automatically more fun to eat. The Oreo ears and candy eyes make these brownies instantly recognizable and totally adorable.
What makes these different from other Halloween brownies is the simplicity. I have seen recipes that require you to make homemade frosting, pipe intricate cat whiskers, or use fondant. That is not this. This is about getting a great result with almost no effort. It is the kind of recipe you can make on a Tuesday afternoon after school, and still have time to clean up before dinner. It is comfort food with a spooky twist, and it is honestly the most fun I have had baking in a long time.
What Ingredients You Will Need
This recipe uses straightforward, everyday ingredients to create something that looks and tastes special. Here is everything you need, along with a few notes from my testing sessions.
- 1 box (18 oz) brownie mix: I prefer Ghirardelli or Duncan Hines for the fudgiest texture. You can use any brand you like, but avoid the “cake-like” mixes if you want a denser brownie that holds the Oreos well.
- Eggs, oil, and water: Follow the amounts listed on your specific brownie mix box. Usually, it is 2 eggs, 1/3 cup oil, and 1/4 cup water. Use room temperature eggs for a smoother batter.
- 24 Oreo cookies: You will use 12 whole Oreos for the ears (cut in half) and 12 more for the bodies. I recommend regular Oreos, not Double Stuf, because they are easier to cut cleanly. If you only have Double Stuf, just be careful when slicing.
- 48 candy eyes: These are the little edible sugar eyes you find in the baking aisle around Halloween. They come in a small jar or bag. You need two per brownie.
- 24 peanut butter chips or candy corn: For the nose. Peanut butter chips stay put better, but candy corn also works and looks cute. I tested both, and the peanut butter chips held their shape after baking.
- Black gel food coloring (optional): If you want to add little whiskers or a mouth with a toothpick, you can. I did not use it in my final version because the faces looked complete without it, but it is an option if you want to get fancy.
For the brownie batter itself, you do not need anything fancy. Just mix according to the box directions. I have tried adding a teaspoon of vanilla extract to the batter for extra depth, and it works nicely but is not necessary. The Oreos bring enough flavor on their own.
One note about the candy eyes: they can sometimes sink into the batter if the brownie is too thin. To prevent this, I recommend placing them on the brownies after the batter has baked for about 10 minutes, so the surface is slightly set. More on that in the method section.
If you are looking for another easy treat with similar vibes, check out these no-bake peanut butter oat energy bites for a healthier but still fun snack option.
Equipment Needed
You do not need a lot of fancy equipment for these brownies, which is one of the reasons I love this recipe. Here is what you will need.
- 9×13-inch baking pan: This is the standard size for a box of brownie mix. If you use an 8×8 pan, the brownies will be thicker and will need a longer baking time. I tested both, and the 9×13 yields a better brownie-to-Oreo ratio.
- Mixing bowl and whisk or spatula: A medium bowl and a sturdy spatula are all you need. No electric mixer required.
- Sharp knife and cutting board: You need a sharp knife to cut the Oreos in half cleanly. A serrated knife works best, but a regular chef’s knife also works if you go slowly.
- Parchment paper or non-stick spray: I recommend lining the pan with parchment paper, leaving an overhang on two sides. This makes it easy to lift the whole brownie slab out for cutting. Non-stick spray works, but the parchment method is cleaner.
- Cooling rack: A wire rack allows the brownies to cool evenly before you cut them. Cutting them while warm will result in messy edges.
- Small offset spatula (optional): If you want to pipe whiskers or add details, a small offset spatula or a toothpick works fine.
If you do not have a 9×13 pan, you can use a disposable aluminum pan from the grocery store. They work perfectly and make cleanup even easier. Just keep an eye on the baking time, as disposable pans can conduct heat differently.
Preparation Method
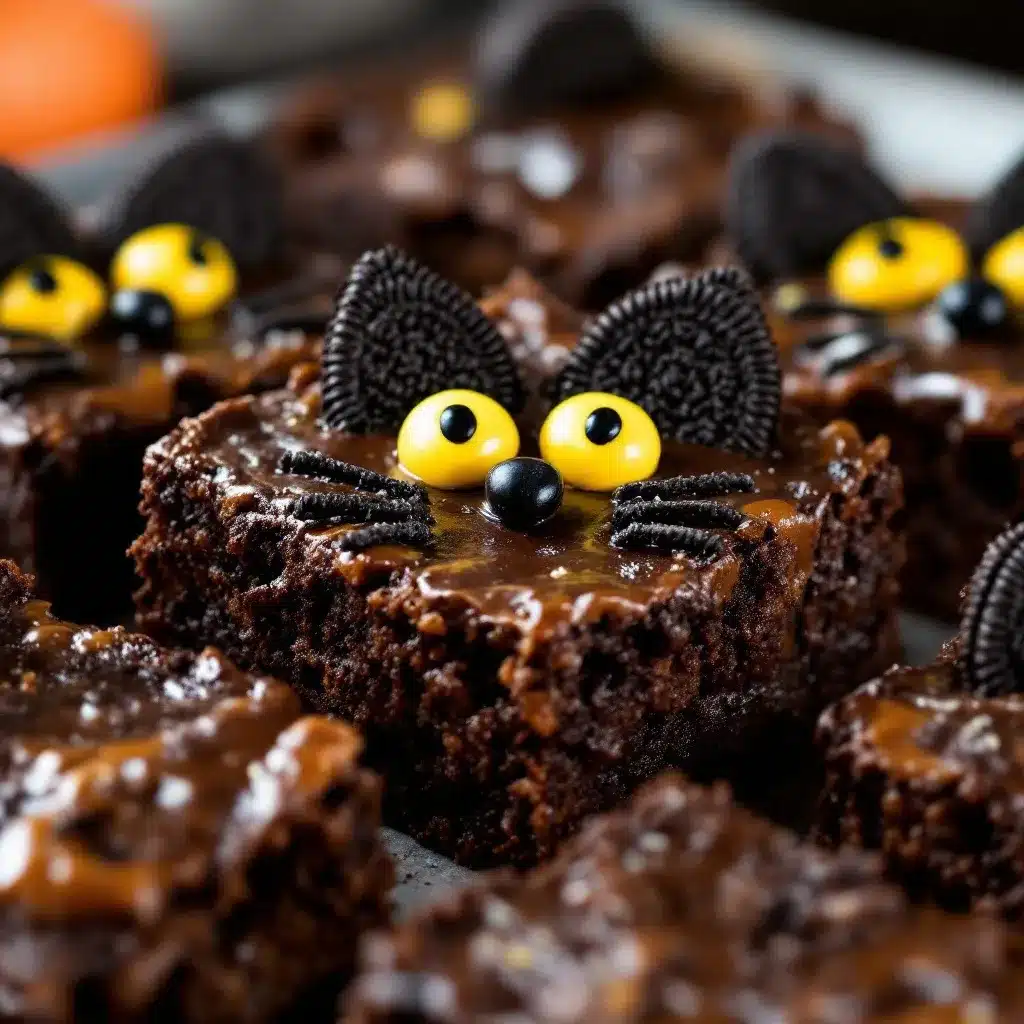
Follow these steps carefully, and you will end up with a pan of adorable black cat brownies that look like they came from a bakery. I have included all the little details I learned from my testing sessions.
- Preheat your oven to 350°F (175°C). Line your 9×13 baking pan with parchment paper, leaving a bit of overhang on the long sides. This will help you lift the brownies out later.
- Prepare the brownie batter according to the instructions on your box. In a medium bowl, combine the brownie mix, eggs, oil, and water. Stir until just combined—do not overmix. A few small lumps are fine.
- Pour the batter into the prepared pan and spread it into an even layer using a spatula. Tap the pan gently on the counter to release any air bubbles.
- Bake for 10 minutes. This is the crucial step. You do not want to bake the brownies all the way through yet. You just want the surface to be slightly set so the Oreos and candy eyes do not sink. The brownies will look underdone, and that is exactly what you want.
- While the brownies are in the oven, prepare the Oreos. Take 12 Oreos and carefully twist them apart. Scrape the cream filling off one side of each cookie. Then, use a sharp knife to cut each Oreo in half. You want a clean cut to make the ears look neat. If the cookie crumbles a bit, do not worry—just press the pieces together when you place them on the brownie.
- After 10 minutes, remove the pan from the oven. The surface should be set but the center will still be jiggly. Now you will assemble the cat faces. Work quickly but carefully.
- Place the Oreo bodies first. Take 12 whole Oreos (the ones you did not cut) and press them gently into the batter, spacing them evenly. I fit 12 in a 9×13 pan by placing them in a 4×3 grid. Press them down just enough so they are flush with the batter surface.
- Add the ears. Take the halved Oreos and place one half on each side of the whole Oreo, with the cut side facing inward. The rounded edge should point outward, like cat ears. Press them down gently.
- Add the candy eyes. Place two candy eyes on each whole Oreo, slightly above the center. Press them in lightly so they stick.
- Add the nose. Place one peanut butter chip or candy corn in the center, just below the eyes. If you are using candy corn, place it pointy-side down.
- Return the pan to the oven and bake for another 15-18 minutes, or until a toothpick inserted into the brownie (not the Oreo) comes out with a few moist crumbs. The total baking time is about 25-28 minutes.
- Let the brownies cool completely in the pan on a wire rack. This is important. If you try to cut them while they are warm, the brownies will crumble and the Oreos may slide off. I waited about 1.5 hours before cutting.
- Once cooled, lift the brownies out using the parchment paper overhang. Place the slab on a cutting board. Use a sharp knife to cut between the cat faces, creating individual brownies. Each brownie will have one Oreo face in the center.
Sensory cue: When you pull the brownies out of the oven, the kitchen will smell like chocolate and warm cookies. The Oreo ears should look slightly darker around the edges, and the candy eyes will be shiny. The brownie itself should look crackly on top but feel soft when you press it gently.
If you want another dessert that pairs well with these brownies, try this creamy banana pudding cheesecake for a completely different but equally indulgent treat.
Cooking Tips & Techniques
I made a few mistakes along the way so you do not have to. Here are the most important tips I learned.
Do not skip the blind bake. The first time I made these, I added the Oreos and candy eyes to the raw batter and baked everything together. The eyes sank into the batter and the ears tilted sideways. By baking the brownies for 10 minutes first, you create a stable surface that holds everything in place. This is the single most important technique in this recipe.
Cut the Oreos carefully. Use a serrated knife and a gentle sawing motion. If you press down too hard, the cookie will shatter. I broke about three Oreos before I got the hang of it. Save the broken pieces for snacking or crumble them on top of ice cream.
Space the cat faces evenly. Before you start placing the Oreos, visualize the grid. I placed mine in four rows of three. If you place them too close together, the brownies will be hard to cut. Too far apart, and you waste brownie space. A 9×13 pan is perfect for 12 cat faces.
Press the Oreos gently. You want them to sit flush with the brownie surface, not sink into it. If you press too hard, the Oreo will disappear into the batter and you will lose the face. A light press is all you need.
Let the brownies cool completely. I know it is tempting to cut into them while they are warm, but trust me on this. The brownies need time to set, and the Oreos need to adhere firmly to the surface. I ruined my first batch by cutting too early, and the Oreos slid right off.
Use a sharp knife for cutting. A dull knife will drag through the brownie and mess up the edges. I recommend wiping the knife clean between cuts for the neatest results.
Variations & Adaptations
I have tested a few variations on these brownies, and they all turned out great. Here are some ideas to make the recipe your own.
Gluten-Free Version: Use a gluten-free brownie mix and gluten-free Oreos. The process stays exactly the same. I tested this with a friend who has celiac disease, and she said they were just as good as the original.
White Chocolate Cats: Instead of peanut butter chips for the nose, use white chocolate chips. You can also drizzle melted white chocolate over the finished brownies for a ghostly effect. It looks really cute and adds a sweet contrast to the dark chocolate.
Pumpkin Spice Brownies: Use a pumpkin spice brownie mix instead of regular chocolate. The orange-brown color of the brownie pairs nicely with the black Oreo ears, and the flavor is perfect for fall. This variation goes well with easy pumpkin dump cake with pecan crumble for a full Halloween dessert spread.
Vegan Version: Use a vegan brownie mix and replace the eggs with flax eggs (1 tablespoon ground flaxseed mixed with 3 tablespoons water per egg). Oreos are actually vegan, so that part is already covered. Use vegan peanut butter chips or skip the nose entirely.
Spider Brownies: If you want to switch up the theme, use the same technique but add pretzel sticks as spider legs. Place four pretzel sticks on each side of the Oreo body before baking. It is a fun twist for a different Halloween look.
Mini Version: Use a mini muffin pan and bake small brownie bites. Cut the Oreos into quarters instead of halves for tiny ears. Reduce the baking time to about 15 minutes total. These are great for parties or lunchbox surprises.
Serving & Storage Suggestions
These brownies are best served at room temperature, but they also taste great straight from the fridge. The cold temperature makes the brownies denser and fudgier, which some people prefer.
For a Halloween party, arrange the brownies on a black or orange platter. You can add a few gummy worms or candy corn around the edges for extra spooky vibes. They also look great on a dessert table next to a bowl of popcorn balls or caramel apples.
Storage: Place the brownies in an airtight container at room temperature for up to 4 days. If you stack them, put a sheet of wax paper between the layers to prevent the Oreos from sticking to each other. Do not refrigerate them unless you prefer a firmer texture, as the fridge can dry them out slightly.
Freezing: These brownies freeze beautifully. Place the cooled, cut brownies on a baking sheet and freeze for 1 hour. Then transfer them to a freezer-safe bag or container. They will keep for up to 3 months. To thaw, leave them at room temperature for about 30 minutes. The Oreos may soften slightly, but they will still taste delicious.
Reheating: If you want a warm brownie, microwave one for about 10-15 seconds. The Oreo will get slightly soft, and the brownie will become gooey. Serve with a scoop of vanilla ice cream for an extra indulgent dessert.
I have noticed that the flavors actually improve after a day. The Oreo and brownie flavors meld together, and the texture becomes even more fudgy. So do not be afraid to make these a day ahead of your party.
Nutritional Information & Benefits
These are a treat, so I am not going to pretend they are health food. But here is a rough estimate of what you are looking at per brownie (based on 12 servings).
- Calories: Approximately 320-350 per brownie
- Fat: 14-16g
- Carbohydrates: 48-52g
- Protein: 4-5g
- Fiber: 2-3g
- Sugar: 30-34g
These values will vary depending on the specific brands you use. The Oreos add sugar and fat, but they also contribute a small amount of iron and calcium. The brownie mix itself is mostly empty calories, but hey—it is Halloween. Sometimes you just need a little fun food.
If you are looking for a healthier option to balance out the sugar, check out these healthy no-mayo egg salad cups for a quick and light lunch.
For those with dietary restrictions, the gluten-free and vegan variations above are great alternatives. Just be mindful of the sugar content if you have blood sugar concerns.
Conclusion
These perfect black cat Halloween brownies with Oreo ears are exactly what a Halloween treat should be—fun, easy, and completely adorable. They do not require any special skills or expensive ingredients. You just need a box of brownie mix, a package of Oreos, and a little bit of patience during the cooling step.
I love this recipe because it brings people together. My niece still talks about the day we made them, and she has already asked if we can make them again for her school Halloween party. That is the kind of reaction that makes all the messy countertops worth it.
I encourage you to play around with the variations. Add different candies, change the colors, or make them your own. The basic technique is so forgiving that you can really run with it. And if you come up with a fun twist, I would love to hear about it. Drop a comment below and tell me how your black cat brownies turned out. Share a photo if you have one—I always love seeing what other home bakers create.
Happy Halloween, and happy baking!
Frequently Asked Questions
Can I use a homemade brownie recipe instead of a box mix?
Absolutely. If you have a favorite homemade brownie recipe, use it. Just make sure the batter is thick enough to hold the Oreos. A thinner batter may cause the cookies to sink. If your homemade recipe is on the thin side, add an extra tablespoon of flour to thicken it up.
Why did my candy eyes sink into the batter?
This usually happens if you add the eyes to the raw batter or if the batter is too thin. The fix is to bake the brownies for 10 minutes first, then add the eyes. The slightly set surface will hold them in place. Also, make sure your candy eyes are not too heavy—some brands sell larger eyes that are more prone to sinking.
Can I use Double Stuf Oreos?
You can, but they are harder to cut cleanly because the cream filling is thicker. If you use Double Stuf, scrape off the extra cream before cutting. The ears will look a bit more rounded, but they will still work. Just be prepared for a messier cutting process.
How do I get clean cuts without crumbling the brownies?
Use a sharp knife and let the brownies cool completely before cutting. I recommend chilling them in the fridge for 30 minutes after they have cooled to room temperature. The cold brownies cut much cleaner. Wipe the knife between cuts with a damp paper towel.
Can I make these ahead of time for a party?
Yes, and I actually recommend it. These brownies taste even better the next day. Bake them the day before your party, let them cool completely, and store them in an airtight container at room temperature. Add any extra decorations (like powdered sugar or drizzle) just before serving.
Pin This Recipe!
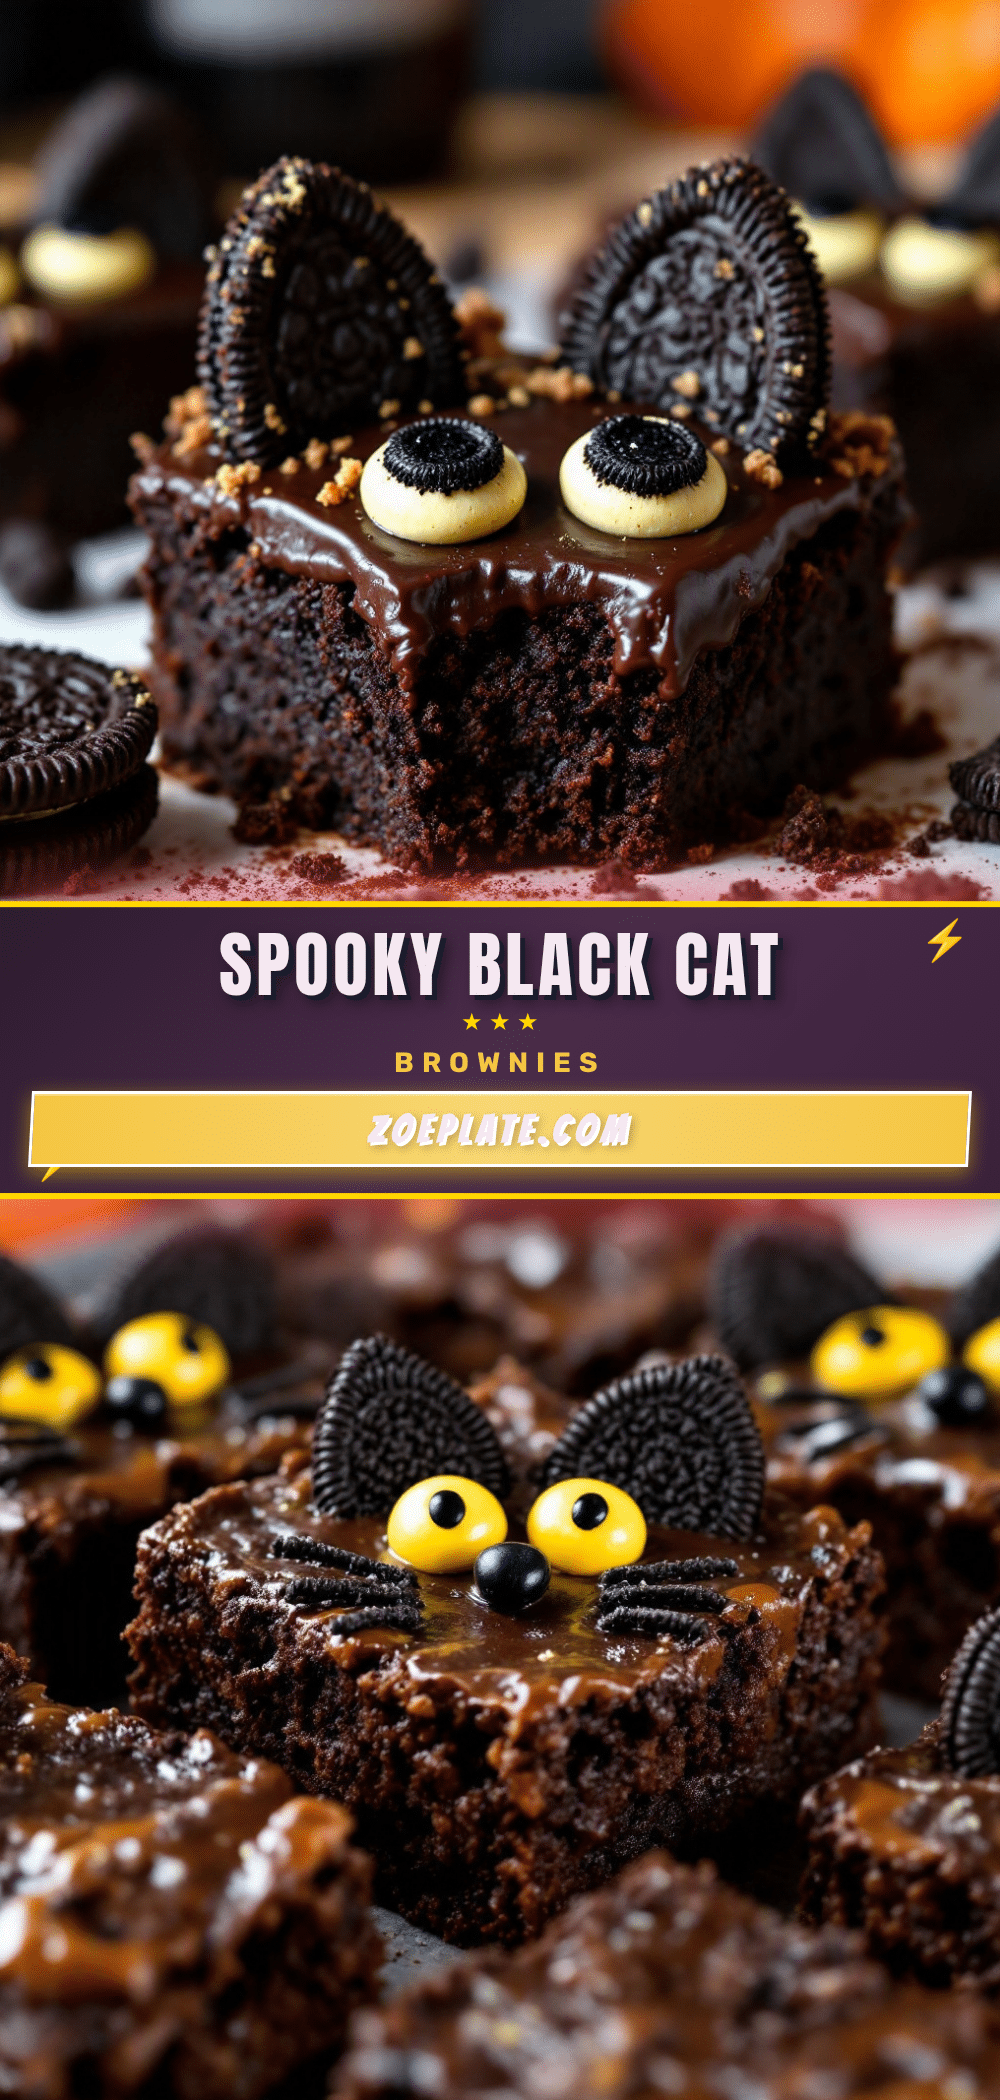
Perfect Black Cat Brownies: Easy Halloween Treat Recipe
These adorable black cat brownies with Oreo ears are a fun and easy Halloween treat made with a boxed brownie mix, Oreos, candy eyes, and peanut butter chips. They require minimal effort and no special equipment, perfect for baking with kids or for a last-minute party dessert.
- Prep Time: 15 minutes
- Cook Time: 25-28 minutes
- Total Time: 1 hour 40 minutes (including cooling)
- Yield: 12 servings 1x
- Category: Dessert
- Cuisine: American
Ingredients
- 1 box (18 oz) brownie mix
- Eggs, oil, and water (as per box directions, typically 2 eggs, 1/3 cup oil, 1/4 cup water)
- 24 Oreo cookies (12 for ears, 12 for bodies)
- 48 candy eyes
- 24 peanut butter chips or candy corn (for noses)
- Black gel food coloring (optional, for whiskers/mouth)
Instructions
- Preheat oven to 350°F (175°C). Line a 9×13-inch baking pan with parchment paper, leaving overhang on long sides.
- Prepare brownie batter according to box directions. Stir until just combined; do not overmix.
- Pour batter into prepared pan and spread evenly. Tap pan gently to release air bubbles.
- Bake for 10 minutes (surface should be set but center still jiggly).
- While brownies bake, prepare Oreos: twist 12 Oreos apart, scrape cream from one side, and cut each in half with a sharp knife.
- Remove pan from oven. Place 12 whole Oreos (bodies) in a 4×3 grid, pressing gently into batter until flush.
- Add ears: place one halved Oreo on each side of each whole Oreo, cut side inward, rounded edge outward. Press gently.
- Add eyes: place two candy eyes on each whole Oreo, slightly above center. Press lightly.
- Add nose: place one peanut butter chip or candy corn (pointy-side down) just below eyes.
- Return pan to oven and bake 15-18 minutes more, until a toothpick inserted into brownie (not Oreo) comes out with moist crumbs. Total bake time: 25-28 minutes.
- Cool completely in pan on a wire rack (about 1.5 hours).
- Lift brownies out using parchment overhang. Cut between cat faces with a sharp knife, wiping blade clean between cuts.
Notes
Do not skip the 10-minute blind bake; it prevents Oreos and eyes from sinking. Use regular Oreos (not Double Stuf) for easier cutting. Let brownies cool completely before cutting to avoid crumbling. For cleaner cuts, chill brownies in fridge for 30 minutes after cooling. Brownies taste even better the next day.
Nutrition
- Serving Size: 1 brownie
- Calories: 335
- Sugar: 32
- Sodium: 200
- Fat: 15
- Saturated Fat: 4
- Carbohydrates: 50
- Fiber: 2
- Protein: 4
Keywords: Halloween brownies, black cat brownies, Oreo brownies, easy Halloween dessert, kid-friendly Halloween treat


