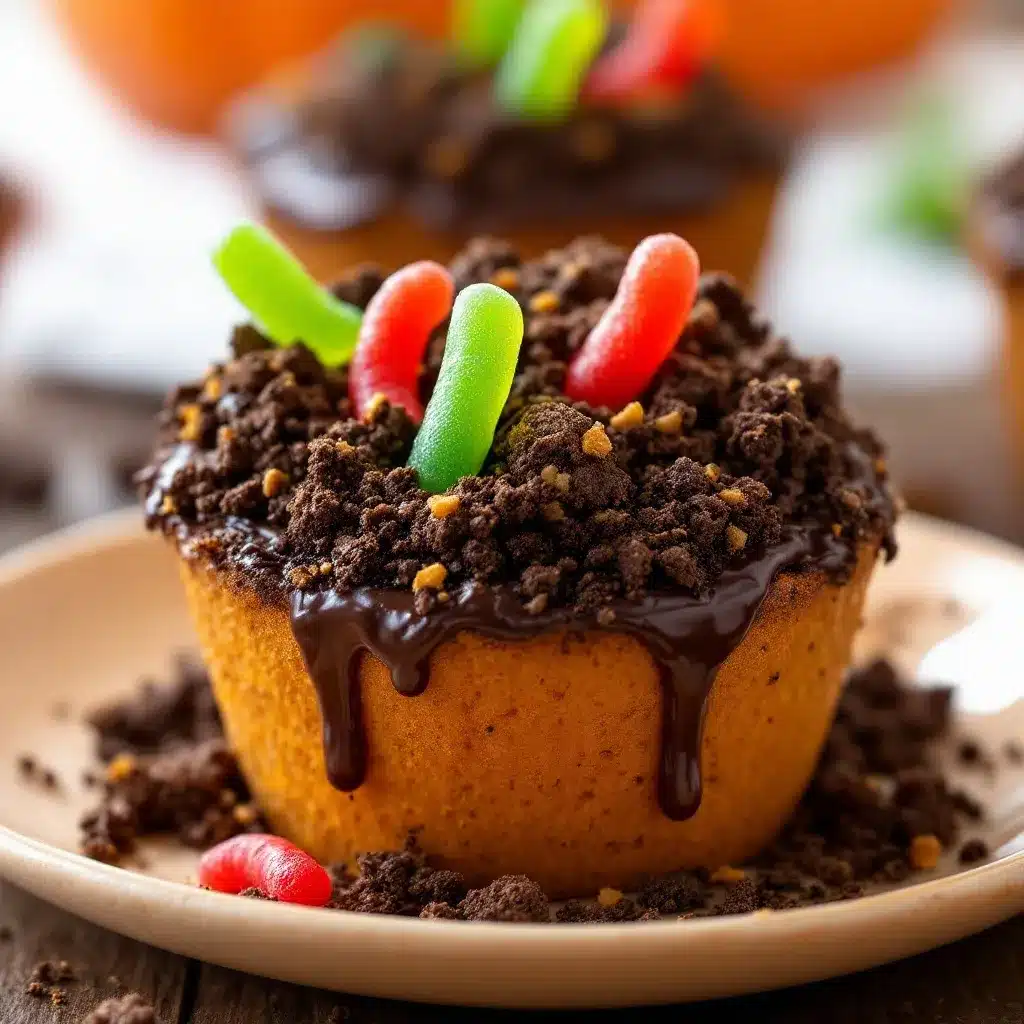
Thick. Clumpy. Undeniably earthy. That’s the first thing you notice when you scoop into a properly made pumpkin dirt cup. It’s not a smooth mousse, and it’s certainly not a silky custard. It’s that dense, slightly gritty, rich texture of real soil that sticks to the spoon and coats your fingers. And that’s the whole point.
I’ve always been weirdly fascinated by dirt. Not the kind on the sidewalk, but the good stuff. The dark, loamy earth you find after a rainstorm. There’s a specific satisfaction in digging into something that looks like garden mulch but tastes like sweet, spiced pumpkin. When I first tried making this treat, I was worried it would be too sweet or too artificial. You know how those store-bought pumpkin desserts can be? Like, cloying and fake.
But this? This is different. The cream cheese adds that tangy bite that cuts through the sugar, and the pumpkin spice brings the warmth. It’s the kind of texture that makes you close your eyes. You’re not just eating a dessert; you’re playing a game. You’re hunting for worms in the dark.
I made these for a Halloween party last year. The kids went absolutely wild. Not just for the gummy worms, but for the mess. There was something primal about it. Adults were laughing as they tried to keep the crumbs off their shirts. It’s messy, it’s fun, and it tastes like fall in a cup. Honestly, the texture is what keeps me coming back. It’s substantial. It feels like comfort food disguised as a spooky prop. If you’re looking for a treat that’s easy to make but looks like you spent hours, this is it. It’s simple, it’s seasonal, and it’s weirdly addictive.
Why You’ll Love This Recipe
Let’s be honest for a second. Halloween desserts usually fall into one of two camps: they’re either incredibly complicated labor of love, or they’re just bags of candy with a label stuck on them. This pumpkin dirt recipe sits perfectly in the middle. It’s the kind of dish that shows you care about the details without requiring a degree in pastry arts. I’ve tested this recipe about a dozen times, tweaking the ratios until the texture was just right. It’s not just a mix of ingredients; it’s a balance of creaminess, spice, and crunch that hits all the right notes.
Here is why this recipe has become a staple in my kitchen every October:
- Quick & Easy: You don’t need to turn on the oven. This comes together in under 15 minutes of active prep time. It’s perfect for those busy weeknights when you want something festive but don’t have hours to spare.
- Simple Ingredients: You likely already have everything in your fridge and pantry. Cream cheese, pumpkin puree, spices, and gummy worms. No fancy grocery trips or obscure items you’ll only use once.
- Perfect for Parties: These are individual portions, which makes them ideal for potlucks, classroom parties, or trick-or-treat favors. They’re easy to grab, easy to eat, and impossible to argue over.
- Crowd-Pleaser: Kids love the novelty of eating “dirt,” and adults love the taste of pumpkin cheesecake in a fun format. It bridges the gap between spooky and delicious.
- Unbelievably Delicious: The texture is the star here. The contrast between the creamy, spiced pumpkin layer and the crunchy cookie crumb base is next-level comfort food. It’s rich, tangy, and sweet all at once.
What makes this recipe different from the rest is the texture of the “dirt.” Most recipes just use crushed Oreos and call it a day. But by folding in the cream cheese mixture properly, you get that clumpy, soil-like consistency that looks authentic. It’s not just a dessert; it’s an experience. It’s the kind of treat that makes you smile before you even take a bite. It’s comfort food reimagined for the spookiest night of the year.
What Ingredients You Will Need
This recipe relies on simple, wholesome ingredients to deliver bold flavor and satisfying texture without the fuss. The beauty of pumpkin dirt cups is that the ingredients are pantry staples. You don’t need anything exotic. The magic happens in how you combine them. I like to keep the ingredient list short because it means less cleanup and less chance of something going wrong. Here is what you need to make the perfect batch.
For the Cookie Crumb Base
- Chocolate Sandwich Cookies: About 2 cups of crumbs. I recommend using standard chocolate sandwich cookies, like Oreos. The dark chocolate flavor mimics the richness of dark soil better than vanilla cookies. Remove the cream filling if you want a purer chocolate taste, though leaving it in adds extra sweetness.
- Unsalted Butter: Melted. This acts as the binder. You want enough butter to make the crumbs clump together when you squeeze them in your hand, but not so much that they become greasy. About 4-5 tablespoons is usually perfect.
For the Pumpkin Cream Layer
- Cream Cheese: Full-fat, softened. This is non-negotiable for the right texture. Light cream cheese won’t hold its shape or provide that tangy cheesecake flavor. Let it sit on the counter for 30 minutes before you start.
- Pumpkin Puree: Canned, not pumpkin pie filling. Make sure you get the 100% pure pumpkin. Pie filling has sugar and spices already added, which will throw off the balance. You want control over the sweetness and spice levels.
- Granulated Sugar: To sweeten the mixture. Adjust based on how sweet your pumpkin puree is. Start with half a cup and taste before adding more.
- Pumpkin Pie Spice: This blend of cinnamon, ginger, nutmeg, and cloves is the heart of the flavor. If you don’t have a pre-made blend, you can mix your own, but the store-bought version is consistent and convenient.
- Vanilla Extract: Just a teaspoon to round out the flavors. Don’t skip it; it adds depth.
For the Topping and Garnish
- Gummy Worms: The stars of the show. Any brand works, but longer worms are easier to pull out for dramatic effect.
- Extra Cookie Crumbs: For sprinkling on top to look like loose dirt.
Note: If you need a gluten-free option, simply use gluten-free chocolate sandwich cookies. The rest of the ingredients are naturally gluten-free, but always check your labels.
Equipment Needed
You don’t need much to make this, which is part of the appeal. A standard food processor or a zip-top bag with a rolling pin will work for crushing the cookies. I prefer the food processor because it gives me a more even crumb size, but the bag method is great for getting the kids involved. For the filling, a large mixing bowl and an electric hand mixer (or a strong whisk) are essential. You want to beat the cream cheese until it’s completely smooth before adding the pumpkin, or else you’ll end up with little white chunks in your orange mixture. Small serving cups, like mason jars, plastic shot glasses, or even hollowed-out mini pumpkins, are perfect for assembly. Just make sure they are clean and dry. I also recommend having a small spoon or piping bag ready if you want to make the gummy worms look like they’re burrowing out of the top.
Preparation Method
- Prep the Cookies (5 minutes): Start by crushing your chocolate sandwich cookies. If using a food processor, pulse until you have fine crumbs. If using a bag, seal them tight and roll over them with a rolling pin until they are sandy. Be careful not to over-process if you want some larger chunks for texture, but fine crumbs usually look more like dirt. Transfer the crumbs to a medium bowl.
- Melt the Butter: Melt your unsalted butter in the microwave or on the stove. Let it cool slightly so it doesn’t melt the cookies, then pour it over the crumbs. Stir until every crumb is coated. It should look like wet sand. This mixture will form the bottom layer of your cups.
- Press the Base: Take your small serving cups. Spoon about a tablespoon of the cookie mixture into the bottom of each cup. Use the back of a spoon or a small glass to press it down firmly. You want a compact layer, not a loose pile. This prevents the cup from falling apart when you eat it. Set them aside on a tray.
- Beat the Cream Cheese (2 minutes): In a large bowl, beat the softened cream cheese with your mixer on medium speed until it is completely smooth and creamy. This is crucial. Scrape down the sides of the bowl. If there are lumps, your final texture will be ruined. It should look like frosting.
- Add Pumpkin and Sugar: Add the pumpkin puree, sugar, pumpkin pie spice, and vanilla extract to the cream cheese. Beat on low speed until just combined. Do not overmix once the pumpkin is in, or you might incorporate too much air, making the mixture too fluffy. You want it dense and creamy. Taste it now. If it needs more sweetness, add a little more sugar. If it’s too tangy, add a pinch more spice.
- Assemble the Cups: Spoon the pumpkin mixture over the cookie base in each cup. Fill them almost to the top. Use a small spatula to smooth the top, or leave it rustic and uneven for a more “dirt-like” appearance. The unevenness actually helps the gummy worms stick better.
- Chill (30 minutes): Place the cups in the refrigerator for at least 30 minutes. This step is important. It sets the cream cheese mixture, making it firm enough to hold the gummy worms upright. If you skip this, the worms might sink to the bottom.
- Decorate: Right before serving, take the cups out. Sprinkle a little extra cookie crumb on top for that final layer of “soil.” Insert the gummy worms. Push them in at an angle so they look like they are crawling out of the ground. You can even bury a few worms halfway in for a hidden surprise.
Cooking Tips & Techniques
Getting the texture right is the biggest challenge with this recipe. The most common mistake is using cold cream cheese. It creates lumps that are impossible to beat out without overmixing. Let it soften on the counter for a good 30 to 45 minutes. Another tip is the moisture content of your pumpkin puree. Some brands are wetter than others. If your mixture looks too runny, add a little more crushed cookie crumbs to thicken it. If it’s too dry, add a teaspoon more of pumpkin puree. You want a consistency that holds its shape but is still soft enough to scoop. Also, don’t skimp on the chilling time. These cups need time to set. If you’re in a rush, you can put them in the freezer for 15 minutes, but the fridge is safer to avoid freezing the cream cheese too hard. When pressing the cookie base, make sure it’s firm. A loose base means a messy cup. Press it down until it feels solid.
Variations & Adaptations
While the classic version is my favorite, there are plenty of ways to twist this recipe. For a lighter option, you can use a mix of half cream cheese and half Greek yogurt. It adds a nice tang and reduces the calories slightly, though the texture will be a bit less rich. If you want to make it more seasonal, try swapping the pumpkin spice for apple cider spice or even chai spice for a different flavor profile. You can also change the cookie base. Ginger snaps make a fantastic “gingerbread dirt” version that pairs beautifully with the pumpkin. For a nut-free version, ensure your cookies and gummy worms are certified nut-free, as some gummy candies are processed in facilities with nuts. You can also add a layer of peanut butter cup crumbs in the middle for a Reese’s-inspired twist. I once tried adding a swirl of caramel sauce into the pumpkin mixture, and it was delicious, though a bit messy to eat. Experimenting is half the fun.
Serving & Storage Suggestions
These cups are best served chilled. The cold temperature contrasts nicely with the room-temperature gummy worms. They look great on a dessert table alongside other Halloween treats like black cat brownies or Frankenstein Rice Krispie treats. They pair well with a glass of cold milk or a cup of hot cider. For storage, keep them in the refrigerator in an airtight container for up to 3 days. The cookie base will soften over time, which some people prefer, but for the best texture, eat them within the first 24 hours. Do not freeze them, as the cream cheese texture can become grainy upon thawing. If you’re making them ahead, assemble the base and the pumpkin filling separately, then combine and decorate right before serving to keep the worms fresh and the cookies crunchy.
Nutritional Information & Benefits
While these are definitely a treat, they do offer some nutritional benefits. Pumpkin is rich in Vitamin A, which is great for eye health and immune function. It’s also high in fiber, which aids in digestion. The cream cheese provides calcium and protein, though it is high in saturated fat. The cookies add quick energy from sugar but offer little nutritional value. Overall, these cups are a balanced mix of fun and flavor. They are naturally gluten-free if you use GF cookies, making them accessible for more guests. They are also dairy-free adaptable if you use vegan cream cheese and cookies. Keep in mind that portion sizes are small, so they are a perfect little indulgence rather than a heavy dessert.
Conclusion
Spooky Creamy Pumpkin Dirt Cups are the perfect way to bring some fun to your Halloween celebrations. They are easy to make, delicious to eat, and visually striking. I love this recipe because it combines the comfort of pumpkin cheesecake with the playful chaos of Halloween. It’s a recipe that brings people together, whether it’s kids digging for worms or adults enjoying a sweet treat. I encourage you to try it and see what variations you can come up with. Maybe you’ll add some candy eyes or swap the worms for spiders. Whatever you do, make it your own. And if you try this recipe, I’d love to hear how it turned out. Leave a comment below with your thoughts or share your spooky creations on social media. Happy Halloween, and enjoy the mess!
Frequently Asked Questions
Can I make these cups ahead of time?
Yes, you can make the cookie base and pumpkin filling up to 2 days in advance. Store them in the fridge. Just wait to add the gummy worms and extra crumbs right before serving so they stay fresh and crunchy.
What can I use instead of Oreos?
You can use any chocolate sandwich cookies. Ginger snaps work great for a spicier flavor. For a gluten-free option, use gluten-free chocolate cookies. Even crushed chocolate cake or brownie bits can work in a pinch.
How do I keep the gummy worms from sinking?
The key is chilling the cups. Make sure the pumpkin mixture is firm before inserting the worms. If the mixture is too soft, the worms will sink. Chilling for at least 30 minutes helps set the cream cheese.
Can I use fresh pumpkin instead of canned?
You can, but fresh pumpkin puree can be watery. If you use fresh, make sure to cook it down and drain any excess liquid, or your dirt cups will be too runny. Canned puree is more consistent and easier to work with.
Are these cups safe for nut allergies?
The base recipe is nut-free, but always check your labels. Some cookie brands are processed in facilities with nuts. Gummy worms are typically nut-free, but verification is important for severe allergies.
Pin This Recipe!

Spooky Creamy Pumpkin Dirt Cups: 5-Ingredient Easy Halloween Treat

A fun, no-bake Halloween dessert featuring a crunchy chocolate cookie base topped with a dense, tangy pumpkin cream cheese mixture and garnished with gummy worms for a spooky, soil-like effect.
- Prep Time: 15 minutes
- Cook Time: 0 minutes
- Total Time: 45 minutes
- Yield: 8 servings 1x
- Category: Dessert
- Cuisine: American
Ingredients
- 2 cups chocolate sandwich cookie crumbs (about 24 cookies, cream filling removed or kept)
- 4–5 tablespoons unsalted butter, melted
- 8 oz full-fat cream cheese, softened
- 1 cup pumpkin puree (canned, 100% pure)
- 1/2 cup granulated sugar
- 1 teaspoon pumpkin pie spice
- 1 teaspoon vanilla extract
- Gummy worms for garnish
- Extra cookie crumbs for sprinkling
Instructions
- Crush chocolate sandwich cookies into fine crumbs using a food processor or a zip-top bag with a rolling pin.
- Melt the unsalted butter and stir it into the cookie crumbs until the mixture resembles wet sand.
- Press about a tablespoon of the cookie mixture firmly into the bottom of small serving cups to create a compact base.
- In a large bowl, beat the softened cream cheese with an electric mixer on medium speed until completely smooth.
- Add the pumpkin puree, sugar, pumpkin pie spice, and vanilla extract to the cream cheese. Beat on low speed until just combined, ensuring the mixture remains dense and creamy.
- Spoon the pumpkin mixture over the cookie base in each cup, filling them almost to the top.
- Refrigerate the cups for at least 30 minutes to allow the cream cheese mixture to set.
- Before serving, sprinkle extra cookie crumbs on top and insert gummy worms at an angle to look like they are burrowing out of the dirt.
Notes
Ensure cream cheese is fully softened to avoid lumps. Chill the cups for at least 30 minutes to help the gummy worms stand upright. For a gluten-free option, use gluten-free chocolate sandwich cookies. Store in the refrigerator for up to 3 days, but consume within 24 hours for best texture.
Nutrition
- Serving Size: 1 cup
- Calories: 280
- Sugar: 22
- Sodium: 220
- Fat: 18
- Saturated Fat: 10
- Carbohydrates: 28
- Fiber: 2
- Protein: 4
Keywords: Halloween dessert, pumpkin dirt cups, no-bake dessert, pumpkin cheesecake, gummy worms, easy Halloween treat, fall recipes, party snacks


